
Installing an LG window air conditioner is easier than you think, especially with the right tools and guidance. This guide walks you through every step—from measuring your window to testing your unit—so you can stay cool all summer long.
Key Takeaways
- Measure your window first: Ensure your LG AC unit fits properly by checking width, height, and depth before purchase or installation.
- Use the included mounting hardware: LG kits come with brackets, side panels, and screws—don’t skip these for a secure fit.
- Seal gaps to prevent air leaks: Use foam weatherstripping or expandable sealant to block drafts and improve efficiency.
- Level the unit correctly: A slight tilt (about 1/4 inch backward) helps condensation drain outside, not into your room.
- Test before finalizing: Run the AC for 10–15 minutes to check cooling, noise, and drainage before securing everything permanently.
- Maintain regularly: Clean filters monthly and inspect seals seasonally to keep your LG AC running smoothly.
- Safety first: Always unplug the unit during installation and avoid overloading electrical circuits.
How to Install an LG Window Air Conditioner in 2026
Summer heat is no joke—especially in 2026, when temperatures seem to climb higher every year. If you’ve just bought an LG window air conditioner, congratulations! You’re about to enjoy cooler, more comfortable indoor air without breaking the bank on central AC. The good news? Installing an LG window AC is a straightforward DIY project that most people can complete in under an hour.
In this guide, we’ll walk you through the entire process—from choosing the right spot to testing your newly installed unit. Whether you’re a first-time installer or just upgrading from an older model, these step-by-step instructions will help you get it done safely and efficiently. No special skills required—just basic tools, a little patience, and this guide by your side.
What You’ll Need
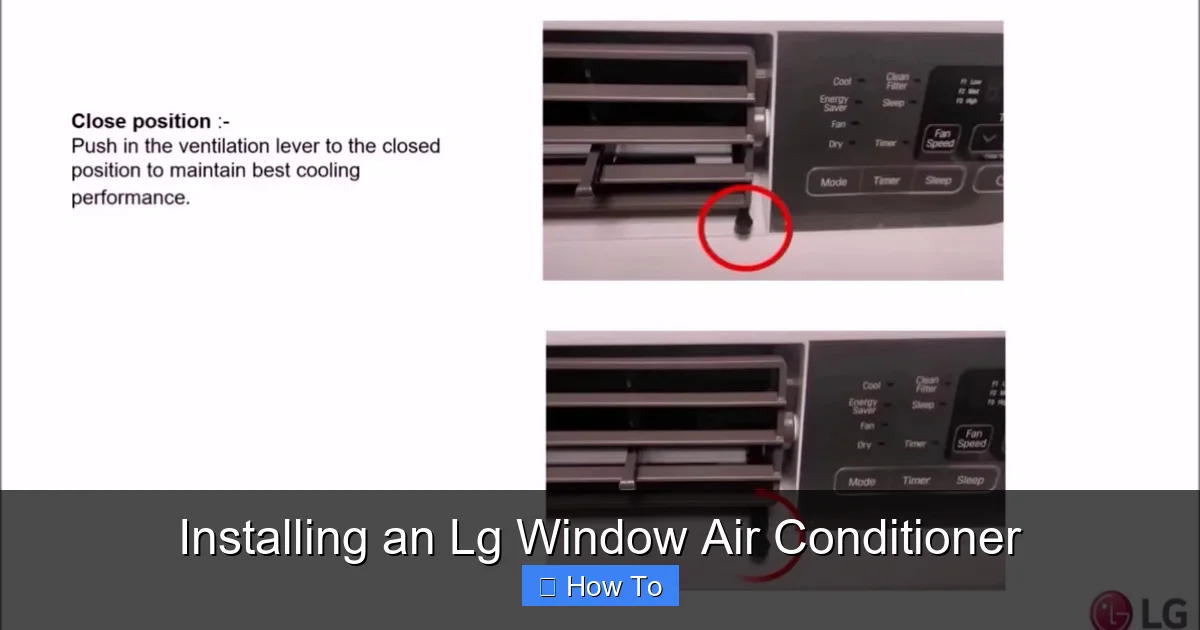
Visual guide about Installing an Lg Window Air Conditioner
Image source: i.ytimg.com
Before you start, gather these essentials:
- Your LG window air conditioner (with included installation kit)
- Measuring tape
- Screwdriver (Phillips and flathead)
- Drill (optional, for some window types)
- Level
- Foam weatherstripping or expandable sealant
- Helper (recommended for heavier units)
- Gloves and safety glasses
Most LG window AC units come with a full installation kit that includes side panels, support brackets, screws, and foam seals. Double-check the box to make sure nothing’s missing. If you’re missing parts, contact LG customer support—they’re usually quick to send replacements.
Step 1: Choose the Right Window
Not all windows are created equal when it comes to AC installation. Here’s what to look for:
Window Type
LG window air conditioners work best in double-hung or sliding windows. Casement (crank-out) windows can be trickier but are still possible with additional brackets. Avoid installing in windows that open outward or are structurally weak.
Size Matters
Measure the window opening carefully:
- Width: Measure the inside width at the top, middle, and bottom. Use the smallest measurement.
- Height: Measure from the windowsill to the top of the opening.
- Depth: Ensure there’s enough space behind the window for the AC unit to extend outward without hitting walls or obstructions.
Compare your measurements to the dimensions listed in your LG AC’s manual. Most LG models are designed to fit windows between 23 and 36 inches wide. If your window is too small or too large, you may need an adapter kit or a different model.
Location Tips
- Choose a window that gets minimal direct sunlight to reduce cooling load.
- Avoid areas near heat sources like ovens or radiators.
- Ensure the window is close to a grounded electrical outlet (within 6 feet).
- Consider noise—don’t install above a bedroom if the unit is loud.
Step 2: Prepare the Window and Area
Clear the Space
Remove any curtains, blinds, or furniture blocking the window. Clear the area outside too—make sure there’s nothing below the window that could be damaged by dripping condensation.
Open the Window
Carefully raise the lower sash of your double-hung window. If it’s stiff, gently wiggle it or use a lubricant. Never force it—this could damage the frame.
Install the Support Bracket (If Included)
Many LG models come with an L-shaped support bracket that attaches to the windowsill. Here’s how to install it:
- Place the bracket on the sill, aligning it with the outer edge of the window frame.
- Mark the screw holes with a pencil.
- Drill pilot holes (if needed) and secure the bracket with the provided screws.
- Ensure it’s level and tightly fastened—this will hold the weight of the AC unit.
If your model doesn’t include a bracket, you can purchase one separately or use wooden blocks as temporary support (not recommended for long-term use).
Step 3: Install the Side Panels
LG window ACs come with adjustable side panels that fill the gaps on either side of the unit. These are crucial for stability and energy efficiency.
Attach the Panels to the AC Unit
- Slide the side panels into the grooves on the left and right sides of the AC unit.
- Adjust them so they extend slightly beyond the width of your window opening.
- Secure them with the provided screws or clips.
Test the Fit
Hold the unit up to the window (with help!) and slide the side panels outward to see how they’ll fit. They should extend to the window frame but not overlap too much. Trim excess foam if needed.
Step 4: Lift and Position the AC Unit
This is the trickiest part—lifting a heavy AC unit into place. Safety is key.
Get Help
Most LG window ACs weigh between 50 and 80 pounds. Never try to lift it alone. Ask a friend or family member to assist.
Lift with Your Legs
Bend your knees, keep your back straight, and lift slowly. Use gloves to improve your grip.
Slide the Unit Into Place
- Position the AC unit on the support bracket or windowsill.
- Slide it into the window opening until the front face is flush with the interior wall.
- Lower the window sash onto the top of the AC unit. It should rest securely on the unit’s top rail.
Check the Tilt
Use a level to ensure the unit tilts slightly backward (about 1/4 inch). This allows condensation to drain outside. If it’s level or tilting inward, adjust the support or add shims under the front.
Step 5: Secure the Unit and Seal Gaps
Fasten the Window Sash
Most LG units include sash locks or brackets. Attach them to the window frame and the AC unit to prevent the window from being opened from the outside (important for security).
Install Side Panel Extensions
Extend the side panels to fill the gaps between the AC and the window frame. Secure them with screws into the window frame or use foam tape for a temporary hold.
Seal All Gaps
Use foam weatherstripping or expandable sealant to close any remaining gaps. This prevents hot air from entering and cool air from escaping. Pay special attention to the top, sides, and bottom of the unit.
Step 6: Plug In and Test
Connect to Power
Plug the AC into a dedicated outlet. Avoid using extension cords—they can overheat. If you must use one, choose a heavy-duty, outdoor-rated cord rated for at least 15 amps.
Turn It On
Set the thermostat to “Cool” and choose a low fan speed. Let it run for 10–15 minutes. Listen for unusual noises and check for cool air coming from the vents.
Check for Leaks
Look outside to see if water is dripping from the back (this is normal). If water is leaking inside, the unit may not be tilted correctly or the drain hole might be blocked.
Troubleshooting Common Issues
Unit Won’t Turn On
- Check the power cord and outlet.
- Ensure the circuit breaker hasn’t tripped.
- Verify the remote or control panel is set correctly.
Not Cooling Enough
- Clean or replace the air filter.
- Check for blocked vents or dirty coils.
- Ensure the room isn’t too large for the unit’s BTU rating.
Water Leaking Inside
- Re-level the unit to ensure proper tilt.
- Clear the drain hole at the back of the unit.
- Check for damaged seals or gaps.
Excessive Noise
- Tighten all screws and brackets.
- Ensure the unit isn’t vibrating against the window frame.
- Place rubber pads under the unit to reduce vibration.
Final Tips for Long-Term Performance
- Clean the filter monthly: A dirty filter reduces airflow and efficiency.
- Inspect seals seasonally: Replace worn weatherstripping to maintain insulation.
- Cover the unit in winter: Use a fitted cover to protect it from snow and debris.
- Schedule professional maintenance: Have a technician check refrigerant levels and coils every few years.
Conclusion
Installing an LG window air conditioner in 2026 is a smart, cost-effective way to beat the heat. With the right preparation and a little teamwork, you can have your unit up and running in under an hour. Remember to measure carefully, secure the unit properly, and seal all gaps to maximize efficiency and comfort.
Once installed, your LG AC will keep your space cool, quiet, and energy-efficient all season long. And with regular maintenance, it’ll serve you well for years to come. Stay cool, stay safe, and enjoy your DIY success!

