
Installing an LG window air conditioner doesn’t have to be stressful. This guide walks you through every step—from measuring your window to testing the unit—ensuring a secure, energy-efficient setup. With clear instructions and expert tips, you’ll stay cool and confident all summer long.
Key Takeaways
- Measure your window accurately: Proper sizing ensures a snug fit and prevents air leaks or instability.
- Use the right tools: A drill, level, screwdriver, and measuring tape are essential for a safe installation.
- Secure the unit properly: Always use support brackets or braces to prevent the AC from falling out of the window.
- Check for electrical compatibility: Ensure your outlet matches the unit’s voltage and amperage requirements.
- Seal gaps with weatherstripping: This improves efficiency and keeps insects and drafts out.
- Test before finalizing: Run the AC briefly to confirm it’s cooling and operating quietly.
- Follow LG’s 2026 safety guidelines: Newer models may include smart features or updated installation protocols.
Introduction: Why Proper Installation Matters
Installing your LG window air conditioner correctly isn’t just about comfort—it’s about safety, efficiency, and longevity. A poorly installed unit can leak cool air, strain your electrical system, or even fall out of the window. In 2026, LG continues to innovate with smarter, quieter, and more energy-efficient models, but even the best technology needs a solid foundation.
This guide will walk you through the entire process, from choosing the right location to testing your newly installed AC. Whether you’re a first-time installer or upgrading from an older model, these step-by-step instructions will help you get it right the first time. By the end, you’ll have a securely mounted, energy-efficient air conditioner ready to beat the summer heat.
Step 1: Gather Your Tools and Materials
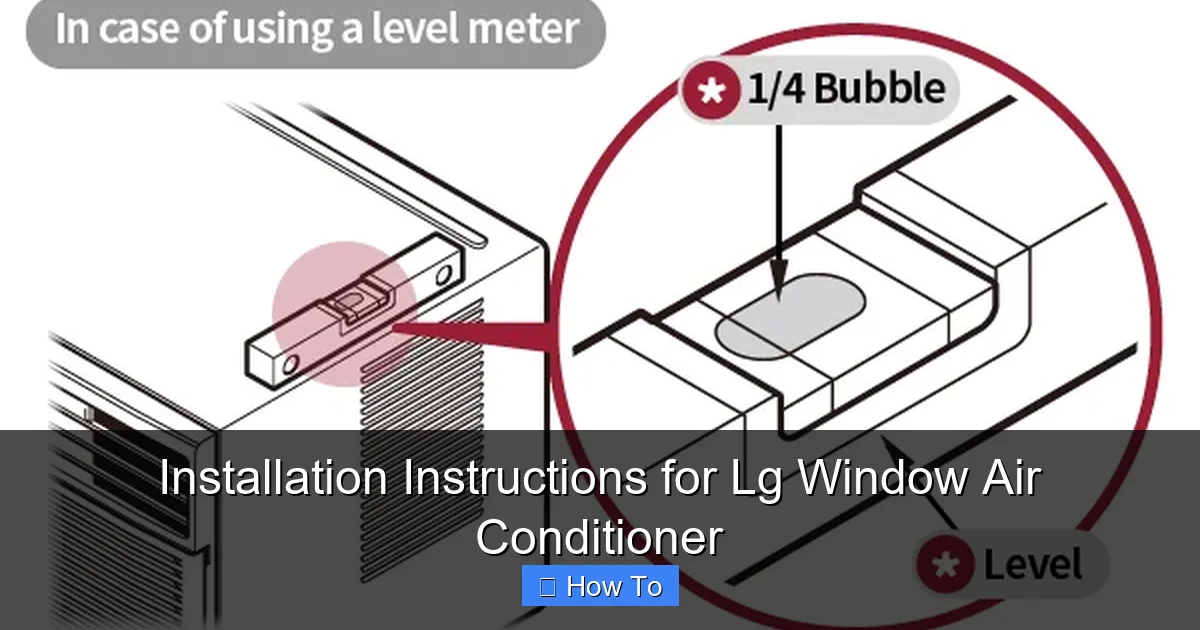
Visual guide about Installation Instructions for Lg Window Air Conditioner
Image source: gscs.lge.com
Before you begin, make sure you have everything you need. Rushing out to buy tools mid-installation can be frustrating and unsafe.
Essential Tools
- Measuring tape
- Drill with drill bits
- Screwdriver (Phillips and flathead)
- Level
- Pencil or marker
- Safety gloves and goggles
Materials Included with Your LG Unit
Most LG window air conditioners come with:
- Window mounting brackets or support legs
- Screws and anchors
- Foam weatherstripping or side panels
- Instruction manual (always keep this handy!)
Optional but Helpful
- Foam insulation tape (for extra sealing)
- Window AC support bracket (if not included)
- Cord cover or surge protector
Pro tip: If your model is a 2026 LG Smart Window AC, check the box for a QR code that links to a digital installation video—great for visual learners!
Step 2: Choose the Right Location
Not all windows are created equal. Picking the best spot ensures optimal performance and safety.
Window Type and Size
LG window ACs are designed for double-hung or sliding windows. Measure the width and height of your window opening. Compare it to the dimensions listed in your AC’s manual. There should be at least 2–3 inches of extra space on each side for the side panels to extend properly.
Sun and Shade Considerations
Avoid placing the unit in direct afternoon sun if possible. While the AC will still work, it will have to run harder, increasing energy use. North- or east-facing windows are ideal.
Clearance and Ventilation
Leave at least 12–18 inches of clearance on the sides and back of the unit. This allows proper airflow and prevents overheating. Never install the AC behind furniture or curtains.
Safety First
Never install a window AC above a balcony, stairwell, or busy walkway unless you use a certified support bracket. In 2026, many cities recommend or require external support for units over 5,000 BTUs.
Step 3: Prepare the Window and Area
A clean, level surface is key to a stable installation.
Clean the Window Sill
Wipe down the interior and exterior window sills with a damp cloth. Remove dirt, dust, or old adhesive that could interfere with sealing.
Check for Level
Place your level on the sill. If it’s not level, you may need to shim the unit slightly during installation. Most LG models have adjustable feet or brackets to help with this.
Remove Window Screens
Take out any screens or storm windows. You’ll reinstall them later, but they can block airflow during setup.
Step 4: Install the Side Panels and Weatherstripping
These components seal the gaps between the AC and the window frame, preventing air leaks and pests.
Attach the Side Panels
Slide the included side panels into the grooves on the sides of the AC unit. Extend them outward to match your window width. Secure them with the provided screws.
Apply Weatherstripping
Cut the foam weatherstripping to fit the top and sides of the window opening. Stick it to the interior frame where the AC will rest. This creates a tight seal when the window is closed.
Pro tip: Use double-sided foam tape for extra adhesion, especially in windy areas.
Step 5: Position the Air Conditioner
This is the most critical step—handle the unit with care.
Lift with Help
Window ACs can weigh 50–80 pounds. Always lift with your legs, not your back, and ask someone to assist you. Never drag the unit across the sill.
Slide into Place
Gently slide the AC into the window opening from the inside. Make sure the front of the unit is level and the back slightly tilts outward (about 1/4 inch). This tilt allows condensation to drain properly.
Secure the Unit
Lower the window sash until it rests on top of the AC. Do not force it—if it doesn’t close easily, adjust the side panels or reposition the unit.
Step 6: Anchor and Support the AC
A secure mount prevents accidents and improves efficiency.
Install the Support Bracket
If your LG model includes a support bracket, attach it to the bottom of the AC and secure it to the exterior wall or window sill using screws and anchors. Drill pilot holes first to avoid cracking wood or vinyl.
Use Interior Brackets
Some models come with L-shaped brackets that screw into the window frame and the AC casing. Tighten these firmly but don’t over-torque—you could crack the plastic.
Check Stability
Give the unit a gentle shake. It should not move side to side or up and down. If it does, tighten the brackets or add shims.
Step 7: Seal All Gaps
Even small gaps can reduce cooling efficiency by up to 20%.
Fill Side Gaps
Use the included foam extensions or cut additional weatherstripping to fill any remaining space between the side panels and the window frame.
Seal the Top
If there’s a gap between the top of the AC and the window sash, use foam tape or a removable sealant strip. Avoid permanent adhesives—you’ll need to remove the unit for cleaning or winter storage.
Check for Drafts
Turn on the AC and feel around the edges with your hand. If you feel cool air escaping or warm air entering, add more sealing material.
Step 8: Connect to Power
Electrical safety is non-negotiable.
Use a Dedicated Outlet
Plug the AC into a grounded outlet that’s not shared with other high-wattage appliances. Avoid extension cords—they can overheat.
Check Voltage and Amperage
Most LG window units require 115V or 230V. Verify this matches your outlet. If you’re unsure, consult an electrician. In 2026, some LG Smart models include built-in voltage sensors that alert you via the LG ThinQ app if there’s a mismatch.
Use a Surge Protector
Protect your investment with a high-quality surge protector, especially in areas prone to lightning storms.
Step 9: Test the Unit
Before you relax, make sure everything works.
Turn It On
Set the thermostat to “Cool” and the fan to “Auto.” Listen for unusual noises like rattling or grinding.
Check Airflow
Feel the air coming from the vents. It should be cool and consistent. If it’s weak, check the filter—it may be dirty or improperly installed.
Monitor for Leaks
Look for water dripping inside or outside. A small amount of exterior condensation is normal, but interior leaks mean the unit isn’t tilted correctly or the drain is blocked.
Troubleshooting Common Issues
Even with careful installation, problems can arise.
Unit Won’t Turn On
Check the power cord, outlet, and circuit breaker. Ensure the remote has batteries and is paired (for smart models).
Not Cooling Enough
Clean the filter, check for blocked vents, and verify the thermostat setting. Also, ensure windows and doors are closed.
Water Leaking Inside
Adjust the tilt so the back is slightly lower than the front. Clear any debris from the drain hole.
Excessive Noise
Tighten loose screws, ensure the unit is level, and check that nothing is vibrating against the window frame.
Remote Not Working
For 2026 LG Smart models, download the LG ThinQ app and follow the pairing instructions. Make sure the AC is within Wi-Fi range.
Conclusion: Enjoy Your Cool, Efficient Summer
Installing your LG window air conditioner doesn’t have to be a headache. By following these steps—measuring carefully, securing the unit, sealing gaps, and testing thoroughly—you’ll enjoy reliable, energy-efficient cooling all season long. In 2026, LG continues to lead with user-friendly designs and smart technology, making installation easier than ever.
Remember, a well-installed AC not only keeps you comfortable but also saves money on energy bills and extends the life of your unit. If you run into issues, consult your manual or contact LG customer support. Stay cool, stay safe, and enjoy your perfectly installed window air conditioner!

