
Emptying water from your LG air conditioner is essential to prevent leaks, odors, and system damage. This guide walks you through the process safely and efficiently, whether you have a window, split, or portable unit.
Key Takeaways
- Regular maintenance prevents water buildup: Emptying the water tank or drain pan regularly helps avoid overflow and potential water damage.
- Know your AC type: The method varies slightly between window, split, and portable LG air conditioners—identify your model first.
- Turn off and unplug the unit: Always prioritize safety by switching off and disconnecting power before starting any maintenance.
- Use the right tools: A bucket, towel, screwdriver, and gloves make the process cleaner and safer.
- Check for clogs in the drain line: A blocked drain hose is a common cause of water accumulation—clean it during the process.
- Inspect for mold or mildew: While emptying water, look for signs of mold in the tank or pan and clean if necessary.
- Reassemble and test: After emptying, reassemble the unit properly and run a test cycle to ensure everything works.
How to Empty Water from LG Air Conditioner: A Complete Guide
If you’ve noticed water pooling around your LG air conditioner or heard gurgling sounds from the unit, it’s likely time to empty the water. While modern LG air conditioners are designed to manage condensation efficiently, water buildup can still occur—especially in humid climates or during heavy usage. Ignoring this issue can lead to leaks, mold growth, unpleasant odors, and even damage to your walls or flooring.
The good news? Emptying water from your LG air conditioner is a simple task you can do yourself with just a few basic tools. Whether you own a window unit, a split system, or a portable LG air conditioner, this guide will walk you through the process step by step. You’ll learn how to safely remove water, clean key components, and prevent future problems.
By the end of this guide, you’ll not only know how to empty water from your LG air conditioner but also understand why it happens and how to keep your unit running smoothly all season long. Let’s get started!
Why Does Water Build Up in LG Air Conditioners?
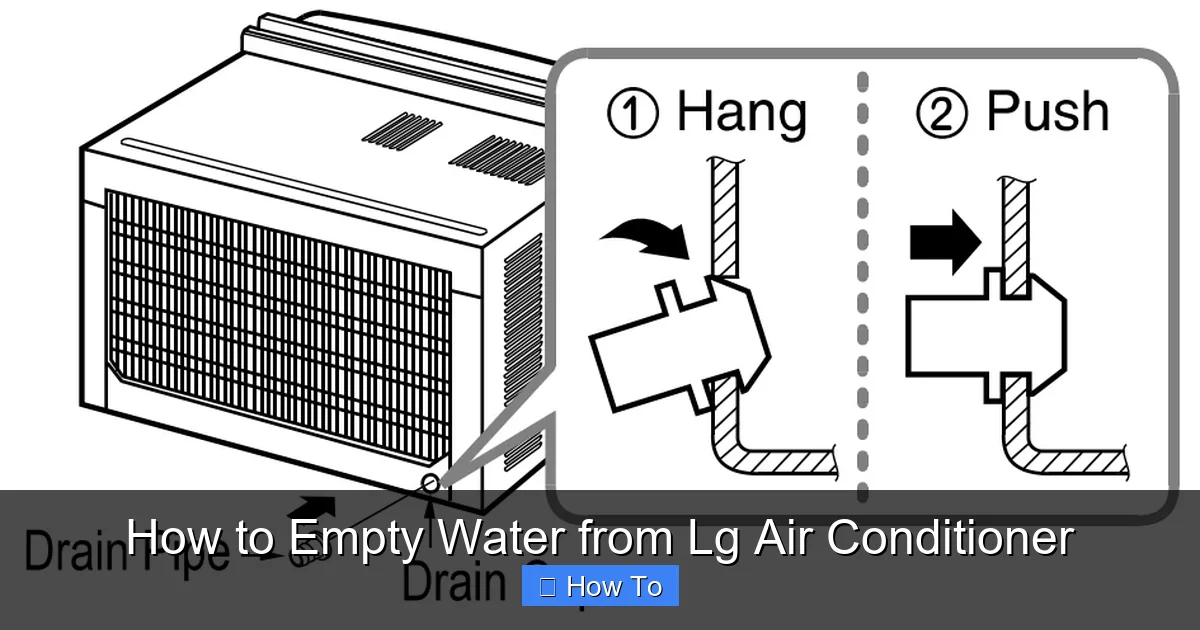
Visual guide about How to Empty Water from Lg Air Conditioner
Image source: gscs.lge.com
Before diving into the how-to, it’s helpful to understand why water collects in your air conditioner in the first place. Air conditioners work by removing heat and moisture from the air. As warm air passes over the cold evaporator coils, moisture condenses into water—just like how dew forms on a cold drink can. This water is supposed to drip into a drain pan and exit through a drain hose or tube.
However, several factors can disrupt this process:
- High humidity: In humid environments, more moisture is extracted from the air, increasing the volume of water produced.
- Clogged drain lines: Dust, dirt, or algae can block the drain hose, preventing water from flowing out.
- Improper installation: If the unit isn’t level or the drain hose is kinked, water may back up.
- Dirty filters or coils: Restricted airflow can cause coils to freeze and then thaw, leading to excess water.
- Full water tank (portable units): Portable LG air conditioners collect water in an internal tank that must be emptied manually.
Understanding these causes helps you not only fix the immediate issue but also prevent it from recurring.
Tools and Materials You’ll Need
Before you begin, gather the following items to make the process smooth and mess-free:
- A large bucket or container (at least 2–3 liters)
- Clean towels or rags
- Rubber gloves (optional, but recommended for hygiene)
- Screwdriver (Phillips or flathead, depending on your model)
- Soft brush or pipe cleaner (for cleaning drain lines)
- Mild detergent or vinegar solution (for cleaning)
- A flashlight (to inspect hard-to-see areas)
Having these tools ready will save you time and reduce frustration during the process.
Step-by-Step Guide: How to Empty Water from LG Air Conditioner
Now that you’re prepared, let’s go through the steps to safely and effectively empty water from your LG air conditioner. The exact method depends on your unit type, so we’ll cover window, split, and portable models.
Step 1: Turn Off and Unplug the Unit
Safety first! Before doing anything, make sure your air conditioner is completely turned off. Use the remote or control panel to switch it off, then unplug it from the power outlet. This prevents any risk of electric shock and ensures the fan and compressor aren’t running while you work.
Pro Tip: Wait at least 10–15 minutes after unplugging to allow any residual electricity to dissipate, especially if you’re working near internal components.
Step 2: Identify Your LG Air Conditioner Type
LG offers several types of air conditioners, and the water removal process varies slightly for each:
- Window units: These are self-contained and mounted in a window or wall. Water typically drains outside through a built-in channel or hose.
- Split systems: These have an indoor unit (evaporator) and an outdoor unit (condenser). Water collects in the indoor unit’s drain pan and exits via a drain hose.
- Portable units: These are freestanding and often have a removable water tank that needs manual emptying.
Check your user manual or look for model numbers on the unit to confirm your type. If you’re unsure, LG’s website has a helpful product lookup tool.
Step 3: Locate the Water Drain or Tank
Once you’ve identified your unit type, find where the water collects:
- For window and split units: Look for a drain pan at the bottom of the indoor unit. The drain hose usually exits from the back or side. In window units, it may drip directly outside.
- For portable units: Most LG portable ACs have a water tank at the bottom rear of the unit. Some models have an automatic shut-off when the tank is full, while others require manual monitoring.
Use a flashlight if needed to peer into tight spaces. If you see water pooling or dripping, that’s your target area.
Step 4: Prepare for Water Removal
Place your bucket or container under the drain hose or tank outlet. Lay down towels around the area to catch any spills. If you’re working indoors, consider placing a plastic sheet underneath for extra protection.
Pro Tip: For portable units, you may need to tilt the unit slightly to access the tank. Do this gently to avoid damaging internal components.
Step 5: Empty the Water Tank (Portable Units)
If you have a portable LG air conditioner, follow these steps:
- Locate the water tank—usually at the back or bottom of the unit.
- Press the release latch or button (if present) to unlock the tank.
- Carefully slide the tank out. It may be heavy if full, so use both hands.
- Pour the water into a sink, toilet, or outdoor drain.
- Wipe the tank with a clean cloth and inspect for mold or residue.
- Rinse with a mild detergent or vinegar solution if needed, then dry thoroughly.
- Reinsert the tank until it clicks into place.
Some LG portable models have a continuous drainage option. If yours does, you can connect a hose to the drain port and route it to a floor drain or outside, eliminating the need for manual emptying.
Step 6: Drain Water from Window or Split Units
For window and split LG air conditioners, the process focuses on the drain pan and hose:
- Locate the drain hose at the back or side of the indoor unit.
- Place your bucket under the hose outlet.
- Gently remove the hose from its mounting clip or bracket.
- Allow the water to drain completely into the bucket.
- If the hose is clogged, use a soft brush or pipe cleaner to clear debris.
- For stubborn clogs, flush the hose with warm water and vinegar.
- Reattach the hose securely to prevent leaks.
Pro Tip: If your unit has a drain pan that’s hard to access, you may need to remove the front panel or cover. Use a screwdriver to carefully unscrew any fasteners, then lift the panel off. Always refer to your user manual for disassembly instructions.
Step 7: Clean the Drain Pan and Components
While the water is draining, take the opportunity to clean the drain pan and surrounding areas:
- Wipe the pan with a damp cloth to remove dirt or slime.
- Use a vinegar-water solution (1:1 ratio) to disinfect and prevent mold.
- Check the evaporator coils for dust buildup—clean with a soft brush if needed.
- Inspect the air filter. If it’s dirty, remove and wash it with mild soap and water, then let it dry completely before reinstalling.
Cleaning these components improves airflow and reduces the risk of future water issues.
Step 8: Check for Leaks or Damage
After emptying the water, inspect the unit for any signs of damage:
- Look for cracks in the drain pan or hose.
- Check seals and gaskets for wear.
- Ensure the unit is level—tilting can cause water to pool on one side.
If you notice any damage, consider contacting LG customer support or a certified technician for repair.
Step 9: Reassemble and Test the Unit
Once everything is clean and dry:
- Reattach any panels or covers you removed.
- Secure the drain hose in its proper position.
- Plug the unit back in and turn it on.
- Set it to cool mode and let it run for 15–20 minutes.
- Listen for unusual noises and check for leaks.
If the unit runs smoothly and no water accumulates, you’ve successfully completed the process!
Troubleshooting Common Issues
Even with proper maintenance, you might encounter problems. Here’s how to handle common issues:
Water Still Accumulating After Emptying
If water continues to build up, the drain line is likely clogged. Try flushing it with a mixture of warm water and vinegar. For persistent clogs, use a wet/dry vacuum to suction out debris from the hose.
Unit Won’t Turn On After Maintenance
Double-check that all panels are securely reattached and the power cord is fully plugged in. Some LG models have safety switches that prevent operation if the front cover isn’t properly closed.
Unpleasant Odors After Cleaning
This usually indicates mold or mildew in the drain pan or coils. Clean the area thoroughly with a disinfectant solution and consider using an AC coil cleaner spray.
Drain Hose Keeps Disconnecting
Ensure the hose is securely clipped and not kinked. If the clip is broken, replace it or use zip ties as a temporary fix.
Preventing Future Water Buildup
Emptying water is important, but prevention is even better. Follow these tips to keep your LG air conditioner running efficiently:
- Clean the air filter monthly: A dirty filter restricts airflow and can cause coils to freeze.
- Inspect the drain hose every 3 months: Look for clogs or damage and clean as needed.
- Keep the area around the unit clear: Ensure vents aren’t blocked by furniture or curtains.
- Use a dehumidifier in high-humidity areas: This reduces the moisture load on your AC.
- Schedule professional maintenance annually: A technician can deep-clean components and check for hidden issues.
By staying proactive, you’ll extend the life of your air conditioner and enjoy cooler, cleaner air all year.
Conclusion
Emptying water from your LG air conditioner might seem like a chore, but it’s a simple and essential part of maintenance. Whether you have a window, split, or portable unit, the process is straightforward when you follow the right steps. By turning off the power, locating the water source, using the right tools, and cleaning key components, you can prevent leaks, odors, and costly repairs.
Remember, regular care goes a long way. Clean your filters, check your drain lines, and keep an eye on water levels—especially during hot, humid months. With these habits, your LG air conditioner will stay efficient, reliable, and trouble-free for years to come.
So the next time you hear that telltale drip or see a puddle forming, don’t panic. Grab your bucket, follow this guide, and get back to enjoying cool, comfortable air.

