
Draining water from your LG window air conditioner is essential to prevent leaks, mold growth, and unit damage. This guide walks you through the process step by step, ensuring your AC runs efficiently and safely all season long.
Key Takeaways
- Regular draining prevents water buildup: Condensation collects during cooling, and if not drained, it can overflow and damage your unit or home.
- Turn off and unplug the unit first: Safety is critical—always disconnect power before performing any maintenance.
- Locate the drain hole or pan: Most LG window ACs have a built-in drain hole or collection pan that needs periodic clearing.
- Use a wet/dry vacuum or turkey baster for stubborn clogs: These tools help remove debris blocking the drain line.
- Clean the filter and coils to reduce moisture: Dirty components increase condensation, leading to more frequent draining needs.
- Check for proper installation and leveling: An improperly leveled unit can cause water to pool instead of drain correctly.
- Schedule seasonal maintenance: Draining and cleaning your AC every few months keeps it running smoothly and extends its lifespan.
How to Drain Water from LG Window Air Conditioner
Is your LG window air conditioner dripping water inside your home or making strange gurgling sounds? You’re not alone. Many homeowners experience water buildup in their window AC units, especially during humid summer months. While LG designs their air conditioners to manage condensation efficiently, sometimes water can accumulate and cause leaks, odors, or even damage to your walls and flooring.
The good news? Draining water from your LG window air conditioner is a simple, do-it-yourself task that takes less than 30 minutes. In this comprehensive guide, we’ll walk you through every step—from safety precautions to troubleshooting common issues—so you can keep your AC running smoothly and your home dry. Whether you’re a first-time user or a seasoned DIYer, this guide will help you maintain your unit like a pro.
Why Does Water Build Up in Your LG Window Air Conditioner?
Before we dive into the draining process, it’s important to understand why water collects in your air conditioner in the first place. Air conditioners work by pulling warm, humid air from your room, passing it over cold evaporator coils, and then blowing cool air back into the space. During this process, moisture in the air condenses on the cold coils—just like water droplets form on a cold glass on a hot day.
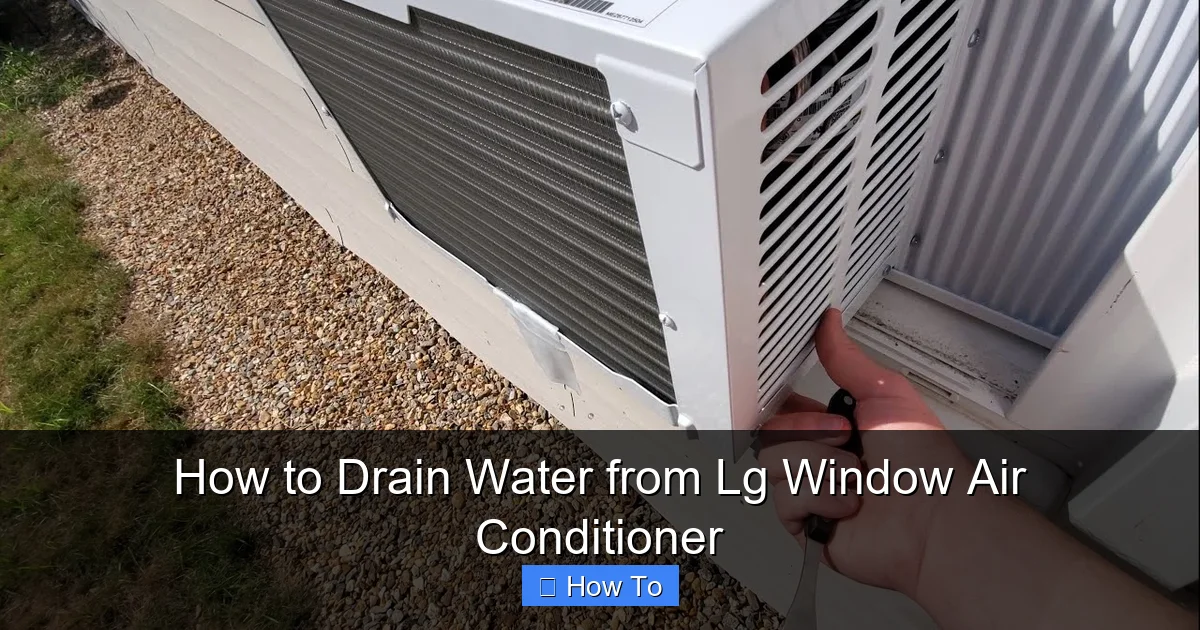
Visual guide about How to Drain Water from Lg Window Air Conditioner
Image source: storables.com
This condensation drips into a collection pan at the bottom of the unit. In most LG window air conditioners, this pan is designed to channel the water toward a drain hole located on the back or bottom of the unit. Under normal conditions, the water should drain outside through this hole. However, several factors can interfere with proper drainage:
- Clogged drain hole: Dust, dirt, or mold can block the drain opening.
- Dirty air filter: A clogged filter reduces airflow, causing coils to get colder and produce more condensation.
- Frozen evaporator coils: Ice buildup can melt and overflow the pan.
- Improper installation: If the unit isn’t tilted slightly backward, water won’t drain properly.
- High humidity: During rainy or extremely humid weather, the AC may produce more water than usual.
Understanding these causes helps you prevent future issues and maintain your unit more effectively.
Tools and Materials You’ll Need
Before starting, gather the following tools and supplies to make the draining process quick and hassle-free:
- Soft cloth or sponge
- Bucket or container (to catch water)
- Screwdriver (Phillips or flathead, depending on your model)
- Wet/dry vacuum (optional, for stubborn clogs)
- Turkey baster or small funnel
- Mild detergent or vinegar solution (for cleaning)
- Garden hose (optional, for flushing the drain)
- Safety gloves and goggles (recommended)
Having these items ready will save you time and ensure you don’t have to pause mid-process to find something.
Step-by-Step Guide to Draining Your LG Window Air Conditioner
Step 1: Turn Off and Unplug the Unit
Safety always comes first. Before touching any part of your air conditioner, make sure it’s completely powered off. Start by turning off the thermostat or control panel. Then, unplug the unit from the electrical outlet. This prevents any risk of electric shock while you’re working on the internal components.
If your LG window AC is hardwired or connected to a wall switch, turn off the circuit breaker that powers the unit. Wait at least 10–15 minutes before proceeding to allow any residual electricity to dissipate.
Step 2: Locate the Drain Hole or Collection Pan
Next, you’ll need to find where the water collects and drains from your unit. Most LG window air conditioners have a drain hole located on the back or bottom of the outdoor side of the unit. This is where condensation exits the system.
To access it, you may need to remove the front panel or grille. Use a screwdriver to carefully unscrew the panel—most LG models have two or four screws holding the front cover in place. Once removed, set the screws aside in a small container so you don’t lose them.
Behind the front panel, you’ll see the air filter. Remove it by sliding it out of its slot. Set it aside for cleaning later. Now, look toward the bottom of the unit. You should see a plastic pan or tray that collects water. This is the collection pan. The drain hole is usually at one end of this pan, often on the side facing outside.
Step 3: Check for Visible Water or Blockages
Inspect the collection pan for standing water. If you see water pooled inside, it means the drain is clogged or not functioning properly. Use a flashlight if needed to get a clear view.
Look closely at the drain hole. Is it blocked by dirt, algae, or mineral deposits? Even a small obstruction can prevent water from flowing out. You might also notice a white, crusty buildup—this is usually mineral residue from hard water.
If the pan is full, carefully tilt the unit slightly (if safe to do so) to pour the water into a bucket. Be gentle to avoid damaging internal components. Never tip the unit too far, as this could spill water into electrical parts.
Step 4: Clear the Drain Hole
Now it’s time to unclog the drain hole. Here are a few effective methods:
Method A: Use a Turkey Baster or Syringe
Fill a turkey baster or large syringe with warm water. Insert the tip into the drain hole and gently squeeze to flush out debris. Repeat several times until water flows freely. This method works well for minor clogs.
Method B: Use a Wet/Dry Vacuum
If the clog is stubborn, a wet/dry vacuum can create strong suction to pull out blockages. Set the vacuum to “wet” mode and attach the hose to the drain hole. Turn it on for 10–15 seconds. You should hear or see debris being pulled out. Be careful not to damage the drain opening with excessive force.
Method C: Flush with a Garden Hose
If you have access to the outdoor side of the unit, use a garden hose to gently flush water through the drain hole. This helps clear out any remaining sludge or buildup. Avoid using high-pressure settings, as they can damage internal parts.
Step 5: Clean the Collection Pan
Once the drain is clear, clean the collection pan to remove any mold, mildew, or residue. Mix a solution of one part white vinegar to three parts water, or use a mild detergent. Dip a soft cloth or sponge into the solution and wipe the inside of the pan thoroughly.
Pay special attention to corners and edges where grime tends to accumulate. Rinse the pan with clean water and dry it with a towel. A clean pan prevents odors and reduces the chance of future clogs.
Step 6: Clean the Air Filter and Evaporator Coils
While you’re at it, take the opportunity to clean the air filter and evaporator coils. A dirty filter restricts airflow, causing the coils to get too cold and produce excess condensation. Remove the filter and rinse it under warm water. Let it air dry completely before reinserting.
For the evaporator coils (located behind the filter), use a soft brush or a coil cleaning spray designed for air conditioners. Gently remove dust and debris. Avoid using water directly on the coils unless the manufacturer recommends it.
Clean coils improve efficiency and reduce moisture buildup, which means less frequent draining.
Step 7: Reassemble the Unit
Once everything is clean and dry, it’s time to put your LG window air conditioner back together. Reinsert the air filter into its slot. Replace the front panel and secure it with the screws you removed earlier. Make sure all connections are tight and the panel is flush with the unit.
Double-check that no tools or cloths are left inside the unit before reassembling.
Step 8: Test the Unit
Plug the unit back in and turn it on. Set the thermostat to a cool temperature and let it run for 10–15 minutes. Go outside and check the drain hole—water should be dripping steadily onto the ground. If it is, you’ve successfully drained and cleared your AC.
If no water comes out, or if you notice leaks inside your home, there may still be a blockage or installation issue. Refer to the troubleshooting section below.
Troubleshooting Common Drainage Issues
Even after following these steps, you might still encounter problems. Here’s how to handle common issues:
Water Still Leaking Inside?
If water is dripping into your room despite clearing the drain, check the installation. Your LG window AC should be tilted slightly backward (about 1/4 inch) so water flows outside. Use a level to check the angle. If it’s not tilted correctly, adjust the mounting brackets or add shims under the front of the unit.
Drain Hole Keeps Getting Clogged?
Frequent clogs may indicate high humidity or poor air quality. Consider using a dehumidifier in the room or replacing your air filter more often (every 1–2 months during peak usage). You can also install a drain line extension to direct water away from the unit.
Ice Buildup on Coils?
If you see ice on the evaporator coils, it’s likely due to a dirty filter, low refrigerant, or restricted airflow. Turn off the unit and let the ice melt completely. Clean the filter and coils, then restart. If ice returns, contact an HVAC technician—there may be a refrigerant leak.
No Water Coming Out at All?
If the unit runs but no water drains, the drain hole may be completely blocked or the pan may be cracked. Inspect the pan for cracks or warping. If damaged, you may need to replace it. Also, ensure the unit isn’t running in “dry mode” or “fan only,” which reduces condensation.
Preventative Maintenance Tips
To avoid future drainage problems, follow these maintenance best practices:
- Clean the filter monthly: A clean filter improves airflow and reduces condensation.
- Inspect the drain hole every season: Check for blockages before summer begins.
- Keep the area around the unit clean: Remove leaves, dirt, and debris from the outdoor side.
- Use a cover in winter: Protect the unit from rain and snow when not in use.
- Schedule professional servicing annually: A technician can check refrigerant levels, seals, and internal components.
Regular care not only prevents water issues but also extends the life of your LG window air conditioner and improves energy efficiency.
When to Call a Professional
While most drainage issues can be resolved at home, some problems require expert help. Contact an HVAC technician if:
- The unit continues to leak after cleaning and reassembly.
- You suspect a refrigerant leak or electrical issue.
- The collection pan is cracked or damaged.
- The compressor or fan motor is making unusual noises.
- You’re uncomfortable performing any of the steps above.
LG also offers customer support and service through their website or authorized dealers. Have your model number ready when calling for assistance.
Conclusion
Draining water from your LG window air conditioner is a simple but essential maintenance task that keeps your unit running efficiently and your home dry. By following this step-by-step guide, you can prevent leaks, reduce mold growth, and avoid costly repairs. Remember to prioritize safety, clean the filter and coils regularly, and check the drain hole seasonally.
With a little care and attention, your LG window AC will keep you cool and comfortable all summer long—without the worry of water damage. Stay proactive, and your air conditioner will reward you with reliable performance for years to come.

