
Keeping your LG air conditioner’s condenser clean is essential for optimal performance and energy efficiency. This guide walks you through the entire process—from safety prep to reassembly—so you can maintain your unit like a pro and avoid costly repairs.
Key Takeaways
- Turn off power first: Always disconnect the unit from the electrical source before cleaning to prevent shocks or damage.
- Clean every 3–6 months: Regular maintenance prevents dust buildup, improves airflow, and boosts cooling efficiency.
- Use gentle tools: Soft brushes, vacuum attachments, and low-pressure water help avoid damaging delicate fins.
- Inspect for damage: Check fins, coils, and fans for bends or corrosion during cleaning—address issues early.
- Allow full drying: Never reassemble or power on the unit until all parts are completely dry to prevent mold or electrical issues.
- Know your model: LG window, split, and portable units have different condenser access points—follow model-specific steps.
- When to call a pro: If you notice refrigerant leaks, strange noises, or persistent poor performance, contact an LG-certified technician.
Why Cleaning Your LG Air Conditioner’s Condenser Matters
Your LG air conditioner works hard to keep your home cool and comfortable, especially during hot summer months. But like any hardworking appliance, it needs regular care to keep performing at its best. One of the most important—and often overlooked—parts of AC maintenance is cleaning the condenser.
The condenser is the outdoor component of your air conditioning system (in split systems) or the rear section of a window or portable unit. Its job is to release heat absorbed from inside your home into the outside air. Over time, this part collects dirt, dust, leaves, pet hair, and even pollen. When the condenser gets clogged, your AC has to work harder to expel heat. This leads to higher energy bills, reduced cooling power, and even premature system failure.
LG designs its air conditioners with efficiency and durability in mind, but even the best units can’t escape the buildup of debris. Fortunately, cleaning the condenser is a straightforward task that most homeowners can do themselves—with the right tools, safety precautions, and a little patience.
In this guide, you’ll learn exactly how to clean the condenser on your LG air conditioner, whether you have a window unit, a portable AC, or a split-system model. We’ll walk you through every step, from turning off the power to reassembling the unit safely. You’ll also get tips on how often to clean, what tools to use, and when it’s time to call in a professional.
By the end of this guide, you’ll not only have a cleaner, more efficient air conditioner—you’ll also extend its lifespan and save money on energy and repairs.
Understanding Your LG Air Conditioner’s Condenser
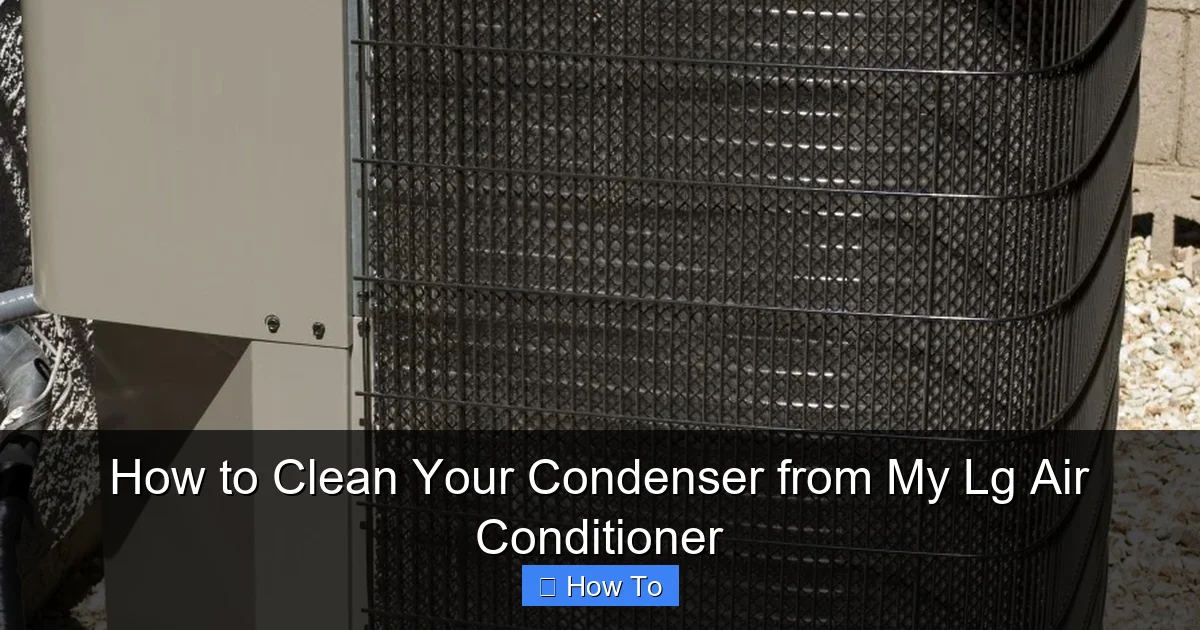
Visual guide about How to Clean Your Condenser from My Lg Air Conditioner
Image source: jaysonwaterquality.com
Before you start cleaning, it’s important to understand what the condenser does and where it’s located. This will help you identify the right parts and avoid confusion during maintenance.
In most LG air conditioners, the condenser consists of three main components:
- Condenser coils: These thin, finned metal tubes carry refrigerant and release heat to the outside air. They’re usually made of copper or aluminum and are highly efficient at transferring heat—but also prone to collecting dirt.
- Condenser fan: This fan blows air across the coils to help dissipate heat. It’s often located behind or beside the coils and can collect dust and debris on its blades.
- Fins: The thin metal fins surrounding the coils increase surface area for better heat exchange. They’re delicate and can bend easily, so they require gentle cleaning.
The location of the condenser depends on your LG AC model:
- Window units: The condenser is at the back of the unit, facing outward. You’ll typically see a grille or vent on the exterior side.
- Portable air conditioners: These have an exhaust hose that vents hot air outside. The condenser is usually inside the unit, behind a rear or side panel.
- Split-system units: These have an indoor evaporator unit and an outdoor condenser unit. The outdoor unit houses the condenser coils, fan, and compressor.
Knowing your model type is crucial because the cleaning process varies slightly. For example, cleaning a window unit’s condenser is simpler than accessing the coils in a split-system outdoor unit. But the core principles—gentle cleaning, thorough drying, and safe reassembly—remain the same.
LG also includes helpful labels and access panels on many models to make maintenance easier. Check your user manual or the unit itself for markings like “Clean Filter” or “Service Panel.” If you’ve misplaced your manual, you can usually download a digital copy from LG’s official support website using your model number.
Tools and Materials You’ll Need
You don’t need fancy equipment to clean your LG air conditioner’s condenser. Most of the tools are household items or inexpensive supplies available at hardware stores. Here’s what to gather before you begin:
- Work gloves: Protect your hands from sharp edges, dust, and debris.
- Safety goggles: Prevent dust or cleaning solution from getting into your eyes.
- Soft-bristle brush: A toothbrush, paintbrush, or dedicated coil brush works well for loosening dirt without damaging fins.
- Vacuum cleaner with brush attachment: Ideal for sucking up loose dust and debris from coils and fins.
- Garden hose with spray nozzle: Use only on low pressure to rinse the condenser. High pressure can bend fins or force water into electrical components.
- Mild detergent or coil cleaner: A few drops of dish soap in water works for light cleaning. For heavy buildup, use an EPA-approved coil cleaner (available at HVAC supply stores).
- Spray bottle: For applying cleaning solution evenly.
- Microfiber cloths: For wiping down surfaces and drying parts.
- Screwdriver (if needed): Some LG models require removing screws to access the condenser. Use the correct type (Phillips or flathead) to avoid stripping.
- Fin comb (optional but helpful): A specialized tool that straightens bent fins. Available online or at hardware stores.
Avoid using harsh chemicals, wire brushes, or high-pressure washers. These can damage the delicate fins, corrode the coils, or void your warranty. Stick to gentle, non-abrasive methods for the best results.
Also, make sure your workspace is safe. If you’re cleaning an outdoor split-system unit, ensure the area is dry and free of tripping hazards. For window or portable units, place them on a stable surface or have someone assist you if lifting is required.
Safety First: Preparing to Clean Your LG AC Condenser
Cleaning your air conditioner’s condenser involves working near electrical components and potentially heavy parts. Safety should always come first. Follow these steps to protect yourself and your unit:
Turn Off the Power
This is the most critical step. Never attempt to clean the condenser while the unit is plugged in or receiving power.
- For window and portable units: Unplug the AC from the wall outlet. If it’s hardwired, turn off the circuit breaker that controls the unit.
- For split-system units: Locate the outdoor disconnect switch (usually a gray box near the condenser unit) and flip it to “OFF.” Then, turn off the breaker in your main electrical panel that supplies power to the AC.
Wait at least 10–15 minutes after turning off the power before starting. This allows any residual electricity in the capacitors to dissipate, reducing the risk of shock.
Wear Protective Gear
Put on your gloves and safety goggles before handling the unit. The fins are sharp, and cleaning solutions can irritate skin or eyes.
Clear the Area
Remove any objects, plants, or debris around the condenser—especially for outdoor units. This gives you room to work and prevents dirt from being blown back onto the clean coils.
Check the Weather
If you’re cleaning an outdoor unit, choose a dry, overcast day. Avoid cleaning in direct sunlight or rain. Wet conditions increase the risk of electrical hazards, and sun exposure can make the metal too hot to handle safely.
Inspect for Damage
Before cleaning, do a quick visual check. Look for:
- Bent or crushed fins
- Corrosion or rust on coils
- Cracks in the housing
- Loose wires or connections
If you notice any serious damage, especially involving electrical components, stop and contact an LG-certified technician. Don’t attempt repairs unless you’re qualified.
Once you’ve completed these safety steps, you’re ready to begin cleaning.
Step-by-Step Guide: Cleaning the Condenser on Your LG Air Conditioner
Now that you’re prepared, let’s walk through the cleaning process. We’ll cover all major LG AC types—window, portable, and split-system—with model-specific tips.
Step 1: Access the Condenser
The method for accessing the condenser depends on your unit type.
- Window units: The condenser is at the back. You may need to remove the exterior grille. Look for clips or screws holding it in place. Gently pry or unscrew to remove.
- Portable units: Remove the rear or side panel. Most LG portable ACs have a latch or a few screws. Check your manual for the exact location.
- Split-system units: The condenser is in the outdoor unit. Remove the top grille or side panel. Some models have a latch; others require a screwdriver. Be careful not to damage the fan blades when lifting the grille.
Once the panel is off, you should see the condenser coils and fan. Take a photo before disassembling further—this will help you remember how to reassemble everything.
Step 2: Vacuum Loose Debris
Use your vacuum cleaner with the brush attachment to remove loose dirt, dust, and leaves from the coils and fins. Work gently, moving in the direction of the fins to avoid bending them.
Focus on the outer surfaces first, then reach into crevices if possible. Don’t force the nozzle—gentle suction is enough.
Step 3: Brush Away Stubborn Dirt
For caked-on grime, use your soft-bristle brush. Dip it in a mixture of warm water and mild detergent, or spray a coil cleaner directly onto the coils.
Gently scrub the fins and coils in a back-and-forth motion. Avoid pressing too hard—aluminum fins are especially fragile.
Pay special attention to the areas behind the fan and between tightly spaced fins. These spots trap the most dirt.
Step 4: Rinse with Low-Pressure Water
Once you’ve loosened the dirt, rinse the condenser with a garden hose set to low pressure. Use a gentle spray—never a jet setting.
Hold the nozzle at least 12 inches away and spray at a 45-degree angle to the fins. This helps water penetrate without bending them.
For split-system units, avoid spraying directly into the fan motor or electrical connections. If water gets in, let the unit dry completely before reassembling.
Step 5: Clean the Fan Blades
While the coils are drying, clean the condenser fan blades. Use a damp microfiber cloth to wipe off dust and grease. If the blades are very dirty, use a brush dipped in soapy water.
Be careful not to bend the blades or disturb the motor. Do not spin the fan by hand—this can damage the motor bearings.
Step 6: Straighten Bent Fins (If Needed)
Inspect the fins. If you see bent or crushed sections, use a fin comb to gently straighten them. Insert the comb into the fins and pull it through in one direction.
This improves airflow and helps your AC run more efficiently.
Step 7: Let Everything Dry Completely
Allow the condenser to air dry for at least 1–2 hours. Make sure no moisture remains, especially around electrical parts.
You can speed up drying by using a clean, dry microfiber cloth to blot excess water—but don’t rub, as this can bend fins.
Step 8: Reassemble the Unit
Once everything is dry, carefully reattach the panels, grilles, or screws. Make sure all parts are securely in place.
Double-check that no tools or debris are left inside the unit.
Step 9: Restore Power and Test
Plug in the unit or turn the breaker back on. Wait a few minutes, then turn on the AC and set it to cooling mode.
Listen for unusual noises and check that cool air is flowing properly. If everything sounds and feels normal, you’re done!
Model-Specific Tips for LG Air Conditioners
LG offers a wide range of air conditioners, and some models have unique features that affect cleaning.
- LG Dual Inverter Window Units: These have enhanced coils and fans. Be extra gentle when cleaning—avoid touching the inverter components.
- LG Portable ACs with Dual Hoses: These have more complex airflow systems. Focus on the exhaust hose connection and ensure it’s clear of blockages.
- LG Art Cool Mirror Split Systems: The outdoor unit may have a sleek design that hides access panels. Refer to the manual for exact locations.
- LG Smart Wi-Fi Models: Some units have self-diagnostic features. After cleaning, check the app for error codes or maintenance reminders.
Always consult your user manual for model-specific instructions. LG’s website has downloadable manuals and video tutorials for many models.
How Often Should You Clean the Condenser?
The frequency of cleaning depends on your environment and usage.
- Every 3 months: Recommended for homes with pets, high pollen counts, or dusty areas.
- Every 6 months: Suitable for average households with moderate use.
- Annually: Only if you live in a clean, low-pollution area and use the AC sparingly.
Signs it’s time to clean include:
- Reduced cooling performance
- Higher than usual energy bills
- Unusual noises from the outdoor unit
- Visible dirt or debris buildup
Regular cleaning not only improves efficiency but also helps your LG AC last longer.
Troubleshooting Common Issues
Even with proper cleaning, you might encounter problems. Here’s how to handle common issues:
Condenser Still Looks Dirty After Cleaning
Some buildup may be baked on or inside hard-to-reach areas. Try a dedicated coil cleaner spray, which can penetrate deeper. Let it sit for 10–15 minutes before rinsing.
Fins Are Bent or Damaged
Use a fin comb to gently straighten them. If many fins are crushed, consider calling a technician—severe damage can affect performance.
Unit Won’t Turn On After Cleaning
Double-check that all panels are securely reattached and power is restored. If the unit still doesn’t work, there may be a tripped breaker or internal issue—contact LG support.
Water Leaking from the Unit
This could be due to improper drainage or a clogged drain line. Check the drain pan and hose for blockages. Clean them if needed.
Unusual Noises After Reassembly
Ensure the fan isn’t hitting any panels or debris. Tighten all screws and make sure the unit is level.
When to Call a Professional
While cleaning the condenser is a DIY-friendly task, some situations require expert help:
- You suspect a refrigerant leak (oily residue, hissing sounds)
- The compressor or fan motor is malfunctioning
- You’re uncomfortable working with electrical components
- The unit is under warranty and requires internal servicing
LG-certified technicians have the tools and training to handle complex issues safely. Regular professional maintenance (once a year) can also complement your DIY cleaning.
Final Thoughts: Keep Your LG AC Running Smoothly
Cleaning the condenser on your LG air conditioner is one of the simplest and most effective ways to maintain performance, save energy, and extend the life of your unit. With the right tools, safety precautions, and a little time, you can keep your AC running like new—even during the hottest days of summer.
Remember: consistency is key. Make condenser cleaning part of your seasonal home maintenance routine. Your LG air conditioner will thank you with cooler air, lower bills, and fewer breakdowns.
By following this guide, you’re not just cleaning a machine—you’re taking control of your home’s comfort and efficiency. So grab your gloves, turn off the power, and get started. Your cool, clean air is just a few steps away.

