
Keeping your LG window air conditioner clean improves cooling efficiency, reduces energy bills, and extends the unit’s lifespan. This guide walks you through a complete cleaning process—from safety prep to reassembly—so your AC runs smoothly all season long.
Key Takeaways
- Turn off and unplug the unit before cleaning: Always prioritize safety by disconnecting power to avoid electrical shock or damage.
- Clean or replace the air filter monthly: A dirty filter restricts airflow, reduces cooling power, and increases energy use.
- Use mild soap and water for most components: Avoid harsh chemicals that can damage plastic or internal parts.
- Inspect and clean the evaporator and condenser coils: Dirty coils reduce efficiency and can lead to overheating or system failure.
- Check drainage and remove debris from the base pan: Clogged drains cause water leaks and promote mold growth.
- Reassemble carefully and test the unit: Ensure all parts are securely in place before turning the AC back on.
- Schedule seasonal deep cleans: Perform a thorough cleaning at least twice a year—before summer and after fall use.
Introduction: Why Cleaning Your LG Window AC Unit Matters
Your LG window air conditioner works hard to keep your home cool and comfortable, especially during hot summer months. But like any appliance, it needs regular maintenance to perform at its best. Over time, dust, dirt, pollen, and moisture build up inside the unit, reducing airflow, straining the motor, and even affecting indoor air quality. A neglected AC can also become a breeding ground for mold and bacteria, which may lead to unpleasant odors or health issues.
The good news? Cleaning your LG window unit air conditioner is easier than you might think—and it doesn’t require special tools or professional help. With just a few household supplies and about 30 to 60 minutes of your time, you can restore your AC’s efficiency, lower your energy bills, and extend its lifespan. This step-by-step guide will walk you through the entire process, from safety precautions to reassembly, so you can keep your LG window AC running smoothly all season long.
Whether you’re a first-time cleaner or haven’t serviced your unit in years, this guide is designed for everyone. We’ll cover everything you need to know, including what to clean, how to clean it safely, and how often to do it. By the end, you’ll have a sparkling-clean air conditioner that cools better, uses less energy, and delivers fresher, healthier air.
What You’ll Need Before You Start
Before diving into the cleaning process, gather all the necessary tools and supplies. Having everything ready will make the job faster and more efficient. Here’s a checklist of what you’ll need:
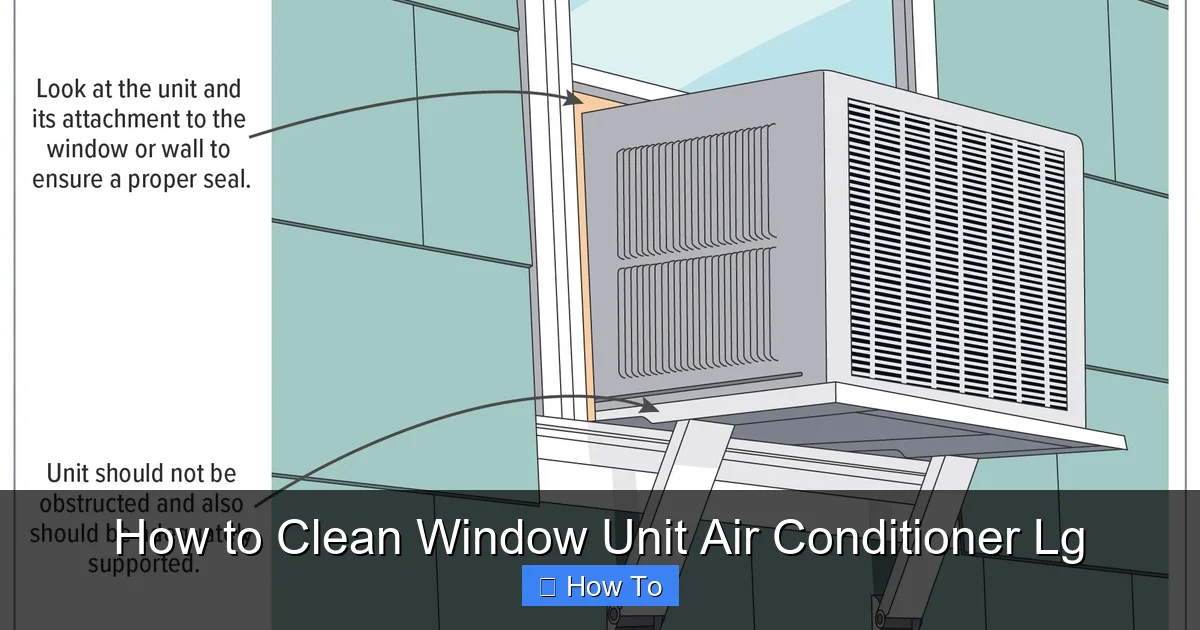
Visual guide about How to Clean Window Unit Air Conditioner Lg
Image source: s3.amazonaws.com
- A screwdriver (usually Phillips head)
- A soft brush or old toothbrush
- A vacuum cleaner with a brush attachment
- Mild dish soap or all-purpose cleaner
- A bucket of warm water
- Microfiber cloths or soft sponges
- A garden hose (optional, for outdoor rinsing)
- Coil cleaner (optional, for heavy coil buildup)
- Rubber gloves (to protect your hands)
- Safety goggles (to protect your eyes from dust)
Most of these items are likely already in your home. If you don’t have a coil cleaner, mild soap and water will work fine for light cleaning. For heavily soiled coils, a commercial coil cleaner can help break down stubborn grime. Always check your LG user manual for any model-specific recommendations before using chemical cleaners.
Step 1: Turn Off and Unplug the Unit
Safety always comes first. Before you touch any part of your LG window air conditioner, make sure it’s completely powered down. Start by turning off the unit using the remote or control panel. Then, unplug it from the wall outlet. This step is crucial—even if the unit appears off, it could still be receiving power, which poses a risk of electric shock.
If your AC is hardwired or connected to a dedicated circuit, turn off the corresponding breaker in your electrical panel. Wait at least 10–15 minutes before handling the unit to allow any residual electricity to dissipate. This extra precaution ensures you’re working safely.
Once the unit is unplugged, give it a few minutes to cool down if it’s been running recently. Hot components can cause burns, and warm plastic may be more prone to cracking during cleaning. Patience here pays off in safety and effectiveness.
Tip: Label the Cord
If you’re cleaning the unit in place (without removing it from the window), consider labeling the power cord with a piece of tape so you don’t accidentally plug it back in too soon. This simple trick prevents accidental startup while you’re still working.
Step 2: Remove the Front Panel and Air Filter
Now that the unit is safe to handle, it’s time to access the internal components. Start by removing the front panel. On most LG window units, the panel is held in place by clips or screws along the top and sides. Gently lift the panel upward or outward—depending on your model—until it releases. Some models may require you to unscrew a few fasteners first, so keep your screwdriver handy.
Once the panel is off, you’ll see the air filter. This is usually a flat, rectangular mesh screen located just behind the front grille. The filter traps dust, pollen, and other airborne particles, so it gets dirty quickly—especially during peak cooling season.
Carefully pull the filter out of its slot. Most LG filters slide out easily, but some may have a small latch or tab you need to press. Avoid forcing it, as this could damage the filter or the housing.
Cleaning the Air Filter
Take the filter to a sink or outdoors and rinse it under lukewarm water. Use a soft brush or your fingers to gently remove dust and debris. If the filter is very dirty, soak it in a mixture of warm water and mild dish soap for 10–15 minutes, then rinse thoroughly.
Never use hot water, as it can warp the filter material. Also, avoid wringing or twisting the filter, which can damage the mesh. Once clean, shake off excess water and let it air dry completely—usually takes 30–60 minutes. A damp filter can promote mold growth when reinstalled.
If your filter is damaged, torn, or more than a year old, consider replacing it. LG offers replacement filters designed specifically for your model, which you can order online or find at appliance stores. A clean filter is one of the easiest ways to improve airflow and efficiency.
Step 3: Vacuum the Interior
With the front panel and filter removed, you now have access to the interior of the unit. Use your vacuum cleaner with a brush attachment to remove loose dust, dirt, and debris from the evaporator coils, fan blades, and base pan. Focus on areas where buildup is heaviest—especially around the coils and near the drain holes.
Be gentle when vacuuming near the coils and fan. These components are delicate and can be bent or damaged if handled roughly. Move the vacuum nozzle slowly and avoid pressing too hard. The goal is to remove surface dust, not scrub or scrub.
If you notice cobwebs, pet hair, or large debris, use a soft brush or cloth to loosen it before vacuuming. This prevents clogging the vacuum and ensures a more thorough clean.
Tip: Use a Flashlight
Shine a flashlight into the unit to spot hidden dirt or mold. Dark corners and crevices often collect grime that’s easy to miss. If you see black spots or fuzzy growth, it’s likely mold—address it during the next cleaning step.
Step 4: Clean the Evaporator and Condenser Coils
The evaporator and condenser coils are critical to your AC’s cooling performance. The evaporator coil absorbs heat from indoor air, while the condenser coil releases heat outside. When these coils are dirty, heat transfer becomes less efficient, forcing the unit to work harder and use more energy.
Start by inspecting the coils. You’ll see the evaporator coil inside the unit (facing the room) and the condenser coil on the back or side (facing outside). Both can accumulate dust, lint, and grease over time.
Cleaning the Evaporator Coil
Use a soft brush or coil brush to gently loosen dirt from the evaporator coil fins. Be careful—these fins are thin and easily bent. If fins are bent, use a fin comb (available at hardware stores) to straighten them. Bent fins restrict airflow and reduce efficiency.
After brushing, spray the coil with a mild coil cleaner or a mixture of water and a few drops of dish soap. Let it sit for 5–10 minutes to break down grime, then rinse with a gentle stream of water. Avoid high-pressure sprays, which can damage the fins.
Cleaning the Condenser Coil
The condenser coil is usually located on the back of the unit and may be harder to reach. If your unit is still in the window, you may need to tilt it slightly or remove it for better access. Only remove the unit if you’re confident in your ability to reinstall it safely.
Use the same brushing and cleaning method as with the evaporator coil. If the coil is very dirty, a commercial coil cleaner can help dissolve stubborn buildup. Follow the product instructions carefully, and always rinse thoroughly.
After cleaning both coils, let them air dry completely before reassembling the unit. Moisture left inside can lead to mold or electrical issues.
Step 5: Clean the Fan Blades and Motor Housing
The fan inside your LG window AC circulates air across the coils and through your room. Over time, fan blades collect dust and can become unbalanced, causing noise or vibration.
Use a soft cloth or brush to wipe down each fan blade. Be gentle—bending a blade can throw the fan off balance. If the blades are very dirty, dampen a cloth with soapy water and wipe them clean, then dry with a towel.
The motor housing (the protective cover around the fan motor) can also collect dust. Wipe it down with a dry or slightly damp cloth. Never spray water directly onto the motor, as this can cause electrical damage.
Tip: Check for Obstructions
While cleaning, make sure nothing is blocking the fan’s rotation. Leaves, paper, or small objects can get stuck and prevent the fan from spinning freely. Remove any debris you find.
Step 6: Clean the Base Pan and Drainage System
The base pan collects condensation and runoff from the coils. If it’s dirty or clogged, water can back up, leading to leaks, mold, or even water damage to your wall or window frame.
Use a sponge or cloth dipped in soapy water to scrub the inside of the base pan. Pay special attention to the corners and around the drain holes. If you see standing water, use a turkey baster or small cup to remove it before cleaning.
Check the drain holes for clogs. These small openings allow water to exit the unit. Use a pipe cleaner, wire, or compressed air to clear any blockages. If the drain is severely clogged, you may need to flush it with a mixture of water and vinegar to dissolve mineral deposits.
Preventing Mold Growth
Mold thrives in dark, damp environments—exactly like the inside of an AC unit. After cleaning the base pan, wipe it dry and consider spraying a light mist of diluted vinegar or a mold-inhibiting cleaner. This helps prevent future growth.
Step 7: Reassemble the Unit
Once all components are clean and dry, it’s time to put your LG window air conditioner back together. Start by placing the air filter back into its slot. Make sure it’s seated properly and facing the correct direction (usually with the arrow pointing inward).
Next, reattach the front panel. Align it with the unit and press or slide it into place until it clicks or screws secure it. Double-check that all clips or screws are tight to prevent rattling or air leaks.
If you removed the unit from the window for cleaning, carefully reinstall it. Make sure it’s level and securely supported. Use brackets or supports if recommended by LG. Never operate the unit if it’s loose or unstable—this can cause damage or injury.
Final Check
Before plugging the unit back in, do a quick visual inspection. Ensure all parts are in place, no tools are left inside, and there’s no moisture remaining. This final step prevents accidents and ensures smooth operation.
Step 8: Plug In and Test the Unit
Once everything is reassembled, plug the unit back into the wall outlet. Turn it on using the remote or control panel and set it to a cool temperature. Listen for unusual noises—rattling, grinding, or squealing could indicate a problem.
Feel the airflow from the vents. It should be strong and cool. If the airflow is weak, double-check that the filter is clean and properly installed. Also, ensure the unit isn’t obstructed by furniture or curtains.
Monitor the unit for the first few hours. Check for leaks around the window or base pan. If you notice water pooling, the drain may still be clogged—repeat the drainage cleaning step.
How Often Should You Clean Your LG Window AC?
Regular maintenance is key to keeping your LG window air conditioner in top shape. Here’s a simple schedule to follow:
- Monthly: Clean or replace the air filter during peak cooling season (spring through fall).
- Every 3–6 months: Vacuum the interior and wipe down accessible components.
- Twice a year: Perform a full deep clean—before summer and after fall use.
- As needed: Clean after storms, heavy pollen seasons, or if you notice reduced performance, odors, or leaks.
Sticking to this schedule helps prevent major issues and keeps your AC running efficiently year after year.
Troubleshooting Common Cleaning Issues
Even with careful cleaning, you might run into a few problems. Here’s how to handle common issues:
Problem: Unit won’t turn on after cleaning
Solution: Double-check that the unit is plugged in and the circuit breaker hasn’t tripped. Ensure the front panel is securely attached—some LG models have a safety switch that prevents operation if the panel is loose.
Problem: Water leaking from the unit
Solution: This usually means the drain is clogged or the unit isn’t level. Clear the drain holes and adjust the unit so it tilts slightly backward (to allow water to flow out).
Problem: Weak airflow
Solution: Check the filter—replace if dirty. Also, inspect the fan and coils for blockages. Bent coil fins can restrict airflow and should be straightened.
Problem: Musty or unpleasant odor
Solution: This is often caused by mold or mildew. Clean the base pan and coils thoroughly, and consider using a mold-inhibiting spray. Replace the filter and run the unit on fan mode for a few hours to dry it out.
Conclusion: Enjoy a Cleaner, Cooler Home
Cleaning your LG window unit air conditioner isn’t just about maintenance—it’s about performance, efficiency, and comfort. A clean AC cools faster, uses less energy, and delivers fresher, healthier air. By following this guide, you’ve taken a big step toward a more efficient home and a longer-lasting appliance.
Remember, regular cleaning doesn’t have to be a chore. With the right tools and a little time, it becomes a simple, rewarding task. Your LG window AC will thank you with reliable cooling all summer long—and you’ll enjoy lower energy bills and peace of mind.
So grab your supplies, follow these steps, and give your air conditioner the care it deserves. Your home—and your wallet—will feel the difference.

