
Keeping your window Carrier air conditioner clean is essential for performance, energy savings, and long-term reliability. A dirty filter or clogged coils can reduce cooling power and increase electricity use. With regular cleaning, you’ll enjoy better airflow, fewer repairs, and a fresher indoor environment.
Key Takeaways
- Clean filters monthly: Dirty air filters restrict airflow and make your system work harder, reducing efficiency and increasing wear.
- Remove dust from coils: Both evaporator and condenser coils should be cleaned every 3–6 months to maintain optimal heat exchange.
- Use the right tools: Vacuum cleaners with brush attachments, soft brushes, microfiber cloths, and mild detergent are ideal for safe cleaning.
- Unplug before servicing: Always disconnect power at the circuit breaker to prevent electrical hazards during maintenance.
- Check the outdoor unit: Even though it’s a window unit, some models have external components that benefit from occasional cleaning.
- Schedule professional tune-ups: Once a year, have a technician inspect refrigerant levels, belts, and electrical connections.
- Replace old units: If your Carrier window AC is over 10 years old, cleaning alone won’t restore peak performance—consider upgrading.
📑 Table of Contents
- Why Cleaning Your Window Carrier Air Conditioner Matters
- Gathering Your Cleaning Supplies
- Preparing Your Workspace and Safety First
- How to Clean the Air Filter
- Cleaning the Evaporator and Condenser Coils
- Wiping Down Exterior Surfaces and Drain Pan
- Reassembly and Post-Cleaning Checks
- Common Mistakes to Avoid
- When to Call a Professional
- Extending the Life of Your Carrier Window AC
Why Cleaning Your Window Carrier Air Conditioner Matters
Have you ever turned on your Carrier window air conditioner only to find it’s blowing warm air? Or worse—it’s making strange noises, running constantly, or not cooling as well as it used to? Chances are, it’s time for a deep clean. Most people think of air conditioners as appliances that just “work,” but like any machine, they need regular care. One of the most important—and easiest—tasks you can do is clean your window Carrier air conditioner properly.
Carrier is a trusted name in HVAC systems, known for durability and energy efficiency. But even the best units lose performance over time if neglected. Dust, pet dander, pollen, and mold spores build up inside your unit, especially on the filters and coils. This buildup restricts airflow, forces the compressor to work harder, and can lead to higher electric bills, poor cooling, and even breakdowns.
Cleaning your window Carrier air conditioner isn’t complicated. With a few basic tools and a little time each month, you can keep your unit running smoothly. In this guide, we’ll walk you through every step—from gathering supplies to troubleshooting common issues. Whether you’re a first-time owner or just looking to refresh your routine, this article will help you maintain your Carrier window AC like a pro.
Gathering Your Cleaning Supplies
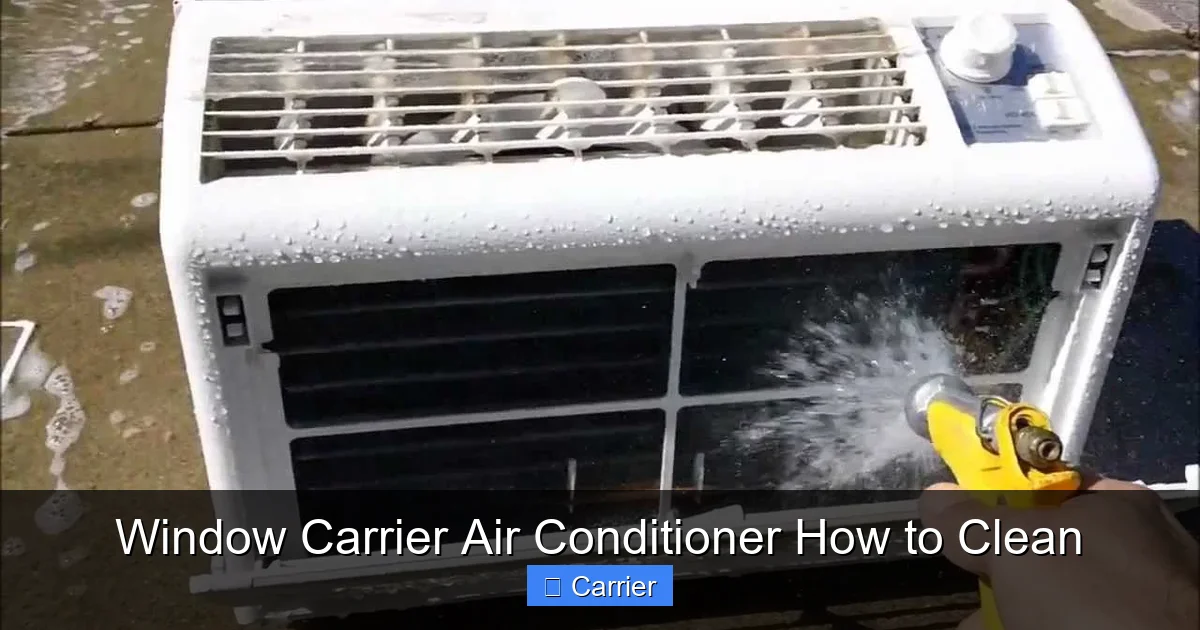
Visual guide about Window Carrier Air Conditioner How to Clean
Image source: i.ytimg.com
Before you start, make sure you have everything you need. You don’t need expensive equipment—just common household items that are gentle yet effective. Gather these before opening your unit:
Essential Tools and Materials
- Vacuum cleaner with hose and brush attachment: This is your go-to tool for removing loose debris from vents and coils.
- Soft-bristled brush: An old toothbrush or paintbrush works great for scrubbing tight spaces.
- Microfiber cloths: These trap dust without scratching surfaces.
- Mild detergent or all-purpose cleaner: Avoid harsh chemicals that could damage plastic or metal parts.
- Bucket of warm water: For soaking and rinsing removable parts.
- Screwdriver (Phillips or flathead): Depending on your model, you may need to remove screws to access internal components.
- Replacement air filter: Have one ready so you can swap it out immediately after cleaning.
What NOT to Use
Avoid using:
- Pressure washers or high-pressure hoses—they can force water into electrical components.
- Ammonia-based cleaners or bleach—these corrode metal and harm seals.
- Coarse sponges or steel wool—they scratch delicate surfaces.
Having your toolkit ready ensures the process goes smoothly and safely. Now that you’re prepared, let’s move on to preparing your workspace.
Preparing Your Workspace and Safety First
Visual guide about Window Carrier Air Conditioner How to Clean
Image source: pngimg.com
Safety always comes first when working with electrical appliances. Your Carrier window air conditioner runs on electricity, and water + electricity = serious danger. Follow these steps before touching any part of the unit:
Step 1: Turn Off Power
Locate your home’s main electrical panel. Flip the breaker that controls the circuit powering your AC unit. Double-check by testing the outlet near the window unit—it should show no voltage. Never skip this step!
Step 2: Remove the Unit from the Window
Most window Carrier ACs slide into a sleeve cut into your wall or window frame. Carefully lift the unit out. Be gentle—these units can be heavy. Place it on a flat, dry surface like a table or tarp.
Step 3: Clear the Area
Make sure there’s nothing around the unit that could get damaged by moisture or dropped parts. Lay down newspaper or a drop cloth to catch dirt and water.
Step 4: Wear Protective Gear
Consider wearing gloves and safety glasses, especially if you have pets or allergies. This protects you from dust and mold spores.
Once your workspace is ready and safe, you’re ready to open up your Carrier window AC and begin cleaning.
How to Clean the Air Filter
The air filter is the first line of defense against dust and allergens. Over time, it gets clogged with particles, which reduces airflow and strains your system. Cleaning or replacing it regularly makes a huge difference.
Locating the Filter
Inside your Carrier window unit, you’ll see a front panel or grille. Remove it by unscrewing the faceplate or lifting it off using tabs. Behind the panel, you’ll spot the filter—usually a rectangular mesh or foam piece mounted vertically.
Cleaning vs. Replacing
If your filter is reusable (often made of washable mesh), rinse it under lukewarm water with mild soap. Let it air-dry completely—never reinstall a wet filter. For disposable filters, replace them immediately after removal.
Frequency Recommendations
– Every 1–2 weeks: During peak summer months with high usage.
– Monthly: In shoulder seasons or if you have pets or live in dusty areas.
– Every 3–6 months: During winter or low-use periods.
A clean filter improves indoor air quality, reduces odors, and helps your Carrier AC run more quietly. It’s one of the simplest ways to boost efficiency.
Cleaning the Evaporator and Condenser Coils
Coils are critical for heat exchange. The evaporator coil absorbs heat from indoor air; the condenser coil releases it outside. When they’re covered in dirt, your unit struggles to cool effectively.
Accessing the Coils
After removing the front panel and filter, look behind the blower assembly. You’ll see two coils: one smaller (evaporator) and one larger (condenser). Some models require removing additional screws to fully expose them.
Removing Loose Debris
Use your vacuum’s brush attachment to gently suck away dust from both coils. Work from top to bottom, following the fin direction to avoid bending them.
Deep Cleaning Tips
For stubborn grime:
- Dip a soft brush in soapy water and lightly scrub the coils.
- Rinse with clean water—but never spray directly into the unit.
- Allow coils to dry completely before reassembling.
Protecting the Fins
Aluminum fins are delicate. Never use a hard object to poke or straighten them. If they’re bent, use a fin comb (available online or at hardware stores) to align them gently.
Dirty coils can cause your Carrier window AC to cycle on and off frequently (short cycling), wasting energy and shortening the compressor’s life. Regular coil cleaning prevents this and keeps cooling consistent.
Wiping Down Exterior Surfaces and Drain Pan
While you’ve got the unit open, take advantage of the downtime to clean other parts.
Exterior Casings
Use a damp microfiber cloth with mild cleaner to wipe down the plastic casing, louvers, and control panel. This removes grime that attracts more dust over time.
The Drain Pan
Located near the bottom of the unit, the drain pan collects condensation. Check for standing water or algae growth. If dirty, mix equal parts water and white vinegar, pour it in, and let it sit for 15 minutes. Rinse thoroughly.
Drain Line Maintenance
Pour a cup of vinegar down the drain line every few months to prevent clogs and odors. This simple habit avoids costly service calls later.
Control Panel and Remote
Wipe the display and buttons with a slightly damp cloth. Dry immediately to avoid moisture buildup.
These small touches keep your Carrier AC looking new and functioning reliably.
Reassembly and Post-Cleaning Checks
Once everything is clean and dry, it’s time to put your Carrier window AC back together.
Putting It Back Together
– Reinstall the filter (make sure it slides in correctly).
– Attach the front panel securely.
– Slide the unit back into the window opening.
– Secure it with side brackets or screws as needed.
– Restore power by flipping the breaker back on.
Testing the Unit
Turn on your AC and listen for unusual sounds. Check that air flows freely and cools quickly. If it still feels weak, double-check that all panels are sealed tightly.
Final Tips
– Leave the unit off for 15 minutes after cleaning to let residual moisture evaporate.
– Mark your calendar for next cleaning—set phone reminders!
– Keep spare filters handy so replacements are never delayed.
Congratulations—you’ve just given your Carrier window air conditioner a full-service spa day!
Common Mistakes to Avoid
Even experienced DIYers make errors. Here’s what not to do:
- Skipping the power off: This risks electric shock or damaging sensitive electronics.
- Using too much water: Water shouldn’t enter the motor or control board. Pat dry instead of soaking.
- Neglecting the outdoor area: Even window units benefit from clearing debris around the base.
- Ignoring warranty terms: Improper cleaning might void your manufacturer’s warranty—check your manual.
- Overlooking humidity control: High indoor humidity means your AC works harder. Use a dehumidifier if needed.
By avoiding these pitfalls, you’ll protect your investment and enjoy reliable cooling for years.
When to Call a Professional
While cleaning is something you can do yourself, certain issues require expert help:
- Refrigerant leaks: These are dangerous and illegal to handle without certification.
- Compressor problems: Strange noises or failure to start often signal deeper mechanical issues.
- Persistent mold or mildew: May indicate a hidden leak requiring inspection.
- Age over 10 years: Older units consume more energy and lose efficiency regardless of cleaning.
Annual professional maintenance ensures your Carrier window AC operates safely and efficiently. Technicians can also spot early warning signs before they become expensive repairs.
Extending the Life of Your Carrier Window AC
Beyond cleaning, here’s how to maximize your unit’s lifespan:
- Keep the area around the window clear: Don’t block vents with furniture or curtains.
- Use a cover when not in use: Protects against rain, leaves, and UV damage.
- Monitor thermostat settings: Set between 72°F–78°F for comfort and efficiency.
- Update firmware (if applicable): Some newer Carrier models support software updates via app.
- Track energy usage: Sudden spikes may signal declining performance.
With thoughtful care, your Carrier window air conditioner can last 10–15 years. That’s decades of dependable cooling—especially compared to cheaper, less durable alternatives.
Frequently Asked Questions
How often should I clean my Carrier window air conditioner?
Clean the air filter every 1–2 weeks during heavy use, and perform a full internal cleaning every 3–6 months. More frequent cleaning is recommended if you have pets or live in dusty environments.
Can I use a pressure washer to clean my Carrier AC?
No, never use high-pressure water on your air conditioner. Water can penetrate electrical components and cause short circuits or corrosion. Stick to vacuuming and gentle hand washing.
Is it safe to clean my Carrier window AC while it’s plugged in?
Absolutely not. Always unplug the unit or turn off the circuit breaker before opening it. Working on live electrical appliances is extremely dangerous and can result in injury or damage.
What happens if I don’t clean my Carrier window AC regularly?
You’ll experience reduced airflow, weaker cooling, higher energy bills, and increased wear on the compressor. Over time, this can lead to complete system failure and costly repairs.
Do all Carrier window air conditioners have washable filters?
Not necessarily. Some models use reusable mesh filters, while others use disposable foam or fiberglass ones. Check your user manual to confirm the type and replacement schedule.
How long does it take to clean a Carrier window AC?
For a basic filter change, it takes about 5–10 minutes. A full internal cleaning including coil and drain pan maintenance takes 20–30 minutes. Plan accordingly and do it during off-peak hours.

