Understanding RV Air Conditioning Systems
When you travel in an RV, comfort is important. An RV air conditioning system helps keep the inside cool. This is especially true on hot summer days. In this article, we will explore how these systems work. We will also discuss the types available, maintenance tips, and more.
https://www.youtube.com/watch?v=Rnsq8H2bYmM
What is an RV Air Conditioning System?
An RV air conditioning system cools the air in your RV. It removes heat and humidity from the inside. This makes the space more comfortable. There are two main types of RV air conditioners:
Roof-Mounted Units
Portable Units
Roof-mounted Units
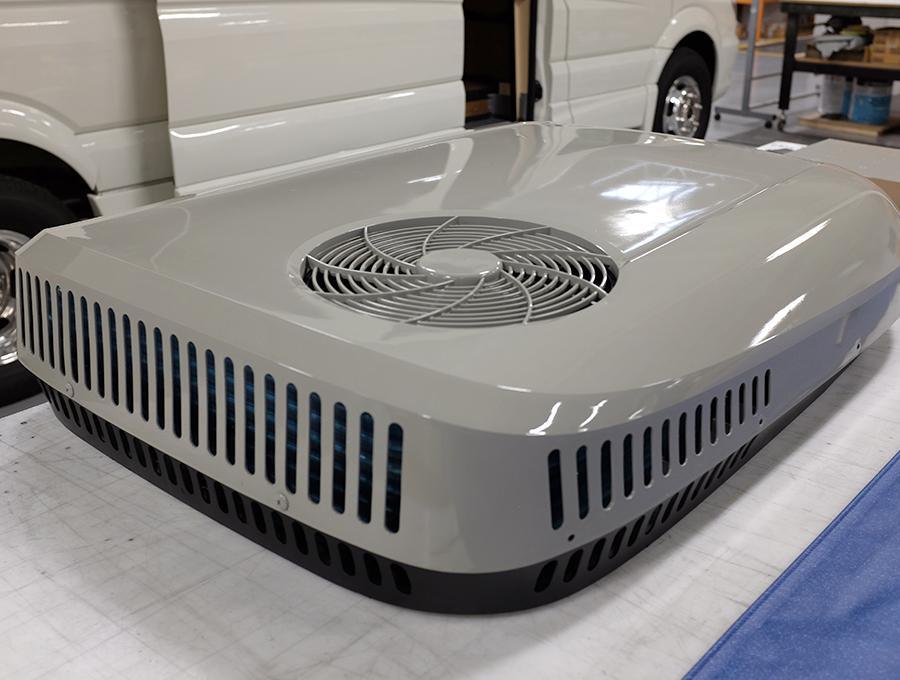
Roof-mounted units sit on the top of the RV. They are common in many RVs. These units can cool large spaces quickly. They usually run on electricity. Most roof-mounted units use a compressor to cool the air.
Portable Units
Portable units are smaller and easy to move. You can place them anywhere inside the RV. They are good for smaller spaces. However, they may not cool as effectively as roof-mounted units. Portable units can also run on electricity. Some models run on batteries too.
How Does an RV Air Conditioning System Work?
Understanding how these systems work is important. RV air conditioners use a refrigerant. This is a special fluid that absorbs heat. Here is a simple breakdown of how it works:
- The unit pulls warm air from inside the RV.
- The air passes over coils filled with refrigerant.
- The refrigerant absorbs the heat from the air.
- The cooled air is then pushed back into the RV.
This process continues until the desired temperature is reached. It is a simple cycle, but it works well.
In practice, the refrigerant undergoes phase changes from liquid to gas and back, moving heat from the interior to the exterior. Modern RV units typically use R-410A or R-32 refrigerants, which have lower global warming potential than older R-22. A common mistake is assuming the refrigerant gets “used up”—it circulates in a sealed loop, so low levels usually indicate a leak that must be repaired before recharging.
Refrigerant Types and Environmental Impact
Most RV air conditioners manufactured after 2010 use R-410A, a hydrofluorocarbon (HFC) blend that does not deplete the ozone layer. Newer models are transitioning to R-32, which has roughly one-third the global warming potential of R-410A. When servicing, always verify the refrigerant type on the unit’s data plate; mixing refrigerants can damage the compressor and void warranties. For disposal, follow EPA Section 608 guidelines to recover refrigerant properly (EPA refrigerant management).
Choosing the Right RV Air Conditioning System
Choosing the right air conditioning system is essential. Here are some factors to consider:
- Size of Your RV
- Climate Conditions
- Power Source
- Budget
Size Of Your Rv
The size of your RV matters. Larger RVs need more cooling power. Check the BTU rating of the unit. BTU stands for British Thermal Unit. Higher BTU means more cooling. For smaller RVs, a unit with lower BTUs is enough.
Climate Conditions
Consider the weather where you travel. If it’s hot and humid, you need a strong unit. Cooler climates may need less power. Think about where you go most often.
Power Source
Most RV air conditioners use electricity. Make sure you have enough power. Some units can run on batteries. Check your RV’s power system before buying.
Budget
Air conditioners come in various prices. Set a budget before shopping. Consider long-term costs too, like maintenance.
Energy efficiency ratings such as EER (Energy Efficiency Ratio) and SEER (Seasonal Energy Efficiency Ratio) help compare operating costs. Higher EER/SEER units cost more upfront but save on generator fuel and shore-power bills over time. The U.S. Department of Energy recommends a minimum EER of 11.0 for RV applications. Pairing a high-EER unit with optimal thermostat settings can reduce runtime by 15‑20%.
Energy Efficiency Ratings: EER and SEER Explained
| Rating | What It Measures | Typical RV Range | Why It Matters |
|---|---|---|---|
| EER | Cooling output (BTU/h) ÷ power input (watts) at 95°F outdoor / 80°F indoor | 9 – 12+ | Directly affects generator load and battery drain |
| SEER | Seasonal average efficiency across a range of temperatures | 10 – 14+ | Better indicator of real-world performance in varying climates |
Units with variable-speed compressors and soft-start kits further improve efficiency by reducing startup surge current.
Maintaining Your RV Air Conditioning System
Regular maintenance helps your air conditioner work well. Here are some tips for keeping it in good shape:
- Clean or Replace Air Filters
- Inspect Coils and Fins
- Check the Drainage System
- Schedule Professional Maintenance
Clean Or Replace Air Filters
Dirty air filters reduce airflow. This makes the unit work harder. Clean or replace filters every month. This will help the system run efficiently.
Inspect Coils And Fins
Coils and fins can gather dirt too. Check them regularly. Clean them gently with a soft brush. This helps improve airflow and cooling.
Check The Drainage System
Your air conditioner needs to drain properly. Check for any clogs in the drainage line. Clear any blockages to prevent water damage.
Schedule Professional Maintenance
Consider having a professional check your system once a year. They can find issues you may not see. Regular maintenance can extend the life of your air conditioning system.
Regular maintenance helps your air conditioner work well. A seasonal checklist — covering filter changes, coil cleaning, condensate line flushing, and electrical connection tightening — prevents most common failures. In dusty environments, inspect filters every two weeks.
Winterizing Your RV Air Conditioner
Before storing your RV for winter, run the AC in fan-only mode for 30 minutes to dry internal components. Cover the roof unit with a breathable UV-resistant cover to prevent debris buildup and UV degradation. Remove and store portable units indoors. Disconnect power and ensure the condensate drain is clear to avoid freeze damage.
 Typical roof-mounted RV air conditioner showing condenser coils and shroud.
 Portable RV air conditioner with flexible exhaust hose for window venting.
Common Problems with RV Air Conditioning Systems
Sometimes, air conditioning systems can have issues. Here are a few common problems:
- Not Cooling Properly
- Strange Noises
- Water Leaks
- Bad Odors
Not Cooling Properly
If your unit is not cooling, check the filters first. Dirty filters can block airflow. If the filters are clean, check the refrigerant levels. Low refrigerant can cause cooling issues.
Low refrigerant can cause cooling issues. If the system still underperforms after filter cleaning, verify condenser airflow isn’t blocked by leaves or awnings.
Strange Noises
Listen for unusual sounds. Rattling or buzzing can indicate a problem. It may be a loose part or a failing motor. If you hear strange noises, have it checked.
Water Leaks
Water leaks can cause serious damage. Check the drainage system for clogs. If you see water pooling, it may be a bigger problem. Contact a professional for help.
Bad Odors
If you smell bad odors, check the filters. They may need cleaning or replacing. Bad smells can also come from mold or mildew. Make sure to keep the unit dry and clean.
When to Call a Professional
Persistent issues like repeated refrigerant loss, compressor short-cycling, or electrical faults (tripped breakers, burnt capacitors) require a certified RV technician. DIY refrigerant handling violates EPA Section 608 and can worsen leaks. A professional can also perform a full system performance test using manifold gauges and temperature split measurements.
Comparison: Roof-Mounted vs Portable RV Air Conditioners
| Feature | Roof-Mounted | Portable |
|---|---|---|
| Cooling Capacity | 13,500–15,000 BTU typical | 8,000–12,000 BTU typical |
| Installation | Permanent, requires roof cutout | Temporary, window vent kit |
| Power Draw | High startup surge (may need soft-start) | Lower surge, easier on generators |
| Space Impact | No interior floor space used | Occupies floor space, needs vent hose |
| Maintenance Access | Roof access required | Easy interior access |
| Cost Range | $800–$1,800+ | $300–$800 |
Choose roof-mounted for whole-RV cooling in hot climates; portable for supplemental cooling or smaller trailers.
Conclusion
An RV air conditioning system is important for comfort. It keeps the inside cool during hot trips. Understanding how it works helps you make good choices. Choose the right system for your RV and travel needs.
Regular maintenance is key to a long-lasting unit. Check filters and clean coils often. Address any problems quickly to avoid costly repairs. Enjoy your travels with a comfortable and cool RV!
Choose the right system for your RV and travel needs. Schedule a professional tune-up before your next trip to avoid breakdowns.
Frequently Asked Questions
How do I size an RV air conditioner for my trailer?
Calculate roughly 20 BTU per square foot of living space, then add 10% for sunny exposure and 600 BTU per additional occupant. A 25‑ft trailer typically needs 13,500–15,000 BTU.
Can I run my RV AC on a 2000‑watt generator?
Only with a soft-start kit installed. Standard roof units draw 1,800–2,200 watts running and 3,500+ watts starting; a soft-start reduces startup surge by 60–70%.
What’s the difference between EER and SEER for RV units?
EER is a single-point efficiency at 95°F outdoor; SEER averages performance across a season. For RV use, EER better predicts generator load.
How often should I clean the condenser coils?
Inspect and gently brush coils every 3 months during heavy use, or monthly in dusty/pollen-heavy areas. Dirty coils can raise head pressure 20–30%, cutting capacity.
Is it normal for water to drip from the roof unit?
Yes, condensate drainage is normal. Ensure the drain pan and hose are clear; clogs cause interior water damage.
Can I install a roof-mounted unit myself?
Possible but not recommended. Requires roof penetration, sealing, and 120 V wiring. Improper installation voids warranties and risks leaks. Professional installation typically costs $300–$600.