
Discover how to safely and thoroughly clean mold from your LG portable air conditioner with this easy-to-follow guide. You’ll learn the right tools, cleaning solutions, and preventive steps to keep your unit mold-free and running efficiently.
Key Takeaways
- Safety first: Always unplug the unit and wear protective gear like gloves and a mask before cleaning to avoid exposure to mold spores.
- Regular maintenance prevents mold: Clean or replace filters monthly and empty the water tank frequently to reduce moisture buildup.
- Use natural cleaners: A mix of white vinegar and water is effective, eco-friendly, and safe for most LG portable AC components.
- Disassemble carefully: Follow your user manual to remove panels, filters, and water trays without damaging internal parts.
- Dry completely before reassembly: Allow all parts to air-dry fully to prevent new mold from forming after cleaning.
- Inspect for hidden mold: Check evaporator coils and drainage channels, as mold can grow in hard-to-see areas.
- Prevent future growth: Use a dehumidifier in humid rooms and run the unit on fan mode occasionally to dry internal components.
How to Clean Mold from LG Portable Air Conditioner
If you’ve noticed a musty smell, black spots, or reduced cooling performance from your LG portable air conditioner, mold might be the culprit. Mold thrives in dark, damp environments—exactly the kind of conditions that can develop inside your AC unit if it’s not properly maintained. The good news? Cleaning mold from your LG portable air conditioner is completely doable with the right approach.
In this comprehensive guide, you’ll learn exactly how to clean mold from your LG portable air conditioner safely and effectively. We’ll walk you through every step—from preparation and disassembly to deep cleaning and reassembly—so you can restore your unit to peak performance. You’ll also discover practical tips to prevent mold from returning, ensuring your air stays fresh and your appliance lasts longer.
Whether you’re dealing with a small patch of mold or a more stubborn infestation, this guide has you covered. Let’s get started!
Why Mold Grows in Portable Air Conditioners
Before diving into the cleaning process, it’s helpful to understand why mold develops in the first place. Portable air conditioners, including LG models, pull warm air from the room, cool it using refrigerant, and release cold air back into the space. During this process, moisture is extracted from the air and collected in a water tank or drained out through a hose.
This constant cycle of condensation creates a moist environment—perfect for mold and mildew to grow, especially in areas like the water tank, air filter, evaporator coils, and drainage system. If the unit isn’t emptied regularly or if the filter isn’t cleaned, moisture builds up, and mold spores (which are always present in the air) begin to multiply.
Other factors that contribute to mold growth include:
- High humidity levels in your home
- Infrequent use of the unit
- Leaving the water tank full for extended periods
- Operating the AC in a poorly ventilated room
- Not cleaning the filter for several months
Mold not only affects the efficiency of your air conditioner but can also impact your health. Breathing in mold spores may trigger allergies, asthma, or respiratory issues, especially in sensitive individuals. That’s why it’s essential to address mold as soon as you notice it.
Tools and Supplies You’ll Need
Before you begin cleaning, gather all the necessary tools and supplies. Having everything ready will make the process smoother and more efficient.
Here’s what you’ll need:
- White vinegar (or a commercial mold cleaner approved for AC units)
- Warm water
- Soft-bristled brush or toothbrush
- Microfiber cloths or soft sponges
- Spray bottle
- Rubber gloves
- Safety goggles
- N95 mask or respirator
- Screwdriver (if needed for disassembly)
- Bucket or container
- Old towel or drop cloth
- Optional: Baking soda (for extra scrubbing power)
- Optional: Isopropyl alcohol (for disinfecting hard surfaces)
Always choose cleaning products that are safe for plastic and metal components. Avoid harsh chemicals like bleach unless absolutely necessary, as they can damage internal parts and leave strong fumes.
Safety Precautions Before Cleaning
Cleaning mold isn’t just about scrubbing—it’s also about protecting yourself. Mold releases spores into the air when disturbed, which can be harmful if inhaled or if they come into contact with your skin or eyes.
Follow these safety steps before you begin:
- Unplug the unit: Always disconnect your LG portable air conditioner from the power source before cleaning. This prevents accidental startup and reduces the risk of electric shock.
- Wear protective gear: Put on rubber gloves, safety goggles, and an N95 mask. This protects you from mold exposure and cleaning chemicals.
- Work in a well-ventilated area: Open windows or work near a fan to help disperse airborne spores and fumes.
- Cover nearby surfaces: Place an old towel or drop cloth on the floor to catch drips and debris.
- Keep children and pets away: Ensure they’re not in the room while you’re cleaning to avoid accidental exposure.
Taking these precautions may seem like overkill, but they’re essential for your health and safety—especially if you’re dealing with a significant mold problem.
Step-by-Step Guide to Cleaning Mold from Your LG Portable Air Conditioner
Now that you’re prepared, let’s walk through the cleaning process step by step. This method works for most LG portable air conditioner models, but always refer to your user manual for model-specific instructions.
Step 1: Turn Off and Unplug the Unit
Before touching anything, make sure your LG portable air conditioner is completely powered off and unplugged from the wall outlet. This is a critical safety step that should never be skipped.
If your unit has a remote control, remove the batteries to prevent accidental activation. Also, check that the water tank is empty. If it’s full, drain it completely before proceeding.
Step 2: Remove the Air Filter
The air filter is one of the most common places for mold to grow. It traps dust, pollen, and moisture—creating an ideal breeding ground for mold.
To remove the filter:
- Locate the filter panel on the back or side of the unit (this varies by model).
- Gently pull the panel open or unscrew it if necessary.
- Carefully slide out the filter. Most LG portable ACs use a washable mesh or foam filter.
Inspect the filter for visible mold, dirt, or discoloration. If it’s heavily soiled or damaged, consider replacing it with a new one. LG recommends replacing filters every 3–6 months, depending on usage.
Step 3: Clean the Air Filter
Once the filter is removed, it’s time to clean it thoroughly.
Here’s how:
- Rinse the filter under lukewarm water to remove loose dust and debris.
- Fill a bucket with a solution of 1 part white vinegar to 3 parts warm water.
- Submerge the filter and let it soak for 15–20 minutes. Vinegar is a natural mold killer and deodorizer.
- Use a soft brush to gently scrub away any remaining mold or grime.
- Rinse the filter again with clean water.
- Shake off excess water and let the filter air-dry completely on a clean towel. Do not reinstall a wet filter—this can promote mold growth.
If you prefer, you can use a mild dish soap instead of vinegar, but vinegar is more effective at killing mold and eliminating odors.
Step 4: Empty and Clean the Water Tank
The water tank collects condensation and is a prime spot for mold. Even if you empty it regularly, residue can build up over time.
To clean the tank:
- Remove the water tank from the unit. Most LG models have a front or side access panel that slides out easily.
- Pour out any remaining water.
- Rinse the tank with warm water to remove loose debris.
- Fill the tank halfway with the vinegar-water solution (1:3 ratio).
- Let it soak for 20–30 minutes. For stubborn mold, add a tablespoon of baking soda to boost cleaning power.
- Use a soft brush to scrub the inside walls, corners, and spout where mold often hides.
- Rinse thoroughly with clean water.
- Wipe the outside of the tank with a damp cloth and let it air-dry completely.
Never use bleach unless absolutely necessary, as it can leave toxic residues and damage plastic components.
Step 5: Clean the Interior and Evaporator Coils
This is where many people skip—but it’s one of the most important steps. Mold can grow on the evaporator coils and inside the unit’s ductwork, even if you can’t see it.
To access these areas:
- Consult your user manual to determine how to remove the front or side panel. Some models require a screwdriver; others have snap-on panels.
- Carefully remove the panel to expose the internal components.
- Use a flashlight to inspect the evaporator coils, fan blades, and drainage tray for mold, dust, or slime.
To clean:
- Spray the vinegar solution onto a microfiber cloth (not directly onto the coils, to avoid damaging sensitive parts).
- Gently wipe down the coils, fan, and surrounding areas. Pay special attention to crevices and corners.
- For hard-to-reach spots, use a soft-bristled toothbrush dipped in the cleaning solution.
- If you see thick mold or slime, apply the solution directly and let it sit for 10 minutes before wiping.
- Use a dry cloth to remove excess moisture.
Never use high-pressure water or abrasive tools inside the unit, as this can damage delicate components.
Step 6: Clean the Drainage System
Clogged or dirty drainage hoses and ports can trap moisture and lead to mold growth. It’s important to clean these parts to ensure proper water flow.
To clean the drainage system:
- Locate the drainage port or hose (usually at the back or bottom of the unit).
- Remove the hose if detachable and rinse it with warm water.
- Use a pipe cleaner or soft brush to remove any buildup inside the hose.
- Flush the hose with the vinegar solution to kill mold and bacteria.
- Reattach the hose securely.
If your model has a built-in drainage port, use a cotton swab dipped in vinegar to clean around the opening.
Step 7: Wipe Down the Exterior
Don’t forget the outside of your LG portable air conditioner. Dust and mold spores can accumulate on the casing, affecting air quality and appearance.
To clean the exterior:
- Wipe the front, sides, and top with a damp microfiber cloth.
- For stubborn stains, use a mild soap solution or the vinegar-water mix.
- Avoid spraying liquids directly onto the unit. Instead, apply cleaner to the cloth first.
- Dry with a clean, dry cloth to prevent water spots.
This step not only improves appearance but also helps prevent mold from spreading to other surfaces.
Step 8: Reassemble the Unit
Once all parts are clean and completely dry, it’s time to put your LG portable air conditioner back together.
Follow these steps:
- Reinstall the water tank, making sure it’s seated properly and locked in place.
- Replace the air filter, ensuring it’s dry and fits snugly.
- Reattach any panels or covers you removed, securing screws if needed.
- Double-check that all connections are tight and nothing is loose.
Take your time during reassembly to avoid damaging components or leaving parts out.
Step 9: Run a Test Cycle
Before using your AC regularly, run a test cycle to ensure everything is working properly.
Here’s how:
- Plug the unit back in and turn it on.
- Set it to fan mode (not cooling) and let it run for 10–15 minutes.
- Listen for unusual noises or vibrations.
- Check for leaks or unusual odors.
- If everything looks and sounds good, switch to cooling mode and monitor performance.
If you notice a musty smell or reduced airflow, there may still be mold inside. Repeat the cleaning process or consider professional servicing.
How to Prevent Mold from Returning
Cleaning mold is only half the battle. To keep your LG portable air conditioner mold-free, you need a solid prevention plan.
Follow these tips:
- Clean the filter monthly: Even if you don’t see mold, regular cleaning prevents buildup.
- Empty the water tank after each use: Don’t let water sit for more than a day.
- Use the unit regularly: Running the AC helps circulate air and dry internal components.
- Run on fan mode occasionally: This dries out the coils and reduces moisture.
- Keep the room dry: Use a dehumidifier in humid climates or during rainy seasons.
- Store properly in off-seasons: Clean the unit thoroughly before storing, and keep it in a dry, covered area.
- Inspect regularly: Check for mold, leaks, or odors every few weeks.
Prevention is always easier—and cheaper—than dealing with a full-blown mold problem.
Troubleshooting Common Issues
Even with proper cleaning, you might run into some issues. Here are a few common problems and how to fix them:
Problem: Musty Smell Returns After Cleaning
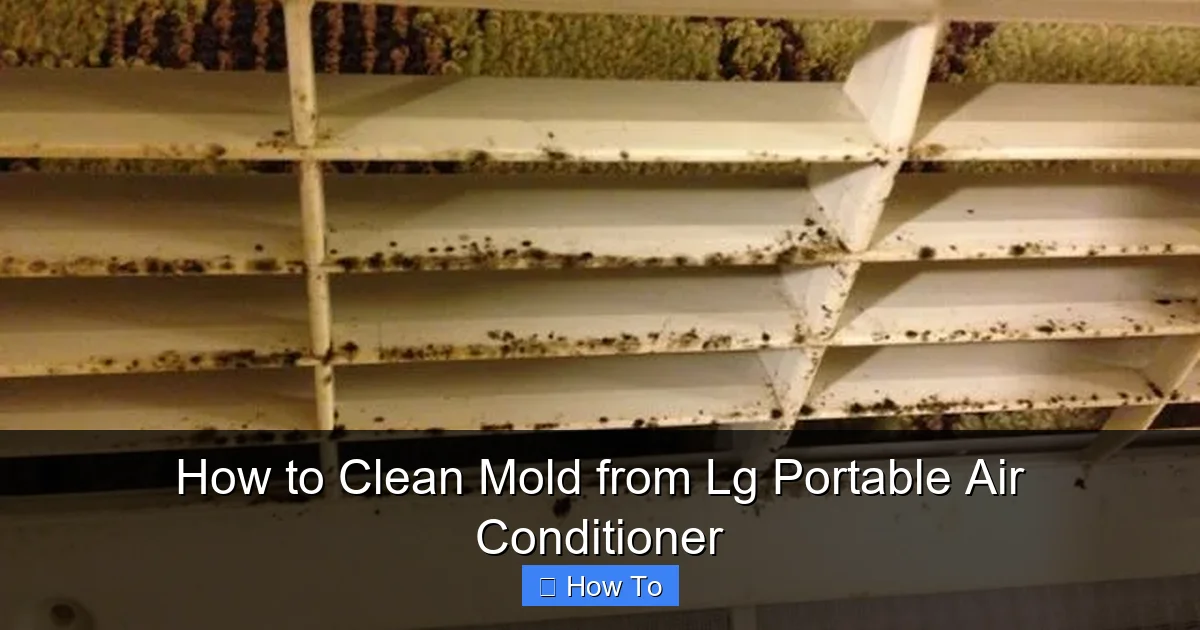
This usually means mold is still present in hidden areas like the evaporator coils or ductwork. Repeat the deep cleaning process, paying extra attention to internal components. Consider using a commercial HVAC-safe mold treatment spray for hard-to-reach areas.
Visual guide about How to Clean Mold from Lg Portable Air Conditioner
Image source: hvac.com
Problem: Water Leaking from the Unit
Check that the water tank is properly seated and not cracked. Also, ensure the drainage hose isn’t clogged or kinked. If the unit is level, water should drain correctly.
Problem: Reduced Cooling Performance
A dirty filter or clogged coils can restrict airflow. Clean or replace the filter and inspect the coils. If the problem persists, the refrigerant level may be low—contact LG support or a certified technician.
Problem: Mold Keeps Coming Back
This often indicates high indoor humidity or infrequent maintenance. Use a hygrometer to monitor humidity levels (aim for 30–50%). Run a dehumidifier and clean the unit more frequently.
When to Call a Professional
While most mold issues can be handled at home, there are times when professional help is needed.
Consider calling a technician if:
- Mold covers a large area inside the unit
- You suspect mold in sealed components (like the compressor)
- The unit still smells musty after thorough cleaning
- You’re uncomfortable disassembling the AC
- The warranty is still active (DIY cleaning may void it)
LG offers customer support and authorized service centers that can safely clean and repair your unit.
Conclusion
Cleaning mold from your LG portable air conditioner might seem daunting, but with the right tools and steps, it’s a manageable task. By following this guide, you’ve learned how to safely remove mold, clean every component, and prevent future growth.
Remember: regular maintenance is the key to a healthy, efficient air conditioner. A little effort now can save you from costly repairs, health issues, and poor air quality down the line.
Keep your filters clean, your water tank empty, and your unit dry. Your LG portable air conditioner will thank you—and so will your lungs.

