
Cleaning your LG portable air conditioner is essential for optimal performance, energy efficiency, and indoor air quality. This guide walks you through a complete cleaning process—from unplugging the unit to reassembling it—ensuring your AC stays fresh, quiet, and effective all season long.
Key Takeaways
- Regular cleaning prevents mold and bacteria buildup: Dust, moisture, and stagnant water in the unit can lead to unpleasant odors and health risks if not cleaned regularly.
- Clean filters improve airflow and efficiency: Clogged filters force the AC to work harder, increasing energy bills and reducing cooling power.
- Always unplug the unit before cleaning: Safety first—never clean or handle internal components while the AC is plugged in.
- Use mild cleaners and soft cloths: Harsh chemicals or abrasive tools can damage sensitive parts like coils and vents.
- Drain the water tank completely: Standing water breeds bacteria and can cause leaks or malfunctions.
- Clean the exterior and vents monthly: Wipe down the outer shell and air vents to prevent dust from entering the system.
- Schedule deep cleaning every 3–6 months: A thorough cleaning ensures long-term performance and extends the life of your LG portable AC.
How to Clean LG Air Conditioner Portable: A Complete Step-by-Step Guide
Keeping your LG portable air conditioner clean isn’t just about aesthetics—it’s about performance, efficiency, and your health. Over time, dust, dirt, and moisture accumulate inside and around your unit, leading to reduced cooling power, strange odors, and even mold growth. Fortunately, cleaning your LG portable AC is simpler than you might think. With the right tools and a little time, you can keep your unit running like new.
In this guide, we’ll walk you through a complete cleaning process, from basic maintenance to deep cleaning. Whether you’re a first-time user or a seasoned pro, these steps will help you maintain your LG portable air conditioner safely and effectively. We’ll cover everything from unplugging the unit to reassembling it, plus tips for troubleshooting common issues. By the end, you’ll know exactly how to clean your LG air conditioner portable and keep it in top shape all year round.
Why Cleaning Your LG Portable Air Conditioner Matters
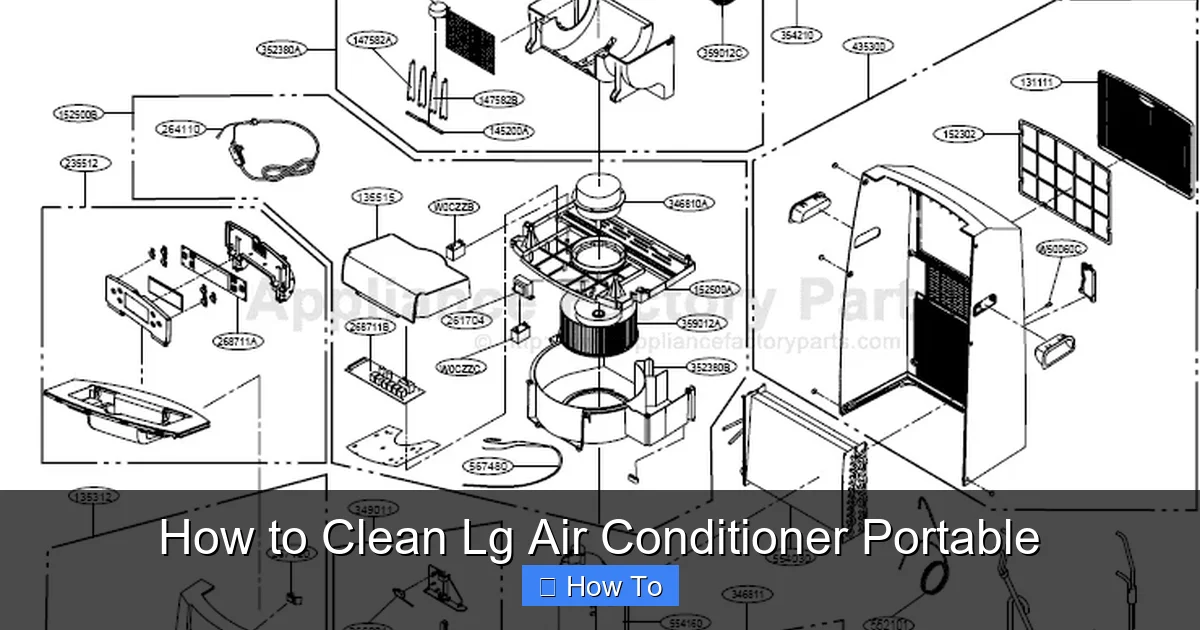
Visual guide about How to Clean Lg Air Conditioner Portable
Image source: cdn.appliancefactoryparts.com
Before diving into the cleaning steps, it’s important to understand why regular maintenance is so crucial. Portable air conditioners, especially LG models, are designed for convenience and efficiency. However, they pull in air from your room, cool it, and expel heat outside—meaning they’re constantly exposed to dust, pet dander, and humidity.
Over time, this buildup can:
– Reduce airflow and cooling efficiency
– Increase energy consumption
– Cause unpleasant odors
– Promote mold and bacteria growth
– Lead to mechanical failures
By cleaning your LG portable AC regularly, you not only improve its performance but also extend its lifespan. A clean unit uses less energy, cools faster, and delivers fresher, healthier air. Think of it like changing the oil in your car—it’s a small task that makes a big difference.
What You’ll Need to Clean Your LG Portable Air Conditioner
Before you begin, gather the following supplies:
– Soft microfiber cloths
– Mild dish soap or all-purpose cleaner
– White vinegar (for disinfecting and deodorizing)
– A small brush (like an old toothbrush)
– A vacuum cleaner with a brush attachment
– A bucket of warm water
– A dry towel
– Gloves (optional, for hygiene)
– A screwdriver (if your model requires panel removal)
Avoid using harsh chemicals like bleach, ammonia, or abrasive scrubbers. These can damage plastic parts, coils, or electrical components. Stick to gentle, non-toxic cleaners for the best results.
Step 1: Turn Off and Unplug the Unit
Safety is the most important part of cleaning your LG portable air conditioner. Always start by turning off the unit using the remote or control panel. Then, unplug it from the wall outlet. This prevents electrical shock and ensures no accidental startup while you’re working.
Wait at least 10–15 minutes after unplugging to let any internal components cool down, especially if the AC has been running recently. This is especially important for the compressor and coils, which can retain heat.
Step 2: Remove and Clean the Air Filter
The air filter is one of the most critical parts to clean. It traps dust, pollen, and other airborne particles, preventing them from entering the unit. When it’s clogged, your AC has to work harder to pull in air, reducing efficiency and potentially causing overheating.
Locate the Filter
Most LG portable air conditioners have a front or side panel that houses the air filter. Look for a removable grille or cover—often labeled “Filter” or marked with an arrow. Some models require you to gently pull the panel outward, while others may have a latch or screws.
Remove the Filter
Carefully slide or lift the filter out of its slot. Be gentle—some filters are made of delicate mesh or foam. If it’s stuck, wiggle it slightly rather than forcing it.
Rinse the Filter
Hold the filter under lukewarm running water. Use your hands to gently rub away dust and debris. For stubborn grime, mix a few drops of mild dish soap with water and use a soft brush to scrub lightly.
Disinfect (Optional)
To kill bacteria and eliminate odors, soak the filter in a solution of 1 part white vinegar to 3 parts water for 10–15 minutes. This is especially helpful if you’ve noticed a musty smell.
Let It Dry Completely
Place the filter on a clean towel and let it air dry for at least 2–3 hours. Never reinstall a wet filter—moisture can lead to mold growth inside the unit.
Reinstall the Filter
Once dry, slide the filter back into its slot. Make sure it’s seated properly and the panel is securely closed.
Step 3: Clean the Exterior and Control Panel
The outside of your LG portable AC collects dust, fingerprints, and smudges. Regular cleaning keeps it looking good and prevents dirt from being pulled into the unit.
Wipe Down the Shell
Use a microfiber cloth dampened with warm, soapy water to wipe the entire exterior. Focus on high-touch areas like the handle, control panel, and vents. Avoid spraying water directly onto the unit—dampen the cloth instead.
Clean the Control Panel
Use a slightly damp cloth to gently wipe the buttons and display. Never use abrasive cleaners or excessive moisture, as this can damage the electronics. For sticky residue, a cotton swab dipped in rubbing alcohol works well—just make sure it’s not dripping.
Vacuum the Air Vents
Use the brush attachment on your vacuum to remove dust from the intake and exhaust vents. This helps maintain proper airflow and prevents debris from entering the internal components.
Step 4: Empty and Clean the Water Tank
Portable air conditioners produce condensation as they cool the air. This moisture collects in a built-in water tank or drip pan. If not emptied regularly, it can overflow, cause leaks, or become a breeding ground for mold and bacteria.
Locate the Water Tank
On most LG portable ACs, the water tank is located at the bottom rear of the unit. Look for a removable tray or a drainage plug. Some models have an automatic shut-off when the tank is full, while others require manual monitoring.
Remove the Tank
Carefully slide out the water tank. Be prepared—it may be heavy if full. Place it in a sink or over a towel to avoid spills.
Empty the Water
Pour out any standing water. If there’s slime or residue, rinse the tank thoroughly with warm water.
Clean the Tank
Use a mixture of warm water and white vinegar (1:1 ratio) to scrub the inside of the tank. A small brush or sponge works well for reaching corners. Rinse thoroughly to remove all vinegar smell.
Let It Dry
Allow the tank to air dry completely before reinserting it. This prevents moisture from lingering inside the unit.
Check the Drain Hose (If Applicable)
Some LG models have a continuous drainage option using a hose. If yours does, inspect the hose for clogs or kinks. Flush it with water to ensure it’s clear.
Step 5: Clean the Evaporator and Condenser Coils
The evaporator and condenser coils are essential for heat exchange. When they’re dirty, your AC can’t cool efficiently. Cleaning them requires a bit more effort but is worth it for performance.
Access the Coils
Depending on your model, you may need to remove a side or rear panel. Check your user manual for specific instructions. Use a screwdriver if necessary, but be gentle—plastic clips can break easily.
Vacuum Loose Debris
Use the brush attachment on your vacuum to remove dust and dirt from the coils. Work in the direction of the fins to avoid bending them.
Apply Coil Cleaner (Optional)
For heavy buildup, use a commercial coil cleaner spray. Spray it evenly over the coils and let it sit for 5–10 minutes. The cleaner will foam and lift dirt. Wipe away residue with a damp cloth.
Rinse (If Recommended)
Some coil cleaners require rinsing. If so, use a gentle stream of water—never a pressure washer. Let the coils dry completely before reassembling.
Step 6: Clean the Exhaust Hose and Vent
The exhaust hose vents hot air outside. Over time, it can collect dust, lint, and even pests. A clean hose ensures proper airflow and prevents overheating.
Disconnect the Hose
Carefully detach the exhaust hose from the back of the unit and the window kit. Most hoses twist or snap off easily.
Vacuum the Interior
Use the vacuum’s brush attachment to clean the inside of the hose. If it’s very dirty, you can use a long-handled brush or a flexible cleaning rod.
Wipe the Exterior
Use a damp cloth to wipe down the outside of the hose. Let it dry completely before reattaching.
Reconnect Securely
Make sure the hose is tightly connected to both the unit and the window bracket. Loose connections can cause hot air to leak back into the room, reducing efficiency.
Step 7: Reassemble and Test the Unit
Once all parts are clean and dry, it’s time to put everything back together.
Reinstall the Filter and Panels
Slide the air filter back into place and secure any removed panels. Double-check that all screws or clips are fastened.
Reinsert the Water Tank
Place the clean, dry water tank back into its slot. Ensure it’s seated properly to avoid leaks.
Plug In and Test
Plug the unit back in and turn it on. Set it to a low cooling mode and listen for unusual noises. Check that air is flowing smoothly and the unit is cooling effectively.
Troubleshooting Common Issues After Cleaning
Even after a thorough cleaning, you might encounter a few hiccups. Here’s how to address them:
Unit Won’t Turn On
– Make sure it’s plugged in securely.
– Check if the water tank is full and needs emptying.
– Ensure the filter is properly installed—some models won’t run if the filter is missing.
Weak Airflow
– Recheck the filter—it may still be damp or clogged.
– Inspect the exhaust hose for kinks or blockages.
– Clean the air vents again if necessary.
Strange Odors
– Run the unit with a bowl of baking soda nearby to absorb odors.
– Consider using an air purifier or odor-neutralizing spray.
– If the smell persists, there may be mold inside—consult a professional.
Water Leaking
– Ensure the water tank is fully seated and not cracked.
– Check the drain hose for clogs or improper installation.
– Make sure the unit is level—tilting can cause leaks.
How Often Should You Clean Your LG Portable Air Conditioner?
Cleaning frequency depends on usage and environment:
– **Air filter:** Clean every 2–4 weeks during heavy use.
– **Exterior and vents:** Wipe down monthly.
– **Water tank:** Empty and clean weekly, or whenever full.
– **Coils and internal parts:** Deep clean every 3–6 months.
If you have pets, allergies, or live in a dusty area, clean more often. Regular maintenance prevents problems before they start.
Tips for Maintaining Your LG Portable AC Year-Round
– **Use a cover when not in use:** Protects from dust and moisture.
– **Keep the area around the unit clear:** At least 20 inches of space for proper airflow.
– **Monitor humidity levels:** High humidity increases condensation and mold risk.
– **Schedule professional servicing:** Once a year, have a technician check refrigerant levels and electrical components.
Conclusion
Cleaning your LG portable air conditioner doesn’t have to be a chore. With this step-by-step guide, you can keep your unit running efficiently, quietly, and odor-free. Regular maintenance not only improves performance but also saves money on energy bills and extends the life of your AC.
Remember: always unplug the unit, clean the filter and water tank regularly, and tackle deep cleaning every few months. A little effort goes a long way in ensuring your LG portable AC keeps you cool and comfortable for years to come.
By following these simple steps, you’ll enjoy fresher air, better cooling, and peace of mind—knowing your air conditioner is in top condition. So grab your cleaning supplies and give your LG portable AC the care it deserves!

