
Keeping your LG air conditioner condenser coils clean is essential for optimal performance and energy efficiency. This guide walks you through the entire process—from preparation to reassembly—so you can maintain your unit like a pro.
Key Takeaways
- Safety first: Always turn off power at the breaker before cleaning to prevent electrical shock or damage.
- Regular maintenance matters: Clean condenser coils at least once a year, or more often if you live in a dusty area.
- Use the right tools: A soft brush, coil cleaner, garden hose, and fin comb help get the job done without damaging delicate parts.
- Don’t skip the fins: Bent or clogged aluminum fins reduce airflow—straighten and clean them gently.
- Check for debris: Remove leaves, grass, and dirt from around the outdoor unit before starting.
- Know when to call a pro: If coils are severely corroded or refrigerant lines are damaged, consult an HVAC technician.
- Improved efficiency = lower bills: Clean coils help your LG AC run smoother, use less energy, and last longer.
Why Cleaning Your LG Air Conditioner Condenser Coils Is Important
Your LG air conditioner works hard to keep your home cool and comfortable, especially during hot summer months. But did you know that one of the most critical components—yet often overlooked—is the condenser coil? Located in the outdoor unit, these thin, finned coils release heat from inside your home to the outside air. Over time, they collect dirt, dust, leaves, grass clippings, and even pet hair. This buildup acts like a blanket, trapping heat and forcing your AC to work harder.
When condenser coils are dirty, your system becomes less efficient. It uses more electricity, struggles to cool your home, and may even overheat or shut down unexpectedly. In fact, according to the U.S. Department of Energy, dirty coils can reduce your AC’s efficiency by up to 30%. That means higher utility bills and a shorter lifespan for your unit.
Cleaning your LG air conditioner condenser coils isn’t just about maintenance—it’s about protecting your investment. LG designs its air conditioners with precision and energy efficiency in mind, but even the best systems need care. Regular cleaning ensures your unit runs at peak performance, saves energy, and avoids costly repairs down the line.
In this guide, you’ll learn exactly how to clean your LG air conditioner condenser coils safely and effectively. Whether you have a window unit, a mini-split, or a central AC system with an outdoor condenser, the principles are similar. We’ll walk you through every step—from turning off the power to reassembling the unit—with clear instructions and practical tips.
By the end of this guide, you’ll feel confident performing this essential maintenance task yourself. No special skills required—just a few tools, some time, and a little elbow grease. Let’s get started!
Tools and Materials You’ll Need
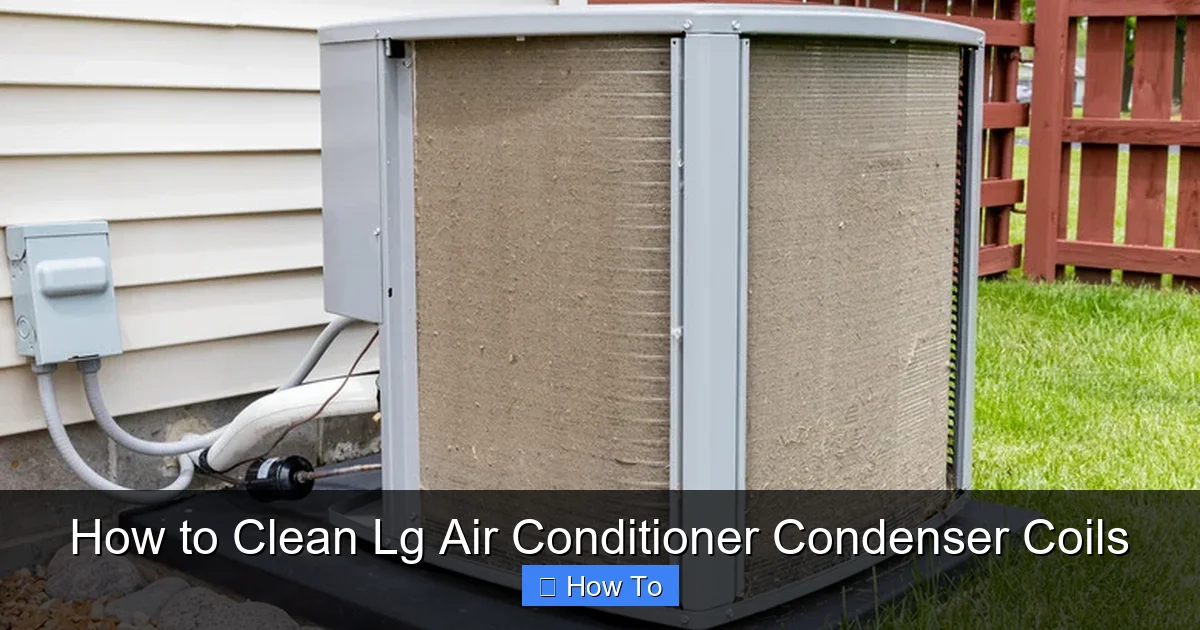
Visual guide about How to Clean Lg Air Conditioner Condenser Coils
Image source: housedigest.com
Before you begin, gather all the necessary tools and supplies. Having everything ready will make the process smoother and safer. Here’s what you’ll need:
- Work gloves: Protect your hands from sharp fins and debris.
- Safety goggles: Prevent dust and cleaning solution from getting into your eyes.
- Soft-bristle brush or coil brush: Ideal for loosening dirt without damaging delicate fins.
- Fin comb: Helps straighten bent aluminum fins for better airflow.
- Garden hose with spray nozzle: Use for rinsing—avoid high-pressure washers.
- Commercial coil cleaner (optional): Choose a non-acidic, biodegradable cleaner designed for AC coils. LG recommends using cleaners approved for aluminum and copper coils.
- Spray bottle: For applying coil cleaner if using a liquid formula.
- Rag or microfiber cloth: For wiping down surfaces and drying.
- Screwdriver or wrench: To remove access panels on the outdoor unit.
- Vacuum with brush attachment (optional): Useful for removing loose debris before washing.
You can find most of these items at your local hardware store or online. If you’re unsure about which coil cleaner to buy, look for brands like Nu-Calgon, Frost King, or LG-approved products. Avoid harsh chemicals like bleach or ammonia—they can corrode the coils and damage the system.
Pro tip: If you have a mini-split system (like LG’s Dual Inverter models), the outdoor unit is smaller and may require extra care. Always check your owner’s manual for model-specific instructions.
Step 1: Turn Off the Power
Safety is the most important part of this process. Before you touch anything, you must disconnect power to the air conditioner. This prevents electrical shock, accidental startup, or damage to the system.
Locate the Electrical Disconnect
Most LG air conditioners have an outdoor condenser unit connected to your home’s electrical system. Near this unit, you’ll find a metal box called the electrical disconnect. It usually has a lever or switch labeled “ON” and “OFF.” This is your first line of defense.
Turn the disconnect switch to the “OFF” position. If you don’t see a disconnect box, go inside and turn off the corresponding circuit breaker in your main electrical panel. Look for the breaker labeled “AC,” “Air Conditioner,” or “Condenser.” Flip it to the “OFF” position.
Double-Check the Power
Even after turning off the disconnect or breaker, it’s smart to double-check. Use a non-contact voltage tester near the wiring to confirm no electricity is flowing. You can also test the indoor unit by trying to turn it on with the remote. If it doesn’t respond, power is off.
Never skip this step. Working on a live electrical system can be extremely dangerous. Even if you’re experienced, a moment of distraction can lead to serious injury.
Wait Before Starting
After turning off the power, wait at least 10–15 minutes before beginning. This allows any residual charge in the capacitors to dissipate. Capacitors store electricity even when the unit is off, and touching them can cause a shock.
Once you’re sure the power is off and the system has cooled down, you’re ready to move on.
Step 2: Clear Debris Around the Unit
Before opening the condenser, take a few minutes to clean the area around it. Over time, leaves, grass, dirt, and other debris can accumulate around the base of the unit. This not only blocks airflow but also gets sucked into the coils during operation.
Remove Large Debris
Start by clearing away any visible debris. Use your hands (with gloves on) or a small rake to remove leaves, twigs, and grass clippings. Pay special attention to the sides and back of the unit, where debris often collects.
If you have pets or live in a windy area, you may find fur, feathers, or even small toys near the unit. Remove everything carefully.
Trim Vegetation
LG recommends keeping at least 2 feet of clearance around the outdoor unit. This ensures proper airflow and makes maintenance easier. Trim back any bushes, vines, or tall grass that are growing too close.
Avoid planting shrubs directly in front of the unit. While landscaping can be attractive, it can also restrict airflow and trap heat.
Check the Base and Drain
Look at the base of the unit. Is it sitting level? Is there standing water or mud? If the unit is on a concrete pad, make sure it’s stable and not cracked. Standing water can attract pests and promote mold growth.
Also, check the condensate drain line (usually a small PVC pipe near the bottom). Make sure it’s not clogged. A clogged drain can cause water to back up and damage the system.
Use a Vacuum (Optional)
If there’s a lot of fine dust or dirt around the fins, use a vacuum with a brush attachment to gently suction it away. This helps prevent debris from falling into the coils when you open the unit.
Taking the time to clean the surrounding area now will make the rest of the job easier and more effective.
Step 3: Remove the Access Panels
Now it’s time to open up the outdoor unit so you can access the condenser coils. Most LG condensers have protective panels that cover the fan, coils, and internal components.
Identify the Panels
Look for screws or bolts holding the top and side panels in place. These are usually Phillips-head or hex screws. Some models have a single top panel, while others have multiple side panels.
Refer to your owner’s manual if you’re unsure. LG often includes diagrams showing how to remove panels for maintenance.
Use the Right Tools
Grab your screwdriver or wrench and carefully remove the screws. Place them in a small container or magnetic tray so you don’t lose them. If screws are rusty or tight, spray a little WD-40 and wait a few minutes before trying again.
Lift Panels Gently
Once the screws are out, lift the panels straight up or slide them out, depending on the design. Be careful—some panels are attached to wiring or the fan shroud. Don’t force anything.
If you’re working on a mini-split system, the panels may be smaller and easier to handle. Still, take your time to avoid bending or breaking plastic parts.
Set Panels Aside Safely
Place the removed panels on a clean, flat surface away from dirt and water. You’ll need to reinstall them later, so keep them organized.
With the panels off, you should now have a clear view of the condenser coils—those thin, layered fins that look like a radiator. This is what we’re here to clean.
Step 4: Inspect the Coils and Fins
Before cleaning, take a close look at the coils and fins. This inspection helps you understand the level of dirt buildup and identify any damage.
Look for Dirt and Grime
Dirty coils will appear gray or brown, with a fuzzy or crusty layer of dust and debris. You might also see mold, pollen, or insect nests. The dirtier the coils, the harder your AC has to work.
Check for Bent Fins
The aluminum fins are very thin and easily bent. Look for areas where fins are crushed, folded, or misaligned. Bent fins block airflow and reduce efficiency.
Use a fin comb (available at hardware stores) to gently straighten them. Insert the comb between the fins and pull it through slowly. Work in one direction to avoid tearing the metal.
Look for Corrosion or Damage
Inspect the coils for signs of rust, pitting, or leaks. If you see greenish residue (common with copper coils), it could indicate corrosion. Small leaks may appear as oily stains or white powder.
If you notice significant damage, it’s best to call an HVAC technician. Cleaning won’t fix structural issues, and attempting repairs yourself could void your warranty.
Check the Fan and Motor
While you’re inspecting, look at the fan blades and motor. Are the blades bent or cracked? Is the motor housing dirty? Clean the fan blades with a damp cloth, but avoid spraying water directly on the motor.
A clean fan helps move air efficiently through the coils, so don’t skip this step.
Step 5: Clean the Condenser Coils
Now for the main event—cleaning the coils. There are two main methods: dry cleaning and wet cleaning. You can use one or both, depending on how dirty the coils are.
Dry Cleaning First
Start with a dry method to remove loose dirt and debris. Use a soft-bristle brush or coil brush to gently scrub the surface of the coils. Work in the direction of the fins to avoid bending them.
If you have a vacuum with a brush attachment, use it to suction up loosened dirt. This is especially helpful for hard-to-reach areas.
Apply Coil Cleaner (Optional)
For heavy buildup, use a commercial coil cleaner. Spray it evenly over the coils, following the manufacturer’s instructions. Most cleaners need to sit for 5–10 minutes to break down grease and grime.
Avoid overspraying—too much cleaner can drip onto the motor or wiring. If using a foam cleaner, make sure it doesn’t clog the fins.
Rinse with a Garden Hose
After the cleaner has worked, rinse the coils with a garden hose. Use a gentle spray setting—never a high-pressure washer. High pressure can bend fins and force water into electrical components.
Rinse from the inside out (from the fan side toward the outside). This pushes dirt away from the unit instead of deeper into the coils.
Let It Dry
After rinsing, let the coils air dry completely. This may take 30 minutes to an hour, depending on the weather. Don’t reassemble the unit while it’s still wet—moisture can cause corrosion or electrical issues.
Step 6: Clean the Fan and Motor Area
While the coils dry, clean the fan and motor housing. Use a damp cloth to wipe down the fan blades, removing dust and grease. Avoid soaking the motor—just a light wipe is enough.
If there’s caked-on dirt, use a mild detergent solution and a soft brush. Rinse carefully and dry with a clean cloth.
Check the fan shroud (the housing around the fan) for debris. Clear out any leaves or dirt that could interfere with airflow.
Step 7: Reassemble the Unit
Once everything is clean and dry, it’s time to put the unit back together.
Replace the Panels
Carefully reinstall the access panels, aligning them with the frame. Secure them with the screws you removed earlier. Don’t overtighten—this can strip the threads or crack the plastic.
Double-Check Connections
Make sure all panels are firmly in place and no wires are pinched or exposed. If you disconnected any wiring (which you shouldn’t have during basic cleaning), double-check that everything is reconnected properly.
Clear the Area Again
Before restoring power, do a final sweep around the unit. Remove any tools, rags, or debris that may have accumulated during cleaning.
Step 8: Restore Power and Test the System
Now that the unit is reassembled, it’s time to turn the power back on.
Turn On the Disconnect or Breaker
Go back to the electrical disconnect or breaker panel and turn the power back on. Wait a few seconds for the system to initialize.
Test the AC
Use the remote or control panel to turn on the air conditioner. Set it to cooling mode and a low temperature. Listen for the fan and compressor to start.
Check that air is blowing from the indoor vents and that the outdoor unit is running smoothly. If you hear unusual noises or the unit doesn’t start, turn it off immediately and check your connections.
Monitor Performance
Over the next few hours, monitor how well your AC cools your home. You should notice improved airflow and faster cooling. Your energy bill may also decrease over time.
Troubleshooting Common Issues
Even with careful cleaning, you might run into problems. Here’s how to handle common issues:
Unit Won’t Turn On
If the AC doesn’t start after cleaning, double-check the power. Make sure the disconnect and breaker are on. Also, check the thermostat settings and remote batteries.
Weak Airflow
If airflow is still weak, the air filter may be dirty. Replace or clean the indoor filter every 1–3 months. Also, check for blocked vents or ductwork issues.
Water Leaking
If you notice water pooling around the indoor unit, the drain line may be clogged. Use a wet/dry vacuum to clear it, or call a technician.
Unusual Noises
Rattling, buzzing, or grinding sounds could indicate loose parts or motor issues. Turn off the unit and inspect the fan and mounting brackets.
Coils Still Dirty
If coils remain dirty after cleaning, you may need a stronger cleaner or professional service. Some buildup requires specialized tools or foaming agents.
How Often Should You Clean LG Condenser Coils?
For most homes, cleaning the condenser coils once a year is sufficient. However, if you live in a dusty area, have pets, or use your AC heavily, consider cleaning every 6 months.
Signs it’s time to clean include:
- Reduced cooling performance
- Higher energy bills
- Unusual noises from the outdoor unit
- Visible dirt or mold on the coils
Set a reminder on your calendar or phone to check the coils each spring before the cooling season begins.
Conclusion
Cleaning your LG air conditioner condenser coils is a simple but powerful way to keep your system running efficiently. By following this step-by-step guide, you’ve learned how to safely remove debris, clean the coils, and restore your unit to peak performance.
Regular maintenance not only improves cooling but also extends the life of your AC and reduces energy costs. With the right tools and a little time, you can do this task yourself—no need to call a technician for basic cleaning.
Remember: safety first, clean regularly, and know when to seek professional help. Your LG air conditioner will thank you with reliable, energy-efficient cooling for years to come.

