
Keeping your LG air conditioner coils clean is essential for optimal performance and energy efficiency. This guide walks you through the entire process—from safety prep to final reassembly—so you can maintain your unit like a pro and avoid costly repairs.
Key Takeaways
- Safety first: Always turn off power at the breaker before cleaning to prevent electrical shock or damage.
- Regular cleaning improves efficiency: Dirty coils reduce cooling power and increase energy bills—clean them every 3–6 months.
- Use the right tools: A soft brush, coil cleaner spray, garden hose (low pressure), and fin comb make the job easier and safer.
- Handle fins gently: Aluminum fins bend easily; use a fin comb to straighten them and avoid blocking airflow.
- Check both indoor and outdoor units: Evaporator coils (inside) and condenser coils (outside) both need attention.
- Know when to call a pro: If coils are heavily corroded, refrigerant lines are damaged, or you’re unsure, hire an HVAC technician.
- Maintain after cleaning: Replace air filters monthly and keep the area around your outdoor unit clear of debris.
Why Cleaning Your LG Air Conditioner Coils Matters
Your LG air conditioner works hard to keep your home cool and comfortable, especially during hot summer months. But behind the scenes, two critical components—the evaporator coils (inside your home) and the condenser coils (in the outdoor unit)—are constantly transferring heat. Over time, dust, dirt, pet hair, pollen, and even mold can build up on these coils, forming a thick layer that acts like insulation. This prevents efficient heat exchange, forcing your AC to work harder, consume more energy, and potentially overheat.
Dirty coils are one of the top reasons for poor cooling performance and high electricity bills. According to the U.S. Department of Energy, a clogged condenser coil can reduce system efficiency by up to 30%. For LG units—known for their advanced inverter technology and energy-saving features—keeping coils clean ensures you’re getting the full benefit of their design.
In this guide, you’ll learn exactly how to clean LG air conditioner coils safely and effectively. Whether you have a window unit, split system, or central air conditioner, the principles are similar. We’ll cover everything from gathering supplies to reassembling your unit, plus tips to keep it running smoothly year-round.
When Should You Clean Your LG AC Coils?
You don’t need to wait for your AC to break down to clean the coils. Regular maintenance is key. Here’s when to schedule a cleaning:
- Every 3–6 months: For most homes, especially in dusty areas or homes with pets.
- Before peak summer season: Get your unit ready for high-demand months.
- After storms or heavy pollen seasons: Debris can accumulate quickly.
- If you notice reduced cooling: Weak airflow or warm air from vents may signal dirty coils.
- Annual professional maintenance: Even if you clean coils yourself, have a technician inspect the system yearly.
Pro Tip: If your LG unit has a “Clean Filter” or “Maintenance” alert on the remote or display, it’s a good reminder to check the coils too—especially if the filter was recently changed but performance hasn’t improved.
Tools and Supplies You’ll Need
Before you start, gather these items to make the process smooth and safe:
- Work gloves: Protect your hands from sharp edges and cleaning chemicals.
- Safety goggles: Prevent debris or cleaner spray from getting in your eyes.
- Soft-bristle brush or coil brush: For loosening dirt without damaging fins.
- Coil cleaner spray: Use a no-rinse, biodegradable cleaner designed for AC coils (e.g., Nu-Calgon, Frost King).
- Garden hose with spray nozzle: For rinsing the outdoor unit (use low pressure).
- Fin comb: To straighten bent aluminum fins and improve airflow.
- Screwdriver or drill: To remove access panels (check your model’s manual).
- Vacuum with brush attachment: For cleaning indoor evaporator coils.
- Microfiber cloth: For wiping down surfaces.
- Bucket and mild detergent: Optional, for cleaning the drain pan.
Note: Avoid using high-pressure washers or harsh chemicals like bleach—they can damage coils and void your warranty.
Step 1: Turn Off the Power
Safety is non-negotiable when working with electrical appliances. Before touching any part of your LG air conditioner, you must disconnect the power.
For Central or Split Systems:
- Go to your home’s main electrical panel (breaker box).
- Locate the breaker labeled “AC,” “Air Conditioner,” or similar.
- Switch it to the “Off” position.
- For extra safety, turn off the disconnect switch near the outdoor unit (usually a gray box on the wall).
For Window or Portable Units:
- Unplug the unit from the wall outlet.
- If hardwired, turn off the corresponding breaker.
Pro Tip: Use a voltage tester to confirm power is off before proceeding. Never assume—double-check!
Step 2: Access the Outdoor Condenser Unit
The condenser coils are located in the outdoor unit—the large box usually sitting beside or behind your house. This is where heat is released from your home.
Remove the Outer Panels:
- Locate the screws or latches holding the top grille or side panels in place.
- Use a screwdriver or drill to carefully remove them.
- Lift off the top grille or fan shroud (some models have a fan mounted underneath).
- Set screws and parts aside in a small container so you don’t lose them.
Caution: Be gentle—LG units often have plastic components that can crack if forced.
Inspect the Coils:
Look through the fins. If you see heavy dirt, grass clippings, or bent fins, it’s time for a deep clean. The coils should be mostly visible and free of major obstructions.
Step 3: Clean the Outdoor Condenser Coils
Now it’s time to tackle the dirt. Follow these steps carefully to avoid damage.
Step 3.1: Brush Away Loose Debris
- Put on gloves and goggles.
- Use a soft-bristle brush to gently scrub the surface of the coils.
- Work from the outside in, brushing vertically along the fins to avoid bending them.
- Remove leaves, grass, and large clumps of dirt.
Pro Tip: If the unit is surrounded by tall grass or shrubs, trim them back to improve airflow and reduce future buildup.
Step 3.2: Apply Coil Cleaner Spray
- Shake the coil cleaner can well.
- Spray evenly across the entire coil surface, covering all fins.
- Focus on heavily soiled areas, but avoid oversaturating.
- Let the cleaner sit for 5–10 minutes (follow product instructions).
Note: Most no-rinse cleaners will foam as they break down grease and grime. This is normal.
Step 3.3: Rinse with Low-Pressure Water
- Set your garden hose to a gentle spray (not jet or high pressure).
- Rinse the coils from the inside out—this pushes dirt away from the unit, not deeper in.
- Use a back-and-forth motion, keeping the nozzle at least 12 inches away.
- Continue until water runs clear and no foam remains.
Warning: High-pressure water can flatten fins and damage the coil. Never use a pressure washer!
Step 3.4: Straighten Bent Fins
- Inspect the fins for bends or crushing.
- Use a fin comb (available at hardware stores) to gently straighten them.
- Match the comb size to your fin spacing (common sizes: 8, 10, 12, 14 fins per inch).
- Run the comb vertically through the fins to restore airflow.
Pro Tip: If many fins are damaged, consider calling a technician—repeated bending weakens the coil.
Step 4: Clean the Indoor Evaporator Coils
The evaporator coils are inside your home, usually behind the front panel of your indoor unit (for split systems) or inside the air handler (for central AC). These coils absorb heat from indoor air and can get clogged with dust and mold.
Step 4.1: Locate the Indoor Unit
- For wall-mounted split systems: Look for the indoor unit on a wall, usually high up.
- For central AC: The evaporator coil is in the air handler, often in the attic, basement, or utility closet.
Step 4.2: Remove the Front Panel
- Turn off power (already done in Step 1).
- Use a screwdriver to remove the front cover or access panel.
- Some LG models have clips—gently pry them open with a flat tool.
- Carefully lower the panel and set it aside.
- Use a vacuum with a brush attachment.
- Gently vacuum the surface of the coils to remove loose dust and debris.
- Work slowly to avoid pushing dirt deeper into the fins.
- Spray a no-rinse coil cleaner directly onto the coils.
- Cover all surfaces, especially the bottom where dirt collects.
- Let it sit for 10–15 minutes to break down grime and kill mold.
- The cleaner will drip into the drain pan—this is normal.
- Locate the drain pan beneath the coils.
- Wipe it with a damp cloth and mild detergent to remove sludge or mold.
- Rinse and dry thoroughly.
- Check the drain line for clogs—use a wet/dry vacuum or pipe cleaner if needed.
- Carefully replace the indoor unit’s front panel and secure it with screws or clips.
- Reinstall the outdoor unit’s top grille and side panels.
- Tighten all screws securely but don’t over-tighten—plastic threads can strip.
- Go back to the breaker box and turn the AC breaker back on.
- For window units, plug the unit back in.
- Turn on the thermostat or remote and set it to cool.
- Listen for normal operation—no unusual noises.
- Check that cold air is flowing from the vents.
- Monitor for 15–20 minutes to ensure everything runs smoothly.
- Change air filters monthly: A clean filter traps dust before it reaches the coils.
- Keep the outdoor unit clear: Trim grass, shrubs, and remove debris within 2 feet of the unit.
- Use a coil protector shield: Some homeowners install mesh screens to block leaves and pets (ensure airflow isn’t restricted).
- Schedule professional maintenance: Once a year, have a technician inspect refrigerant levels, electrical connections, and overall performance.
- Monitor performance: If cooling seems weak or energy bills rise, check the coils early.
- Refrigerant leaks: If you smell a sweet odor or see oily residue near coils, stop using the unit and call a technician immediately.
- Electrical issues: Frequent tripping breakers or burning smells indicate deeper problems.
- Coil corrosion: White or green powder on coils suggests corrosion—common in coastal areas. A pro can assess if coating or replacement is needed.
- Warranty concerns: If your LG unit is under warranty, check the terms—some require professional servicing to remain valid.
- Lack of tools or confidence: If you’re unsure about any step, it’s better to hire a licensed HVAC technician.
Step 4.3: Vacuum the Coils
Step 4.4: Apply Coil Cleaner
Step 4.5: Clean the Drain Pan
Pro Tip: Pour a cup of vinegar or bleach solution down the drain line monthly to prevent algae growth.
Step 5: Reassemble and Restore Power
Once everything is clean and dry, it’s time to put your LG air conditioner back together.
Step 5.1: Reattach Panels
Step 5.2: Restore Power
Step 5.3: Test the System
Pro Tip: If the unit doesn’t start or makes strange sounds, turn it off and double-check connections. When in doubt, call a professional.
Troubleshooting Common Issues
Even with careful cleaning, you might encounter problems. Here’s how to handle them:
Issue: AC Still Not Cooling Well
Dirty coils may not be the only issue. Check the air filter—if it’s clogged, replace it. Also, ensure vents aren’t blocked and the thermostat is set correctly. If problems persist, refrigerant levels or compressor issues may be to blame—call an HVAC technician.
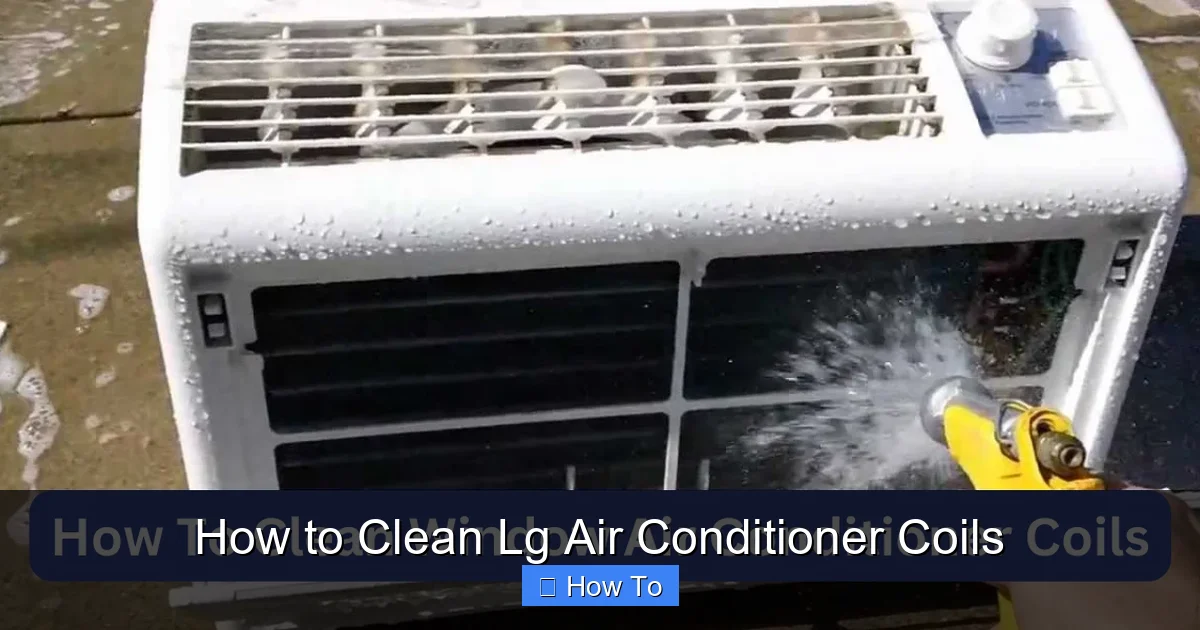
Visual guide about How to Clean Lg Air Conditioner Coils
Image source: totalabove.com
Issue: Water Leaking Indoors
This often means the drain pan or line is clogged. Clean the drain line with a wet/dry vacuum or flush it with vinegar. Make sure the unit is level—tilting can cause overflow.
Issue: Bent or Damaged Fins
Minor bends can be fixed with a fin comb. But if large sections are crushed or corroded, the coil may need professional repair or replacement. Continuing to use a damaged coil can lead to system failure.
Issue: Unusual Noises After Reassembly
Check that all panels are securely attached and nothing is loose. If the fan hits the shroud, adjust the alignment. Never operate the unit with panels off.
Issue: Coil Cleaner Smell Lingers
Run the fan-only mode for 30–60 minutes to air out the system. Open windows to ventilate the room. Most cleaners are low-odor, but some may have a mild chemical scent initially.
Maintenance Tips to Keep Coils Clean Longer
Cleaning your LG air conditioner coils doesn’t have to be a yearly chore. Follow these tips to reduce buildup:
Pro Tip: LG’s Smart ThinQ app (for compatible models) can send maintenance reminders and alert you to potential issues—take advantage of smart features!
When to Call a Professional
While cleaning coils is a DIY-friendly task, some situations require expert help:
Remember: Regular DIY cleaning extends the life of your AC, but annual professional checkups ensure everything runs safely and efficiently.
Conclusion
Cleaning your LG air conditioner coils is one of the most effective ways to maintain cooling performance, reduce energy costs, and prevent breakdowns. With the right tools, a little time, and attention to safety, you can keep your unit running like new. By following this guide—turning off power, cleaning both indoor and outdoor coils, reassembling carefully, and maintaining regularly—you’ll enjoy cooler air and peace of mind all season long.
Don’t wait for your AC to struggle. Make coil cleaning a part of your home maintenance routine. Your LG air conditioner—and your wallet—will thank you.

