
Changing the filter on your LG window air conditioner is quick, easy, and essential for optimal performance. This guide walks you through every step—from locating the filter to reassembling your unit—so you can breathe cleaner air and extend your AC’s lifespan.
Key Takeaways
- Regular filter changes improve air quality: A clean filter traps dust, pollen, and allergens, ensuring fresher air in your home.
- Frequency matters: Replace or clean your LG window AC filter every 1–2 months during peak usage seasons.
- Turn off the unit first: Always power down your air conditioner before removing or replacing the filter for safety.
- Use the right filter type: Check your model number and use a compatible LG filter or high-quality generic alternative.
- Clean vs. replace: Some filters are washable; others are disposable—know which kind your unit uses.
- Proper installation prevents damage: Reinstall the filter correctly to avoid airflow blockages or strain on the motor.
- Maintenance boosts efficiency: A clean filter helps your AC cool faster, use less energy, and last longer.
How to Change Filter on LG Window Air Conditioner
Keeping your LG window air conditioner running smoothly isn’t just about setting the right temperature—it’s also about regular maintenance. One of the most important (and often overlooked) tasks is changing or cleaning the air filter. A dirty filter restricts airflow, forces your AC to work harder, increases energy bills, and can even lead to costly repairs down the line.
In this comprehensive guide, you’ll learn exactly how to change the filter on your LG window air conditioner—step by step. Whether you’re a first-time homeowner or just need a refresher, we’ll cover everything from identifying your filter type to troubleshooting common issues. By the end, you’ll feel confident performing this simple but vital maintenance task like a pro.
Why Changing Your LG Window AC Filter Matters
Visual guide about How to Change Filter on Lg Window Air Conditioner
Image source: i.ytimg.com
Before diving into the steps, let’s talk about why this matters. Your air conditioner’s filter acts like a gatekeeper for your indoor air. As the unit pulls in warm air from your room, it passes through the filter, which captures dust, pet dander, pollen, mold spores, and other airborne particles. Over time, these contaminants build up, clogging the filter.
When that happens, your AC has to work overtime to pull air through the blocked filter. This not only reduces cooling efficiency but also increases wear and tear on internal components like the fan motor and compressor. In extreme cases, a severely clogged filter can cause the evaporator coil to freeze, leading to system shutdowns or water leaks.
Beyond performance, a clean filter directly impacts your health. If you or anyone in your household suffers from allergies, asthma, or respiratory conditions, a dirty filter can worsen symptoms by circulating polluted air. Regularly changing your LG window AC filter ensures you’re breathing cleaner, healthier air—all while saving money on energy bills and extending your unit’s lifespan.
How Often Should You Change the Filter?
The frequency of filter changes depends on several factors, including usage, environment, and filter type. However, as a general rule:
– **During peak cooling season (summer):** Change or clean the filter every 4–6 weeks.
– **Light or occasional use:** Every 2–3 months may be sufficient.
– **High-pollen areas, homes with pets, or smokers:** Check monthly and replace more often if visibly dirty.
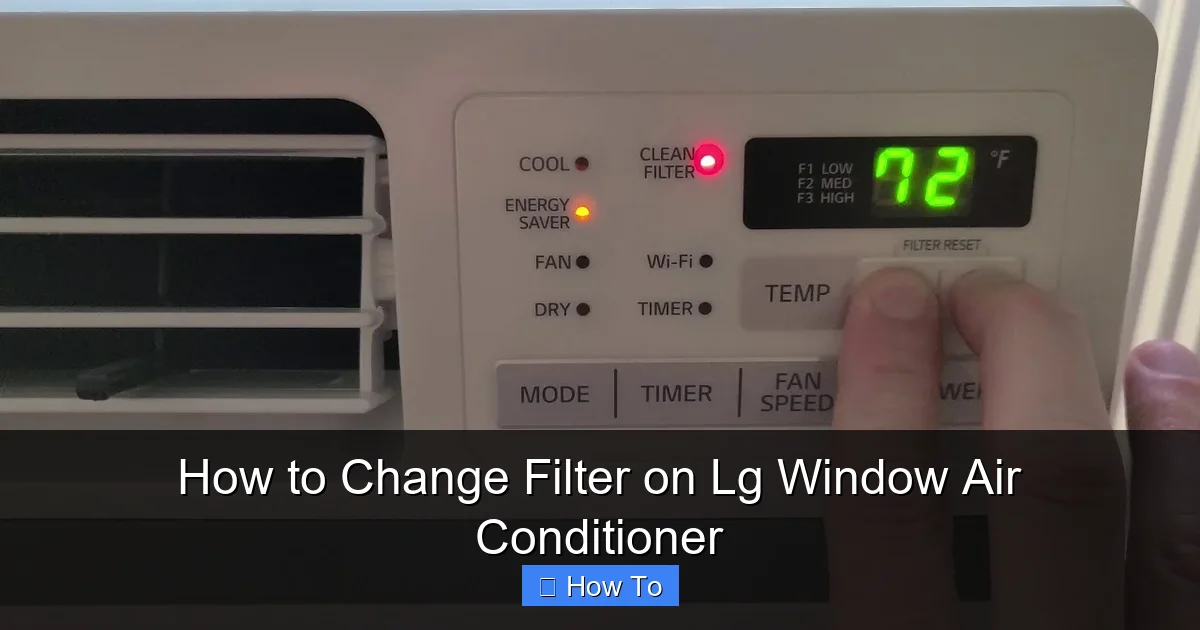
LG typically recommends inspecting the filter at least once a month. If it looks gray or covered in dust, it’s time for a change—even if it hasn’t been a full month. Many newer LG window units also have a “Filter Reset” indicator light that alerts you when maintenance is due.
Pro tip: Mark your calendar or set a phone reminder after each filter change. Consistency is key to maintaining optimal performance.
Tools and Supplies You’ll Need
The good news? You don’t need fancy tools to change your LG window AC filter. Here’s what you’ll need:
– A replacement filter (compatible with your LG model)
– A soft cloth or vacuum with a brush attachment (for cleaning around the unit)
– Mild soap and water (if cleaning a reusable filter)
– A small brush or toothbrush (optional, for stubborn dust)
Always check your owner’s manual for specific recommendations. Most LG window air conditioners use either a washable foam filter or a disposable pleated filter. Knowing which type you have will help you choose the right replacement.
Step-by-Step Guide to Changing Your LG Window AC Filter
Now, let’s get into the nitty-gritty. Follow these steps carefully to safely and effectively change your filter.
Step 1: Turn Off the Air Conditioner
Safety first! Before touching anything inside your unit, make sure the air conditioner is completely powered off. This means:
– Switching the thermostat to “Off”
– Unplugging the power cord from the wall outlet
Never attempt to remove the filter while the unit is running or even in standby mode. Even if the fan isn’t spinning, electrical components could still be energized. Unplugging ensures there’s no risk of electric shock.
Step 2: Locate the Front Panel or Grille
Most LG window air conditioners have a front-facing grille or panel that covers the filter. This panel is usually held in place by clips or screws along the top and sides.
Look for a latch or release button near the top edge of the grille. On some models, you’ll need to gently pull the bottom of the grille outward to disengage the clips. Others may require you to unscrew two or four small screws (often Phillips-head) located at the top corners.
If you’re unsure, consult your user manual—LG designs vary slightly by model year and series (e.g., LW8016ER, LW1216ER, etc.).
Step 3: Remove the Front Panel
Once the clips or screws are released, carefully tilt the front panel forward and lift it away from the unit. Set it aside on a flat, stable surface—preferably away from dust or moisture.
Be gentle! The panel is often made of lightweight plastic and can crack if forced. Some models have a cord or wire connecting the panel to the unit (for controls or indicators). If yours does, don’t yank it—just disconnect the connector gently before fully removing the panel.
Step 4: Find and Remove the Air Filter
With the front panel off, you should now see the air filter sitting just behind the grille. It’s typically a rectangular panel made of mesh, foam, or pleated material, held in place by a frame or slot.
To remove it:
– Slide the filter straight out from its housing
– If it’s stuck, wiggle it slightly while pulling—don’t force it
Take note of how the filter is oriented (which side faces inward, which direction it slides in). This will help you reinstall it correctly later.
Step 5: Inspect and Clean or Replace the Filter
Now comes the decision: clean or replace?
If you have a **washable filter** (common in many LG models), rinse it under lukewarm water. Use a mild detergent if needed, but avoid harsh chemicals or scrubbing—this can damage the mesh. Let it air-dry completely before reinstalling. Never put a wet filter back into the unit—it can promote mold growth.
If you have a **disposable filter**, inspect it closely. If it’s gray, clogged, or torn, it’s time for a new one. Even if it looks okay, replace it every 1–2 months during heavy use.
When buying a replacement, always match the model number of your LG window AC. You can find this on a label inside the front panel or on the unit’s side. Common filter sizes include 14” x 18”, 16” x 20”, and 20” x 25”, but confirm yours before purchasing.
Tip: Buy a pack of filters in advance so you’re never caught off guard. Generic brands can work fine, but ensure they’re the correct size and MERV rating (usually MERV 4–6 for window units).
Step 6: Reinstall the Filter
Once your filter is clean and dry (or you’ve inserted a new one), slide it back into the slot exactly as it was before. Make sure it sits flat and secure—no gaps or bends.
Double-check the orientation: the arrow on the filter frame (if present) should point toward the unit (i.e., inward). This ensures proper airflow direction.
Step 7: Reattach the Front Panel
Carefully align the front panel with the unit and press it back into place. If your model uses clips, you should hear a soft “click” as they engage. For screw-mounted panels, reinsert and tighten the screws—but don’t overtighten, as this can strip the plastic threads.
If your panel has a connected wire, reconnect it now before snapping the panel closed.
Step 8: Plug In and Test the Unit
Plug your air conditioner back into the wall outlet and turn it on. Set the thermostat to a cool temperature and listen for normal operation. You should feel cool air flowing within a few minutes.
If the unit doesn’t turn on, double-check that the panel is fully secured—many LG models have a safety switch that prevents operation if the front grille isn’t properly attached.
Tips for Maintaining Your LG Window AC Filter
Changing the filter is just one part of the equation. Here are some extra tips to keep your unit in top shape:
– **Vacuum the exterior vents monthly:** Use a brush attachment to remove dust from the front and side grilles.
– **Keep the area around the unit clear:** Don’t block airflow with furniture, curtains, or plants.
– **Clean the evaporator and condenser coils annually:** This requires more disassembly—consider hiring a pro if you’re not comfortable doing it yourself.
– **Check for leaks or unusual noises:** These can signal deeper issues that a filter change won’t fix.
– **Use a programmable thermostat:** This reduces runtime and extends filter life.
Troubleshooting Common Issues
Even with careful steps, you might run into hiccups. Here’s how to handle them:
Filter Won’t Slide Out Easily
Don’t force it! Check for hidden clips or screws you may have missed. Sometimes dust buildup makes the filter stick—gently wiggle it while pulling.
Unit Won’t Turn On After Reassembly
This usually means the front panel isn’t fully secured. Open it again and ensure all clips or screws are properly engaged. The safety interlock switch may be preventing operation.
Reduced Airflow After Filter Change
Double-check that the filter is installed in the correct direction. Also, verify that no debris fell into the fan housing during the process.
Filter Light Stays On
Some LG models have a “Filter Reset” button or require a manual reset after replacement. Refer to your manual—it’s often as simple as holding the “Filter” button for 3–5 seconds.
When to Call a Professional
While changing the filter is a DIY-friendly task, there are times when you should call an HVAC technician:
– If the filter slot is damaged or broken
– If you notice ice buildup, water leaks, or strange smells
– If the unit still underperforms after a clean filter and coil inspection
– If you’re uncomfortable handling electrical components
Regular filter changes can prevent many of these issues, but don’t hesitate to seek help when needed.
Conclusion
Changing the filter on your LG window air conditioner is one of the simplest yet most impactful maintenance tasks you can do. It takes just 5–10 minutes, costs very little, and delivers big rewards: better air quality, lower energy bills, and a longer-lasting AC unit.
By following this guide, you’ve learned how to safely remove, inspect, clean, or replace your filter—and how to avoid common pitfalls. Remember to check your filter monthly, replace it regularly, and keep your unit clean inside and out.
Your home deserves cool, clean air—and so do you. Make filter changes a habit, and your LG window air conditioner will thank you with reliable, efficient performance all season long.

