
Turning on your Carrier air conditioner is simple once you know the steps. Whether you’re using a thermostat, wall switch, or remote control, this guide covers everything from basic operation to advanced settings. With clear instructions and expert tips, you’ll keep your home cool efficiently and avoid common mistakes.
Key Takeaways
- Remote Control Basics: Most Carrier window units use a handheld remote; press the power button (usually labeled “ON” or has a fan icon).
- Smart Thermostat Setup: For Carrier central AC systems with smart thermostats, press the “Power” button or use the mobile app to turn on cooling mode.
- Wall Switch Location: Check behind furniture or in utility closets—many Carrier units have a physical switch near the indoor unit.
- Reset After Power Outage: If your AC won’t turn on after an outage, reset the circuit breaker and unplug the unit for 5 minutes before restarting.
- Filter Maintenance Matters: A clogged air filter can prevent your Carrier AC from turning on; clean or replace it monthly during peak use.
- Troubleshoot Error Codes: If your display shows codes like “E1” or “F1,” consult your manual or contact Carrier support—these indicate specific issues.
- Safety First: Always turn off power at the circuit breaker before performing maintenance to avoid electrical hazards.
📑 Table of Contents
- How Do I Turn My Air Conditioner On Carrier? A Complete Step-by-Step Guide
- Understanding Your Carrier Air Conditioner Type
- Turning On a Carrier Window Air Conditioner
- Using the Smart Thermostat to Turn On Carrier Central AC
- Finding and Using the Wall Switch for Indoor Units
- Resetting Your Carrier AC After a Power Outage
- Troubleshooting When Your Carrier AC Won’t Turn On
- Maintaining Your Carrier AC for Reliable Performance
- Safety Tips When Operating Your Carrier AC
- Conclusion: Mastering Your Carrier Air Conditioner
How Do I Turn My Air Conditioner On Carrier? A Complete Step-by-Step Guide
If you’ve just moved into a new home or are struggling with your Carrier air conditioner not responding when you try to turn it on, don’t worry—you’re not alone. Carrier is one of the most trusted names in HVAC systems worldwide, known for their energy efficiency, durability, and user-friendly designs. But even the best appliances can confuse users when they’re unsure where to begin. Whether you’re dealing with a portable, window-mounted, or central air system, understanding how to properly power up your Carrier AC is essential for comfort and longevity.
In this comprehensive guide, we’ll walk you through every method for turning your Carrier air conditioner on—from simple remote controls to complex smart thermostats—plus troubleshooting tips if things go wrong. No jargon, no confusion: just clear, practical advice that anyone can follow. By the end of this article, you’ll feel confident operating your Carrier unit and maintaining it like a pro.
Understanding Your Carrier Air Conditioner Type
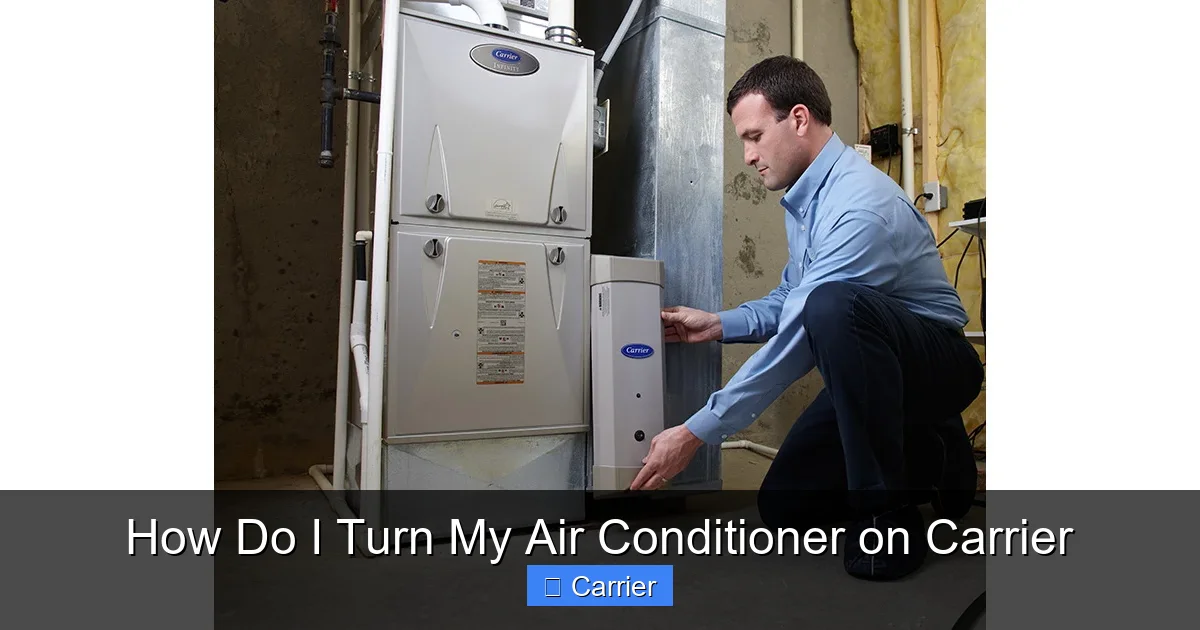
Before diving into how to turn your Carrier AC on, it helps to know what kind of system you have. Carrier offers several types of air conditioning units, each with its own startup process. Let’s break them down so you can identify yours quickly.
Visual guide about How Do I Turn My Air Conditioner on Carrier
Image source: acguided.com
Window-Mounted Units
These are compact, self-contained units installed directly in a window or wall sleeve. They’re popular for single rooms or apartments due to their affordability and ease of installation. Most come with a built-in thermostat and a remote control.
Example: If you see a rectangular box with vents on either side and a control panel facing outward, you likely have a window unit. These usually turn on by pressing the “Power” button on the unit itself or via the included remote.
Portable Air Conditioners
Unlike fixed installations, portable units sit on the floor and expel hot air through a hose connected to a nearby window. Some Carrier portables include remotes, while others rely solely on onboard buttons.
Central Air Systems with Ductwork
This is the most common setup in modern homes. The outdoor compressor and indoor evaporator coil work together through ductwork to cool your entire house. These systems use a central thermostat—often programmable or Wi-Fi enabled—to regulate temperature.
Ductless Mini-Split Systems
Ideal for homes without existing ductwork, mini-splits consist of an outdoor unit and one or more indoor blowers mounted on walls. Each indoor unit can be controlled independently, typically via a wireless remote or wall-mounted controller.
Knowing your unit type will help you choose the right method to turn it on and avoid unnecessary frustration.
Turning On a Carrier Window Air Conditioner
If your Carrier AC is a window model, here’s exactly how to get it running:
Visual guide about How Do I Turn My Air Conditioner on Carrier
Image source: i.bobopic.com
- Locate the Remote Control: Most Carrier window units come with a small remote. If you can’t find it, check the owner’s manual or look under cushions or in storage bins.
- Press the Power Button: Point the remote toward the unit and press the “ON” or “Power” button (usually marked with a circle or fan symbol). The display should light up and show a target temperature.
- Adjust Settings: Use the “Mode” button to select “Cool,” then set your desired temperature using the “+” and “–” keys.
- Check the Display: You should see indicators for fan speed, mode, and temperature. If nothing lights up, try replacing the remote batteries.
Pro Tip: If the remote isn’t working, many Carrier window units also have a physical power button on the front panel. Just press it once to activate the unit.
Using the Smart Thermostat to Turn On Carrier Central AC
For homeowners with Carrier central air systems, the thermostat is your command center. Modern Carrier thermostats—like those in the Infinity® series—are designed for intuitive use and smart home integration.
Basic Steps to Turn On Cooling Mode:
- Wake the Screen: Tap the screen or press any button to wake it up.
- Select “Cool”: Look for the blue snowflake icon or tap “Cool” on the interface.
- Set Temperature: Increase the temperature slightly above room temp (e.g., from 72°F to 74°F) to signal the system to start cooling.
- Confirm Settings: Ensure the fan setting is not on “Auto” only—set it to “On” temporarily if the unit doesn’t kick in.
Using the Carrier App (Wi-Fi Enabled Models):
If your thermostat supports Wi-Fi (like the Côr® or Prestige® lines), you can turn on your Carrier AC remotely:
- Download the “Carrier” or “Côr” app from the App Store or Google Play.
- Log in with your account credentials.
- Tap “Climate Control” and switch to “Cool” mode.
- Adjust the temperature and confirm.
This feature lets you cool your home before you arrive—perfect for beating the summer heat!
Finding and Using the Wall Switch for Indoor Units
Some Carrier central air systems—especially older models or certain ductless units—have a physical wall switch that powers the indoor blower. This switch is often hidden behind furniture or tucked away in a closet.
Where to Look:
- Behind couches, beds, or entertainment centers.
- In utility rooms near the furnace or water heater.
- Near the indoor air handler or evaporator coil.
- Turn Off Power: Go to your main electrical panel and flip the breaker that controls your AC system.
- Unplug the Unit: If it’s a portable or window unit, unplug it from the outlet.
- Wait 5 Minutes: This allows capacitors to discharge fully.
- Restore Power Gradually: Turn the breaker back on, wait 30 seconds, then plug the unit back in (if applicable).
- Restart the System: Use your remote, thermostat, or wall switch to turn it on.
- Is the circuit breaker tripped? Reset it.
- Are GFCI outlets (in bathrooms or kitchens) still active?
- Is the unit plugged in securely?
- Replace the batteries.
- Make sure there’s no obstruction between the remote and the sensor on the unit.
- Clean the IR sensor lens gently with a soft cloth.
- E1/E2: Refrigerant pressure issue—call a technician.
- F1/F2: Sensor fault—may need recalibration.
- LF: Low airflow—check filters and vents.
- Clogged air filter.
- Dirty coils.
- Refrigerant leak (requires professional service).
- Vacuum around the outdoor unit to remove debris.
- Inspect and clean or replace the air filter (use high-efficiency filters for better performance).
- Check refrigerant lines for leaks or frost.
- Schedule professional servicing once a year (spring is ideal).
- Clean evaporator and condenser coils.
- Verify electrical connections are tight and corrosion-free.
- Never bypass safety switches. These protect against overheating or short circuits.
- Keep children away from moving parts. Fans and vents can cause injury if touched.
- Avoid placing flammable items near the outdoor unit. Heat exchangers generate warmth.
- Don’t operate the unit if water is pooling around it. This could indicate a drainage blockage or internal leak.
The switch looks like a standard light switch but may be labeled “AC,” “Blower,” or “Indoor Unit.” Flip it to the “ON” position. Then return to your thermostat and set cooling mode as usual.
Note: Not all Carrier systems require this step—only those with separate indoor power controls.
Resetting Your Carrier AC After a Power Outage
After a blackout, your Carrier air conditioner might not respond immediately. That’s normal! Here’s how to safely restore it:
This reset clears error logs and reinitializes the system safely.
Troubleshooting When Your Carrier AC Won’t Turn On
Even with perfect instructions, sometimes your Carrier AC refuses to cooperate. Here’s how to diagnose and fix common issues:
1. No Power at All
Check the following:
2. Remote Isn’t Working
Try these fixes:
3. Thermostat Shows Error Code
Common Carrier error codes include:
4. Unit Runs but Doesn’t Cool
This isn’t a startup problem—but it’s related. Likely causes:
If problems persist after basic checks, contact Carrier customer support or an authorized dealer.
Maintaining Your Carrier AC for Reliable Performance
Getting your Carrier air conditioner turned on is just the first step. To ensure it keeps working smoothly year after year, regular maintenance is key.
Monthly Tasks:
Seasonal Deep Clean:
Remember: a well-maintained Carrier AC runs quieter, lasts longer, and uses less electricity.
Safety Tips When Operating Your Carrier AC
While Carrier units are built for safety, improper handling can lead to risks. Always follow these guidelines:
If you smell burning, hear unusual noises, or see sparks, shut off the unit immediately and call a technician.
Conclusion: Mastering Your Carrier Air Conditioner
Turning on your Carrier air conditioner doesn’t have to be intimidating. Whether you’re using a simple remote, a smart thermostat, or a wall switch, the process becomes second nature with a little practice. The key is knowing your equipment type, following the right steps, and performing routine care to keep everything running smoothly.
By now, you should feel confident starting your Carrier AC in any situation—whether it’s a scorching July afternoon or a sudden heatwave. And remember: if something seems off, Carrier’s support team is just a phone call away. With proper use and maintenance, your Carrier unit will deliver reliable cooling for years to come.
Stay cool, stay comfortable, and enjoy the peace of mind that comes with knowing exactly how to turn your Carrier air conditioner on!
Frequently Asked Questions
How do I turn on my Carrier window air conditioner if the remote isn’t working?
Most Carrier window units have a physical power button on the front panel. Press it once to turn the unit on. Also, check that the batteries in the remote aren’t dead and that there’s no obstacle blocking the infrared signal between the remote and the unit.
Can I use my smartphone to turn on my Carrier central air conditioner?
Yes, if your Carrier thermostat is Wi-Fi enabled (such as models in the Côr or Infinity series), you can use the official Carrier app to turn on cooling mode remotely. Simply log in, select “Cool,” and adjust the temperature from anywhere with internet access.
Why won’t my Carrier AC turn on after a power outage?
After an outage, the system needs time to reset. Turn off the circuit breaker, unplug the unit (if applicable), wait five minutes, then restore power gradually. This clears residual charge and allows the system to reboot safely.
Do all Carrier air conditioners have a wall switch?
Not always. Only some models—especially older central systems or certain ductless units—have a dedicated wall switch for the indoor blower. Check behind furniture or in utility areas. If you can’t find one, your system likely doesn’t need it.
What should I do if my Carrier AC displays an error code?
Error codes like E1, F1, or LF indicate specific faults such as sensor issues or low airflow. Refer to your owner’s manual for code meanings. In most cases, these require professional diagnosis—contact Carrier support or an HVAC technician for assistance.
How often should I clean my Carrier air conditioner filter?
You should inspect and clean or replace the air filter once a month during peak cooling season (typically May through September). A dirty filter restricts airflow and can prevent the unit from turning on or reduce efficiency significantly.

