Clean a Dryer Vent Pipe : Ultimate Guide
How to Clean a Dryer Vent Pipe
Do you notice that your clothes are taking longer to dry? Are you experiencing a musty smell coming from your dryer? These are signs that your dryer vent pipe may be clogged and in need of cleaning. In this comprehensive guide, we will walk you through the process of cleaning your dryer vent pipe, step by step.
Why is it Important to Clean Your Dryer Vent Pipe?
Before we delve into the cleaning process, let's understand why it is crucial to keep your dryer vent pipe clean. Over time, lint and debris can accumulate in the vent, obstructing airflow. This not only prolongs drying times but also poses a fire hazard. Regular cleaning can improve the efficiency of your dryer and reduce the risk of a fire breaking out.
According to the National Fire Protection Association, dryers cause approximately 13,820 home fires annually, with failure to clean being the leading factor. Lint is highly flammable, and restricted airflow causes the dryer to overheat, creating ideal conditions for ignition. Beyond safety, a clean vent reduces energy consumption — a clogged vent can increase drying time by 30–50%, directly raising your utility bills. In practice, homeowners often notice the difference immediately after cleaning: cycles finish faster, the laundry room stays cooler, and the dryer lasts longer because its heating element and motor aren't overworked.
Step 1: Gather the Necessary Tools
Before you begin, ensure you have the following tools at hand:
Vent brush
Cleaning kit
Vacuum cleaner
For a thorough job, consider adding a few more items to your kit: a flexible drill-powered auger brush (ideal for runs longer than 10 ft), a flashlight or headlamp to inspect the interior, foil tape (UL 181 rated) for resealing joints, and a pair of work gloves to protect against sharp metal edges. A shop vac with a crevice tool outperforms a standard household vacuum for heavy lint loads. If your vent terminates on the roof, you'll also need a sturdy extension ladder and fall-protection gear — safety first.
Step 2: Disconnect the Dryer
Start by disconnecting your dryer from the power source and moving it away from the wall to access the vent pipe.
https://www.youtube.com/watch?v=Pe-L2pbQjoY

Credit: www.lowes.com
Safety note: For gas dryers, also shut off the gas valve at the supply line before moving the appliance. If you smell gas at any point, stop immediately, ventilate the area, and call your utility provider.
Step 3: Clean the Exterior Vent
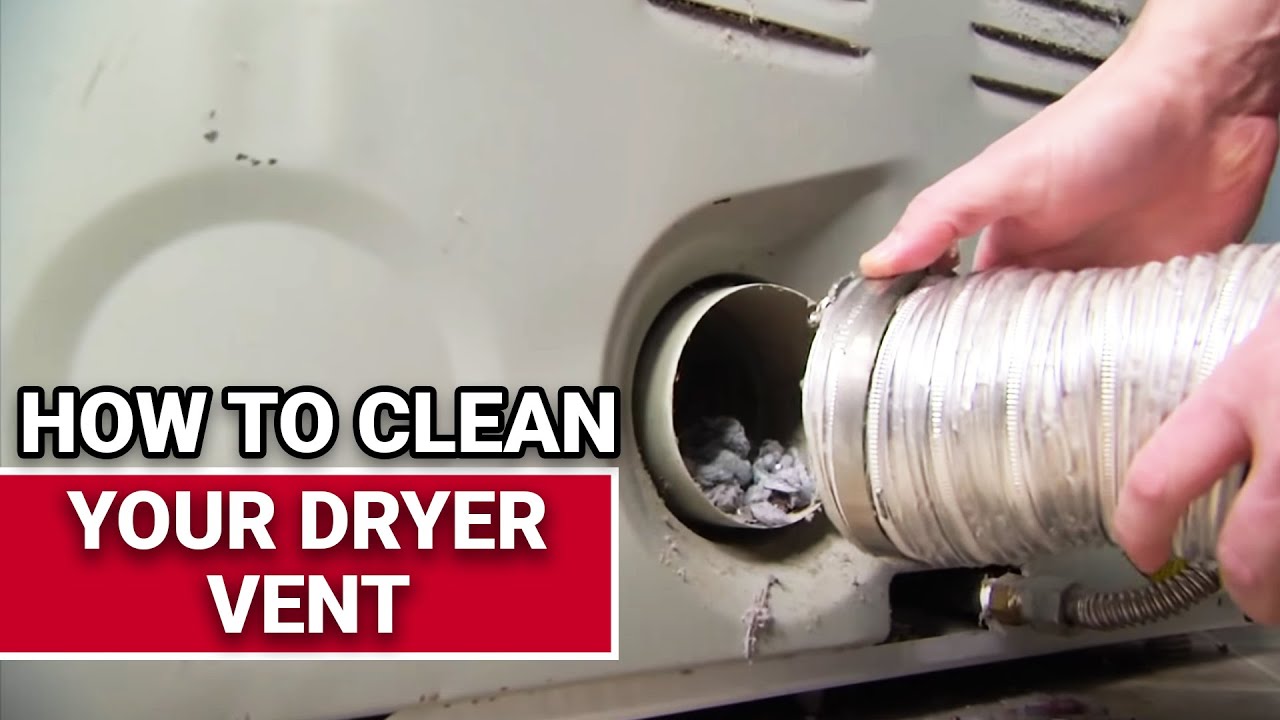
Locate the exterior vent and remove any visible debris or blockages. Use the vent brush to clear any buildup in this area.
Credit: www.youtube.com
Check that the damper flap opens freely and isn't stuck shut by lint or paint. A stuck flap prevents proper exhaust and invites pests. While you're outside, verify the vent termination is at least 3 ft from any air intake, window, or door per IRC M1502.3.
Step 4: Use the Cleaning Kit
Assemble the cleaning kit according to the manufacturer's instructions. This typically involves attaching flexible rods and a brush to reach deep into the vent pipe.
Work from the interior side toward the exterior whenever possible — pushing lint toward the shorter exit path reduces the chance of compacting a blockage mid-run. Rotate the brush clockwise as you advance; this prevents the rods from unscrewing inside the pipe. For rigid metal duct, a drill-powered brush at 300–500 RPM cleans faster, but keep speed low on semi-rigid foil or plastic transition ducts to avoid tearing. A common mistake is stopping when resistance disappears; continue the full length to the exterior hood, then make a second pass.
Step 5: Vacuum the Vent and Hose
Use a vacuum cleaner to remove any lint or dust from both the vent and the hose connected to the dryer.
After brushing, vacuum both ends again. Use the crevice tool to reach into the dryer's exhaust port and the transition duct connection. If you have access to the middle of a long run (via a clean-out port or by temporarily disconnecting a joint), vacuum from there as well. In practice, a second vacuum pass after reassembly catches lint shaken loose during reconnection.
Step 6: Clean the Lint Trap
Remove the lint trap from the dryer and clean it thoroughly. This should be done regularly to prevent lint buildup.
Wash the screen with warm, soapy water and a soft brush every month to remove invisible fabric-softener residue that blocks airflow. Let it dry completely before reinserting. While the trap is out, vacuum the trap housing — lint accumulates deep in the chute and bypasses the screen. This step alone can restore 10–15% airflow on neglected machines.
Step 7: Reassemble and Test
Once the vent and hose are clean, reattach the vent to the exterior and reconnect the dryer. Turn on the dryer and ensure that air is flowing freely through the vent.
Run the dryer on "Air Fluff" (no heat) for 2–3 minutes and hold a piece of tissue or an anemometer at the exterior hood. Strong, steady airflow that flaps the tissue horizontally confirms a clear path. Weak or pulsing flow suggests a remaining restriction — recheck joints for crushed duct or missed sections. Tighten all clamps and seal joints with foil tape, not duct tape, which degrades with heat.
How Often Should You Clean Your Dryer Vent?
Most households should clean the full vent system annually. Increase frequency to every six months if: you have a large family (5+ loads/week), pets that shed heavily, a vent run longer than 25 ft with multiple elbows, or a dryer located on an interior wall far from the exterior. The lint trap screen should be cleared every load; the trap housing vacuumed monthly. Set a calendar reminder tied to daylight-saving changes — spring and fall — so it becomes routine.
Building Code Requirements You Should Know
The 2024 International Residential Code (IRC M1502) and most local amendments require: maximum vent length 35 ft (deduct 5 ft per 90° elbow, 2.5 ft per 45° elbow), minimum 4-inch diameter, smooth rigid metal duct for concealed runs, and termination at least 3 ft from openings. Plastic or foil accordion-style transition duct is only permitted between dryer and rigid duct, not inside walls. Some jurisdictions now mandate a clean-out access point for runs over 20 ft. Check with your local building department before rerouting or replacing ductwork.
Common Mistakes to Avoid
- Using duct tape instead of UL 181 foil tape — it dries out and leaks within months.
- Running the brush only from the exterior — you'll pack lint into a tighter plug.
- Ignoring the transition duct behind the dryer — it's the most crushed, kinked section.
- Reconnecting a gas dryer without leak-testing the supply line (soap-bubble test).
- Assuming a leaf blower cleans everything — it can't dislodge matted lint in elbows.
- Skipping the exterior damper check — a stuck flap negates all your interior work.
DIY vs. Professional Cleaning
While it is possible to clean your dryer vent pipe yourself, some homeowners prefer to hire a professional service. Professional cleaners have specialized equipment and expertise to ensure a thorough cleaning, especially for long or complex vent systems.
DIY cost: $30–$60 for a quality brush kit. Professional service: $120–$250 depending on vent length, roof access, and region. Hire a pro if the vent runs through the roof, exceeds 25 ft with multiple elbows, uses old plastic duct that needs replacement, or if you lack safe roof access. Ask for before/after airflow readings (CFM) and a written report — reputable companies provide both. For routine maintenance on accessible vents, DIY is effective and builds familiarity with your system.
Signs Your Dryer Vent Pipe Needs Cleaning
It's important to recognize the signs that indicate your dryer vent pipe requires cleaning:
Longer drying times
Musty odor on clothes
Overheating or burning smells
Additional red flags: the dryer exterior feels unusually hot, the laundry room is humid or smells of lint, the exterior damper barely moves during a cycle, lint appears around the door seal or behind the dryer, and the dryer shuts off mid-cycle (high-limit thermostat tripping). If you notice any of these, clean the vent immediately — don't wait for your annual schedule.
Frequently Asked Questions
How To Clean A Dryer Vent Pipe?
To clean a dryer vent pipe, disconnect the dryer and take it outside. Use a vent cleaning kit or a vacuum to remove lint buildup. Ensure the exterior vent is clear and reattach the vent. If you have an electric leaf blower, you can force air through the vent to remove lint.
Can I Clean My Dryer Vent By Myself?
Yes, you can clean your dryer vent by yourself by disconnecting the dryer and using an electric leaf blower to blow out the lint.
Can I Use A Leaf Blower To Clean My Dryer Vent?
Yes, you can use an electric leaf blower to clean your dryer vent by forcing air through it.
How Do I Know If My Dryer Vent Is Clogged?
You can tell if your dryer vent is clogged if your clothes take longer than usual to dry, the dryer gets hot to the touch, or there is excess lint buildup in the lint trap or around the vent. Regular cleaning of your dryer vent can help prevent these issues.
Disconnect your dryer from the transition line and use a cleaning kit or a vacuum to remove any lint buildup. You can also hire a professional dryer vent cleaning service to do it for you.
What Type of Duct Material Is Safest?
Rigid metal (galvanized or aluminum) smooth-wall duct is the only material approved for concealed runs. Semi-rigid aluminum foil is acceptable only for the visible transition between dryer and wall. Plastic vinyl or foil accordion duct should be replaced — it traps lint in ridges, sags, and fails fire tests.
Can a Clogged Vent Cause Carbon Monoxide Issues?
Yes. On gas dryers, a blocked vent can cause combustion gases — including carbon monoxide — to spill into the living space instead of exhausting outside. Install a CO detector in the laundry area and test it monthly.
Conclusion
Regularly cleaning your dryer vent pipe is essential for maintaining the efficiency and safety of your dryer. By following the step-by-step guide provided, you can ensure that your dryer vent pipe remains free from obstructions, reducing the risk of fire and improving the performance of your appliance.
For more home maintenance tips that protect your appliances and lower energy costs, explore our seasonal maintenance checklist. If you're upgrading laundry appliances, our guide on choosing the right system for your home covers sizing and efficiency factors that apply to dryers too. Staying current on new innovations in air conditioning also helps you spot heat-pump dryer technology that eliminates venting altogether. And for a broader look at whole-home efficiency, the best HVAC systems for residential use roundup includes integrated laundry considerations. Bookmark our blog for the latest appliance-care guides.