When Replacing Ac Compressor What Else Should Be Replaced: Essential Components
When it comes to replacing an AC compressor in your car, there are several important components that should also be considered for replacement. Ensuring that these additional parts are addressed can help improve the overall performance and longevity of your vehicle's air conditioning system.
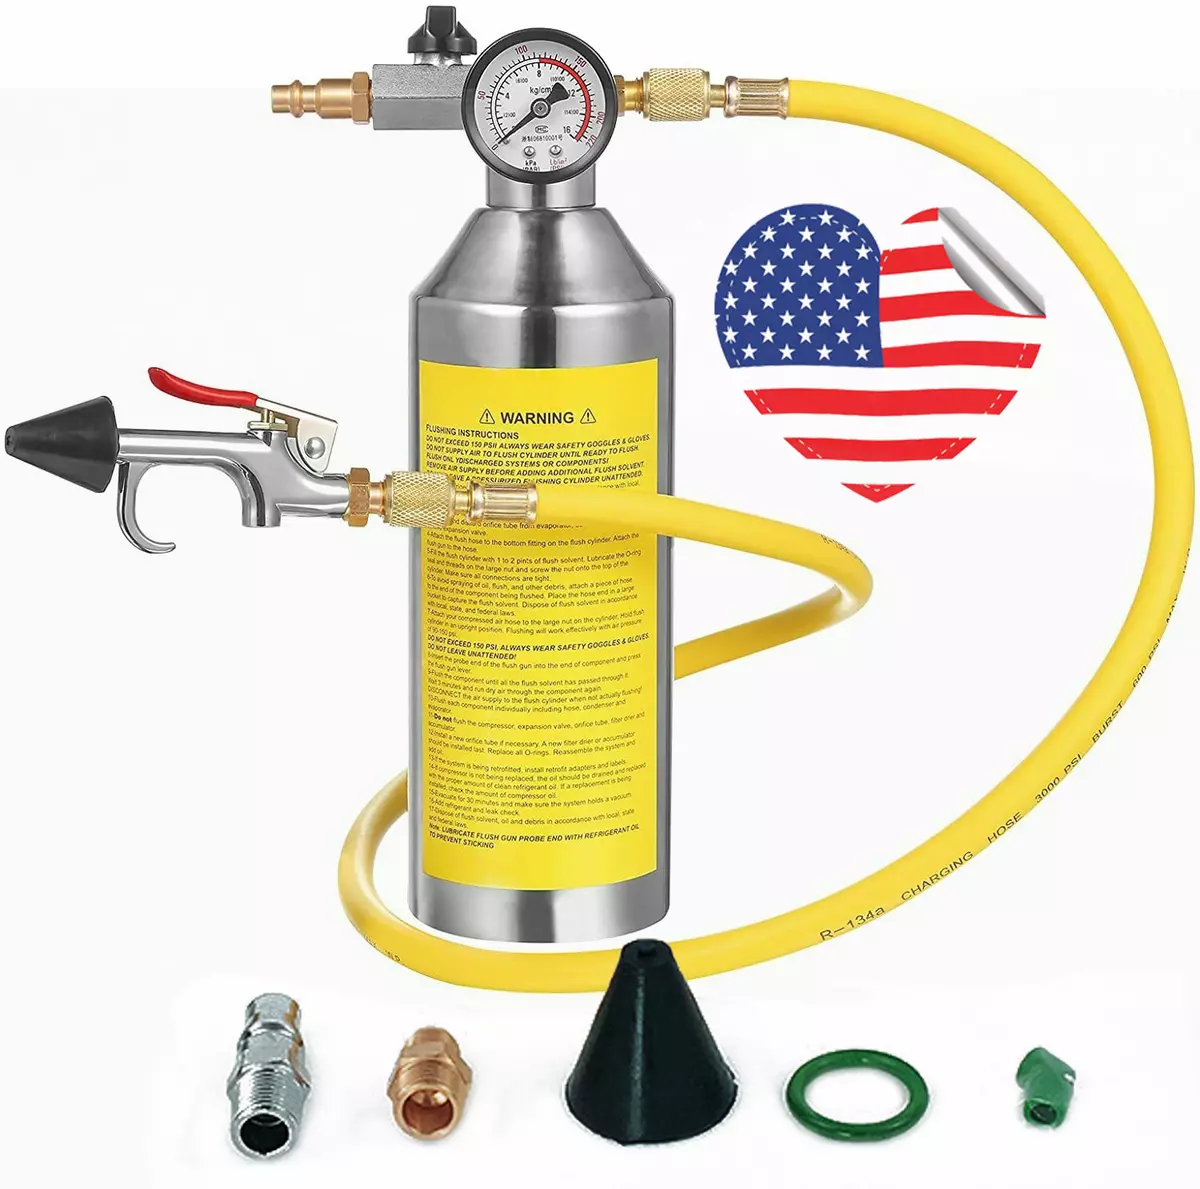
Diagram showing typical components replaced alongside the compressor.
Credit: www.ebay.com
Diagram of typical components replaced with the compressor
Components to Consider Replacing:
| Component | Reason for Replacement |
|---|---|
| New Compressor | Essential for optimal functioning of the AC system. |
| Basic Hand Tools | Required to disassemble and reassemble components. |
| Refrigerant Recovery Tank | Needed to safely recover old refrigerant from the system. |
| Equipment for Recovery and Charging | Necessary to properly recharge the AC system with refrigerant. |
| Refrigerant | Key component for cooling the air in the system. |
| Seals for AC Lines | Ensure a proper seal to prevent leaks in the system. |
| Accumulator or Receiver Drier | Helps remove moisture and contaminants from the refrigerant. |
| Orifice Tube | Regulates refrigerant flow in the system. |
When replacing the AC compressor, it is crucial to assess the condition of these components and replace any parts that show signs of wear or damage. This proactive approach can prevent potential issues and ensure the efficiency of your vehicle's air conditioning system. For more on this, see our guide on cost of replacing ac compressor in car.
Tools and Safety Equipment
Beyond the parts listed above, a proper compressor swap requires a few dedicated tools and safety gear. A manifold gauge set, vacuum pump, and refrigerant recovery machine are standard in any professional shop. Technicians should also wear refrigerant‑rated gloves and safety glasses, and work in a well‑ventilated area to avoid exposure to high‑pressure gases. Using the correct torque specifications for mounting bolts and line fittings prevents leaks and premature failure. For a deeper dive on routine upkeep, see our guide on regular seasonal upkeep.
If the AC compressor is functioning well and the condenser remains intact, you may only need to focus on a few components. Here's a list of what you might consider replacing or checking:
- Refrigerant : Sometimes, a simple recharge of the refrigerant will restore optimal cooling performance.
- Filter Dryer or Accumulator : Replacing this part can help maintain system efficiency, as it removes moisture and contaminants.
- Expansion Valve or Orifice Tube : These regulate refrigerant flow and pressure, so ensure they are in good condition.
- Belts and Hoses : Inspect these for wear and tear. Replacing them if they're cracked or frayed can prevent future issues.
- AC Relay and Fuses : Swap out malfunctioning relays or blown fuses to ensure proper electrical flow.
By addressing these components, you can maintain your AC system's performance without unnecessary replacements.
Step-by-Step Compressor Replacement Overview
A disciplined, step‑by‑step process reduces comeback rates and protects the new compressor. The typical workflow includes:
- Recover all refrigerant using a certified recovery machine.
- Remove the serpentine belt and disconnect the clutch electrical connector.
- Disconnect the high‑ and low‑side lines, capping them immediately to prevent contamination.
- Unbolt and remove the old compressor.
- Flush the system with approved solvent to eliminate metal shavings and old oil.
- Install the new compressor with fresh O‑rings and torque bolts to spec.
- Replace the accumulator/drier and orifice tube (or expansion valve) as a set.
- Evacuate the system to at least 500 microns for 30 minutes.
- Recharge with the exact refrigerant weight using a calibrated scale.
- Perform a leak test, then verify vent temperatures and pressures.
Following these steps in order ensures a clean, reliable repair. Ready to start? See the full installation walkthrough for step‑by‑step photos. Industry standards such as SAE standards outline proper refrigerant recovery procedures.

Sample kit of compressor, seals, and drier available for purchase.
Credit: www.amazon.com
Sample kit showing compressor, seals, and drier
Is it Necessary to Evacuate the AC System Before Recharging It?
Absolutely, evacuating the AC system before recharging is a critical step. This process ensures that all air and moisture are removed from the system, which can otherwise lead to corrosion and poor performance. For more on this, see our guide on air conditioner compressor.
Here’s why it’s essential:
- Prevents Contamination: Any remaining air or moisture can mix with the refrigerant, potentially causing acid formation that might damage the system components.
- Ensures Proper Function: Evacuation allows the refrigerant to circulate efficiently, maximizing cooling performance.
- Protects Components: By removing unwanted substances, you protect sensitive parts like the compressor from unnecessary wear and potential failure.
In summary, to maintain the longevity and efficiency of your AC system, always ensure it is evacuated before recharging. This small step can prevent significant issues down the road.
https://www.youtube.com/watch?v=rulXlnG2Unk
Expert Recommendations:
- Consider Replacing the Entire System: Professionals may suggest replacing the entire air conditioning system if the compressor burns out, as it could be more cost-effective in the long run.
- Receiver/Drier Replacement: Advised to replace the receiver/drier when replacing the compressor to maintain optimal performance. Replacing the receiver/drier is crucial because it plays a key role in keeping your AC system clean and efficient. The receiver/drier filters out moisture and contaminants, which can otherwise lead to corrosion or damage to the new compressor. By ensuring the system is free of these harmful elements, you extend the lifespan of the compressor and enhance overall system reliability.
- This preventive step not only safeguards your investment but also ensures your AC system runs smoothly, providing consistent cooling performance. Always consider this replacement as part of your comprehensive AC maintenance routine.
- Condenser Replacement: Modern condensers are difficult to flush, so it is often recommended to replace the condenser along with the compressor.
By adhering to these recommendations and ensuring that all essential components are addressed during the AC compressor replacement process, you can enhance the functionality and reliability of your vehicle's air conditioning system. For more on this, see our guide on when to call a professional for air conditioning.
When replacing an A/C compressor, warranties often stipulate that the drier and cooling radiator be replaced as well. This is because they are commonly designed as a single unit, resulting in a more reliable performance when all components are new.
- Enhanced System Efficiency: The drier helps remove moisture and contaminants from the refrigerant. By replacing it along with the compressor, the system maintains optimal performance, reducing the risk of future failures.
- Preventative Maintenance: If contaminants from a failing compressor enter the system, they can spread and cause future damage. Replacing the cooling radiator ensures that any potential debris or contaminants are eliminated, safeguarding the entire A/C system.
- Warranty Protection: Manufacturers and third-party insurers set these requirements to protect against costly repairs. If the compressor fails prematurely, having replaced these components ensures the warranty remains valid, allowing for lifetime replacement of the compressor if needed.
- Cost-Effectiveness: Though the initial cost may seem higher, replacing all these parts together can save on labor costs compared to fixing them individually later.
In summary, replacing the drier and cooling radiator along with the A/C compressor maximizes efficiency, maintains warranty coverage, and ultimately saves money long term.
Choosing the Right Replacement Compressor
Selecting a compressor that matches the vehicle’s specifications is as important as the installation itself. OEM units guarantee exact fit, calibrated displacement, and factory warranty support, while quality aftermarket compressors can offer cost savings if they meet SAE J2727 performance criteria. Key factors to compare include:
| Factor | OEM | Aftermarket |
|---|---|---|
| Fitment guarantee | Direct bolt‑on | May require adapters |
| Warranty length | 12–24 months | 6–12 months (varies) |
| Refrigerant compatibility | Pre‑charged for vehicle spec | Must verify R‑134a / R‑1234yf match |
| Price | Higher | Lower |
| Availability | Dealer network | Wide distributor network |
In practice, a common mistake is choosing a cheaper aftermarket compressor without confirming the displacement type (fixed vs. variable). Always verify the part number against the service manual. Compare options with our guide on selecting the proper unit.
Refrigerant Handling Regulations (2026 Update)
Current EPA Section 608 rules require that anyone recovering, recycling, or recharging automotive refrigerants be certified and use approved recovery equipment. Venting any refrigerant to the atmosphere is illegal and can result in significant fines. Shops must document the amount recovered and the type of refrigerant used (R‑134a or R‑1234yf) on the service invoice. For the official regulatory text, refer to the EPA’s Section 608 page.
Common Mistakes to Avoid When Replacing an AC Compressor
- Skipping the system flush – Residual metal shavings or old oil will contaminate the new compressor and cause early failure.
- Reusing old O‑rings or seals – Even microscopic tears can lead to slow leaks that degrade performance over time.
- Over‑ or under‑charging refrigerant – Both conditions reduce cooling capacity and stress the compressor. Use a calibrated scale and follow the vehicle‑specific charge weight.
- Neglecting to replace the accumulator/drier – This component absorbs moisture; a saturated drier will introduce acid into the system.
- Ignoring belt tension and alignment – A misaligned or loose serpentine belt can slip, overheat, and damage the new compressor clutch.
Following a disciplined, step‑by‑step process and double‑checking each of these items dramatically reduces comeback rates.
Cost Overview and Warranty Considerations
A typical compressor‑only replacement (parts + labor) ranges from $600‑$1,200 depending on vehicle make and labor rates. Adding the accumulator/drier, orifice tube, and condenser can raise the total to $1,200‑$2,000 but often saves money by preventing repeat visits. Many OEM and aftermarket warranties require the drier and condenser to be replaced at the same time; failing to do so can void the compressor warranty. Keep all receipts and service records — they are essential if a warranty claim arises later.
Warranty Registration and Documentation
Most manufacturers require the warranty to be registered within 30 days of installation. Keep a complete file that includes: the original invoice, a copy of the technician’s certification, photos of the replaced drier and condenser, and the refrigerant charge weight recorded on the service ticket. This documentation protects you if a premature failure occurs and simplifies any claim process. Keep your records organized with our routine upkeep schedule.
Potential Issues with Incomplete Removal of Metal Shreds in an AC Rebuild
Rebuilding an air conditioning (AC) system can sometimes seem like a straightforward solution, but it comes with its own set of challenges, especially if metal shreds are not entirely cleared from the system. Here's what can go wrong:
- Compressor Failure : The most immediate problem often surfaces with the compressor. Any leftover metal shards can quickly damage the new compressor by scoring its internal components, leading to another failure shortly after installation.
- Belt Damage : Metal particles can cause the AC system to seize, as these shreds obstruct the normal flow of refrigerant. This blockage can lead to the AC compressor not turning, which can burn or snap the drive belt connected to it. Consequently, this might affect other systems powered by the same belt, such as the power steering.
- Loss of Function Across Systems : When an AC failure damages the belt, it can also compromise other vehicle systems. For instance, if the AC and power steering share a belt, you'll lose power steering function, risking safety during travel.
- Ongoing Contamination : Metal shreds that settle in hoses, filters, or other components can later dislodge and circulate back into the new compressor or pump. This can cause repeated breakdowns until a complete flush or another rebuild is performed.
- Increased Repair Costs : Each failure adds to the cost and time needed for repairs. Repeated rebuilds or flushing processes to ensure all contaminants are removed can increase expenses significantly.
Proper cleaning and flushing during an AC rebuild are crucial to prevent these potential issues and ensure a long-lasting repair.
Why Inspecting Your AC Condenser for Damage is Crucial
The importance of inspecting your AC condenser cannot be overstated. This component, located behind the front grille of your vehicle, is vulnerable to road debris such as rocks, dirt, and other harmful materials that can cause significant damage.
Key Reasons to Inspect:
- Prevent Cooling Issues : A damaged condenser can lead to reduced cooling efficiency. This not only affects comfort while driving but can also put extra strain on other parts of the AC system.
- Avoid Costly Repairs : Catching damage early can save you money. A routine inspection allows for minor repairs before they escalate into more expensive problems.
- Maintain Vehicle Value : A well-functioning AC system contributes to the overall health of your car. Regular checks help preserve the vehicle's resale value by ensuring all systems are in optimal condition.
- Enhance Longevity : Routine inspections can prolong the life of your AC system. Addressing damages promptly ensures that the condenser and surrounding components last longer.
Inspection Tips:
- Visual Examination : Regularly look for visible signs of damage, such as dents and punctures.
- Listen for Unusual Noises : Strange sounds can indicate internal damage.
- Check for Leaks : Pooling liquid underneath your vehicle could signify a leaking condenser.
Regular inspection of your AC condenser is a small step that can have significant benefits in maintaining your vehicle's performance and value. By staying proactive, you can avoid headaches down the road and ensure your AC system continues to run smoothly.
Post-Installation Checks and System Verification
After the new compressor is installed and the system recharged, run through these verification steps to confirm a healthy repair:
- Verify belt tension and alignment with a tension gauge; adjust to the manufacturer’s spec.
- Start the engine, engage the AC, and record high‑ and low‑side pressures using a manifold gauge set. Compare readings to the service manual’s pressure‑temperature chart.
- Measure vent temperature at the center dashboard outlet; it should be within 5 °F of the spec for the ambient condition.
- Listen for abnormal clutch cycling, knocking, or hissing that could indicate a leak or restriction.
- Perform an electronic leak check on all fittings, the compressor shaft seal, and the condenser.
- Document all pressures, temperatures, and leak‑test results on the service order for warranty records.
These checks catch issues early and provide a baseline for future maintenance. Verify performance using our condenser performance test and warm air diagnosis guides. Vehicle safety guidelines from NHTSA recommend verifying belt tension after service.
Conclusion
When replacing an AC compressor, it is vital to consider the accompanying components that may also require replacement for optimal performance. By following expert advice and addressing all necessary parts, you can ensure the long-term efficiency of your vehicle's air conditioning system.
Ready to get your AC running like new? Schedule a professional inspection today.
Frequently Asked Questions On When Replacing Ac Compressor What Else Should Be Replaced: Essential Components
What To Change When You Replace Ac Compressor?
When replacing the AC compressor, it is recommended to also replace the following items: the new compressor itself, basic hand tools like wrenches and screwdrivers, refrigerant recovery tank, equipment for system recovery and charging, refrigerant, and a torch. Additionally, it is important to change all necessary seals to hook up the AC lines, the accumulator or receiver drier, and the orifice tube if equipped.
What Are The Parts Need To Be Replaced With A Ac Compressor?
When replacing an AC compressor, you should also replace the complete compressor assembly, all necessary seals, the accumulator or receiver drier, and the orifice tube if equipped.
Can I Replace Ac Compressor Only?
Yes, you can replace the AC compressor only. However, it's recommended to also replace the necessary seals, accumulator, orifice tube, and receiver/drier.
What Needs To Be Replaced When Ac Compressor Fails?
When the AC compressor fails, it is recommended to replace the following parts: the AC compressor assembly, seals for connecting AC lines, accumulator or receiver drier, and orifice tube (if equipped). Basic hand tools, refrigerant recovery tank, equipment for recovering and charging the system, refrigerant, and a torch are also needed for the replacement process.
What Should Be Done If The Shop Did Not Perform A Vacuum Test On The AC System?
If the shop didn't conduct a vacuum test on the AC system, it's essential to request that they perform one. This test helps ensure the system is properly sealed, with no leaks present.
Here’s what you should ask the shop to do:
- Conduct a Vacuum Test : This step confirms the integrity of the system by verifying that all connections are secure and leak-free.
- Inspect All Components : Have them check hoses, connections, and seals for any signs of wear or damage that could lead to leaks.
- Monitor Pressure : They should monitor the pressure levels to detect any potential issues.
A thorough vacuum test and inspection can prevent future problems, ensuring your AC system operates efficiently.
How Often Should I Replace the AC Accumulator/Drier?
Most manufacturers recommend replacing the accumulator or receiver‑drier every time the system is opened for service (e.g., compressor swap). In practice, a fresh drier every 2‑3 years or 30,000 miles helps keep moisture levels low and protects the new compressor.
Can I Use R‑1234yf in a System Designed for R‑134a?
No. R‑1234yf operates at different pressures and requires compatible seals, hoses, and a specific compressor. Retrofitting without a full system conversion can cause leaks and compressor damage. Always follow the vehicle manufacturer’s refrigerant specification.
What Are the Signs of a Failing AC Condenser?
Look for reduced cooling performance, visible fin damage, oily residue on the condenser surface, or a hissing noise when the AC runs. Early detection avoids more costly repairs later.