Removing the front cover of your LG air conditioner is essential for cleaning, maintenance, or filter replacement. This guide walks you through the process safely and efficiently, ensuring you avoid damage and keep your unit running smoothly.
Key Takeaways
- Always turn off the power before removing the front cover to prevent electrical hazards.
- Use gentle pressure when lifting the cover—LG designs often feature snap-in clips that can break if forced.
- Check your model number first, as removal steps may vary slightly between LG window, split, and portable AC units.
- Clean the filter and interior while the cover is off to improve airflow and energy efficiency.
- Reattach the cover securely to prevent rattling noises and ensure proper operation.
- Keep small parts organized—some models include screws or latches that must be reinstalled correctly.
- Refer to the user manual for model-specific instructions if available.
How to Remove Front Cover of LG Air Conditioner
Keeping your LG air conditioner clean and well-maintained is key to enjoying cool, fresh air all summer long—and beyond. Over time, dust, pet hair, and debris can build up inside the unit, reducing efficiency and potentially affecting indoor air quality. One of the most important maintenance tasks is removing the front cover to access the air filter and internal components. Whether you’re performing routine cleaning, replacing a filter, or troubleshooting an issue, knowing how to safely remove the front cover of your LG air conditioner is a must-have skill for any homeowner or renter.
In this comprehensive 2026 guide, we’ll walk you through the entire process of removing the front cover of your LG air conditioner—step by step. We’ll cover different LG AC types (window, split, and portable), highlight safety precautions, and share expert tips to avoid common mistakes. By the end, you’ll feel confident handling this task like a pro, ensuring your unit stays in top condition for years to come.
Why Removing the Front Cover Is Important
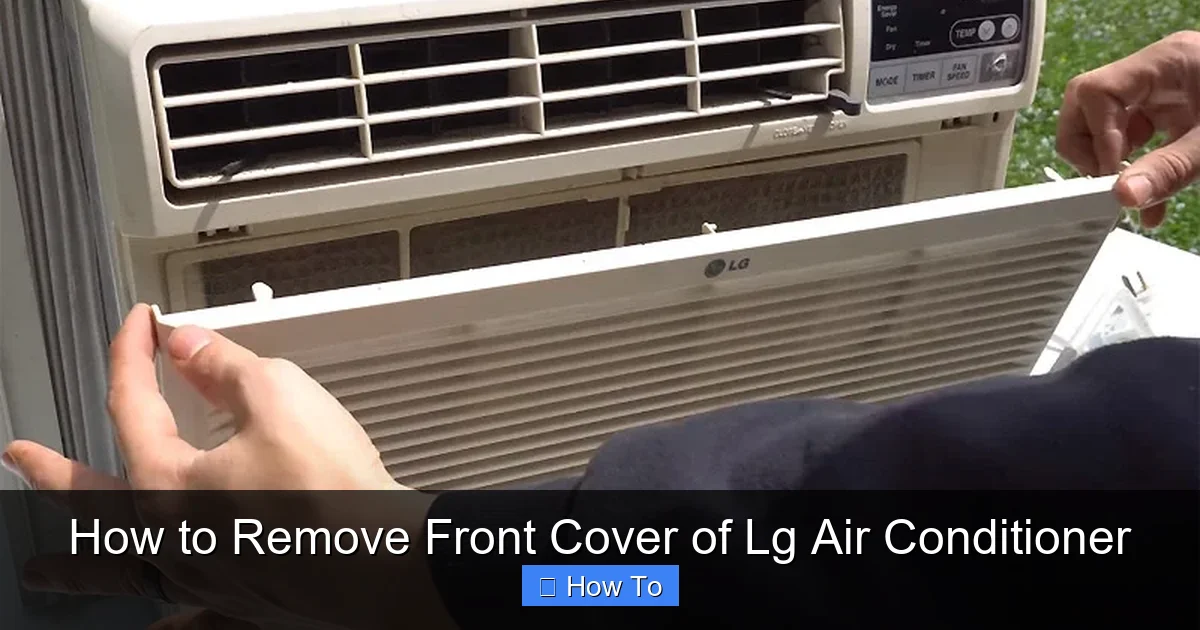
Visual guide about How to Remove Front Cover of Lg Air Conditioner
Image source: arlingtonairconditioningheating.com
Before diving into the how-to, let’s talk about why this step matters. The front cover of your LG air conditioner isn’t just a cosmetic shell—it protects internal components and houses the air filter, which plays a critical role in air quality and system performance.
Over time, the filter collects dust, pollen, mold spores, and other airborne particles. If left unchecked, this buildup can restrict airflow, forcing your AC to work harder and consume more energy. In extreme cases, a clogged filter can lead to frozen coils, reduced cooling capacity, or even system failure.
Removing the front cover allows you to:
– Clean or replace the air filter
– Wipe down internal surfaces
– Inspect for mold or mildew
– Check for obstructions in the airflow path
– Perform deeper maintenance (like coil cleaning)
Regular access to these components—typically every 1–2 months during peak usage—can extend the life of your unit and keep your energy bills low. Plus, it’s a simple task that takes just a few minutes once you know how.
Safety First: Precautions Before You Begin
Safety should always come first when working with any electrical appliance—especially air conditioners, which are connected to your home’s power supply. Here are the essential safety steps to follow before removing the front cover:
1. Turn Off the Power
Never attempt to remove the front cover while the unit is powered on. Even if the AC appears to be off, it may still be receiving electricity. To be safe:
– Turn off the air conditioner using the remote or control panel.
– Unplug the unit from the wall outlet.
– For window or split units hardwired into your electrical system, turn off the corresponding circuit breaker.
This step prevents electric shock and protects internal components from accidental damage.
2. Allow the Unit to Cool Down
If your AC has been running recently, give it at least 15–20 minutes to cool down. The internal coils and compressor can get very hot, and touching them too soon may cause burns.
3. Work in a Clean, Dry Area
Choose a well-lit, dry space to perform the removal. Avoid working in damp or humid conditions, as moisture can damage electrical parts or promote mold growth.
4. Use Proper Tools (If Needed)
Most LG air conditioners are designed for tool-free access, but some models may require a Phillips-head screwdriver or flathead tool to release latches. Keep a small toolkit nearby just in case.
5. Wear Protective Gear
While not always necessary, wearing gloves can protect your hands from sharp edges or dust. Safety glasses are also a good idea if you’re cleaning inside the unit.
Identifying Your LG Air Conditioner Model
LG offers a wide range of air conditioners, including window units, split systems (wall-mounted), and portable models. The method for removing the front cover can vary slightly depending on the type and model year.
To ensure you follow the correct steps, start by identifying your unit:
– Look for a label or sticker on the side or back of the unit. It will include the model number (e.g., LW1216ER, LP1419IVSM, or LS1221IVSM).
– Check the user manual—if you still have it.
– Visit LG’s official support website and enter your model number for specific instructions.
In general:
– Window units (like the LW series) typically have a front grille that lifts or swings open.
– Split systems (like the LS or LA series) often feature a front panel that detaches from the indoor unit.
– Portable ACs (like the LP series) may have a removable front cover or side panel.
Knowing your model helps you avoid confusion and ensures you don’t force parts that aren’t meant to be moved.
Step-by-Step Guide: Removing the Front Cover
Now that you’ve prepared safely and identified your model, it’s time to remove the front cover. Below is a detailed, step-by-step process that works for most LG air conditioners in 2026. We’ll cover the most common designs, with notes for variations.
Step 1: Power Down and Unplug the Unit
As emphasized earlier, always disconnect power before starting. Unplug the AC from the wall or turn off the breaker. This is non-negotiable for safety.
Step 2: Locate the Front Cover
The front cover is the large panel on the front of the unit, usually featuring horizontal or vertical slats for airflow. It may be labeled “Air Intake” or “Filter Access.”
On some models, the cover is flush with the unit. On others, it may have a slight lip or groove along the top or sides.
Step 3: Check for Latches or Screws
Most modern LG units use snap-in clips or spring-loaded latches—no tools required. However, older models or certain portable units may have small screws securing the cover.
Look for:
– Small plastic tabs along the top or sides
– A latch mechanism near the bottom
– Screws hidden behind a decorative cover or sticker
If you see screws, use a Phillips-head screwdriver to remove them. Keep them in a small container so they don’t get lost.
Step 4: Gently Lift or Pull the Cover
This is where many people go wrong—using too much force. LG designs are engineered for easy access, so the cover should release with minimal effort.
Here’s how to do it properly:
For Window and Split Units:
– Place your fingers along the top edge of the front cover.
– Gently pull the top away from the unit. You should feel it “unclip” from the frame.
– Once the top is free, tilt the cover downward and lift it off.
– Some models may have a hinge at the bottom—simply lift and pivot the cover up.
For Portable Units:
– Look for a release button or latch on the front or side.
– Press the button while pulling the cover outward.
– If there’s no button, try sliding the cover sideways or lifting it straight up.
Tip:
If the cover doesn’t budge, don’t force it. Double-check for hidden screws or clips. Forcing it can crack the plastic or damage internal wiring.
Step 5: Set the Cover Aside Safely
Once removed, place the front cover on a clean, flat surface—preferably on a towel or soft cloth to prevent scratches. Avoid placing it on the floor where it could collect dust or get stepped on.
What to Do Once the Cover Is Off
Now that the front cover is off, you’ve gained access to the air filter and internal components. This is the perfect time to perform routine maintenance.
1. Remove and Clean the Air Filter
The air filter is usually located just behind the front cover. It’s a rectangular mesh panel that slides out easily.
– Gently pull the filter out by its handle or edge.
– If it’s washable (most LG filters are), rinse it under lukewarm water. Use a mild detergent if needed.
– Let it air dry completely before reinserting. Never put a wet filter back in—this can promote mold growth.
2. Wipe Down the Interior
Use a soft, dry cloth or a vacuum with a brush attachment to remove dust from the interior surfaces. Pay special attention to the evaporator coils and fan blades.
Avoid using water or cleaning sprays inside the unit unless specified in the manual. Excess moisture can damage electrical components.
3. Inspect for Mold or Mildew
Check for any signs of mold, especially around the drain pan or coil area. If you spot mold, use a mixture of water and white vinegar (1:1 ratio) on a cloth to gently wipe it away. Never spray liquid directly into the unit.
4. Check for Obstructions
Make sure nothing is blocking the airflow—like paper, leaves, or pet hair. Clear any debris you find.
Reattaching the Front Cover
Once you’ve completed your cleaning or maintenance, it’s time to put the front cover back on. This step is just as important as removal—improper reattachment can cause noise, reduced efficiency, or even damage.
Step 1: Align the Cover Correctly
Make sure the cover is oriented the right way. Most LG covers have a specific top and bottom. Look for alignment marks or asymmetrical edges.
Step 2: Reinsert the Bottom First (If Applicable)
On models with a bottom hinge, slide the bottom edge into place first. Then tilt the top toward the unit.
Step 3: Snap the Top into Place
Press the top edge firmly but gently until you hear or feel it click into the clips. Don’t slam it—firm pressure is enough.
Step 4: Secure Any Screws or Latches
If your model uses screws, reinsert and tighten them. For latches, make sure they’re fully engaged.
Step 5: Test the Fit
Give the cover a light tug to ensure it’s secure. It shouldn’t wobble or come loose. If it does, double-check the clips or screws.
Troubleshooting Common Issues
Even with careful handling, you might run into problems. Here are some common issues and how to fix them:
Problem: The Cover Won’t Come Off
– Cause: Hidden screws or stiff clips.
– Solution: Recheck for screws under stickers or caps. If clips are stiff, try warming the plastic slightly with a hairdryer (on low heat) to make it more flexible.
Problem: The Cover Won’t Snap Back On
– Cause: Misalignment or damaged clips.
– Solution: Ensure the cover is properly aligned. If a clip is broken, contact LG support—don’t force it.
Problem: Rattling Noise After Reassembly
– Cause: Loose cover or missing screw.
– Solution: Recheck all fasteners and ensure the cover is fully seated.
Problem: Filter Doesn’t Fit After Cleaning
– Cause: Warped filter or incorrect reinsertion.
– Solution: Let the filter dry completely. If it’s warped, replace it with a genuine LG filter.
Maintenance Tips for 2026 and Beyond
To keep your LG air conditioner running efficiently in 2026 and beyond, follow these best practices:
– Clean the filter every 4–6 weeks during peak usage seasons.
– Schedule professional maintenance once a year to check refrigerant levels, coils, and electrical connections.
– Use a cover during off-seasons to protect the unit from dust and debris.
– Upgrade to a smart filter if available—some 2026 LG models support Wi-Fi-enabled filters that alert you when cleaning is needed.
Conclusion
Removing the front cover of your LG air conditioner is a simple yet essential task that every owner should know how to do. With the right preparation, a gentle touch, and attention to detail, you can safely access the filter and internal components for cleaning and maintenance. Not only does this improve air quality and efficiency, but it also helps prevent costly repairs down the line.
Remember: always power off the unit, identify your model, and follow the steps carefully. If you’re ever unsure, consult your user manual or contact LG customer support. With regular care, your LG air conditioner will keep you cool and comfortable for many summers to come.
By following this 2026 guide, you’re not just maintaining your AC—you’re taking control of your home’s comfort and energy use. So go ahead, give your unit the attention it deserves. Your lungs (and your wallet) will thank you.