
Installing an LG inverter air conditioner can save energy and improve comfort, but it requires careful planning and execution. This guide walks you through every step—from choosing the right location to testing the system—ensuring a safe and professional-quality installation.
Key Takeaways
- Choose the right location: Pick a shaded, well-ventilated wall with enough space for airflow and access to power.
- Gather the right tools: You’ll need a drill, level, wrench set, vacuum pump, and electrical tester for a smooth installation.
- Follow safety protocols: Always turn off power at the breaker and wear protective gear to prevent accidents.
- Seal and insulate properly: Prevent leaks and energy loss by sealing refrigerant lines and wall holes with foam and tape.
- Test the system thoroughly: Run a full cooling cycle and check for unusual noises, leaks, or error codes.
- Consider professional help: If you’re unsure about electrical or refrigerant work, hire a licensed technician.
- Register your unit: Activate your LG warranty online after installation to ensure coverage and support.
How to Install LG Inverter Air Conditioner: A Complete Step-by-Step Guide
Installing an LG inverter air conditioner might seem like a daunting task, but with the right preparation and guidance, it’s entirely doable—even for DIY enthusiasts. Unlike traditional AC units, LG inverter models are designed to adjust their compressor speed based on room temperature, which means they use less energy, run quieter, and maintain more consistent comfort. However, proper installation is critical to unlocking these benefits. A poorly installed unit can lead to reduced efficiency, higher electricity bills, refrigerant leaks, or even system failure.
In this comprehensive guide, we’ll walk you through every step of installing your LG inverter air conditioner—from planning and preparation to final testing and troubleshooting. Whether you’re replacing an old unit or installing a brand-new system, this guide will help you do it safely, correctly, and efficiently. We’ll cover everything you need to know, including tools, safety tips, wiring basics, and common mistakes to avoid. By the end, you’ll have a cool, quiet, and energy-efficient air conditioner running smoothly in your home.
What You’ll Need Before You Begin
Before you start drilling holes or lifting heavy components, make sure you have all the necessary tools and materials. Rushing into installation without proper preparation can lead to mistakes, delays, or safety hazards. Here’s a checklist of what you’ll need:
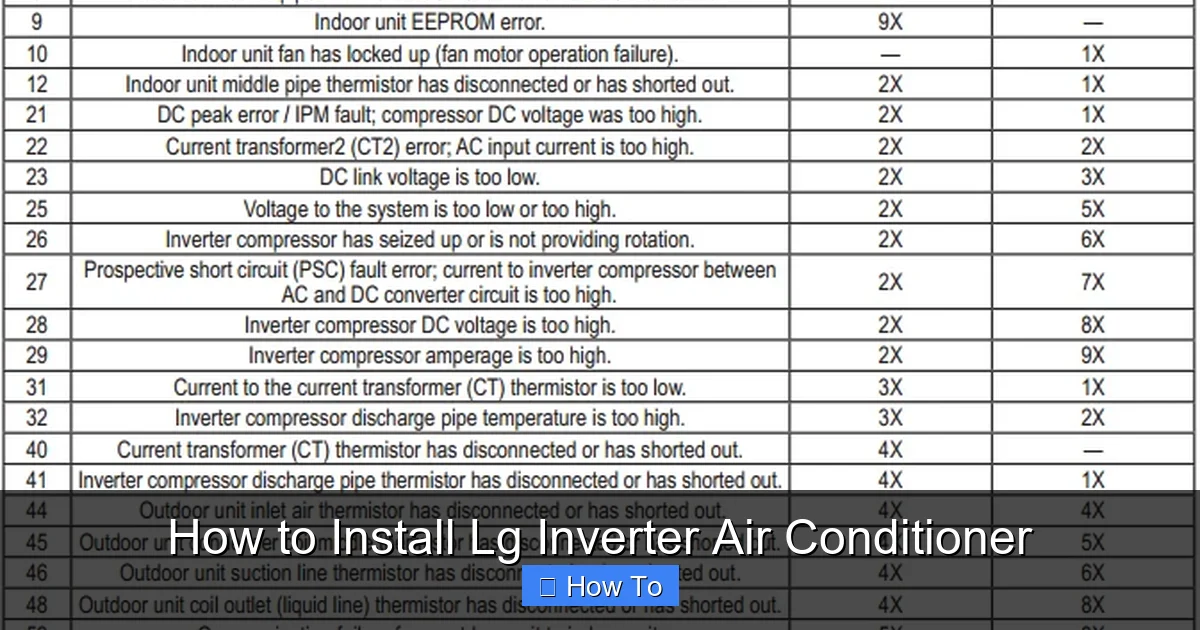
Visual guide about How to Install Lg Inverter Air Conditioner
Image source: acerrorcode.com
Essential Tools
- Power drill and drill bits: For making holes in the wall and mounting brackets.
- Level: To ensure the indoor and outdoor units are mounted straight.
- Wrench set (including adjustable wrench): For tightening refrigerant line connections.
- Vacuum pump: To remove air and moisture from the refrigerant lines—this is crucial for system performance.
- Manifold gauge set: To monitor pressure during evacuation and charging.
- Pipe cutter or hacksaw: For cutting refrigerant lines to the correct length.
- Flaring tool: To create secure, leak-free connections on copper pipes.
- Electrical tester (multimeter): To verify power is off and check wiring.
- Screwdrivers (Phillips and flathead): For assembling brackets and panels.
- Measuring tape: For accurate placement and spacing.
- Stud finder: To locate wall studs and avoid drilling into them unnecessarily.
Materials and Supplies
- Mounting bracket and screws: Usually included with the LG unit—double-check the package.
- Refrigerant lines (copper tubing): Typically 1/4″ and 3/8″ for most residential units. Length depends on distance between indoor and outdoor units.
- Insulation sleeves: To wrap refrigerant lines and prevent condensation.
- Wall sleeve or grommet: To protect lines passing through the wall and keep pests out.
- Sealant (silicone or foam): To seal the wall hole and prevent air leaks.
- Electrical cable: 3-core wire (live, neutral, ground) rated for the AC’s power requirements.
- Cable ties and clips: To secure wiring and lines neatly.
- Safety gear: Gloves, safety goggles, and non-slip shoes.
Optional but Helpful
- Helper: Air conditioners are heavy—having a second person makes lifting and positioning much easier.
- Ladder or step stool: For reaching high mounting locations.
- Vacuum cleaner: To clean up dust and debris after drilling.
- Smartphone or camera: To take reference photos before disconnecting wires.
Step 1: Choose the Right Location
The location of your LG inverter air conditioner plays a huge role in its performance, efficiency, and lifespan. A poor choice can lead to poor airflow, noise issues, or even system damage. Here’s how to pick the best spot for both the indoor and outdoor units.
Indoor Unit Placement
- Height: Mount the indoor unit high on the wall, ideally 6–8 feet above the floor. This allows cool air to descend and circulate evenly.
- Clearance: Leave at least 6–12 inches of space above, below, and on both sides of the unit. Avoid placing it behind curtains or furniture.
- Sunlight and heat sources: Avoid direct sunlight, near heaters, stoves, or lamps. Heat can interfere with the thermostat and cause the unit to overwork.
- Airflow: Choose a spot where air can flow freely into and out of the unit. Don’t install it in a corner or enclosed space.
- Access for maintenance: Make sure you can easily reach the unit for filter cleaning and servicing.
Outdoor Unit Placement
- Level ground: Place the outdoor unit on a flat, stable surface like a concrete pad or wall-mounted bracket. Use a level to ensure it’s perfectly horizontal.
- Ventilation: Leave at least 2 feet of clearance on all sides, especially the front and top. This allows proper airflow for heat exchange.
- Shade: While the unit is designed to withstand weather, placing it in partial shade can improve efficiency and reduce wear.
- Noise considerations: Avoid placing it near bedrooms or quiet areas. LG inverter units are quiet, but the outdoor fan still makes some noise.
- Drainage: Ensure the unit can drain condensation easily. Avoid low spots where water might pool.
Distance Between Units
The indoor and outdoor units should be as close as possible—ideally under 25 feet. Longer distances require larger refrigerant lines and may need additional refrigerant charge. Check your LG model’s manual for maximum allowable distance.
Step 2: Turn Off Power and Prepare the Area
Safety is paramount when working with electrical appliances. Before you touch any wires or drill into walls, make sure the power is completely off.
Turn Off the Circuit Breaker
- Locate the main electrical panel in your home.
- Find the breaker labeled for the air conditioner or the room where you’re installing it.
- Switch it to the “OFF” position.
- Use a multimeter or non-contact voltage tester to confirm no power is reaching the outlet or wiring.
Clear the Work Area
- Remove furniture, rugs, or decorations near the installation site.
- Cover floors with a drop cloth to catch dust and debris.
- Ensure the area is well-lit—use a work light if needed.
Check the Wall Structure
- Use a stud finder to locate wall studs. Avoid drilling into studs unless necessary—mounting brackets usually attach directly to the wall.
- Make sure the wall is strong enough to support the indoor unit (typically 50–100 lbs).
- If installing on drywall, use heavy-duty anchors or toggle bolts for secure mounting.
Step 3: Install the Indoor Unit Mounting Bracket
The mounting bracket is the backbone of your indoor unit installation. If it’s not secure, the entire unit could fall, causing damage or injury.
Mark the Bracket Position
- Hold the bracket against the wall at the desired height.
- Use a level to ensure it’s perfectly horizontal.
- Mark the screw holes with a pencil.
Drill Pilot Holes
- Drill pilot holes at the marked spots using a drill bit slightly smaller than the screws.
- If drilling into concrete or brick, use a masonry bit and wall plugs.
Secure the Bracket
- Align the bracket with the holes and insert screws.
- Tighten them firmly, but don’t over-tighten—this can strip the holes or damage the bracket.
- Double-check with the level to ensure it’s still straight.
Tip: Use a Template
Most LG units come with a paper template. Tape it to the wall to guide your drilling and ensure accurate placement.
Step 4: Drill the Wall Hole for Refrigerant Lines
This step requires precision. The hole must be the right size and angle to allow lines to pass through without damage and to prevent water from entering.
Determine Hole Size and Angle
- The hole should be slightly larger than the combined diameter of the refrigerant lines, drain hose, and electrical cable—usually 2.5 to 3 inches.
- Drill at a slight downward angle (about 1–2 degrees) toward the outside. This helps rainwater drain out instead of seeping in.
Drill from Inside to Outside
- Start drilling from the inside using a hole saw attachment.
- Go slowly to avoid cracking the wall or damaging pipes behind it.
- Once the drill bit pokes through, finish from the outside to clean up the edges.
Insert the Wall Sleeve
- Slide a rubber or plastic wall sleeve into the hole to protect the lines and seal gaps.
- Apply silicone sealant around the edges to prevent air and water leaks.
Step 5: Connect the Refrigerant Lines
This is one of the most critical steps. Improperly connected refrigerant lines can cause leaks, reduce cooling, or damage the compressor.
Prepare the Copper Lines
- Cut the lines to the required length using a pipe cutter—avoid using a hacksaw if possible, as it can leave burrs.
- Deburr the cut ends with a reamer or file to ensure smooth, clean edges.
- Flare the ends using a flaring tool. This creates a tight seal when connected to the unit.
Connect to the Indoor Unit
- Remove the service panel on the indoor unit.
- Locate the refrigerant line ports (usually labeled “L” for liquid and “G” for gas).
- Slide the insulation sleeves over the lines.
- Attach the flared ends to the ports and tighten with a wrench. Use two wrenches—one to hold the port and one to tighten the nut—to avoid twisting the pipe.
Route Lines Through the Wall
- Feed the lines, drain hose, and electrical cable through the wall hole from inside to outside.
- Bundle them together with cable ties, but don’t overtighten.
- Wrap the entire bundle with insulation tape for extra protection.
Step 6: Install the Outdoor Unit
The outdoor unit houses the compressor, condenser, and fan. It must be installed securely and level to function properly.
Prepare the Base
- If using a concrete pad, ensure it’s level and cured.
- If wall-mounting, install the outdoor bracket securely using expansion bolts.
Position the Unit
- Lift the outdoor unit with help—it can weigh 70–100 lbs.
- Place it on the pad or attach it to the bracket.
- Use a level to check alignment. Adjust with shims if needed.
Connect Refrigerant Lines
- Remove the outdoor unit’s service panel.
- Connect the lines to the corresponding ports (match the labels).
- Tighten the connections with a wrench, using the two-wrench method.
Connect the Drain Hose
- Attach the drain hose to the outdoor unit’s drain port.
- Route it downward to a suitable drainage area—don’t let it pool near the unit.
Step 7: Wire the Units Together
Electrical wiring must be done correctly to ensure safety and proper operation. If you’re not confident with electrical work, consult a licensed electrician.
Run the Electrical Cable
- Use a 3-core cable (live, neutral, ground) rated for the AC’s voltage and amperage (usually 220–240V).
- Route the cable through the wall hole with the refrigerant lines.
- Leave extra length at both ends for connections.
Connect Indoor Unit Wiring
- Open the indoor unit’s electrical compartment.
- Match the wires to the terminal block: L (live), N (neutral), and ⏚ (ground).
- Tighten the screws securely. Double-check connections.
Connect Outdoor Unit Wiring
- Open the outdoor unit’s electrical panel.
- Connect the wires to the corresponding terminals.
- Ensure the ground wire is properly bonded.
Tip: Label Wires
Before disconnecting anything, label the wires or take a photo. This prevents confusion during reconnection.
Step 8: Evacuate the Refrigerant Lines
Air and moisture in the refrigerant lines can reduce efficiency and damage the compressor. Evacuation removes these contaminants using a vacuum pump.
Connect the Manifold Gauge
- Attach the manifold gauge to the service ports on the outdoor unit.
- Connect the yellow hose to the vacuum pump.
- Open the low-pressure valve (usually the blue one).
Run the Vacuum Pump
- Turn on the pump and let it run for at least 15–30 minutes.
- Monitor the gauge—it should drop to -30 inHg (inches of mercury) or lower.
- Close the valve and turn off the pump.
- Wait 5–10 minutes to ensure the vacuum holds. If it drops, there’s a leak.
Close the Valves
- Once evacuated, close both valves on the manifold gauge.
- Disconnect the hoses carefully to avoid releasing refrigerant.
Step 9: Test the System
Now it’s time to power up and see if everything works. Take it slow and watch for any issues.
Restore Power
- Go back to the circuit breaker and turn it on.
- Wait a few seconds before turning on the AC.
Turn On the AC
- Use the remote to set the unit to cooling mode.
- Set the temperature low (e.g., 68°F) to trigger immediate cooling.
Check for Proper Operation
- Listen for the compressor and fan starting up.
- Feel cold air coming from the indoor unit.
- Check the outdoor unit—the fan should spin, and the compressor should run.
- Look for error codes on the display. Common codes include CH 01 (communication error) or CH 05 (refrigerant issue).
Inspect for Leaks
- Use a leak detector or soapy water to check all refrigerant connections.
- Look for bubbles—this indicates a leak.
Troubleshooting Common Issues
Even with careful installation, problems can occur. Here’s how to fix the most common ones.
Unit Won’t Turn On
- Check the circuit breaker—it may have tripped.
- Verify wiring connections are tight and correct.
- Ensure the remote has batteries and is paired.
No Cooling or Weak Cooling
- Check the air filter—it may be dirty.
- Ensure the refrigerant lines weren’t kinked during installation.
- Verify the system was properly evacuated and charged.
Water Leaking Indoors
- Check the drain hose—it may be clogged or improperly sloped.
- Ensure the indoor unit is level—tilting can cause water to pool.
Strange Noises
- Rattling: Loose panels or mounting brackets.
- Gurgling: Normal during startup, but persistent noise may indicate a refrigerant issue.
- Banging: Compressor problem—turn off and call a technician.
Final Steps and Maintenance Tips
Once your LG inverter air conditioner is running smoothly, take these final steps to ensure long-term performance.
Seal the Wall Hole
- Fill any gaps around the wall sleeve with expanding foam or silicone sealant.
- This prevents drafts, pests, and water intrusion.
Clean Up
- Vacuum dust and debris from the work area.
- Dispose of packaging and old materials responsibly.
Register Your Unit
- Visit LG’s official website and register your air conditioner using the model and serial numbers.
- This activates your warranty and gives you access to support and updates.
Schedule Regular Maintenance
- Clean or replace the air filter every 1–2 months.
- Inspect refrigerant lines and connections annually.
- Have a professional service the unit every 1–2 years.
Conclusion
Installing an LG inverter air conditioner is a rewarding project that can save you money and improve your home’s comfort. While it requires attention to detail and some technical know-how, following this guide step by step will help you achieve a safe, efficient, and professional-quality installation. Remember, if you ever feel unsure—especially with electrical or refrigerant work—don’t hesitate to call a licensed technician. Your safety and the performance of your AC unit are worth the investment. With proper care, your LG inverter air conditioner will keep you cool for many summers to come.

