
This guide walks you through the safe and correct way to remove the front cover of an LG air conditioner, whether it’s a window unit, portable model, or split system. You’ll learn essential tools, safety tips, and troubleshooting advice to avoid damage.
Key Takeaways
- Safety first: Always unplug the unit before starting to prevent electrical shock or injury.
- Know your model: LG air conditioners vary by type—window, portable, or split—so identify yours before proceeding.
- Use the right tools: Most covers require only your hands or a flathead screwdriver; avoid prying with force.
- Follow panel clips: Front covers are held by plastic clips or screws—gently release them to avoid breaking.
- Clean while open: Take advantage of access to clean filters, coils, and vents for better performance.
- Reattach securely: Ensure all clips snap back in place to maintain airflow and unit integrity.
- When to call a pro: If the cover is stuck or damaged, consult an LG technician to avoid warranty issues.
How to Get Front Cover Off LG Air Conditioner
If you’ve ever needed to clean your LG air conditioner, replace a filter, or inspect internal components, you’ve probably wondered: How do I get the front cover off? Whether you’re dealing with a window unit, a portable AC, or a split-system model, removing the front panel is often the first step—but it must be done carefully to avoid damaging delicate parts.
This comprehensive guide will walk you through the entire process, from identifying your LG air conditioner type to safely removing and reattaching the front cover. You’ll learn the tools you need, step-by-step instructions, safety precautions, and troubleshooting tips. By the end, you’ll feel confident handling this common maintenance task like a pro.
Let’s get started!
Why Remove the Front Cover?
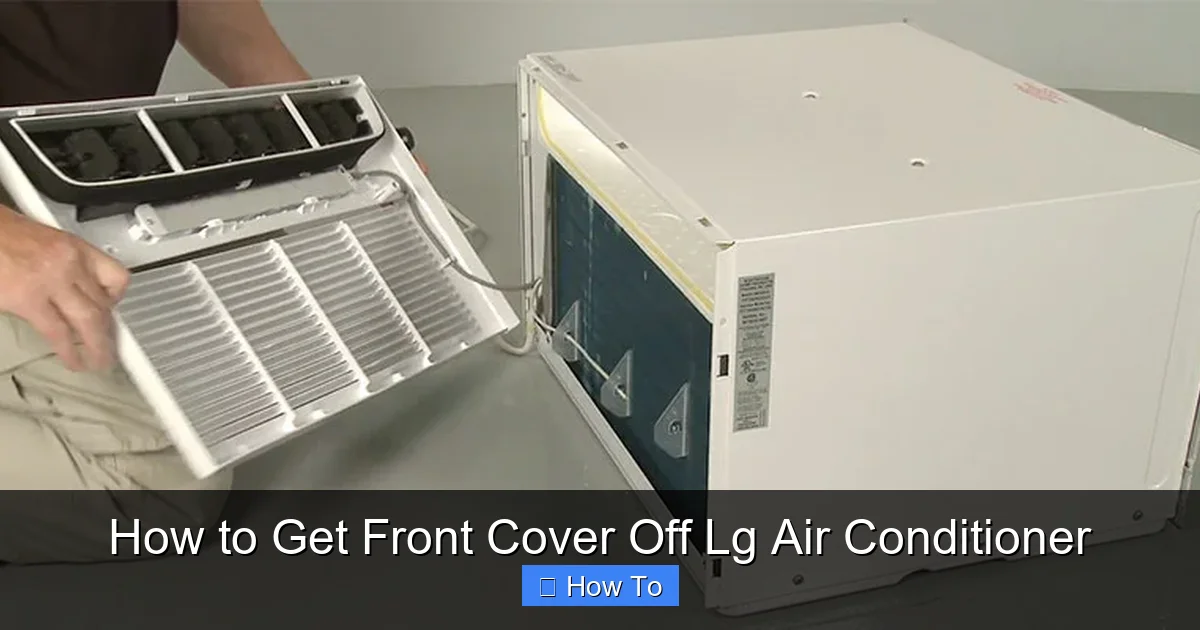
Visual guide about How to Get Front Cover Off Lg Air Conditioner
Image source: nextmodernhome.com
Before diving into the how-to, it’s important to understand why you might need to remove the front cover of your LG air conditioner. Common reasons include:
- Cleaning the air filter: Dust and debris build up over time, reducing efficiency and air quality.
- Deep cleaning the unit: Accessing internal components like coils and fans for thorough cleaning.
- Inspecting for damage: Checking for mold, pests, or wear and tear.
- Replacing parts: Installing new filters, sensors, or control panels.
- Preparing for storage: Cleaning and covering the unit before winter or long-term storage.
Regular maintenance not only extends the life of your air conditioner but also improves its cooling performance and energy efficiency. And the front cover is your gateway to all of that.
Safety First: Precautions Before You Begin
Safety should always come first when working with electrical appliances. Air conditioners, even when turned off, can retain electrical charge or have sharp edges. Follow these essential safety steps:
1. Turn Off and Unplug the Unit
Never attempt to remove the front cover while the air conditioner is plugged in. Even if it’s turned off at the remote or control panel, there could still be power flowing to internal components.
- Locate the power cord and unplug it from the wall outlet.
- If your unit is hardwired (common with window or split systems), turn off the circuit breaker that controls the AC.
- Wait at least 10–15 minutes before starting. This allows capacitors to discharge and reduces the risk of shock.
2. Work in a Well-Lit, Dry Area
Choose a clean, dry space with good lighting. Avoid working outdoors in humid or rainy conditions, as moisture can damage internal parts or increase shock risk.
3. Wear Protective Gear (Optional but Recommended)
While not always necessary, wearing gloves can protect your hands from sharp edges or dust. Safety goggles are also a good idea if you’re cleaning inside the unit.
4. Keep Children and Pets Away
Small parts, tools, and open units can be hazardous. Keep the work area clear of distractions.
Identify Your LG Air Conditioner Type
LG makes several types of air conditioners, and the method for removing the front cover varies slightly depending on the model. Here’s how to identify yours:
1. Window Air Conditioner
These units are installed in a window or wall sleeve. They have a single box design with a front grille or panel.
- Look for a horizontal or vertical front grille with slats.
- The filter is usually accessible behind this grille.
- Common models: LG LW8016ER, LW1216ER.
2. Portable Air Conditioner
These are freestanding units on wheels, often with a hose that vents out a window.
- The front cover is typically a large plastic panel with vents.
- Filters are located behind the front or side panels.
- Common models: LG LP1419IVSM, LP0817WSR.
3. Split System (Wall-Mounted or Ductless)
These have an indoor unit mounted on the wall and an outdoor compressor.
- The indoor unit has a sleek front panel that may slide or lift open.
- Filters are behind the front cover, which often swings down or to the side.
- Common models: LG LSU121CESM, LSU091CESM.
4. Check the Model Number
To be sure, locate the model number on a label inside the unit (often behind the filter) or on the back/side. You can also check the user manual or LG’s website for specific instructions.
Tools You’ll Need
The good news? You probably already have everything you need at home. Here’s a list of common tools:
- Flathead screwdriver (small): For gently prying open clips or screws.
- Phillips-head screwdriver: If your model uses screws to secure the cover.
- Soft cloth or microfiber towel: To protect surfaces and clean as you go.
- Flashlight: To see inside tight spaces.
- Gloves (optional): For hand protection.
Most LG front covers are designed to be removed by hand or with minimal tools. Avoid using pliers, hammers, or excessive force—these can crack plastic or damage internal components.
Step-by-Step: Removing the Front Cover
Now that you’re prepared, let’s go through the removal process for each type of LG air conditioner.
For Window Air Conditioners
Step 1: Unplug the Unit
As emphasized earlier, safety comes first. Unplug the AC from the wall and wait 10–15 minutes.
Step 2: Locate the Front Grille
The front grille is the slatted panel at the front of the unit. It’s usually held in place by plastic clips or a latch.
Step 3: Release the Clips or Latch
Most LG window units have a simple latch system:
- Look for a small tab or button at the top or bottom of the grille.
- Gently press or lift the tab while pulling the grille forward.
- If there’s no visible latch, the grille may simply snap off—grasp the sides and pull evenly.
Tip: If the grille feels stuck, don’t force it. Check for hidden screws or clips. Some models have screws at the bottom that must be removed first.
Step 4: Remove the Grille
Once the clips are released, the grille should come off easily. Set it aside on a soft surface to avoid scratches.
Step 5: Access the Filter
Behind the grille, you’ll see the air filter. It’s usually a flat, rectangular panel that slides out. Remove it for cleaning or replacement.
For Portable Air Conditioners
Step 1: Unplug and Move the Unit
Unplug the portable AC and move it to a stable, level surface. Make sure the exhaust hose is disconnected.
Step 2: Locate the Front Panel
The front panel is the large vented section on the front of the unit. It’s typically held by clips or screws.
Step 3: Check for Screws
Some portable models have small screws at the top or bottom of the panel. Use a Phillips-head screwdriver to remove them.
- Store screws in a small container so you don’t lose them.
- If there are no screws, the panel is likely clip-mounted.
Step 4: Release the Clips
Insert a flathead screwdriver (or your fingers) into the small gap between the panel and the unit. Gently pry outward to release the clips.
- Work from one side to the other, releasing clips gradually.
- Avoid prying too hard—plastic clips can break.
Step 5: Remove the Panel
Once all clips are free, carefully lift the panel away from the unit. Some models may have a hinge at the bottom—lift and tilt forward.
Step 6: Access Internal Components
Now you can clean the filter, inspect the fan, or wipe down the interior. Be gentle with wiring and sensors.
For Split System (Wall-Mounted) Air Conditioners
Step 1: Turn Off Power
Unplug the indoor unit or turn off the circuit breaker. Wait 15 minutes.
Step 2: Locate the Front Panel
The front panel is the decorative cover on the wall unit. It’s usually smooth and may have a small gap at the bottom or sides.
Step 3: Open the Panel
Most LG split systems have a panel that swings down or to the side:
- Look for a small indentation or handle at the bottom edge.
- Gently pull the bottom of the panel outward. It should pivot downward.
- Some models require you to lift the panel slightly before pulling.
Tip: If the panel doesn’t move, check for a hidden latch or button. Refer to your user manual for model-specific instructions.
Step 4: Secure the Panel
Once open, the panel may stay in place on hinges. If not, support it with one hand while working.
Step 5: Remove the Filter
The filter is usually located just behind the panel. Slide it out horizontally or lift it from the bottom.
Cleaning and Maintenance Tips
Now that the front cover is off, take the opportunity to clean and inspect your unit:
1. Clean the Air Filter
- Rinse the filter under warm water. Use a mild detergent if needed.
- Let it air dry completely before reinstalling. Never put a wet filter back in.
- Replace the filter every 1–3 months, depending on usage.
2. Wipe Down the Interior
Use a soft, damp cloth to wipe the inside of the front cover and the area behind it. Avoid spraying water directly into the unit.
3. Vacuum the Coils and Fan
Use a soft brush attachment on your vacuum to remove dust from the evaporator coils and fan blades. This improves airflow and efficiency.
4. Check for Mold or Pests
Look for signs of mold, mildew, or insect nests. If you find mold, use a mixture of water and vinegar to clean affected areas. For pests, consider calling a professional.
5. Inspect Wiring and Components
Look for loose wires, burnt smells, or damaged parts. If you notice anything unusual, stop and consult a technician.
Reattaching the Front Cover
Once cleaning is complete, it’s time to put everything back together.
1. Reinstall the Filter
Make sure the filter is clean and dry. Slide it back into place, ensuring it fits snugly.
2. Align the Front Cover
Position the cover so it lines up with the clips or hinges. For split systems, make sure the panel is level.
3. Secure the Clips or Screws
- For clip-mounted covers, press firmly around the edges until you hear or feel them snap into place.
- For screw-mounted covers, reinsert and tighten screws gently—don’t overtighten.
4. Test the Unit
Plug the unit back in and turn it on. Listen for unusual noises and check that air flows properly. If the cover is loose or rattling, recheck the clips.
Troubleshooting Common Issues
Even with careful handling, you might run into problems. Here’s how to fix them:
Problem: The Cover Won’t Come Off
- Cause: Hidden screws or stiff clips.
- Solution: Check the bottom, sides, or inside edges for screws. Use a flashlight to inspect. If clips are stiff, warm the area slightly with a hairdryer to soften the plastic.
Problem: Clips Are Broken
- Cause: Forced removal or old, brittle plastic.
- Solution: Use zip ties or electrical tape to secure the cover temporarily. Order replacement clips from LG or a parts supplier.
Problem: Cover Won’t Snap Back On
- Cause: Misaligned clips or warped panel.
- Solution: Check that all clips are intact and aligned. Gently bend the panel (if flexible) to fit. Avoid forcing it.
Problem: Unit Doesn’t Work After Reassembly
- Cause: Loose wiring or improper reassembly.
- Solution: Double-check that all components are securely in place. If the unit still doesn’t work, consult a technician.
When to Call a Professional
While removing the front cover is generally safe for DIYers, there are times when you should call an LG-certified technician:
- The cover is cracked or damaged and needs replacement.
- You notice electrical issues, burning smells, or water leaks.
- The unit is under warranty, and DIY repairs could void it.
- You’re uncomfortable working with electrical components.
Professional service ensures your unit is handled correctly and maintains its warranty coverage.
Final Tips for Success
- Take photos: Before removing the cover, snap a picture of how it’s attached. This helps during reassembly.
- Work slowly: Rushing increases the risk of damage.
- Keep parts organized: Use a tray or bowl for screws and clips.
- Refer to the manual: LG’s user manuals often include diagrams for cover removal.
- Clean regularly: Make this a seasonal habit to keep your AC running efficiently.
Conclusion
Removing the front cover of your LG air conditioner doesn’t have to be intimidating. With the right preparation, tools, and techniques, it’s a straightforward task that can improve your unit’s performance and lifespan. Whether you’re cleaning filters, inspecting components, or preparing for storage, this guide gives you the confidence to do it safely and correctly.
Remember: safety first, know your model, and work gently. And when in doubt, don’t hesitate to consult a professional. Your LG air conditioner will thank you with cooler air and fewer repairs down the road.
Now go ahead—take that cover off and give your AC the care it deserves!

