
Cleaning your LG 6000 BTU window air conditioner improves cooling performance, saves energy, and extends the unit’s lifespan. This guide walks you through a safe, thorough cleaning process—from unplugging the unit to reassembling it—so you can enjoy fresher, cooler air without calling a technician.
Key Takeaways
- Turn off and unplug the unit first: Always prioritize safety by disconnecting power before starting any cleaning.
- Clean or replace the air filter monthly: A dirty filter reduces airflow and forces the AC to work harder, increasing energy use.
- Use mild soap and water for most parts: Avoid harsh chemicals that can damage plastic components or internal wiring.
- Inspect the evaporator and condenser coils: Dust buildup on coils reduces efficiency—gently clean with a soft brush or coil cleaner.
- Check the drain hole and pan for clogs: Standing water can cause leaks or mold growth if not cleared regularly.
- Reassemble carefully and test the unit: Ensure all parts are dry and securely in place before turning the AC back on.
- Schedule seasonal deep cleans: Even with monthly filter changes, a full cleaning every 3–6 months keeps your LG 6000 BTU AC in top shape.
How to Clean a Window Air Conditioner LG 6000 BTU: A Complete Step-by-Step Guide
If you’ve got an LG 6000 BTU window air conditioner humming away in your bedroom or living room, you know how vital it is for staying cool during hot summer months. But like any appliance, it needs regular maintenance to keep working efficiently. Over time, dust, pollen, pet dander, and moisture can build up inside your AC unit—leading to poor airflow, strange odors, reduced cooling power, and even higher electricity bills.
The good news? Cleaning your LG 6000 BTU window AC isn’t as complicated as it might seem. With the right tools, a little patience, and this detailed guide, you can safely and effectively clean your unit yourself—no professional help required. In this article, we’ll walk you through every step of the process, from preparing your workspace to reassembling and testing your freshly cleaned air conditioner. By the end, you’ll not only have a cleaner, more efficient AC but also peace of mind knowing you’ve extended its lifespan and improved your indoor air quality.
Why Cleaning Your LG 6000 BTU Window Air Conditioner Matters
Before diving into the cleaning steps, it’s helpful to understand why regular maintenance is so important. Your LG 6000 BTU window AC works by pulling warm air from your room, passing it over cold evaporator coils, and blowing cooler air back out. Along the way, it also removes humidity and filters out airborne particles.
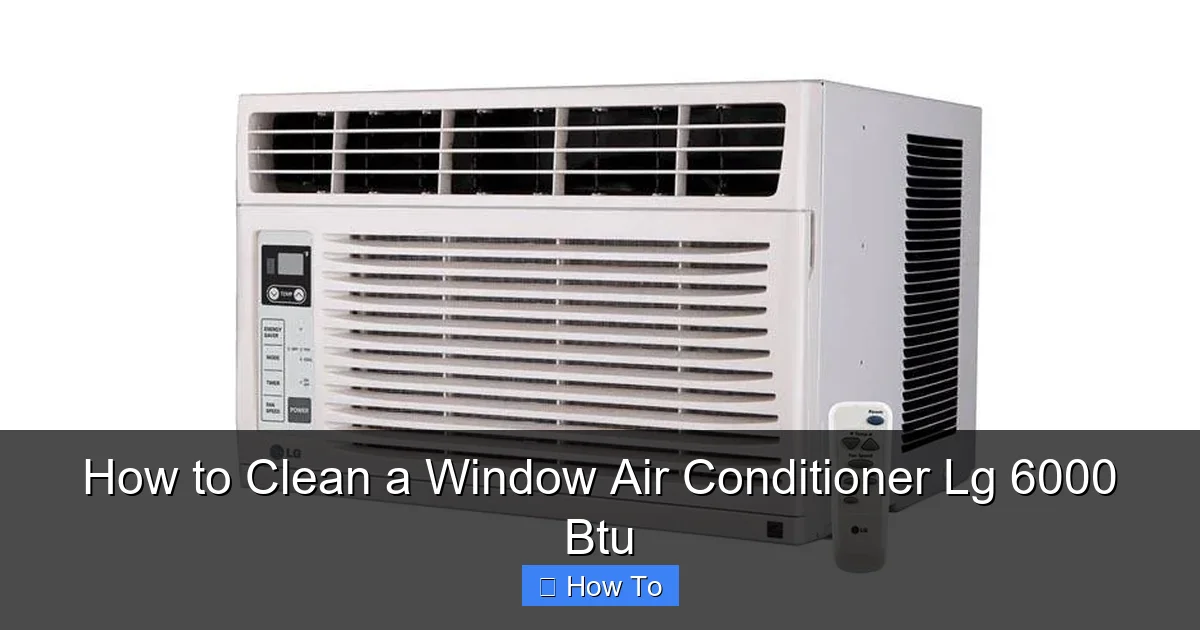
Visual guide about How to Clean a Window Air Conditioner Lg 6000 Btu
Image source: i0.wp.com
But when dust and debris accumulate on the air filter, coils, fan blades, and drainage system, several problems can arise:
- Reduced cooling efficiency: A clogged filter or dirty coils force the compressor to work harder, which uses more energy and may not cool your space effectively.
- Poor indoor air quality: Mold, mildew, or bacteria can grow in damp areas like the drain pan, releasing unpleasant odors or allergens into your home.
- Water leaks: A blocked drain hole can cause water to back up and drip inside your room—or worse, damage your walls or flooring.
- Shortened lifespan: Excessive strain on internal components can lead to premature wear and costly repairs or replacements.
LG recommends cleaning the air filter at least once a month during heavy use and performing a deeper cleaning every few months. Following this routine ensures your unit runs smoothly, keeps your energy bills low, and delivers clean, refreshing air all season long.
Tools and Supplies You’ll Need
Before you begin, gather these essential items to make the cleaning process quick and hassle-free:
- Soft cloths or microfiber towels
- Mild dish soap or all-purpose cleaner
- Spray bottle filled with water
- Soft-bristled brush (like an old toothbrush or paintbrush)
- Vacuum cleaner with a brush attachment
- Garden hose (optional, for outdoor rinsing)
- Coil cleaner spray (optional, for heavy coil buildup)
- Rubber gloves (to protect your hands)
- Screwdriver (if needed to remove panels)
- Bucket or basin (for soaking parts)
Most of these are household items you likely already have. Avoid using abrasive scrubbers, bleach, or strong solvents—they can scratch plastic surfaces or damage sensitive components. Stick to gentle cleaners and soft tools to protect your LG 6000 BTU unit.
Step 1: Turn Off and Unplug the Unit
Safety always comes first! Before touching any part of your air conditioner, make sure it’s completely powered down.
Unplug from the Wall Outlet
Locate the power cord and gently pull it from the wall outlet. Never yank the cord—grasp the plug itself to avoid damaging the wiring. If your unit is plugged into a power strip or surge protector, turn that off as well.
Turn Off the Circuit Breaker (Optional but Recommended)
For extra safety, especially if you’re doing a deep clean that involves water near electrical components, consider switching off the circuit breaker that powers the outlet. This eliminates any risk of accidental shock.
Let the Unit Cool Down
If your AC has been running recently, give it at least 30 minutes to cool off. Hot components can be fragile and may warp or crack if handled while warm.
Once the unit is unplugged and cooled, you’re ready to start cleaning!
Step 2: Remove and Clean the Front Panel and Air Filter
The front panel and air filter are the most accessible parts of your LG 6000 BTU window AC—and they’re also the dirtiest. This step should be done monthly, even if you’re not doing a full deep clean.
Open the Front Grille
Most LG window units have a front grille that swings open like a door. Look for small tabs or latches on the sides or bottom of the grille. Gently press or lift them to release the panel. Some models may require you to slide the grille upward slightly before pulling it forward.
Remove the Air Filter
Behind the grille, you’ll see a removable air filter—usually made of mesh or pleated fabric. Carefully slide it out. Note its orientation so you can reinstall it correctly later.
Rinse the Filter
Hold the filter under lukewarm running water to rinse away loose dust and debris. For stubborn grime, mix a few drops of mild dish soap in a bucket of water and soak the filter for 10–15 minutes. Use your hands or a soft brush to gently scrub both sides.
Dry Completely
Shake off excess water and lay the filter flat on a clean towel to air-dry. Never reinstall a wet filter—it can promote mold growth and restrict airflow. Make sure it’s 100% dry before putting it back.
Wipe Down the Front Panel
While the filter dries, use a damp cloth to wipe the inside and outside of the front grille. Pay attention to crevices where dust tends to collect. Dry with a clean towel.
Pro Tip: If your filter is damaged, torn, or over two years old, replace it with a compatible LG filter (model numbers vary—check your user manual).
Step 3: Vacuum the Interior and Exterior Vents
Even with a clean filter, dust can settle inside the unit’s housing and around the vents. A quick vacuum removes surface debris without disassembling the entire AC.
Use the Brush Attachment
Attach the soft brush nozzle to your vacuum cleaner. Gently run it over the exterior vents (both front and back) to suck up loose dirt, pet hair, and cobwebs.
Clean Inside the Unit (If Accessible)
With the front panel removed, you may be able to see inside the main compartment. Use the vacuum to carefully remove dust from the fan blades, coil fins, and surrounding areas. Be gentle—coil fins are thin and easily bent.
Warning: Do not insert the vacuum nozzle too deeply or forcefully. You could damage internal wiring or misalign delicate components.
Step 4: Clean the Evaporator and Condenser Coils
The evaporator (indoor) and condenser (outdoor) coils are critical for heat exchange. When coated in dust, they can’t transfer heat efficiently—making your AC less effective and more expensive to run.
Identify the Coils
In most LG 6000 BTU window units, the evaporator coil is visible behind the front panel, while the condenser coil is on the back side of the unit (facing outside). You may need to remove additional panels or screws to access the condenser coil—refer to your user manual if unsure.
Gently Brush Away Loose Debris
Use a soft-bristled brush to loosen dust from the coil fins. Work in the direction of the fins (not against them) to avoid bending or damaging them.
Apply Coil Cleaner (If Needed)
For heavy buildup, spray a commercial coil cleaner (follow product instructions). Let it foam and dissolve grime for 5–10 minutes, then rinse with a gentle stream of water from a garden hose. Never use high-pressure water—it can flatten the fins.
Alternative: DIY Cleaning Solution
If you don’t have coil cleaner, mix equal parts water and white vinegar in a spray bottle. Spray lightly on the coils, let sit for 10 minutes, then rinse. Vinegar is natural, non-toxic, and effective against mildew.
Important: Always ensure the unit is unplugged and completely dry before reassembly. Moisture near electrical parts can cause shorts or corrosion.
Step 5: Clean the Fan Blades and Motor Housing
The fan circulates air through the unit. Over time, dust sticks to the blades and motor housing, throwing the fan off balance and reducing airflow.
Access the Fan Assembly
Depending on your model, you may need to remove a side panel or unscrew the motor housing. Consult your LG manual for specific disassembly steps. If you’re uncomfortable removing parts, skip this step or consult a professional.
Wipe Fan Blades Carefully
Use a damp cloth wrapped around a flat tool (like a butter knife or putty knife) to reach between the blades. Wipe each blade gently—avoid spinning the fan manually, as this can damage the motor.
Vacuum Motor Housing
Use the vacuum brush to remove dust from around the motor. Do not spray water near the motor—it’s not waterproof.
Tip: If you notice excessive wobbling or noise when the fan runs, it may need professional balancing or lubrication.
Step 6: Clear the Drain Hole and Drain Pan
Your LG 6000 BTU AC removes moisture from the air, which collects in a drain pan and exits through a small hole. If this system clogs, water can overflow and cause leaks.
Locate the Drain Pan
The drain pan sits beneath the evaporator coil, usually accessible after removing the front panel or bottom cover.
Remove Standing Water
Use a sponge or paper towels to soak up any water in the pan. Check for sludge or algae—a common cause of odors.
Clear the Drain Hole
Use a pipe cleaner, thin wire, or compressed air to gently clear the drain hole. You can also pour a cup of warm water mixed with a tablespoon of vinegar down the hole to dissolve buildup.
Clean the Pan
Wipe the pan with soapy water, rinse, and dry thoroughly. For persistent mold, spray with a 50/50 vinegar-water solution and let sit before rinsing.
Regular drain maintenance prevents water damage and keeps your AC smelling fresh.
Step 7: Reassemble and Test the Unit
Once all parts are clean and completely dry, it’s time to put your LG 6000 BTU air conditioner back together.
Reinstall Components in Reverse Order
Start with the drain pan (if removed), then the fan assembly, coils, and finally the front panel and filter. Make sure all screws are tightened securely but don’t overtighten—plastic parts can crack.
Double-Check Connections
Ensure no wires are pinched or disconnected during reassembly. If anything looks loose or misaligned, power off and investigate before proceeding.
Plug In and Test
Reconnect the power cord and turn on the unit. Set it to “Cool” mode and listen for normal operation. Feel the airflow—it should be strong and cool within a few minutes.
If the unit doesn’t turn on, makes unusual noises, or leaks water, unplug it immediately and recheck your work. When in doubt, contact LG customer support or a certified technician.
Troubleshooting Common Cleaning Issues
Even with careful cleaning, you might encounter a few hiccups. Here’s how to handle them:
- Unit won’t turn on after cleaning: Double-check that it’s plugged in and the circuit breaker is on. Ensure all panels are fully closed—many LG units have safety switches that prevent operation if the front grille isn’t secure.
- Reduced airflow: This usually means the filter is still dirty or reinstalled incorrectly. Remove and inspect it again.
- Water leaking indoors: Likely a clogged drain hole or misaligned drain pan. Recheck Step 6.
- Strange odors: Lingering smells often come from mold in the drain pan or on the filter. Soak affected parts in vinegar solution and ensure everything dries completely.
- Bent coil fins: Use a fin comb (available at hardware stores) to gently straighten them. Damaged fins reduce efficiency.
Most issues are minor and fixable with patience. But if problems persist, don’t hesitate to seek professional help—especially if under warranty.
Maintenance Schedule for Your LG 6000 BTU Window AC
To keep your air conditioner in peak condition, follow this simple schedule:
- Monthly: Clean or replace the air filter.
- Every 3 months: Vacuum interior and exterior vents; inspect drain system.
- Twice a year (spring and fall): Perform a full deep clean, including coils and fan (if accessible).
- Before storing (if applicable): Clean thoroughly, cover the outdoor side, and store in a dry place.
Consistent care prevents major problems and keeps your LG 6000 BTU unit running like new for years.
Final Thoughts
Cleaning your LG 6000 BTU window air conditioner doesn’t have to be intimidating. With this guide, you now have everything you need to maintain your unit safely, effectively, and affordably. Regular cleaning not only boosts performance and lowers energy costs but also contributes to healthier, more comfortable indoor air.
Remember: a little effort goes a long way. By dedicating just 30–60 minutes a few times a year, you’ll protect your investment, avoid costly repairs, and enjoy reliable cooling all summer long. So grab your supplies, follow these steps, and breathe easy knowing your AC is clean, efficient, and ready to beat the heat.

