
Changing the filter on your LG air conditioner is a simple but essential maintenance task that improves air quality and system efficiency. This guide walks you through the process clearly and safely, whether you have a window, split, or portable unit.
Key Takeaways
- Regular filter changes improve air quality: Clean filters trap dust, pollen, and allergens, ensuring healthier indoor air for you and your family.
- Frequency matters: Most LG air conditioner filters should be cleaned or replaced every 1–3 months, depending on usage and environment.
- Different models, different access points: Window, split, and portable LG units have unique filter locations—always check your user manual first.
- Use the right filter type: LG recommends using genuine or compatible filters designed for your specific model to maintain performance and warranty.
- Turn off the unit before servicing: Always power down your AC before removing or replacing the filter to ensure safety.
- Clean vs. replace: Washable filters can be cleaned and reused, while disposable ones must be replaced—know which type your unit uses.
- Proper installation prevents damage: Reinstall the filter correctly to avoid airflow blockage, reduced efficiency, or system strain.
How to Change the Filter on an LG Air Conditioner
Keeping your LG air conditioner running smoothly isn’t just about setting the right temperature—it’s also about regular maintenance. One of the most important yet often overlooked tasks is changing or cleaning the air filter. A dirty filter restricts airflow, reduces cooling efficiency, increases energy bills, and can even lead to costly repairs down the line. Worse, it can circulate dust, mold, and allergens throughout your home.
The good news? Changing the filter on an LG air conditioner is quick, easy, and doesn’t require any special tools. Whether you own a window unit, a ductless mini-split, or a portable AC, this guide will walk you through the process step by step. By the end, you’ll know exactly how to locate, remove, clean, or replace your filter—and keep your LG AC performing at its best.
In this comprehensive guide, you’ll learn:
– Why changing your LG air conditioner filter matters
– How often you should do it
– Step-by-step instructions for different LG AC types
– Tips for choosing the right replacement filter
– Troubleshooting common issues
– And answers to frequently asked questions
Let’s get started!
Why Changing Your LG Air Conditioner Filter Is Important
Before diving into the “how,” it’s worth understanding the “why.” Your air conditioner’s filter plays a crucial role in both performance and air quality. Here’s what happens when you neglect it:
Reduced Airflow: A clogged filter blocks air from passing through the system. This forces the fan to work harder, which can lead to overheating and increased wear on components.
Poor Cooling Performance: Even if your AC is running, a dirty filter can prevent it from cooling your room effectively. You might notice warm air blowing or longer cooling times.
Higher Energy Bills: When your AC has to work harder, it uses more electricity. Studies show that a clean filter can reduce energy consumption by up to 15%.
Indoor Air Pollution: The filter traps dust, pet dander, pollen, and other airborne particles. If it’s full, these contaminants get recirculated into your home—especially problematic for people with allergies or asthma.
Risk of Freezing: Restricted airflow can cause the evaporator coil to freeze, leading to system shutdowns and potential water damage.
Shortened Lifespan: Over time, the extra strain from a dirty filter can shorten the life of your LG air conditioner.
Changing the filter regularly is one of the simplest and most cost-effective ways to protect your investment and maintain a healthy, comfortable home.
How Often Should You Change the Filter?
The frequency of filter changes depends on several factors, including your environment, usage, and the type of filter your LG air conditioner uses.
General Guidelines:
– Every 1 month: If you have pets, allergies, or live in a dusty area.
– Every 2–3 months: For average household use with no pets or allergies.
– Every 6 months: If the unit is used infrequently (e.g., seasonal use).
Washable vs. Disposable Filters:
– Washable filters: These can be rinsed and reused. Clean them every 1–2 months, or when visibly dirty.
– Disposable filters: These must be replaced. Check them monthly and replace when they appear gray or clogged.
Seasonal Considerations:
During peak cooling seasons (summer), your AC runs more often, so filters get dirtier faster. Consider checking them monthly during these months.
Signs It’s Time to Change the Filter:
– Visible dirt or discoloration
– Reduced airflow from vents
– Unusual odors when the AC is on
– Increased dust around the unit
– Higher-than-normal energy bills
Pro tip: Set a calendar reminder or mark your filter change dates on a sticky note near the unit. Consistency is key!
Tools and Materials You’ll Need
The great thing about changing an LG air conditioner filter is that you don’t need much. Here’s what to gather before you begin:
- Replacement filter (if disposable): Make sure it matches your LG model number. You can find this on the unit or in the user manual.
- Mild soap and water (for washable filters): Avoid harsh chemicals that could damage the filter material.
- Soft brush or cloth: For gently scrubbing washable filters.
- Dry towel: To dry the filter completely before reinstalling.
- Gloves (optional): To keep your hands clean, especially if the filter is very dirty.
- Screwdriver (rarely needed): Some older LG window units may have screws securing the front panel.
Always check your user manual first—some models may have specific requirements or recommendations.
Step-by-Step Guide: How to Change the Filter on Different LG Air Conditioners
LG offers a variety of air conditioners, including window units, split systems (like the LG Dual Inverter), and portable models. The filter location and removal process vary slightly between types. Below, we’ll cover each one in detail.
LG Window Air Conditioner
Window units are common in apartments and single rooms. Here’s how to change the filter:
Step 1: Turn Off the Unit
Before doing anything, switch off the air conditioner using the remote or control panel. For extra safety, unplug it from the wall outlet.
Visual guide about How to Change the Filter on an Lg Air Conditioner
Image source: smartacsolutions.com
Step 2: Locate the Front Panel
The filter is usually behind the front grille or panel. Look for a latch or clip on the top or sides of the unit.
Step 3: Open the Front Panel
Gently lift or slide the panel upward. Some models have a hinge—don’t force it. If it doesn’t open easily, check for hidden clips or screws.
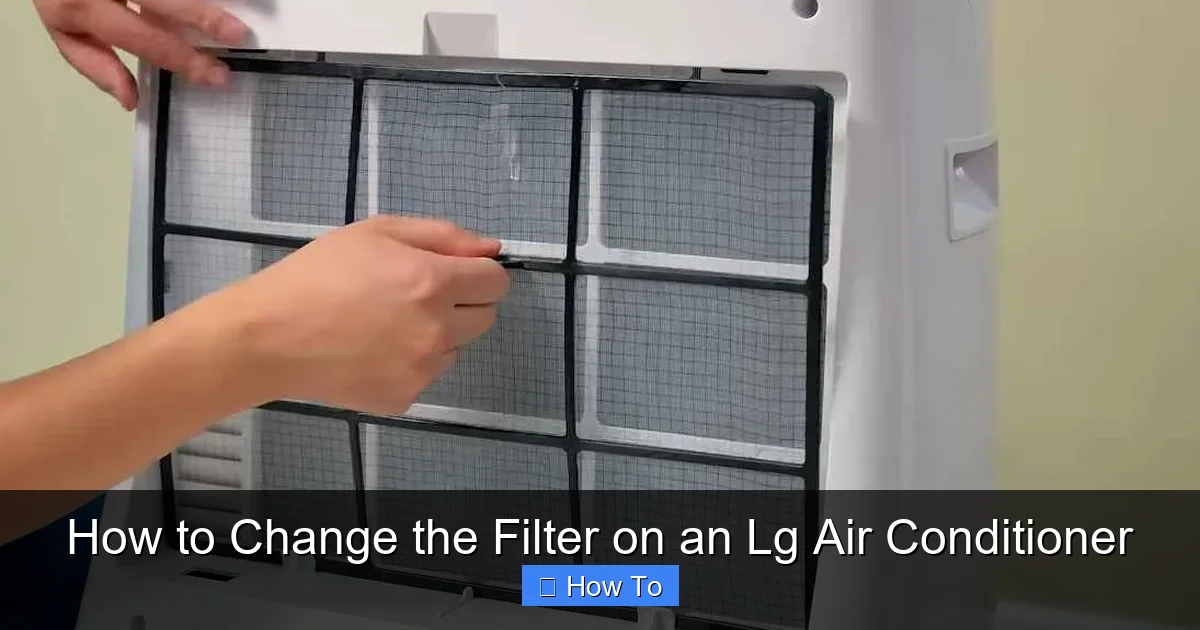
Step 4: Remove the Filter
The filter is typically a flat, rectangular panel that slides out from the top or side. Pull it out carefully. Note its orientation so you can reinstall it the same way.
Step 5: Clean or Replace the Filter
- If it’s washable, rinse it under lukewarm water. Use mild soap if needed, then let it air dry completely.
- If it’s disposable, replace it with a new one of the same size and type.
Step 6: Reinstall the Filter
Slide the clean or new filter back into place, ensuring it fits snugly and is oriented correctly. Close the front panel and secure any latches.
Step 7: Turn the Unit Back On
Plug in the unit and power it on. Listen for normal operation and check that air is flowing properly.
LG Split Air Conditioner (Mini-Split or Ductless)
Split systems have an indoor unit mounted on the wall and an outdoor compressor. The filter is inside the indoor unit.
Step 1: Turn Off the Power
Use the remote to turn off the AC. For safety, turn off the circuit breaker that powers the indoor unit.
Step 2: Open the Front Panel
Most LG split units have a front panel that swings open. Look for small tabs or a release button near the bottom. Gently pull the panel down or to the side.
Step 3: Locate the Filter
The filter is usually a long, flat panel behind the front grille. It may be held in place by clips or a frame.
Step 4: Remove the Filter
Lift the filter slightly and pull it out. Some models have two filters—remove both if present.
Step 5: Clean or Replace
- For washable filters, rinse with water and mild soap. Let dry completely—never reinstall a wet filter.
- For disposable filters, replace with a new one. Check the model number on the old filter or in the manual.
Step 6: Reinstall the Filter
Slide the filter back into the slot, making sure it’s seated properly. Close the front panel until it clicks into place.
Step 7: Restore Power
Turn the circuit breaker back on and power up the unit. Test the airflow to ensure everything is working.
LG Portable Air Conditioner
Portable units are freestanding and often used in rooms without windows. The filter is usually located at the back or side.
Step 1: Turn Off and Unplug
Switch off the unit and unplug it from the outlet.
Step 2: Locate the Filter Cover
Look for a removable panel on the back or side of the unit. It may be labeled “Filter” or have a small handle.
Step 3: Remove the Cover
Slide or lift the cover off. Some models use clips—press gently to release.
Step 4: Take Out the Filter
The filter is typically a mesh panel. Pull it out carefully.
Step 5: Clean or Replace
- If washable, rinse under water and let dry.
- If disposable, replace with a compatible filter.
Step 6: Reinstall
Place the clean or new filter back into the slot. Reattach the cover securely.
Step 7: Plug In and Test
Plug the unit back in and turn it on. Check for proper airflow and cooling.
Choosing the Right Replacement Filter
Using the correct filter is essential for performance and safety. Here’s how to choose the right one:
Check Your Model Number:
Every LG air conditioner has a model number, usually found on a label on the unit or in the user manual. Use this to find the exact filter size and type.
Types of Filters:
– Standard Mesh: Basic filtration for dust and large particles.
– Carbon Filters: Help reduce odors and smoke.
– HEPA Filters: Capture fine particles like pollen and pet dander (available on some high-end models).
– Anti-Bacterial Filters: Inhibit mold and bacteria growth.
Where to Buy:
– LG official website
– Authorized retailers (Best Buy, Home Depot, etc.)
– Online marketplaces (Amazon, eBay)—but verify seller authenticity
Avoid Cheap Knockoffs:
Low-quality filters may not fit properly or could damage your unit. Stick to genuine LG filters or reputable third-party brands with good reviews.
DIY Filter Cutting (Not Recommended):
Some people try to cut generic filters to size. This can create gaps that allow unfiltered air to bypass the filter. It’s better to buy the correct size.
Troubleshooting Common Issues
Even with careful maintenance, you might run into problems. Here’s how to handle them:
Filter Doesn’t Fit Properly
This usually means you have the wrong size or type. Double-check the model number and compare dimensions. Never force a filter into place—it could damage the unit.
Unit Still Not Cooling After Filter Change
A dirty filter isn’t the only cause of poor cooling. Check for:
- Blocked vents or airflow obstructions
- Low refrigerant (requires professional service)
- Thermostat settings
- Dirty outdoor unit (for split systems)
If the problem persists, contact LG support or a certified technician.
Water Leaking After Filter Change
This could be due to improper filter installation blocking the drain path. Ensure the filter is seated correctly and not bent. Also, check that the unit is level.
Strange Odors After Filter Change
New filters can sometimes have a mild chemical smell. Run the unit for a few hours to air it out. If odors persist, the indoor unit may need cleaning—especially the evaporator coil.
Filter Gets Dirty Too Fast
If your filter clogs within weeks, consider:
- Using a higher-efficiency filter
- Running the fan on “auto” instead of “on” to reduce runtime
- Sealing windows and doors to reduce dust entry
- Vacuuming and dusting your home more frequently
Maintenance Tips for Long-Term Performance
Changing the filter is just one part of AC care. Follow these tips to keep your LG unit in top shape:
- Clean the exterior: Wipe down the front panel and vents with a damp cloth monthly.
- Check the outdoor unit: For split systems, ensure the outdoor compressor is free of debris, leaves, and dirt.
- Inspect the drain line: Clogged drains can cause leaks. Flush with water or vinegar occasionally.
- Schedule professional maintenance: Have a technician service your unit once a year, especially before summer.
- Use a programmable thermostat: Reduces runtime and extends filter life.
- Keep the area around the unit clear: Allow at least 2 feet of space around indoor and outdoor units for proper airflow.
Conclusion
Changing the filter on your LG air conditioner is a simple task with big rewards. It improves air quality, boosts efficiency, lowers energy costs, and helps your unit last longer. Whether you have a window, split, or portable model, the process is straightforward—just follow the steps in this guide.
Remember: consistency is key. Set reminders, use the right filter, and don’t skip this essential maintenance step. Your lungs, your wallet, and your AC will thank you.
By taking a few minutes every month or two to care for your filter, you’re investing in a healthier, more comfortable home. And with LG’s reliable technology, you can trust your air conditioner to keep you cool—season after season.
So go ahead, grab that filter, and give your LG AC the care it deserves. You’ve got this!

