
Changing the filter on your LG portable air conditioner is essential for optimal performance and clean air. This guide walks you through the entire process, from locating the filter to reassembling your unit, with helpful tips and troubleshooting advice to ensure success.
Key Takeaways
- Regular filter changes improve air quality and unit efficiency: A clean filter ensures better airflow, reduces energy consumption, and prevents dust and allergens from circulating in your home.
- LG portable ACs have washable or replaceable filters: Most models use reusable filters that can be cleaned, but some may require replacement depending on usage and model.
- Always unplug the unit before maintenance: Safety first—turning off and unplugging your air conditioner prevents electrical hazards during filter removal and cleaning.
- Check the filter every 2–4 weeks: High-use environments or homes with pets may need more frequent checks to avoid clogging and reduced performance.
- Proper reassembly prevents leaks and malfunctions: Ensure all panels and filters are securely in place to maintain proper operation and avoid water leakage.
- Use only LG-approved replacement filters: Generic filters may not fit correctly or provide the same level of filtration, potentially damaging your unit.
- Refer to your user manual for model-specific instructions: While most LG portable ACs follow similar steps, your model may have unique features or access points.
How to Change Filter on LG Portable Air Conditioner
Keeping your LG portable air conditioner in top shape doesn’t have to be complicated. One of the simplest yet most impactful maintenance tasks is changing or cleaning the air filter. A dirty filter restricts airflow, makes your unit work harder, increases energy bills, and can even lead to poor indoor air quality. Fortunately, LG designs its portable air conditioners with user-friendly maintenance in mind, and replacing or cleaning the filter is a quick job you can do in under 15 minutes.
In this comprehensive guide, you’ll learn everything you need to know about how to change the filter on your LG portable air conditioner. We’ll cover why it matters, how often to do it, step-by-step instructions for various models, tips for cleaning and reassembly, and troubleshooting common issues. Whether you’re a first-time owner or just need a refresher, this guide will help you keep your portable AC running smoothly all year long.
Why Changing the Filter Matters
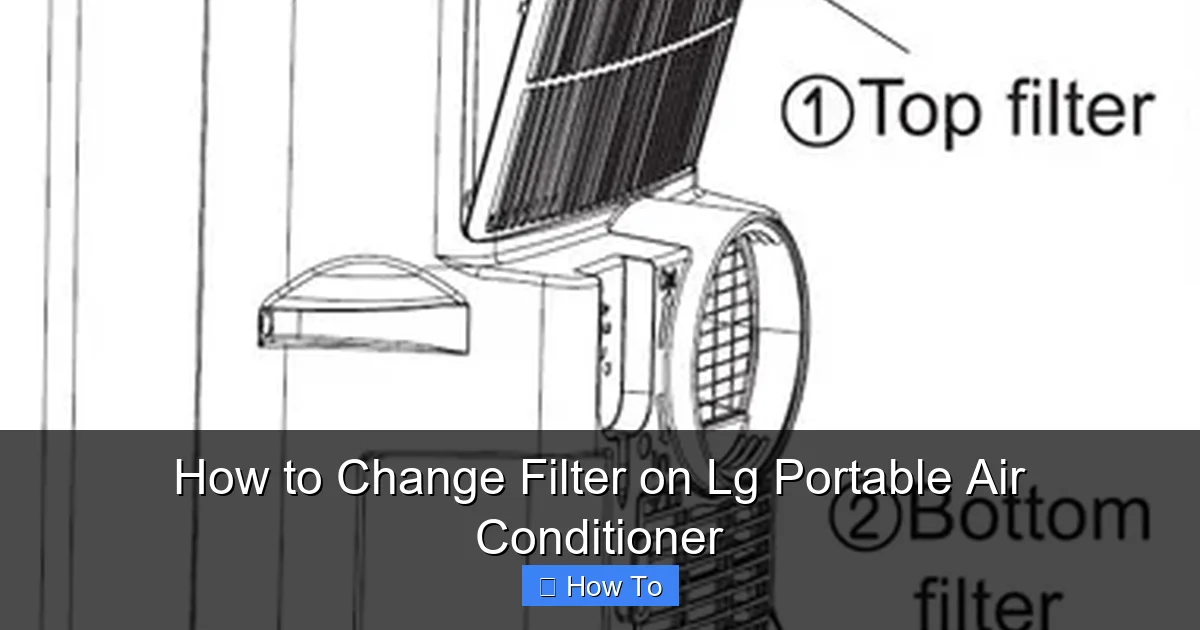
Visual guide about How to Change Filter on Lg Portable Air Conditioner
Image source: gscs.lge.com
Your LG portable air conditioner’s filter plays a vital role in both performance and air quality. As the unit pulls in warm air from the room, it passes through the filter before being cooled and released back into your space. Over time, dust, pet dander, pollen, and other airborne particles accumulate on the filter. If left unchecked, this buildup can cause several problems:
– Reduced cooling efficiency: A clogged filter restricts airflow, making it harder for the unit to cool your room effectively.
– Higher energy consumption: When airflow is blocked, the compressor and fan must work harder, increasing electricity usage.
– Poor indoor air quality: A dirty filter can no longer trap allergens and pollutants, allowing them to recirculate in your home.
– Potential unit damage: In extreme cases, restricted airflow can cause the evaporator coil to freeze or the motor to overheat.
Regular filter maintenance ensures your LG portable AC operates at peak efficiency, saves energy, and provides cleaner, healthier air. It’s one of the easiest ways to extend the life of your appliance.
How Often Should You Change or Clean the Filter?
The frequency of filter maintenance depends on several factors, including usage, environment, and household conditions. Here’s a general guideline:
– Every 2 weeks: If you use your portable AC daily, especially in hot climates or during allergy season.
– Every 3–4 weeks: For moderate use, such as running the unit a few hours each evening.
– Monthly: If the unit is used infrequently or in a clean environment.
However, if you have pets, live in a dusty area, or notice reduced airflow or unusual odors, check the filter more often. A quick visual inspection can tell you a lot—if the filter looks gray or covered in dust, it’s time for a clean.
LG recommends checking the filter at least once a month during peak usage seasons. Some newer LG portable AC models even have a filter indicator light that alerts you when maintenance is needed. If your unit has this feature, pay attention to it—it’s a helpful reminder.
Tools and Materials You’ll Need
Before you begin, gather these simple items to make the process smooth and safe:
– A soft brush or vacuum with a brush attachment
– Mild dish soap and warm water
– A clean, dry towel
– Replacement filter (if needed—check your model)
– User manual (for model-specific guidance)
Most LG portable air conditioners use a washable mesh filter, so you likely won’t need to buy a new one every time. However, if the filter is damaged, frayed, or no longer traps dust effectively, it’s time to replace it. Always use an LG-approved replacement filter to ensure proper fit and performance.
Step-by-Step Guide to Changing the Filter
Now that you understand the importance and frequency of filter maintenance, let’s walk through the actual process. While specific steps may vary slightly depending on your LG portable AC model, the general procedure is consistent across most units.
Step 1: Turn Off and Unplug the Unit
Safety is paramount. Before touching any part of your air conditioner, make sure it’s completely turned off and unplugged from the power outlet. This prevents accidental startup and reduces the risk of electric shock. Even if the unit appears off, residual power can still pose a danger.
If your unit has a remote control, remove the batteries or ensure it’s not sending signals that could restart the system. Wait at least 5–10 minutes after unplugging to allow any internal capacitors to discharge.
Step 2: Locate the Filter Access Panel
Most LG portable air conditioners have a front or side access panel that houses the air filter. Here’s how to find it:
– Front panel models: Look for a grille or vent on the front of the unit. It’s usually held in place by clips or screws. Gently press the sides or top to release the panel.
– Side panel models: Some units have the filter behind a removable side grille. Check both the left and right sides.
– Top or rear access: A few models may have the filter behind a panel on the top or back. Refer to your user manual if you’re unsure.
The access panel is typically labeled “Filter” or marked with an icon. If you can’t find it, consult your user manual—LG provides detailed diagrams for each model.
Step 3: Remove the Filter
Once you’ve opened the access panel, you’ll see the air filter. It’s usually a flat, rectangular mesh panel that slides out easily. Here’s how to remove it safely:
– Gently pull the filter straight out. Avoid twisting or forcing it, as this could damage the frame or the unit.
– Some filters have a small handle or tab to make removal easier. Use it if available.
– If the filter is stuck, check for hidden clips or screws holding it in place. Most LG filters are designed to be tool-free, but older models may require a screwdriver.
Place the removed filter on a clean surface, such as a towel or paper bag, to avoid spreading dust.
Step 4: Inspect the Filter
Take a close look at the filter. A clean filter should appear white or light gray with minimal dust buildup. If it’s dark, clogged, or has visible debris, it needs cleaning. Also check for:
– Tears or holes in the mesh
– Bent or damaged frames
– Signs of mold or mildew (which may require deep cleaning or replacement)
If the filter is damaged, replace it with a new LG-approved filter. Continuing to use a damaged filter can reduce efficiency and potentially harm the unit.
Step 5: Clean the Filter
For washable filters, cleaning is simple and effective. Follow these steps:
1. Use a soft brush or vacuum with a brush attachment to remove loose dust and debris from both sides of the filter.
2. Rinse the filter under lukewarm water. Avoid hot water, as it can warp the mesh.
3. If the filter is very dirty, soak it in a mixture of mild dish soap and warm water for 10–15 minutes.
4. Gently scrub both sides with a soft brush or sponge to remove stubborn grime.
5. Rinse thoroughly to remove all soap residue.
6. Shake off excess water and place the filter on a clean towel to air dry completely.
Important: Never use harsh chemicals, bleach, or abrasive cleaners. These can damage the filter and release harmful fumes when the unit is running. Also, do not put the filter in the dishwasher or washing machine—the agitation can destroy the mesh.
Allow the filter to dry completely before reinstalling. This usually takes 1–2 hours, depending on humidity and airflow. Installing a damp filter can lead to mold growth and unpleasant odors.
Step 6: Clean the Filter Housing
While the filter is drying, take the opportunity to clean the area where it sits. Dust and debris can accumulate in the filter housing, reducing airflow even with a clean filter.
– Use a vacuum with a brush attachment to remove loose dust.
– Wipe the interior with a damp cloth. Avoid getting water into electrical components.
– Let the housing dry completely before reassembly.
This extra step ensures maximum airflow and prevents recontamination of the new or cleaned filter.
Step 7: Reinstall the Filter
Once the filter is completely dry, it’s time to put it back. Follow these tips for proper installation:
– Make sure the filter is oriented correctly. Most LG filters have an arrow or label indicating the direction of airflow. The arrow should point toward the unit (into the airflow path).
– Slide the filter gently into the housing until it clicks or sits flush.
– Ensure it’s seated securely and not crooked or loose.
A poorly installed filter can allow unfiltered air to bypass the system, reducing efficiency and air quality.
Step 8: Reattach the Access Panel
Close the filter access panel and secure it properly:
– For clip-on panels, press firmly until you hear a click.
– For screw-mounted panels, replace and tighten the screws evenly.
– Make sure there are no gaps or loose areas that could allow air leaks.
An improperly closed panel can cause the unit to work harder and may trigger error codes on some models.
Step 9: Plug In and Test the Unit
Once everything is reassembled, plug the unit back into the power outlet. Turn it on and set it to a cooling mode. Listen for normal operation and check that air is flowing freely from the vents.
If the unit doesn’t start, double-check that it’s plugged in and the access panel is fully closed. Some models have safety switches that prevent operation if the panel isn’t secure.
Run the unit for 10–15 minutes and observe performance. You should notice improved airflow and cooling efficiency compared to before the filter change.
Tips for Maintaining Your LG Portable AC Filter
To get the most out of your filter and your air conditioner, follow these practical tips:
– Set a reminder: Use your phone calendar or a sticky note to remind yourself to check the filter every 2–4 weeks.
– Keep spare filters: If your model uses replaceable filters, keep an extra one on hand so you can swap it out immediately while the other dries.
– Clean during off-hours: Perform maintenance in the morning or evening when the unit isn’t in heavy use.
– Vacuum regularly: Reduce dust buildup by vacuuming around the unit and keeping the surrounding area clean.
– Monitor performance: If you notice reduced cooling, strange noises, or increased energy bills, check the filter first—it’s often the culprit.
Troubleshooting Common Issues
Even with proper maintenance, you might encounter a few hiccups. Here’s how to handle common problems:
Filter Won’t Come Out
If the filter is stuck, don’t force it. Check for hidden clips, screws, or a locked panel. Some models have a safety latch that must be released before removal. Refer to your user manual for model-specific instructions.
Unit Won’t Turn On After Reassembly
This is often due to a loose or improperly closed access panel. Make sure the panel is fully secured and all clips or screws are in place. Some LG models have a safety switch that prevents operation if the panel isn’t closed.
Reduced Airflow After Filter Change
Double-check that the filter is installed correctly and not blocked. Also, ensure the vent hose is not kinked or obstructed. If airflow remains low, inspect the evaporator coil for frost or dirt buildup.
Unusual Odors
If you notice a musty or burning smell after cleaning the filter, it could indicate mold in the unit or a dirty evaporator coil. Clean the coil with a soft brush and coil cleaner, or contact LG support for professional service.
Water Leakage
A clogged filter can cause the evaporator coil to freeze and then drip water when it thaws. After cleaning the filter, run the unit in fan mode for 30 minutes to melt any ice. Ensure the drain plug is closed and the unit is level.
When to Replace the Filter
While most LG portable AC filters are reusable, they don’t last forever. Over time, the mesh can degrade, lose its shape, or become less effective at trapping particles. Replace the filter if you notice:
– Visible damage, such as tears or holes
– Persistent odors even after cleaning
– Reduced airflow despite regular cleaning
– The filter no longer fits snugly in the housing
LG recommends replacing the filter every 6–12 months under normal use, or sooner in high-dust environments. Always use genuine LG replacement filters for the best performance and compatibility.
Conclusion
Changing the filter on your LG portable air conditioner is a simple but essential task that pays big dividends in performance, efficiency, and air quality. By following this guide, you can keep your unit running smoothly with minimal effort. Remember to unplug the unit, locate the filter, clean or replace it as needed, and reassemble everything securely.
Regular maintenance not only extends the life of your air conditioner but also helps you save on energy bills and breathe cleaner air. With just a few minutes of your time every few weeks, you can enjoy cool, comfortable indoor air all season long.
Don’t wait until your unit starts struggling—make filter changes a part of your routine. Your LG portable air conditioner will thank you with reliable, efficient cooling for years to come.

