
Featured image for coleman mach air conditioner instructions
Image source: appliancesissue.com
Master your Coleman Mach air conditioner in minutes with this straightforward setup guide designed for hassle-free installation and optimal performance. Follow the step-by-step instructions to ensure proper mounting, electrical connections, and thermostat configuration—no expert skills required. Get cool, reliable comfort fast, whether you’re using it in an RV, camper, or small living space.
Key Takeaways
- Read the manual first: Always review Coleman Mach air conditioner instructions before setup.
- Verify compatibility: Confirm your RV’s electrical system matches unit requirements.
- Secure mounting: Use included hardware to prevent vibration damage.
- Check thermostat settings: Set to “Cool” and desired temperature for best results.
- Inspect seals: Ensure air ducts are sealed to maximize efficiency.
- Test run early: Power on and verify operation before final installation.
📑 Table of Contents
- Coleman Mach Air Conditioner Instructions: Easy Setup Guide
- Understanding Your Coleman Mach Air Conditioner
- Pre-Installation Checklist and Safety Tips
- Step-by-Step Installation Guide
- Operating Your Coleman Mach Air Conditioner
- Maintenance and Troubleshooting Tips
- Performance Comparison: Coleman Mach vs. Competitors
- Final Thoughts: Why Coleman Mach Is a Smart Choice
Coleman Mach Air Conditioner Instructions: Easy Setup Guide
Imagine this: You’ve just pulled into your favorite campsite after a long drive, the sun is blazing, and the inside of your RV feels more like an oven than a cozy retreat. You reach for the Coleman Mach air conditioner, eager to cool things down—only to realize you’ve misplaced the manual or can’t quite remember how to get it running properly. Sound familiar? You’re not alone. Many RV owners, especially first-timers or seasonal users, find themselves scratching their heads when it comes to setting up or troubleshooting their Coleman Mach AC unit. That’s exactly why having clear, step-by-step Coleman Mach air conditioner instructions is so important.
The Coleman Mach series has been a trusted name in RV climate control for decades, known for its reliability, quiet operation, and efficient cooling power. Whether you’re boondocking in the desert or parked at a lakeside campground, these units are designed to keep you comfortable no matter the weather. But even the best equipment can feel intimidating without the right guidance. That’s where this guide comes in. We’ll walk you through everything you need to know—from initial setup and installation tips to daily operation, maintenance, and troubleshooting common issues. Think of this as your go-to companion for getting the most out of your Coleman Mach air conditioner, without the frustration or guesswork.
Understanding Your Coleman Mach Air Conditioner
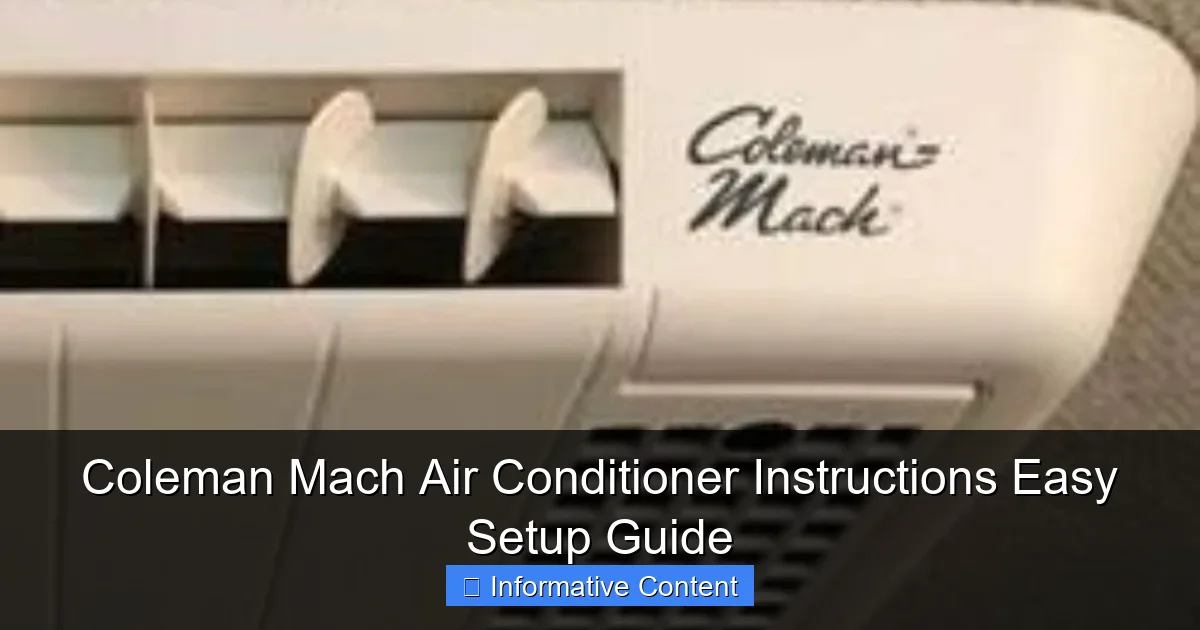
Before diving into the setup process, it’s helpful to understand what makes the Coleman Mach air conditioner such a popular choice among RV enthusiasts. These units are specifically engineered for recreational vehicles and come in a variety of models—ranging from 9,000 BTU to 15,000 BTU—to suit different RV sizes and cooling needs. They’re roof-mounted, meaning they sit on top of your RV and draw in outside air while expelling heat, all while circulating cool air inside your living space.
Visual guide about coleman mach air conditioner instructions
Image source: i1.wp.com
Key Features of Coleman Mach AC Units
One of the standout features of Coleman Mach air conditioners is their energy efficiency. Many models are designed to operate on standard 120V power, making them compatible with most campground electrical hookups. They also come equipped with advanced components like high-efficiency compressors, variable-speed fans, and digital thermostats, which help maintain consistent temperatures while using less power. This is especially important when you’re running off a generator or limited shore power.
Another major advantage is the quiet operation. Unlike older AC models that can sound like a jet engine taking off, Coleman Mach units are engineered to minimize noise. The fan blades are aerodynamically designed, and the compressor is insulated to reduce vibration and sound. This means you can enjoy a cool, peaceful night’s sleep without being disturbed by loud humming or rattling.
Additionally, many newer models include smart controls and compatibility with digital thermostats or even smartphone apps (depending on the model). This allows you to adjust temperature settings remotely, set timers, or monitor energy usage—perfect for tech-savvy travelers who want convenience at their fingertips.
Common Models and Their Specifications
Coleman offers several Mach models, each tailored to different needs. Here’s a quick overview of some of the most popular ones:
- Coleman Mach 8 (9,000 BTU): Ideal for smaller RVs or pop-up campers. Lightweight and energy-efficient, it’s perfect for weekend trips or mild climates.
- Coleman Mach 10 (13,500 BTU): A mid-range option that balances power and efficiency. Great for medium-sized travel trailers or fifth wheels.
- Coleman Mach 15 (15,000 BTU): The powerhouse of the lineup, designed for large motorhomes or hot climates. Can cool multiple rooms simultaneously.
Each model comes with slightly different installation requirements and control options, so it’s important to know which one you have before proceeding with setup. You can usually find the model number on a label inside the AC unit’s access panel or on the original packaging.
Pre-Installation Checklist and Safety Tips
Setting up your Coleman Mach air conditioner isn’t just about flipping a switch—it starts with proper preparation. Skipping this step can lead to poor performance, damage to the unit, or even safety hazards. Whether you’re installing a new unit or preparing an existing one for the season, this checklist will help ensure everything goes smoothly.
What You’ll Need Before Starting
Before you begin, gather the following tools and materials:
- Phillips and flathead screwdrivers
- Socket wrench set
- Silicone sealant (roof-safe, non-hardening type)
- Measuring tape
- Level
- Electrical tester (to verify power source)
- Owner’s manual (if available)
It’s also a good idea to have a helper on hand, especially if you’re lifting the unit onto the roof. These AC units can weigh anywhere from 60 to 100 pounds, depending on the model, and working alone on a roof can be risky.
Safety First: Important Precautions
Safety should always be your top priority when working with electrical and rooftop equipment. Here are a few essential tips:
- Turn off all power sources before beginning any work. This includes disconnecting from shore power and turning off the RV’s main breaker.
- Use a sturdy ladder and ensure it’s placed on level ground. Never lean it against the side of the RV—always position it at a safe angle.
- Wear non-slip shoes and consider using a safety harness if you’re working on a steep or high roof.
- Check the roof condition before installation. Look for soft spots, cracks, or signs of water damage. A compromised roof can lead to leaks or structural issues.
- Never work in wet or windy conditions. Rain or strong winds increase the risk of slipping or electrical shock.
Taking these precautions not only protects you but also helps preserve the lifespan of your air conditioner. A little preparation goes a long way in preventing accidents and costly repairs down the road.
Step-by-Step Installation Guide
Now that you’re prepared and safety-conscious, let’s walk through the actual installation process. While professional installation is always an option, many RV owners successfully install their Coleman Mach units themselves with the right guidance. This step-by-step guide will help you do just that—safely and correctly.
Step 1: Remove the Old Unit (If Applicable)
If you’re replacing an existing air conditioner, start by turning off all power and carefully removing the old unit. Use a socket wrench to loosen the mounting bolts underneath the roof. Have a helper support the unit from above as you lower it down. Be gentle—old units can be brittle, and you don’t want to damage the roof opening.
Once the old unit is out, clean the roof opening thoroughly. Remove any old sealant, debris, or insulation. This ensures a tight, weatherproof seal for your new Coleman Mach unit.
Step 2: Position the New Unit
With the roof opening prepped, it’s time to lift the new Coleman Mach air conditioner into place. Use a dolly or have a helper assist you in lifting it onto the roof. Carefully align the unit over the opening, making sure the drain holes are facing the correct direction (usually toward the rear of the RV).
Use a level to ensure the unit is sitting flat. Even a slight tilt can affect drainage and cause water to pool, leading to leaks or mold growth. Adjust the position as needed before securing it.
Step 3: Secure and Seal the Unit
Once the unit is properly aligned, secure it to the roof using the provided mounting bolts. Tighten them evenly to avoid warping the base. Don’t overtighten—this can crack the roof or damage the AC housing.
Next, apply a generous bead of silicone sealant around the entire perimeter of the unit where it meets the roof. Use a roof-safe, non-hardening sealant that remains flexible over time. This prevents water from seeping in during rain or snow. Smooth the sealant with your finger or a caulking tool for a clean finish.
Step 4: Connect the Electrical Wiring
This is the most critical step—and one that requires caution. Locate the electrical junction box inside your RV, usually near the roof opening. Follow the wiring diagram in your owner’s manual to connect the AC unit’s wires to the corresponding terminals (typically labeled L1, L2, and ground).
Double-check all connections to ensure they’re tight and secure. Loose wiring can cause overheating or electrical failure. Once connected, replace the junction box cover and restore power to test the unit.
Step 5: Test the System
Turn on the breaker and set the thermostat to “Cool” mode. Listen for the compressor and fan to start up. You should feel cool air blowing within a few minutes. If the unit doesn’t turn on, double-check the power source, breaker, and wiring connections.
Let the AC run for at least 15–20 minutes to ensure it’s cooling properly and there are no unusual noises or vibrations. If everything looks and sounds good, you’re all set!
Operating Your Coleman Mach Air Conditioner
Congratulations—you’ve successfully installed your Coleman Mach air conditioner! Now it’s time to learn how to operate it efficiently and comfortably. Whether you’re a first-time user or just need a refresher, these tips will help you get the most out of your cooling system.
Using the Thermostat and Controls
Most Coleman Mach units come with a wall-mounted thermostat or a control panel inside the AC unit itself. To operate it:
- Press the Power button to turn the system on.
- Use the Mode button to select “Cool,” “Fan Only,” or “Auto” (if available).
- Adjust the temperature using the up and down arrows. The ideal setting is usually between 72°F and 78°F for comfort and efficiency.
- Set the fan speed to “High” for faster cooling or “Low” for quieter operation.
Some models also have a “Sleep” mode, which gradually adjusts the temperature overnight to save energy and improve comfort.
Maximizing Cooling Efficiency
To keep your RV cool without overworking the AC, follow these practical tips:
- Close curtains and blinds during the day to block out sunlight and reduce heat gain.
- Use fans to circulate cool air. Ceiling or portable fans help distribute air more evenly.
- Avoid opening windows while the AC is running—this lets hot air in and makes the unit work harder.
- Run the AC during cooler parts of the day (early morning or evening) to pre-cool your RV before peak heat.
- Keep vents unobstructed by furniture or bedding. Blocked airflow reduces efficiency.
By following these habits, you’ll not only stay comfortable but also extend the life of your air conditioner and reduce energy consumption.
Maintenance and Troubleshooting Tips
Like any piece of equipment, your Coleman Mach air conditioner needs regular care to perform at its best. A little maintenance goes a long way in preventing breakdowns and costly repairs. Plus, knowing how to troubleshoot common issues can save you time and stress when you’re on the road.
Routine Maintenance Checklist
Here’s what you should do to keep your AC in top shape:
- Clean the air filter monthly. Remove the filter from the return air grille, rinse it with water, and let it dry completely before reinstalling. A dirty filter restricts airflow and reduces efficiency.
- Inspect the roof sealant annually. Look for cracks or gaps and reapply sealant as needed to prevent leaks.
- Check the drain pan and hose. Make sure the drain isn’t clogged with debris, which can cause water to back up and damage the unit.
- Lubricate moving parts (if applicable). Some older models may require occasional lubrication of the fan motor—consult your manual for guidance.
- Run the AC periodically during off-seasons. Even in winter, running the unit for 10–15 minutes once a month helps keep seals flexible and prevents moisture buildup.
Common Problems and How to Fix Them
Even with proper care, issues can arise. Here are a few common problems and their solutions:
- AC won’t turn on: Check the power source, breaker, and thermostat settings. Ensure the unit is receiving 120V power.
- Not cooling enough: Clean the filter, check for blocked vents, and ensure the thermostat is set correctly. In extreme heat, the AC may struggle to keep up—consider using fans or shade.
- Strange noises: Rattling could mean loose parts; grinding may indicate a failing motor. Turn off the unit and inspect for obstructions or damage.
- Water leaking inside: This usually means a clogged drain or damaged sealant. Clear the drain and reseal the roof if necessary.
- Ice buildup on coils: Often caused by a dirty filter or low refrigerant. Turn off the AC, let it thaw, and clean the filter. If ice returns, call a technician.
When in doubt, consult your owner’s manual or contact Coleman customer support. Most issues can be resolved with simple fixes, but electrical or refrigerant problems should be handled by a professional.
Performance Comparison: Coleman Mach vs. Competitors
When choosing an RV air conditioner, it’s natural to compare options. The Coleman Mach series stands out for its balance of performance, durability, and user-friendly design. But how does it stack up against competitors like Dometic or Advent?
Below is a comparison of key features across three popular 15,000 BTU models:
| Feature | Coleman Mach 15 | Dometic Penguin II | Advent ACR15015 |
|---|---|---|---|
| BTU Output | 15,000 | 15,000 | 15,000 |
| Noise Level (dB) | 58 | 62 | 65 |
| Energy Efficiency (EER) | 11.5 | 11.0 | 10.8 |
| Digital Thermostat | Yes | Yes | No |
| Warranty | 2 years | 2 years | 1 year |
| Price Range | $800–$1,000 | $900–$1,100 | $700–$850 |
As you can see, the Coleman Mach 15 offers competitive noise levels, strong energy efficiency, and reliable performance at a mid-range price. While Advent may be cheaper upfront, it lacks some of the advanced features and durability of the Mach series. Dometic is a solid alternative, but often comes at a higher cost.
Ultimately, the best choice depends on your budget, RV size, and climate needs. But for most RV owners, the Coleman Mach air conditioner delivers excellent value and peace of mind.
Final Thoughts: Why Coleman Mach Is a Smart Choice
After walking through the setup, operation, and maintenance of the Coleman Mach air conditioner, one thing is clear: this unit is built for real-world RV life. It’s reliable, efficient, and designed with the traveler in mind. Whether you’re a weekend warrior or a full-time RVer, having a dependable cooling system makes all the difference in your comfort and enjoyment on the road.
The Coleman Mach air conditioner instructions don’t have to be complicated. With the right preparation, a little patience, and this guide, you can install and operate your unit with confidence. And by following regular maintenance routines, you’ll keep it running smoothly for years to come.
So the next time you pull into a hot campsite, you won’t have to worry about fumbling with controls or dealing with a malfunctioning AC. Instead, you’ll be able to kick back, relax, and enjoy the cool, quiet comfort that only a well-maintained Coleman Mach can provide. After all, the best adventures are the ones where you feel at home—no matter where you park.
Frequently Asked Questions
How do I install a Coleman Mach air conditioner?
To install a Coleman Mach air conditioner, first ensure your RV or space has a compatible roof opening and electrical connection. Follow the included mounting template, secure the unit with screws, and connect the wiring according to the wiring diagram in the manual.
What size Coleman Mach air conditioner do I need?
Choose a Coleman Mach air conditioner based on the square footage and insulation of your space—common sizes range from 9,000 to 15,000 BTUs. For most RVs, a 13,500 or 15,000 BTU unit provides efficient cooling in various climates.
How do I operate the thermostat on my Coleman Mach AC unit?
The thermostat on a Coleman Mach air conditioner is typically controlled via a digital wall thermostat or a remote. Set your desired temperature, select cooling or fan mode, and the unit will cycle on and off to maintain comfort.
Why is my Coleman Mach air conditioner not cooling properly?
If your Coleman Mach air conditioner isn’t cooling, check for blocked vents, a dirty air filter, or low refrigerant levels. Also, ensure the thermostat is set correctly and the unit has proper voltage and airflow.
Can I run my Coleman Mach AC on a generator?
Yes, you can run a Coleman Mach air conditioner on a generator, but it must provide sufficient wattage—typically 3,000 to 4,000 starting watts depending on the model. Use a generator rated for continuous operation to avoid damage.
How do I clean and maintain my Coleman Mach air conditioner?
Regularly clean the air filter and inspect the condenser coils for dirt or debris. At the start of each season, check seals, vents, and electrical connections to ensure optimal performance and longevity of your unit.

