
Featured image for coleman ductless air conditioner remote control instructions
Image source: partsexpert.ca
Master your Coleman ductless air conditioner with ease using the intuitive remote control—this guide breaks down every function for instant comfort. From adjusting temperature and fan speed to setting timers and modes, clear, step-by-step instructions ensure you get the most from your unit without the guesswork.
Key Takeaways
- Power on/off easily: Use the power button to start or stop your Coleman ductless AC.
- Adjust temperature quickly: Press up/down arrows to set your desired cooling level.
- Select fan speed: Choose low, medium, high, or auto for optimal airflow control.
- Switch modes seamlessly: Toggle between cool, fan, dry, or heat with the mode button.
- Use timer function: Set auto on/off times to save energy and improve convenience.
- Reset remote if unresponsive: Remove batteries, wait 10 seconds, then reinsert to restore function.
📑 Table of Contents
- Coleman Ductless Air Conditioner Remote Control Instructions Guide
- Understanding Your Coleman Ductless AC Remote Control
- Step-by-Step Remote Control Setup and Pairing
- Mastering Basic Remote Functions
- Advanced Features and Smart Functions
- Troubleshooting Common Remote Issues
- Maintenance Tips to Extend Remote Life
- Conclusion
Coleman Ductless Air Conditioner Remote Control Instructions Guide
It’s a sweltering summer afternoon, and you’ve just come home after a long day. You’re looking forward to cooling off in your living room with your trusty Coleman ductless air conditioner. You press the power button on the remote—nothing. You try again. Still nothing. Frustration sets in. Sound familiar? If you’ve ever found yourself squinting at a tiny LCD screen, pressing buttons in random order, or wondering why your AC isn’t responding, you’re not alone. The remote control is the brain of your ductless AC system, and understanding how to use it properly can make all the difference between comfort and chaos.
Coleman ductless air conditioners are known for their energy efficiency, quiet operation, and sleek design. But like any modern appliance, they rely heavily on a well-functioning remote control to deliver optimal performance. Whether you’re setting the temperature, switching modes, or scheduling a timer, the remote is your go-to tool. Yet, many users struggle with even the most basic functions—especially when the manual gets misplaced (we’ve all been there). That’s why this guide exists: to walk you through every essential function of your Coleman ductless air conditioner remote control, step by step, in plain, easy-to-understand language. No technical jargon, no confusing diagrams—just real, practical help.
In this comprehensive guide, we’ll cover everything from initial setup and pairing to advanced features like sleep mode and energy-saving settings. You’ll learn how to troubleshoot common issues, interpret error codes, and even extend the life of your remote. Whether you’re a first-time user or someone who’s had their unit for years but still finds the remote a bit mysterious, this guide will empower you to take full control of your indoor climate. Let’s dive in and make your Coleman ductless AC work smarter—not harder.
Understanding Your Coleman Ductless AC Remote Control
Before we get into the nitty-gritty of operation, let’s take a moment to get acquainted with your remote. The Coleman ductless air conditioner remote control may look like a standard HVAC remote, but it’s packed with features designed to give you precise control over your indoor environment. Most models come with a compact, handheld design featuring a backlit LCD screen, intuitive buttons, and a responsive interface. The remote typically operates on two AAA batteries and communicates with the indoor unit via infrared signals—so line of sight matters.
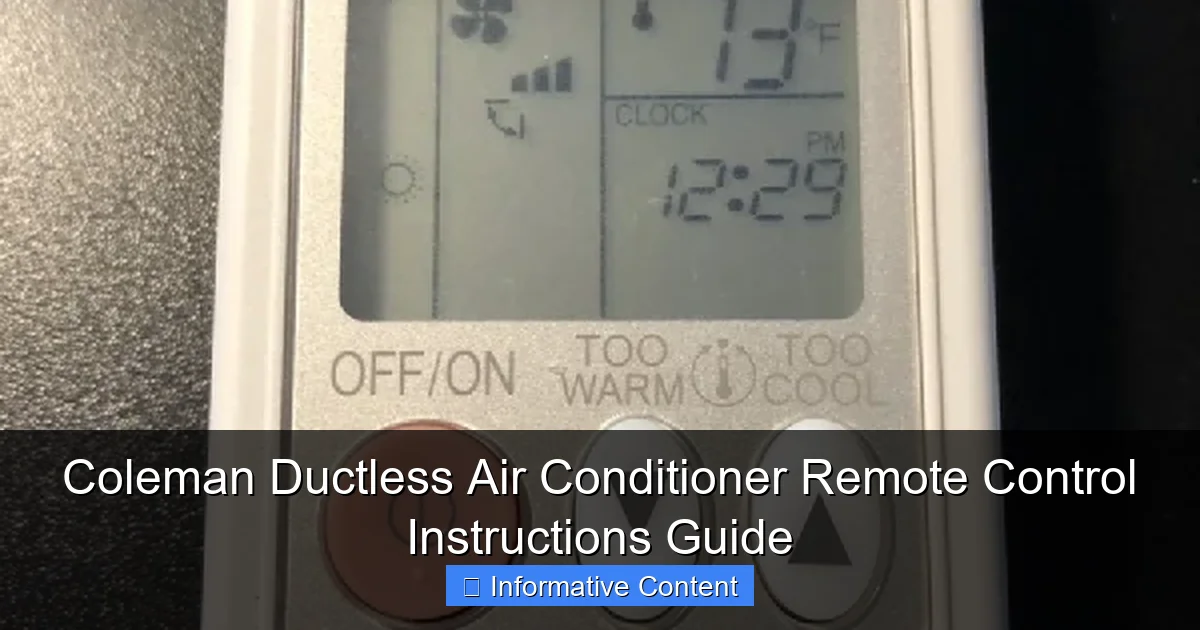
Visual guide about coleman ductless air conditioner remote control instructions
Image source: dansanderson.com
Remote Layout and Key Components
Let’s break down the main sections of the remote so you know what each button does. While the exact layout may vary slightly depending on your model, the core functions remain consistent across most Coleman ductless AC remotes.
- Power Button: Usually located at the top, this turns the unit on or off. A single press toggles the system.
- Mode Button: Cycles through operating modes: Cool, Heat, Fan, Dry, and Auto. Each press changes the mode, and the current mode is displayed on the screen.
- Temperature Up/Down Buttons: Adjust the desired temperature in 1-degree increments. Most units allow settings between 60°F and 86°F (16°C to 30°C).
- Fan Speed Button: Controls airflow intensity. Options typically include Low, Medium, High, and Auto. Auto lets the system decide based on cooling needs.
- Timer Button: Used to set on/off schedules. You can program the AC to turn on before you get home or shut off after you fall asleep.
- Sleep Button: Activates energy-saving sleep mode, which gradually adjusts temperature for comfort and efficiency overnight.
- Swing/Louver Button: Adjusts the direction of airflow from the indoor unit’s vents for even distribution.
- Display/Light Button: Turns the remote’s backlight on or off—handy for nighttime use.
How the Remote Communicates with the Unit
Your remote sends signals to the indoor unit using infrared (IR) technology. This means the remote must have a clear line of sight to the receiver on the AC unit—usually located on the front panel. Obstacles like furniture, curtains, or even people can block the signal. If your remote isn’t working, check that nothing is blocking the path between the remote and the unit. Also, make sure the remote is within range—typically up to 20 feet (6 meters).
Some newer Coleman models also support Wi-Fi connectivity via optional smart hubs, allowing control through a mobile app. However, the standard remote remains the primary interface for most users. Understanding how it communicates helps troubleshoot issues like unresponsiveness or delayed commands.
Common Remote Models and Compatibility
Coleman offers several remote models depending on the ductless system you have. The most common include the Coleman Comfort Control Remote (Model CRC-1) and the CRC-2, which are compatible with a wide range of ductless mini-split systems. Always check your unit’s model number (usually found on a label inside the front panel or in the user manual) to confirm remote compatibility. Using the wrong remote can lead to malfunction or limited functionality.
Pro Tip: If you’ve lost your remote or it’s damaged, contact Coleman customer support or check with authorized dealers. Replacement remotes are often available, but they must match your system’s frequency and protocol.
Step-by-Step Remote Control Setup and Pairing
Setting up your Coleman ductless air conditioner remote might seem straightforward, but a few key steps ensure it works flawlessly from day one. Whether you’re installing a new unit or replacing an old remote, proper setup is essential. Let’s walk through the process so you can start cooling (or heating) with confidence.
Initial Remote Setup
Start by inserting two fresh AAA batteries into the remote. Make sure the polarity is correct—positive (+) and negative (-) ends aligned with the markings inside the battery compartment. Once installed, the remote should power on automatically, displaying the current time and temperature settings (if previously configured).
Next, point the remote directly at the indoor unit and press the Power button. The unit should respond with a beep or a light indicator, confirming communication. If nothing happens, check the batteries, ensure the unit is plugged in, and verify that the remote is within range and unobstructed.
Pairing the Remote with the Indoor Unit
Most Coleman ductless systems are pre-paired at the factory, so pairing isn’t usually necessary. However, if you’re using a replacement remote or experiencing communication issues, manual pairing may be required. Here’s how:
- Turn off the AC unit using the power switch on the indoor unit or the circuit breaker.
- Wait 10 seconds, then turn it back on.
- Within 30 seconds, press and hold the Mode and Fan Speed buttons on the remote simultaneously for 5 seconds.
- The remote screen should flash, indicating pairing mode.
- Press the Power button once to confirm.
- The unit should beep, and the remote display should stabilize—pairing is complete.
If pairing fails, repeat the process. Some models may require a different button combination—consult your user manual for model-specific instructions.
Setting the Clock and Date
Accurate time settings are crucial for timer functions and sleep mode. To set the clock:
- Press and hold the Timer button for 3 seconds until the clock display blinks.
- Use the Temperature Up/Down buttons to adjust the hour.
- Press Timer again to move to minutes.
- Adjust minutes using the same buttons.
- Press Timer once more to confirm.
Some remotes also allow you to set the day of the week, which helps with weekly scheduling. Check your model’s features—this is especially useful if you use timer-based routines.
Troubleshooting Setup Issues
If your remote still isn’t working after setup, try these quick fixes:
- Replace the batteries: Weak batteries are the #1 cause of remote failure.
- Reset the remote: Remove batteries, wait 30 seconds, reinsert, and try again.
- Check for interference: Other IR devices (like TV remotes) can sometimes interfere. Test in a different room if possible.
- Clean the sensor: Dust on the remote’s IR emitter or the unit’s receiver can block signals. Use a soft, dry cloth.
Remember: patience is key. Most setup issues are minor and solvable with a few simple steps.
Mastering Basic Remote Functions
Now that your remote is set up and paired, it’s time to master the basics. These core functions are used daily and form the foundation of your AC experience. Let’s go through each one with practical examples so you can use them like a pro.
Turning the Unit On and Off
This one seems simple, but it’s worth covering. To turn on your Coleman ductless AC:
- Point the remote at the indoor unit.
- Press the Power button once.
- The unit will beep, and the display will show the current mode and temperature.
To turn it off, press the Power button again. The unit will shut down, and the fan may continue running for a few seconds to cool internal components—this is normal.
Pro Tip: If you’re leaving for an extended period, turn off the unit at the circuit breaker to save energy and prevent accidental activation.
Selecting Operating Modes
Your remote lets you choose from several modes depending on your needs. Here’s what each does:
- Cool Mode: Lowers room temperature. Ideal for hot days. The compressor runs to remove heat.
- Heat Mode: Warms the room. Perfect for chilly mornings or winter months (if your model is a heat pump).
- Fan Mode: Circulates air without cooling or heating. Great for ventilation or mild weather.
- Dry Mode: Reduces humidity without significantly lowering temperature. Useful in damp climates or during rainy seasons.
- Auto Mode: The system automatically selects Cool or Heat based on the set temperature and room conditions.
To switch modes, press the Mode button repeatedly until the desired mode appears on the screen. The unit will adjust accordingly within a few minutes.
Adjusting Temperature and Fan Speed
Temperature control is straightforward: use the Up and Down arrows to set your preferred temperature. Most Coleman units allow settings from 60°F to 86°F. For example, if it’s 80°F outside and you want a comfortable 72°F indoors, press the down arrow until “72” appears.
Fan speed affects how quickly the room reaches the set temperature and how noisy the unit is. Options typically include:
- Low: Quiet operation, slower cooling.
- Medium: Balanced noise and performance.
- High: Fastest cooling, louder fan.
- Auto: The system adjusts fan speed based on demand.
Press the Fan Speed button to cycle through options. For energy savings, use Auto or Low when possible.
Using the Timer Function
The timer is one of the most useful features—it lets you automate your AC to save energy and enhance comfort. You can set the unit to turn on before you arrive home or turn off after you fall asleep.
To set a timer:
- Press the Timer button. The display will show “ON” or “OFF” timer options.
- Use the Temperature Up/Down buttons to set the desired time (e.g., 7:00 PM).
- Press Timer again to confirm.
- Repeat for the opposite timer (e.g., set “OFF” for 11:00 PM).
Example: You leave for work at 8 AM and return at 6 PM. Set the “OFF” timer for 8:30 AM and the “ON” timer for 5:30 PM. Your home will be cool and ready when you walk in the door.
Note: Timers are 24-hour based. Always double-check AM/PM settings to avoid surprises.
Controlling Airflow Direction
Proper airflow ensures even cooling and prevents hot or cold spots. Use the Swing or Louver button to adjust the vent direction.
- Press once to activate automatic swing—the vents will move up and down to distribute air.
- Press again to stop at a fixed position.
- Some models allow left-right adjustment—check your remote for additional buttons.
Tip: Avoid directing airflow straight at people for long periods, as it can cause discomfort or drafts.
Advanced Features and Smart Functions
Beyond the basics, your Coleman ductless AC remote offers several advanced features designed to improve comfort, save energy, and simplify daily use. These “smart” functions may not be immediately obvious, but once you learn them, you’ll wonder how you lived without them.
Sleep Mode: Comfort That Adapts Overnight
Sleep mode is a game-changer for nighttime comfort. Instead of running at a constant temperature, the system gradually adjusts the temperature as you sleep—warming slightly in cooling mode or cooling slightly in heating mode. This mimics your body’s natural temperature drop during sleep, helping you rest better while saving energy.
To activate sleep mode:
- Press the Sleep button once.
- The display will show a moon icon or “SLEEP” indicator.
- The unit will run for 7–8 hours, then automatically shut off.
Example: You set the AC to 68°F before bed. With sleep mode on, it might rise to 70°F after 2 hours and 72°F after 4 hours—reducing strain on the compressor and lowering your bill.
Note: Sleep mode overrides timer settings, so disable it if you’re using a scheduled shut-off.
Energy-Saving and Eco Modes
Many Coleman remotes include an Eco or Energy Saver mode. When activated, the system runs the compressor intermittently instead of continuously, reducing power consumption by up to 20%.
To enable Eco mode:
- Look for an Eco button or a leaf icon.
- Press it once to activate.
- The display may show “ECO” or a green indicator.
This mode is ideal for mild weather or when you’re away but want to maintain a baseline temperature. However, it may take longer to cool or heat the room compared to full-power mode.
Turbo or Quick Cool/Heat Mode
Need fast cooling on a scorching day? Turbo mode ramps up the compressor and fan to maximum for rapid temperature adjustment.
To use Turbo mode:
- Press the Turbo button (sometimes labeled “Quick Cool” or “Max”).
- The unit will run at peak performance for 30 minutes, then return to normal operation.
This is great for quickly cooling a room after it’s been closed up all day. Just remember—it uses more energy, so use it sparingly.
Filter Reset and Maintenance Alerts
Some Coleman remotes display a filter icon when the air filter needs cleaning. This typically appears after 250 hours of operation. To reset the alert:
- Clean or replace the filter (located behind the front panel).
- Press and hold the Filter or Reset button for 3 seconds.
- The icon should disappear.
Regular filter maintenance improves air quality and system efficiency. Aim to check the filter every 1–2 months during heavy use.
Child Lock Function
Worried about kids (or pets) playing with the remote? Use the child lock to disable all buttons except Power.
To activate:
- Press and hold the Mode and Fan Speed buttons for 5 seconds.
- The display will show a lock icon.
- To unlock, repeat the same step.
This prevents accidental changes and keeps your settings secure.
Troubleshooting Common Remote Issues
Even the best remotes can act up from time to time. Whether it’s unresponsiveness, erratic behavior, or a blank screen, most issues have simple fixes. Let’s go through the most common problems and how to solve them—no technician required.
Remote Not Responding
If your remote isn’t working at all, start with these steps:
- Check the batteries: Weak or dead batteries are the most common cause. Replace them with fresh AAA batteries.
- Ensure line of sight: Point the remote directly at the indoor unit. Remove any obstacles.
- Test the IR signal: Use your phone camera to see if the remote’s IR emitter lights up when a button is pressed (point the remote at the camera—you should see a faint purple glow).
- Reset the remote: Remove batteries, wait 30 seconds, reinsert, and try again.
If none of these work, the remote may be faulty and need replacement.
Buttons Not Working or Sticking
Over time, buttons can become unresponsive due to dirt or wear. Try cleaning the remote with a soft, dry cloth. For sticky buttons, use a cotton swab lightly dampened with isopropyl alcohol—never spray liquid directly on the remote.
If a specific button (like Mode or Timer) isn’t working, it could be a hardware issue. Contact Coleman support for repair or replacement options.
Display Issues or Flickering Screen
A flickering or dim display usually points to low battery power. Replace the batteries and see if the issue resolves. If the screen remains blank or garbled, the remote’s internal circuitry may be damaged.
Pro Tip: Avoid exposing the remote to extreme temperatures or moisture—this can damage the LCD screen.
Incorrect Temperature Readings
If the remote shows a temperature that doesn’t match the room, it may be due to placement. The remote has a built-in temperature sensor, so if it’s sitting in direct sunlight or near a heat source (like a lamp), it will give false readings.
Solution: Keep the remote in a shaded, central location. For more accurate room temperature, rely on the indoor unit’s sensor instead.
Remote Loses Pairing
If the remote stops communicating with the unit, re-pair it using the steps outlined earlier. Power cycling the AC (turning it off and on at the breaker) can also help reset the connection.
If pairing fails repeatedly, there may be an issue with the unit’s receiver or the remote’s transmitter. In rare cases, interference from other electronic devices can cause problems—try moving the remote closer to the unit.
When to Replace the Remote
If troubleshooting doesn’t resolve the issue, it may be time for a new remote. Signs include:
- No response after battery replacement.
- Physical damage (cracked screen, broken buttons).
- Persistent pairing failures.
Always purchase a compatible model from an authorized dealer to ensure full functionality.
Maintenance Tips to Extend Remote Life
A little care goes a long way in keeping your Coleman remote in top condition. With proper maintenance, your remote can last for years—saving you money and hassle down the road.
Battery Care and Replacement
Use high-quality alkaline AAA batteries and replace them every 6–12 months, even if they seem to work. Weak batteries can cause erratic behavior or shorten the remote’s lifespan. When replacing, clean the battery contacts with a dry cloth to prevent corrosion.
Avoid rechargeable batteries unless specified—they often don’t provide consistent voltage, which can affect performance.
Cleaning the Remote
Dust and grime can accumulate on the buttons and screen. Clean the remote monthly with a soft, dry microfiber cloth. For stubborn dirt, lightly dampen the cloth with water or isopropyl alcohol—never soak the remote.
Pay special attention to the IR emitter (usually a small dark window on the front) and the sensor on the AC unit. Keep both clean and unobstructed.
Proper Storage
Store the remote in a cool, dry place when not in use. Avoid leaving it in hot cars, near windows, or in humid areas like bathrooms. Extreme temperatures can damage internal components.
Consider using a remote holder or hook near the AC unit to prevent misplacement.
Avoiding Physical Damage
Dropping the remote can crack the screen or dislodge internal parts. Handle it gently and keep it away from pets and small children who might chew or step on it.
If you have multiple remotes (e.g., for TV and AC), label them to avoid confusion.
Software and Firmware Updates
While most Coleman remotes don’t receive software updates, some smart models connected via Wi-Fi may. Check the manufacturer’s website or app periodically for updates that improve performance or add features.
Even if your remote isn’t “smart,” keeping the AC unit’s firmware updated (if applicable) ensures compatibility and optimal performance.
Conclusion
Your Coleman ductless air conditioner remote control is more than just a gadget—it’s the key to comfort, efficiency, and convenience. From turning on the AC on a hot day to setting a timer for energy savings, mastering its functions transforms your indoor climate experience. We’ve covered everything from basic setup and pairing to advanced features like sleep mode, Eco settings, and troubleshooting common issues.
Remember, the remote is designed to make your life easier, not harder. With the tips and instructions in this guide, you’re now equipped to use every feature confidently. Whether you’re adjusting the temperature, cleaning the filter, or resetting a timer, you’ve got this. And if you ever run into trouble, don’t panic—most issues are fixable with a few simple steps.
Take a moment today to test your remote, clean it, and maybe even set up a timer for tomorrow morning. Small actions like these can make a big difference in your comfort and energy bills. Your Coleman ductless AC is a reliable partner in keeping your home cool and cozy—now, so is your understanding of how to control it.
Stay cool, stay informed, and enjoy the peace of mind that comes with knowing your remote inside and out.
Frequently Asked Questions
How do I pair my Coleman ductless air conditioner remote control with the unit?
To pair the remote, ensure the AC is powered on, then press and hold the “Set” or “Pair” button on the indoor unit (refer to your manual for exact location) until the remote display flashes. The remote should sync automatically within 30 seconds.
What do the mode symbols mean on my Coleman AC remote control?
The mode symbols (Cool, Dry, Fan, Auto) let you select your preferred operation—Cool for cooling, Dry for dehumidifying, Fan for airflow only, and Auto for automatic temperature regulation. Check your Coleman ductless air conditioner remote control instructions manual for specific symbol details.
Why is my Coleman AC remote not working even with new batteries?
If the remote doesn’t work with new batteries, check for obstructions between the remote and the AC’s IR receiver, and ensure you’re within 20 feet of the unit. Reprogramming the remote or resetting the AC’s power may also resolve the issue.
How do I set the timer on my Coleman ductless AC remote?
Press the “Timer” button on the remote, then use the up/down arrows to adjust the desired time (in hours). Press “Timer” again to confirm. The unit will automatically turn on/off based on your setting.
Can I adjust the fan speed with my Coleman AC remote control?
Yes, press the “Fan” button to cycle through speed options (Low, Medium, High, Auto). The selected speed will display on the remote screen. Refer to your Coleman ductless air conditioner remote control instructions for model-specific features.
How do I troubleshoot unresponsive buttons on my Coleman remote?
Clean the remote’s button contacts gently with isopropyl alcohol and a cotton swab. If issues persist, perform a factory reset by removing batteries, holding all buttons for 10 seconds, then reinserting batteries.

