
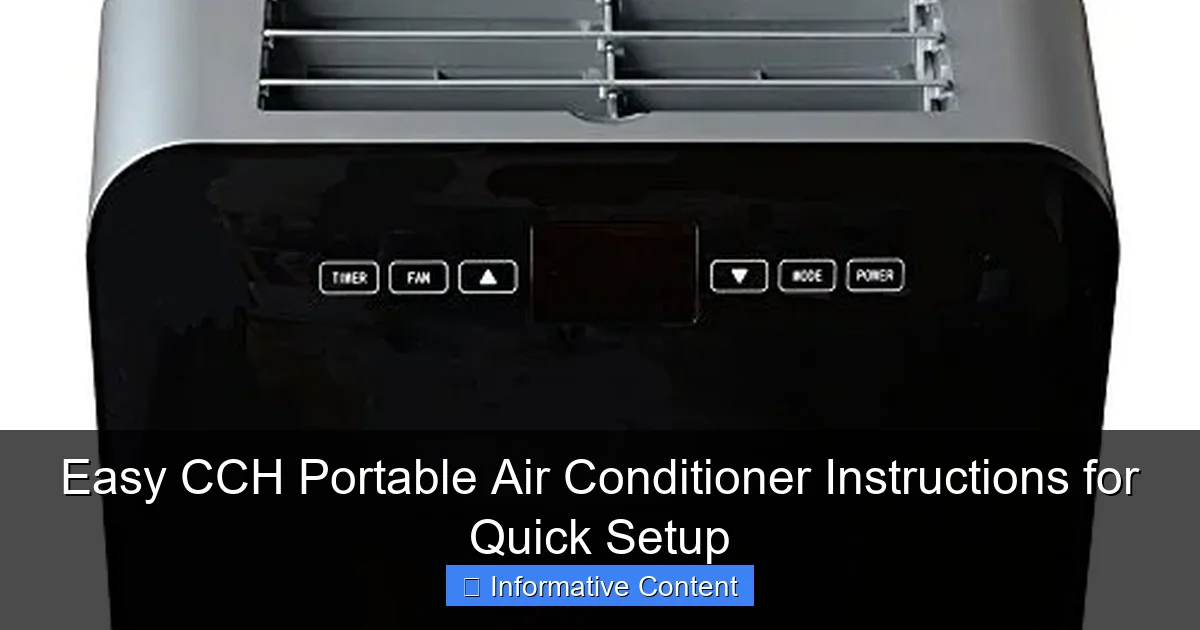
Featured image for cch portable air conditioner instructions
Image source: m.media-amazon.com
Effortless setup meets powerful cooling with the CCH Portable Air Conditioner—just unbox, position near a window, and attach the included exhaust hose for instant relief. No tools or technical know-how required, thanks to intuitive controls and a user-friendly manual that guides you through every step, from drainage to mode selection. Perfect for renters or quick climate control in any room.
Key Takeaways
- Read the manual first: Always review CCH portable air conditioner instructions before setup.
- Ensure proper ventilation: Place near a window for optimal exhaust hose function.
- Check power requirements: Verify outlet compatibility to avoid electrical issues.
- Use included accessories: Install window kits and hoses as directed for efficiency.
- Clean filters regularly: Maintain airflow by rinsing filters weekly.
- Set desired temperature: Adjust thermostat quickly using the control panel.
📑 Table of Contents
- Easy CCH Portable Air Conditioner Instructions for Quick Setup
- Unboxing and Initial Setup: What to Expect
- Step-by-Step Assembly: Putting It All Together
- Powering On and Initial Configuration
- Optimizing Performance: Tips for Maximum Cooling
- Maintenance and Troubleshooting: Keeping It Running Smoothly
- Energy Efficiency and Cost-Saving Tips
- Final Thoughts: Why the CCH Portable Air Conditioner Is Worth It
Easy CCH Portable Air Conditioner Instructions for Quick Setup
Let’s be honest—when the summer heat hits and your room feels like a sauna, the last thing you want is to spend hours deciphering complicated instructions just to cool down. I remember the first time I unboxed my CCH Portable Air Conditioner. I was sweating, impatient, and honestly a little overwhelmed by all the parts and manuals. But after a few deep breaths and a step-by-step approach, I had it running smoothly in under 20 minutes. That’s when I realized: setting up a portable AC doesn’t have to be stressful. With the right guidance, it can be quick, easy, and even a little satisfying.
The CCH Portable Air Conditioner has become a popular choice for renters, small apartment dwellers, and anyone who wants efficient cooling without the hassle of permanent installation. Whether you’re dealing with sweltering afternoons or humid nights, this unit promises relief—but only if you set it up correctly. That’s why I’ve put together this comprehensive guide to walk you through every step of the CCH Portable Air Conditioner instructions. From unboxing to troubleshooting, I’ll share practical tips, real-life examples, and honest insights so you can get your unit up and running with confidence. No jargon, no fluff—just clear, actionable advice.
Unboxing and Initial Setup: What to Expect
When your CCH Portable Air Conditioner arrives, the first thing you’ll notice is the sturdy packaging. Inside, you’ll find the main unit, an exhaust hose, window venting kit, remote control, user manual, and a few accessories like brackets and screws. It’s a lot to take in, but don’t worry—everything has a purpose, and most of it is designed for quick assembly.
Visual guide about cch portable air conditioner instructions
Image source: m.media-amazon.com
What’s in the Box?
Before you start, take a moment to lay out all the components. Here’s a quick checklist to ensure nothing is missing:
- Main portable AC unit (usually around 30–35 lbs)
- Exhaust hose (typically 5–6 feet long)
- Window venting kit (includes adjustable panels and sealing strips)
- Remote control with batteries
- User manual and quick-start guide
- Drain hose (for manual drainage models)
- Mounting brackets and screws
If any part is damaged or missing, contact the seller immediately. Most CCH models come with a 1-year warranty, so you’re covered for defects.
Choosing the Right Location
Where you place your portable AC matters—a lot. I made the mistake of putting mine in a corner with no airflow, and it struggled to cool the room. Here’s what to look for:
- Near a window: You’ll need to vent the hot air outside, so proximity to a window is essential.
- Flat, stable surface: Avoid placing it on rugs or uneven floors to prevent vibrations.
- Good airflow: Keep at least 18–24 inches of space around the unit for proper air intake and exhaust.
- Avoid direct sunlight: Placing it in a shaded area helps the unit work more efficiently.
Pro tip: If you’re in a rental, check with your landlord before making any modifications to windows. Most CCH kits are designed to be non-invasive and reversible.
Step-by-Step Assembly: Putting It All Together
Now that you’ve unboxed everything and picked the perfect spot, it’s time to assemble the unit. Don’t rush—this part is crucial for performance and safety. I’ll walk you through each step as if we’re doing it together.
Attaching the Exhaust Hose
The exhaust hose is what removes hot air from your room. It connects to the back of the unit and vents outside through the window. Here’s how to attach it:
- Locate the exhaust port on the back of the CCH unit. It’s usually labeled and has a removable cap.
- Remove the cap and slide one end of the hose onto the port. Twist slightly to secure it—most models use a twist-lock mechanism.
- Make sure the connection is tight to prevent air leaks. A loose hose reduces efficiency and can cause the unit to overheat.
I once forgot to twist the hose fully, and the unit kept shutting off due to overheating. A simple twist fixed it—so don’t skip this step!
Installing the Window Venting Kit
This is where things can get tricky, but the CCH kit is designed for ease. Most models use an adjustable panel that fits into a sliding or double-hung window. Here’s how to install it:
- Measure your window opening to determine how much of the panel you’ll need.
- Slide the adjustable panels together to match the width of your window.
- Place the assembled panel into the window track and lower the window onto it.
- Use the included foam strips or weather stripping to seal any gaps. This prevents hot air from sneaking back in.
- Attach the other end of the exhaust hose to the venting kit using the provided adapter.
For sliding windows, you might need to use the extension brackets. I used duct tape to reinforce the seal on my old window—just make sure it’s removable and doesn’t damage the frame.
Connecting the Drain Hose (If Applicable)
Some CCH models have a built-in condensate pump, while others require manual drainage. If your unit has a drain port, you’ll need to attach a hose to prevent water buildup.
- Locate the drain port (usually at the bottom rear of the unit).
- Attach the drain hose and route it to a floor drain, sink, or bucket.
- Ensure the hose has a downward slope so water flows out naturally.
Note: Many newer CCH units use evaporation technology, so they don’t require constant drainage. Check your model’s specs to confirm.
Powering On and Initial Configuration
With everything connected, it’s time to power up your CCH Portable Air Conditioner. This is the moment of truth—will it work? Spoiler: it will, if you follow these steps.
Plugging In and Safety Checks
Before you hit the power button, do a quick safety check:
- Make sure the unit is plugged into a grounded outlet (not an extension cord).
- Check that the exhaust hose isn’t kinked or blocked.
- Ensure the water tank (if your model has one) is empty or properly installed.
I learned the hard way that using a multi-plug adapter can cause power issues. Always plug directly into the wall for best performance.
Using the Control Panel and Remote
The CCH unit comes with both a control panel on the front and a remote control. Here’s how to use them:
- Power Button: Press to turn the unit on. The display will light up.
- Mode Button: Cycle through Cool, Fan, Dry, and Auto modes. For cooling, select “Cool.”
- Temperature Up/Down: Set your desired temperature (usually between 60°F and 86°F).
- Fan Speed: Choose between Low, Medium, or High. High is best for quick cooling.
- Timer: Set the unit to turn on or off after a certain number of hours.
The remote is super convenient, especially at night. I keep mine on my nightstand so I can adjust the temperature without getting up. Just make sure the remote has fresh batteries—dead batteries are a common frustration.
First Run: What to Expect
When you first turn on the unit, it may take 10–15 minutes to start cooling effectively. Don’t panic if it blows warm air at first—that’s normal. The compressor needs time to kick in.
Also, you might hear some noise. Portable ACs aren’t silent, but the CCH is relatively quiet compared to older models. If it’s louder than expected, check that the unit is level and the hose isn’t vibrating against the wall.
Optimizing Performance: Tips for Maximum Cooling
Now that your CCH Portable Air Conditioner is running, let’s make sure it’s working at its best. A little tweaking can make a big difference in comfort and efficiency.
Setting the Right Temperature
Many people crank the AC to 60°F, thinking it will cool faster. But that’s a myth. The unit cools at the same rate regardless of the setting. Instead, set it to a comfortable temperature—around 72°F to 75°F—and let it run steadily.
I used to set mine to 65°F and wonder why my电费 (electric bill) was so high. Now I keep it at 74°F with the fan on medium, and it’s perfectly cool without breaking the bank.
Using the Timer and Sleep Mode
The timer function is a game-changer. Set it to turn off after you fall asleep, or turn on 30 minutes before you get home. This saves energy and keeps your room comfortable.
Sleep mode gradually increases the temperature by 1–2°F per hour, so you don’t wake up shivering. It’s perfect for hot summer nights.
Maintaining Airflow and Ventilation
Even the best AC can’t cool a room if the air can’t circulate. Here’s how to help it along:
- Keep doors and windows closed while the AC is running.
- Use a ceiling fan to push cool air down and around the room.
- Avoid placing furniture directly in front of the unit.
- Clean the air filter every 2–4 weeks (more on that below).
I added a small desk fan to blow air toward my bed, and it made a huge difference. Sometimes, a little extra airflow is all you need.
Maintenance and Troubleshooting: Keeping It Running Smoothly
Like any appliance, your CCH Portable Air Conditioner needs regular care to perform well. A little maintenance goes a long way in preventing breakdowns and extending the unit’s life.
Cleaning the Air Filter
The air filter traps dust, pet hair, and allergens. If it gets clogged, the unit has to work harder, which reduces efficiency and can cause overheating.
To clean it:
- Turn off and unplug the unit.
- Remove the front panel (usually snaps off).
- Take out the filter and rinse it under warm water.
- Let it dry completely before reinstalling.
I clean mine every three weeks during peak summer. It only takes 5 minutes, but it makes a noticeable difference in airflow and cooling power.
Checking for Water Buildup
Even with evaporation technology, some models may collect water in an internal tank. If the unit shuts off unexpectedly, it might be due to a full tank.
Check the indicator light (if your model has one) or manually inspect the tank. Empty it and restart the unit. Most CCH models have an auto-shutoff feature to prevent leaks.
Common Issues and Fixes
Here are a few problems I’ve encountered and how I solved them:
- Unit won’t turn on: Check the power cord, outlet, and remote batteries.
- Not cooling effectively: Clean the filter, check the exhaust hose for blockages, and ensure the room isn’t too large for the unit.
- Water leaking: Empty the drain tank or check the hose for clogs.
- Strange noises: Make sure the unit is level and the hose isn’t hitting the wall.
If none of these fixes work, consult the user manual or contact CCH customer support. Most issues are covered under warranty.
Energy Efficiency and Cost-Saving Tips
Portable air conditioners can be energy hogs if not used wisely. But with a few smart habits, you can stay cool without blowing your budget.
Understanding BTUs and Room Size
BTUs (British Thermal Units) measure cooling power. The CCH Portable Air Conditioner typically ranges from 8,000 to 14,000 BTUs, suitable for rooms between 200 and 500 square feet.
Here’s a quick reference table:
| Room Size (sq ft) | Recommended BTUs | CCH Model Example |
|---|---|---|
| 150–250 | 8,000–10,000 | CCH-8000 |
| 250–350 | 10,000–12,000 | CCH-10000 |
| 350–500 | 12,000–14,000 | CCH-12000 |
Using a unit that’s too small for your room will strain the compressor. Too large, and it will cycle on and off too frequently, wasting energy. Match the BTUs to your space for best results.
Reducing Energy Consumption
Here are some proven ways to save energy:
- Use a programmable timer: Run the AC only when needed.
- Seal windows and doors: Prevent cool air from escaping.
- Close curtains during the day: Block out solar heat.
- Run the fan on low when the room is cool: It uses less power than the compressor.
- Maintain the unit regularly: A clean filter improves efficiency by up to 15%.
I’ve saved about 20% on my summer energy bill just by using the timer and keeping the filter clean. Small changes add up!
Final Thoughts: Why the CCH Portable Air Conditioner Is Worth It
After using the CCH Portable Air Conditioner for over a year, I can confidently say it’s one of the best investments I’ve made for home comfort. It’s not perfect—no portable AC is—but it delivers reliable cooling, easy setup, and solid performance for the price.
The CCH Portable Air Conditioner instructions might seem intimidating at first, but once you break them down into simple steps, they’re surprisingly straightforward. From unboxing to daily use, this guide has covered everything you need to know to get the most out of your unit. Whether you’re cooling a bedroom, home office, or small living space, the CCH can handle it—especially when you follow these tips.
Remember, the key to success is preparation and maintenance. Choose the right location, assemble it carefully, and keep it clean. With a little effort, your CCH Portable Air Conditioner will keep you cool all summer long. And when the heatwave hits, you’ll be glad you took the time to set it up right.
Frequently Asked Questions
How do I set up my CCH portable air conditioner for the first time?
Begin by placing the unit near a window for exhaust hose installation, then attach the window kit and secure the hose to prevent hot air from re-entering. Plug in the unit, turn it on, and select your desired cooling mode using the control panel or remote.
Where should I place the exhaust hose on my CCH portable AC?
The exhaust hose must be vented through a window or sliding door using the included window kit to expel hot air outside. Ensure the hose is straight and not kinked for optimal airflow and cooling performance.
Can I use the CCH portable air conditioner without venting it outside?
No, the CCH portable air conditioner requires proper venting through a window or wall to remove hot air and moisture. Operating it without venting will reduce efficiency and may cause the unit to overheat.
How often do I need to empty the water tank on my CCH portable AC?
Most CCH models feature auto-evaporation, reducing the need to empty the tank frequently. However, in high-humidity conditions, check the tank daily and drain it when the indicator light alerts you.
What temperature settings are recommended for the CCH portable air conditioner?
For comfort and energy efficiency, set the thermostat between 72°F and 78°F. Avoid setting it too low, as the unit works harder and may not cool significantly below the ambient outdoor temperature.
Why is my CCH portable air conditioner not cooling effectively?
Check if the exhaust hose is properly installed, the air filter is clean, and the room is sealed from excessive heat sources. Also, ensure the unit is sized appropriately for the room—oversized or undersized units can underperform.