Featured image for through the-wall air conditioner sleeve sizes
Image source: s3-assets.sylvane.com
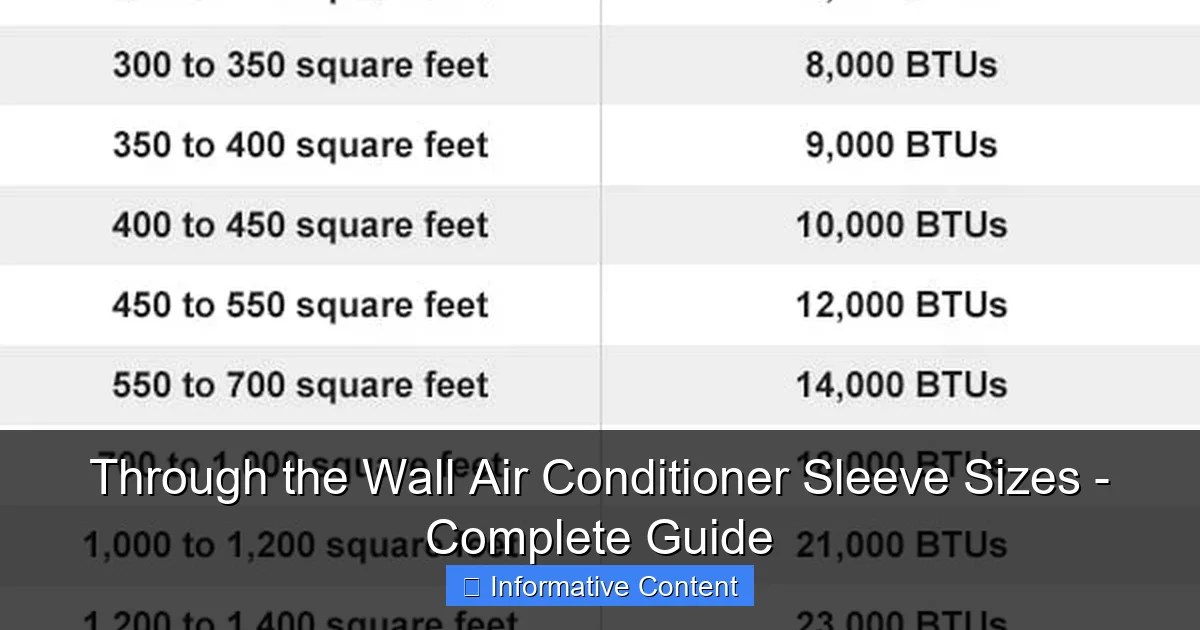
Through-the-wall air conditioner sleeve sizes are standardized but vary by model and manufacturer, making it crucial to measure your unit and opening precisely before buying. Common widths range from 24 to 36 inches, with 26″ and 30″ being the most typical, ensuring compatibility with most built-in ACs and retrofit installations. Always verify sleeve depth and wall thickness to guarantee a secure, weather-tight fit.
Key Takeaways
- Measure sleeve dimensions first: Always check width, height, and depth before purchasing.
- Match sleeve to AC unit: Ensure compatibility with your through-the-wall air conditioner model.
- Standard sizes vary: Common widths range from 24″ to 30″; confirm your specific needs.
- Insulation matters: Choose sleeves with built-in insulation to improve energy efficiency.
- Check wall thickness: Verify sleeve depth accommodates your wall’s construction.
- Seal gaps properly: Use weatherproof caulking to prevent air leaks and moisture intrusion.
📑 Table of Contents
- Why Through the Wall Air Conditioner Sleeve Sizes Matter
- What Is a Through-the-Wall Air Conditioner Sleeve?
- Standard Through the Wall Air Conditioner Sleeve Sizes
- How to Measure Your Existing Sleeve (or Wall Opening)
- Matching Your AC Unit to the Right Sleeve Size
- Common Problems and How to Fix Them
- Data Table: Popular Through-the-Wall AC Sleeve Sizes
- Final Thoughts: Getting It Right the First Time
Why Through the Wall Air Conditioner Sleeve Sizes Matter
Imagine this: You’ve spent weeks researching the perfect through-the-wall air conditioner, only to install it and realize it doesn’t fit. The gap between the unit and the sleeve is too big, the sides don’t align, or worse—the sleeve itself is too narrow for the model you picked. Sound familiar? It’s a frustrating situation, but one that’s entirely avoidable with a little knowledge about through the wall air conditioner sleeve sizes.
Through-the-wall AC units are a fantastic solution for cooling specific rooms without the noise and bulk of window units or the complexity of central air. But their success hinges on one critical detail: the sleeve. Think of it as the “frame” for your AC. Without the right sleeve size, you risk poor fit, air leaks, reduced efficiency, and even water damage. Whether you’re replacing an old unit or installing a new one, understanding sleeve dimensions—width, height, depth, and wall thickness—is the key to a smooth, stress-free setup.
What Is a Through-the-Wall Air Conditioner Sleeve?
A through-the-wall air conditioner sleeve is a metal or vinyl frame that’s permanently installed in your wall to hold the AC unit securely. It acts as a structural support, seals the opening, and helps maintain insulation. Unlike window units that sit on the sill, through-the-wall models are recessed into the wall, making the sleeve essential for safety, performance, and aesthetics.
The Role of the Sleeve in Installation
The sleeve does more than just hold the AC. It:
- Prevents air leaks that reduce cooling efficiency
- Keeps pests and moisture out of the wall cavity
- Supports the weight of the unit, especially larger models
- Allows for easier removal and replacement of the AC
When the sleeve fits correctly, the AC unit slides in smoothly, locks in place, and forms a tight seal. If the sleeve is too big or too small, you’ll face gaps, drafts, and potential structural issues over time.
Common Materials Used in Sleeves
Sleeves are typically made from:
- Galvanized steel: Durable, rust-resistant, and ideal for long-term installations. Best for exterior walls with high moisture exposure.
- Vinyl (PVC): Lightweight, corrosion-proof, and easier to cut. Often used in retrofit projects or where metal isn’t suitable.
- Aluminum: Less common but used in coastal areas due to saltwater resistance.
While material choice matters, size is the real game-changer. A poorly sized sleeve—even made of the best material—won’t solve fit issues.
Standard Through the Wall Air Conditioner Sleeve Sizes
One of the most confusing aspects of through-the-wall ACs is the lack of universal sizing. Unlike window units, which often follow a few standard widths, through-the-wall sleeves come in a wide range of dimensions. But don’t worry—there are patterns. Most manufacturers stick to a few standard sleeve sizes, which we’ll break down below.
Common Widths: The Starting Point
Width is the most critical dimension. If the sleeve is too narrow, the AC won’t fit. If it’s too wide, you’ll have large gaps that require sealing. Here are the most common sleeve widths:
- 24 inches: The most popular size, fitting many 8,000–12,000 BTU units. Think of it as the “standard” for mid-sized rooms (150–300 sq. ft.).
- 26 inches: Slightly wider, used for larger 12,000–18,000 BTU models. Often found in older installations.
- 22 inches: Less common, used for compact or commercial units. Rare in residential settings.
- 27–28 inches: For heavy-duty or commercial-grade ACs (18,000+ BTU). Requires reinforced framing.
Pro tip: Measure your existing sleeve’s interior width (not the outer flange) to match it with the AC unit’s sleeve requirements.
Height and Depth: The Forgotten Dimensions
Height and depth are just as important as width. A sleeve that’s too shallow won’t accommodate the AC’s depth, and one that’s too short can block airflow.
- Height: Most sleeves are between 15 and 18 inches tall. Some commercial units need up to 20 inches.
- Depth: Typically 14 to 18 inches, depending on wall thickness. Standard 2×4 walls are about 4 inches thick, but older homes may have thicker walls (6–8 inches), requiring deeper sleeves.
For example, a 24” x 16” x 16” sleeve (W x H x D) is common for 10,000 BTU units in modern homes.
Wall Thickness: Matching the Sleeve to Your Home
Wall thickness determines the sleeve’s depth. A mismatch leads to:
- Too shallow: The AC sticks out too far, looks awkward, and risks damage.
- Too deep: The unit sits too far in, reducing airflow and cooling power.
Measure your wall thickness at the installation site. If it’s non-standard (e.g., brick, stone, or thick insulation), you may need a custom sleeve or extension kit.
How to Measure Your Existing Sleeve (or Wall Opening)
Whether you’re replacing an old AC or installing a new sleeve, accurate measurements are crucial. Here’s how to do it right—no guesswork.
Step-by-Step Measuring Guide
- Locate the sleeve: If replacing, remove the old AC. You’ll see the sleeve’s interior.
- Measure interior width: Use a tape measure across the inside of the sleeve (not the outer flange). Record the smallest measurement—walls may not be perfectly straight.
- Measure interior height: Measure from the top to the bottom of the sleeve’s interior.
- Measure depth: Measure from the interior face to the exterior face. If the sleeve is flush with the wall, measure the wall thickness at the opening.
- Check for obstructions: Look for nails, pipes, or wiring inside the sleeve. These can affect installation.
Example: Measuring a 24-Inch Sleeve
Let’s say you remove your old AC and find a metal sleeve. You measure:
- Interior width: 24.25 inches
- Interior height: 16 inches
- Depth: 15.5 inches (matches your 2×6 wall)
This tells you your sleeve is a standard 24” x 16” x 15.5” size. Most 10,000–12,000 BTU ACs will fit, but always cross-check with the manufacturer’s specs.
What If There’s No Existing Sleeve?
No sleeve? No problem. You’ll need to:
- Choose the AC unit first (to know the sleeve size needed).
- Cut a hole in the wall using a reciprocating saw or hole saw.
- Install the sleeve, ensuring it’s level and secured to the wall framing.
- Seal gaps with foam or caulk.
Caution: If you’re cutting into an exterior wall, check for insulation, vapor barriers, and weatherproofing. Mistakes here can lead to energy loss or water damage.
Matching Your AC Unit to the Right Sleeve Size
Now that you know how to measure, let’s talk about matching your AC unit to the sleeve. This is where most people trip up—buying an AC without confirming sleeve compatibility.
Step 1: Check the AC’s Sleeve Requirements
Every through-the-wall AC comes with a manual or spec sheet listing the minimum sleeve size. Look for:
- “Sleeve width” (e.g., 24.125 inches)
- “Sleeve depth” (e.g., 15.75 inches)
- “Wall opening size” (may include clearance for framing)
Example: A Friedrich Kuhl 12,000 BTU unit requires a 24.125” x 16” x 15.75” sleeve. If your existing sleeve is 24” x 16” x 15.5”, it’s too small by 0.125”—a critical difference!
Step 2: Account for Clearance and Gaps
Manufacturers often recommend a small gap (0.125–0.25 inches) around the AC for easy installation and airflow. But:
- Too tight: The AC won’t slide in.
- Too loose: You’ll need extra sealing (foam, shims) to prevent drafts.
Tip: If your sleeve is slightly larger than required, use foam tape or shims to fill gaps. Avoid overstuffing—this can damage the AC or reduce airflow.
Step 3: Consider Universal Sleeve Kits
Some brands offer universal sleeve kits with adjustable side panels. These are great if:
- You’re replacing an old sleeve with a non-standard size.
- You want flexibility for future AC upgrades.
Example: The LG LW1017ERSM includes a universal sleeve that adjusts from 24 to 27 inches wide. It’s a lifesaver for retrofit jobs.
Common Problems and How to Fix Them
Even with careful planning, sleeve issues happen. Here are the most common problems—and how to solve them.
Problem 1: The AC Doesn’t Fit the Sleeve
Symptoms: The unit won’t slide in, or it’s too loose.
Solutions:
- Too small: If the gap is minor (under 0.25 inches), use a rubber mallet to gently tap the AC in. For larger gaps, you may need to widen the sleeve (with caution) or buy a compatible AC.
- Too large: Fill gaps with high-density foam tape or custom-cut shims. Seal with caulk to prevent air leaks.
Note: Never force an AC into a sleeve—it can damage the unit or wall.
Problem 2: Air Leaks and Drafts
Symptoms: Cold air escapes in summer, or hot air leaks in winter.
Solutions:
- Use foam insulation strips around the AC’s edges.
- Apply weatherstripping between the AC and sleeve.
- For exterior gaps, use exterior-grade caulk (e.g., silicone).
Example: A 1/4-inch gap around a 24-inch sleeve can leak up to 20% of your AC’s output. Sealing it saves energy and money.
Problem 3: Sleeve Rust or Deterioration
Symptoms: Rust, warping, or cracks in the sleeve.
Solutions:
- Minor rust: Sand and paint with rust-resistant spray.
- Severe damage: Replace the sleeve. Cut out the old one and install a new one with proper sealing.
Prevention tip: In humid climates, use vinyl sleeves or coat metal sleeves with a rust inhibitor.
Data Table: Popular Through-the-Wall AC Sleeve Sizes
| AC Model (Example) | Sleeve Width (in) | Sleeve Height (in) | Sleeve Depth (in) | BTU Range | Best For |
|---|---|---|---|---|---|
| Frigidaire FHWW103WB1 | 24.125 | 16 | 15.75 | 10,000 | Medium rooms (200–250 sq. ft.) |
| Friedrich Kuhl KCL12A10A | 24.125 | 16 | 15.75 | 12,000 | Large rooms (300–400 sq. ft.) |
| LG LW1017ERSM (Universal) | 24–27 | 16 | 15.75 | 10,000 | Retrofit projects, variable walls |
| Koldfront WTC14012B | 26 | 17 | 16 | 14,000 | Very large rooms (450+ sq. ft.) |
| GE AHEK08AC | 24 | 15.75 | 15.5 | 8,000 | Small rooms (100–150 sq. ft.) |
Note: Always verify dimensions with the manufacturer before purchasing. Sizes may vary by model year.
Final Thoughts: Getting It Right the First Time
Choosing the right through the wall air conditioner sleeve size isn’t just about measurements—it’s about peace of mind. A properly fitted sleeve means better cooling, less noise, lower energy bills, and fewer headaches down the road.
Remember: Start with your existing sleeve (if you have one), measure carefully, and double-check the AC’s requirements. If you’re starting from scratch, pick an AC first, then build the sleeve to match. And when in doubt, opt for a universal sleeve—it’s a small investment that saves big on compatibility issues.
Through-the-wall ACs are a smart, efficient way to cool your space. But like any home improvement, success comes down to details. The sleeve might seem minor, but it’s the foundation of your AC’s performance. Get the size right, seal it well, and enjoy cool, quiet comfort for years to come. After all, no one wants to repeat the “AC doesn’t fit” nightmare—especially in the middle of summer.
Frequently Asked Questions
What are standard through the wall air conditioner sleeve sizes?
Most through the wall air conditioner sleeves come in standard widths of 24″, 26″, 27″, and 42″, with 26″ and 27″ being the most common for residential units. Height and depth vary by model, so always check manufacturer specifications before purchasing.
How do I measure for a through the wall AC sleeve?
Measure the width, height, and depth of your existing sleeve or wall opening using a tape measure. For accuracy, measure at multiple points, as older walls may have slight variations. These dimensions will help you choose the correct through the wall air conditioner sleeve size.
Can I use a universal sleeve for all through the wall AC units?
While universal sleeves exist, compatibility depends on your AC unit’s brand and model. Always verify the sleeve’s dimensions and mounting requirements to ensure a proper fit and weatherproof installation.
What happens if my sleeve is too small for the AC unit?
A sleeve that’s too small can cause poor airflow, reduced efficiency, or damage to the unit. Never force an AC into an undersized sleeve—adjust the opening or choose a compatible sleeve instead.
Are there different sleeve sizes for commercial vs. residential units?
Yes, commercial through the wall AC sleeves are often larger (e.g., 42″ width) to accommodate heavier-duty units. Residential sleeves typically range from 24″–27″ in width, but always confirm based on your unit’s requirements.
How do I replace an old through the wall sleeve?
Remove the old sleeve carefully, ensuring the wall opening matches the new sleeve’s through the wall air conditioner sleeve size. Use shims and sealant to secure and insulate the new sleeve properly.