
This comprehensive how-to guide shows you everything you need to know about using your Panasonic air conditioner remote control. You’ll learn the basics, advanced features, troubleshooting tips, and energy-saving techniques—all in simple, easy-to-follow steps.
By the end, you’ll be able to operate your AC like a pro, keeping your home cool, comfortable, and efficient. No technical jargon, just clear instructions anyone can follow.
Key Takeaways
- Power On/Off: Press the power button once to turn on or off your Panasonic AC. The display will light up when powered.
- Temperature Control: Use the up/down arrows to adjust temperature between 16°C–30°C (60°F–86°F) depending on model.
- Mode Selection: Cycle through Cooling, Dry, Fan, Auto, or Heating modes using the MODE button for different comfort needs.
- Timer Settings: Set sleep or auto-off timers (up to 8 hours) using the TIMER function for automatic shutoff or startup.
- Fan Speed Adjustment: Choose from Low, Medium, High, or Auto fan speeds using the FAN SPEED button for airflow control.
- Air Swing & Airflow: Enable vertical/horizontal swing via SWING or VANE buttons for better air distribution.
- Troubleshooting: Reset the remote by removing batteries, clean contacts, or re-pairing if unresponsive.
Quick Answers to Common Questions
Can I use my Panasonic AC remote through walls?
No, Panasonic AC remotes use infrared signals that require a direct line of sight. Obstructions like furniture or walls block the signal. Keep the remote pointed clearly at the indoor unit for best response.
What temperature should I set my Panasonic AC to for energy savings?
Set your Panasonic AC between 24°C and 26°C (75°F–79°F) for optimal balance of comfort and efficiency. Every degree below 24°C increases energy use by about 6–8%. Using ECO mode further reduces consumption.
How do I reset my Panasonic AC remote if it stops working?
Remove the batteries, wait 30 seconds, then reinsert them. Hold the POWER and MODE buttons together for 5 seconds to force a reset. This clears temporary glitches and restores normal function.
Does my Panasonic AC support heating in cold climates?
Only heat pump models support heating. Check your model number—look for “HP” or “Heat Pump” in the name. Non-heat pump units only cool. If unsure, consult your manual or Panasonic’s website.
Why won’t my remote turn off the AC even after pressing POWER?
Possible causes: dead batteries, blocked IR sensor, or the AC entering standby mode (common after reaching set temperature). Try replacing batteries, cleaning the AC’s receiver window, and ensuring the remote faces the unit directly.
How to Use Panasonic Air Conditioner Remote Control: A Complete Guide
Welcome to your go-to guide on mastering the Panasonic air conditioner remote control! Whether you’re a first-time owner or upgrading from an older model, understanding how to use your remote effectively can make a huge difference in your comfort, energy savings, and appliance longevity.
In this article, you’ll learn how to power on your unit, adjust temperature and fan speed, select different operating modes, set timers, and even troubleshoot common issues. We’ll also share pro tips to maximize efficiency and avoid mistakes that could reduce performance or shorten your AC’s lifespan.
Let’s dive in—your perfect indoor climate is just a few button presses away!
Understanding Your Panasonic AC Remote Control
Before pressing any buttons, it helps to know what each part of your remote does. Most Panasonic AC remotes have a similar layout, though design may vary slightly by model. Here’s a quick breakdown of the key components:
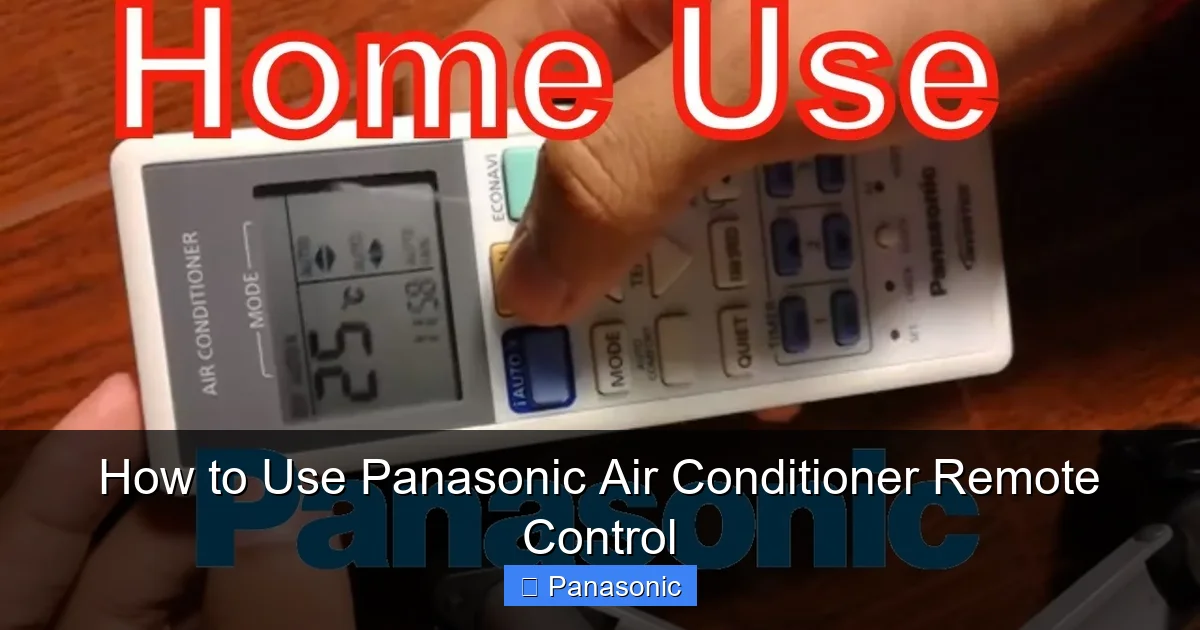
Visual guide about How to Use Panasonic Air Conditioner Remote Control
Image source: i.ytimg.com
The Display Screen
The small LCD or LED screen at the top shows important info like current temperature, selected mode (e.g., COOL), fan speed, timer status, and error codes if something goes wrong.
Power Button
Usually labeled “POWER” and marked with a circle icon, this turns your air conditioner on or off. Press it once to activate the unit; press again to shut it down completely.
Temperature Buttons
These are typically two arrow keys—one pointing up (▲) and one down (▼). They let you increase or decrease the desired temperature in 1-degree increments. For example, pressing ▲ once raises the setpoint by 1°C.
Mode Button
Often called “MODE,” this cycles through different operation types like Cooling, Dehumidifying (Dry), Fan-only, Auto, and sometimes Heating. Each press changes the symbol displayed (like snowflakes for Cool or droplets for Dry).
Fan Speed Button
This adjusts how fast the internal fan runs—Low, Medium, High, or Auto (which adapts based on room conditions). Great for balancing noise and airflow.
Timer Function
Allows you to schedule when your AC turns on or off automatically. You can set a sleep timer (for nighttime use) or an auto-off timer (to save energy).
Swing/Vane Controls
If your unit supports air direction control, these buttons let you move the louvers left/right or up/down so cold air spreads evenly across the room.
Other Useful Features
- Mute/Silent Mode: Reduces remote beeps and sometimes fan noise.
- Turbo/Fast Cool/Warm: Activates high-speed cooling or heating for quick results.
- Filter Indicator: Reminds you when it’s time to clean the air filter.
Now that you recognize the main parts, let’s walk through how to use them step by step.
Step-by-Step: How to Operate Your Panasonic AC Remote
1. Turn On Your Air Conditioner
To start your Panasonic AC:
- Point the remote directly at the indoor unit (within 7 meters / 23 feet).
- Press the POWER button once.
- Wait a few seconds—you should hear the unit kick on and see lights activate on the AC itself.
- The remote display will show the current room temperature and confirm the active mode (e.g., “COOL” or “AUTO”).
Pro Tip: If nothing happens after pressing POWER, check that the AC is plugged in and the circuit breaker isn’t tripped.
2. Set Your Desired Temperature
Once the AC is running:
- Use the ▲ or ▼ buttons to choose your ideal temperature.
- Most models allow settings between 16°C and 30°C (60°F–86°F).
- Aim for 24–26°C (75–79°F) for energy-efficient comfort.
Example: If it feels warm, press ▲ until the display reads 24°C. The AC will work harder at first but gradually ease off as the room cools.
3. Select the Right Operating Mode
Press the MODE button repeatedly to switch between options:
- COOL: Standard air conditioning—best for hot days.
- DRY: Removes humidity without lowering temperature much. Ideal for rainy seasons.
- FAN: Runs only the fan—no cooling or heating. Good for circulating air gently.
- AUTO: Smart mode that picks Cool or Dry based on room conditions.
- HEAT: Available on heat pump models—use for winter warmth.
Tip: In humid climates, try DRY mode first—it saves energy while reducing mugginess.
4. Adjust Fan Speed
After selecting a mode:
- Press FAN SPEED.
- Choose from Low, Medium, High, or Auto.
- Auto is usually best—it balances quiet operation and effective airflow.
Note: Higher fan speeds cool faster but are louder. Save High for initial setup, then drop to Medium or Auto once comfortable.
5. Use the Timer Function
Timers help automate usage and save electricity:
- Press TIMER on the remote.
- Use ▲/▼ to set how many minutes or hours until shutdown (or startup).
- Confirm with SET or ENTER (if available).
Example: Set a 2-hour sleep timer before bed—the AC turns off automatically so you don’t waste energy overnight.
6. Control Air Direction (If Supported)
For better circulation:
- Press VANE or SWING.
- Use directional arrows to tilt louvers up/down or side-to-side.
- Some remotes offer “Auto Swing”—just press once for random louver movement.
Why It Matters: Directing air away from people prevents drafts while spreading cool air evenly.
7. Access Advanced Features
Depending on your model, look for:
- ECO Mode: Optimizes energy use without sacrificing comfort.
- TURBO:: Rapid cooling/heating for instant relief.
- SILENT:: Minimizes noise—ideal for bedrooms.
- FILTER RESET:: Resets the maintenance reminder after cleaning filters.
Check your manual! Not all features appear on every remote.
Practical Tips for Better Performance
Using your remote correctly isn’t just about pressing buttons—it’s about smart habits too.
Avoid Common Mistakes
- Don’t change temp too often: Wait 5–10 minutes between adjustments. Frequent changes stress the compressor.
- Never point the remote at reflective surfaces: Windows or mirrors can confuse the infrared sensor.
- Replace batteries yearly: Weak batteries cause lag or missed signals.
Energy-Saving Tricks
- Use ECO or AUTO mode instead of manual settings—they reduce power use by up to 30%.
- Set the thermostat 2°C higher than usual in summer (e.g., 26°C instead of 24°C).
- Close curtains during peak sun hours to reduce load on your AC.
Keep the Remote Clean
Dust and grime can block signal transmission:
- Wipe the remote with a soft, dry cloth weekly.
- Avoid liquids—moisture damages circuits.
- Clean under the battery cover gently with compressed air.
Troubleshooting Your Panasonic AC Remote
Even the best remotes sometimes act up. Here’s how to fix common problems:
Remote Not Responding
- Replace the batteries (use fresh alkaline ones).
- Remove and reinsert batteries to reset the connection.
- Make sure no objects block the path between remote and AC unit.
- Try aiming the remote straight ahead—not upward or downward.
AC Turns Off Randomly
This could mean:
- The temperature reached your setpoint (normal behavior).
- You hit the timer accidentally—check the display for countdown symbols.
- Overheating due to dirty filters—clean or replace them.
Error Codes Appear
If numbers flash on the display (e.g., “E1”, “P1”), refer to your user manual. Common codes include:
- E1/E2: Communication error between indoor/outdoor units.
- P1/P2: Power supply issue—check voltage or contact technician.
- F1/F2: Sensor fault—may need professional repair.
Still Having Issues?
If basic fixes don’t work:
- Unplug the AC for 5 minutes, then restart.
- Reset the remote by holding POWER + MODE for 5 seconds.
- Contact Panasonic support or a certified technician.
Conclusion: Master Your Panasonic AC Remote Today
You now have all the tools to confidently operate your Panasonic air conditioner remote control. From turning on your unit to setting precise temperatures, choosing eco-friendly modes, and avoiding common pitfalls—you’re well-equipped for year-round comfort.
Remember: the key is consistency. Use timers, keep filters clean, and avoid drastic temperature swings. With these practices, your AC will run efficiently, quietly, and last longer.
Enjoy cool summers and cozy winters—powered by smart, simple control!
