Replacing the main control board in your LG LW2511ER air conditioner can restore functionality and avoid costly repairs. This guide walks you through the entire process—from diagnosis to final testing—with clear, beginner-friendly steps and safety tips.
Key Takeaways
- Safety first: Always unplug the unit and discharge capacitors before starting any work to prevent electric shock.
- Diagnose correctly: Confirm the control board is faulty using error codes or multimeter testing before replacing it.
- Use genuine parts: Purchase an OEM LG main control board compatible with the LW2511ER model for reliable performance.
- Follow a methodical process: Label wires, take photos, and work step by step to avoid reassembly mistakes.
- Test after installation: Power on the unit and run a full cooling cycle to ensure proper operation.
- Know your limits: If you’re unsure at any point, consult a licensed HVAC technician to avoid damage or injury.
- Keep documentation: Save the old board and packaging in case of warranty claims or returns.
How to Replace Main Control Board LG LW2511ER Air Conditioner
If your LG LW2511ER air conditioner isn’t turning on, responding to the remote, or displaying error codes like E1 or E6, the main control board might be the culprit. The main control board—also known as the PCB (Printed Circuit Board)—is the brain of your AC unit. It manages power distribution, fan speed, temperature settings, and communication between components. When it fails, your air conditioner essentially becomes a paperweight.
Replacing the main control board yourself can save you hundreds of dollars in technician fees. While it may sound intimidating, with the right tools, patience, and this step-by-step guide, even a DIY beginner can complete the job safely and successfully in 2026. This guide will walk you through everything you need to know—from diagnosing the issue to installing the new board and testing your unit.
We’ll cover safety precautions, required tools, detailed disassembly instructions, wiring tips, and troubleshooting advice. By the end, you’ll have a fully functional LG LW2511ER air conditioner and the confidence to tackle similar repairs in the future.
What You’ll Need
Before you begin, gather all the necessary tools and materials. Having everything ready will make the process smoother and reduce the risk of mistakes.
- Screwdrivers: Phillips #2 and flathead screwdrivers
- Multimeter: To test voltage and continuity (optional but recommended)
- Needle-nose pliers: For handling small connectors
- Electrical tape: To label and secure wires
- Camera or smartphone: To take reference photos during disassembly
- Work gloves: To protect your hands from sharp edges
- Replacement main control board: OEM part compatible with LG LW2511ER (model number: 6871A20018B or equivalent)
- Anti-static wrist strap: Optional but helpful to prevent static damage to the new board
Make sure you purchase the correct replacement board. The LG LW2511ER uses a specific main control board, and using an incompatible part can damage your unit or void the warranty. Check the label on your old board or consult LG’s official parts website for verification.
Safety First: Essential Precautions
Working with electrical components carries inherent risks. The LG LW2511ER operates on high-voltage AC power, and even when unplugged, capacitors on the control board can retain a dangerous charge. Follow these safety steps to protect yourself and your equipment.
Unplug the Unit
Turn off the air conditioner using the remote or control panel, then unplug it from the wall outlet. Do not rely solely on the power button—always disconnect the physical plug. If your unit is hardwired, turn off the circuit breaker that supplies power to the AC.
Visual guide about How to Replace Main Control Board Lg Lw2511er Air Conditioner
Image source: aircondition.ae
Discharge Capacitors
Capacitors store electrical energy even after the unit is unplugged. To safely discharge them, wait at least 10–15 minutes after unplugging. Then, use an insulated screwdriver with a rubber handle to carefully short the capacitor terminals. Place the metal blade across both terminals for a few seconds. You may hear a faint pop or see a small spark—this is normal. Repeat for all large capacitors on the board.
Work in a Dry, Well-Lit Area
Avoid working in damp or humid conditions. Moisture increases the risk of electric shock and can damage sensitive electronics. Use a bright work light to clearly see small components and wire colors.
Wear Protective Gear
Put on work gloves to protect your hands from sharp metal edges inside the unit. If you’re using an anti-static wrist strap, connect it to a grounded metal surface to prevent static discharge that could damage the new control board.
Step 1: Diagnose the Problem
Before replacing the main control board, confirm that it’s actually faulty. Replacing a functional board is a waste of time and money. Here’s how to diagnose the issue properly.
Check for Error Codes
Turn on the unit and observe the display. The LG LW2511ER shows error codes when something goes wrong. Common codes related to the control board include:
- E1: Communication error between indoor and outdoor units
- E6: Fan motor malfunction (can be caused by board failure)
- E8: Power supply issue
- No display or blinking lights: Often indicates a failed control board
If you see any of these codes repeatedly, the control board is a likely suspect.
Test Power Supply
Use a multimeter to check if power is reaching the control board. Set the multimeter to AC voltage (typically 120V for window units). Carefully probe the input terminals on the board where the main power wires connect. If no voltage is present, the issue might be with the power cord, outlet, or breaker—not the board.
Inspect for Physical Damage
Open the front panel and look at the control board. Check for:
- Burnt or discolored components
- Swollen or leaking capacitors
- Melted solder joints
- Corrosion or water damage
Visible damage is a strong indicator that the board needs replacement.
Test Continuity
Set your multimeter to continuity mode (usually marked with a diode symbol). Test key fuses and relays on the board. A blown fuse or open relay can mimic board failure. Replace any faulty fuses before assuming the entire board is bad.
Step 2: Remove the Front Panel
Now that you’ve confirmed the board needs replacing, it’s time to access it. The main control board is located behind the front panel of the LG LW2511ER.
Locate the Screws
The front panel is held in place by several screws. Most are visible along the top and sides of the unit. Use your Phillips #2 screwdriver to remove them. Keep the screws in a small container so you don’t lose them.
Detach the Panel
Gently pull the front panel forward. It may be connected by a ribbon cable for the display or control buttons. If so, carefully unplug the ribbon cable by lifting the locking tab and sliding it out. Do not force it—ribbon cables are delicate.
Set the Panel Aside
Place the front panel on a soft surface, face down, to avoid scratching the plastic. Keep the ribbon cable disconnected until reassembly.
Step 3: Access the Main Control Board
With the front panel removed, you’ll see the internal components. The main control board is typically mounted near the top or center of the unit, behind a protective cover.
Remove the Control Board Cover
Locate the plastic or metal cover over the control board. It’s usually held by 2–4 screws. Remove them and set the cover aside. Be careful not to drop screws into the unit.
Identify the Main Control Board
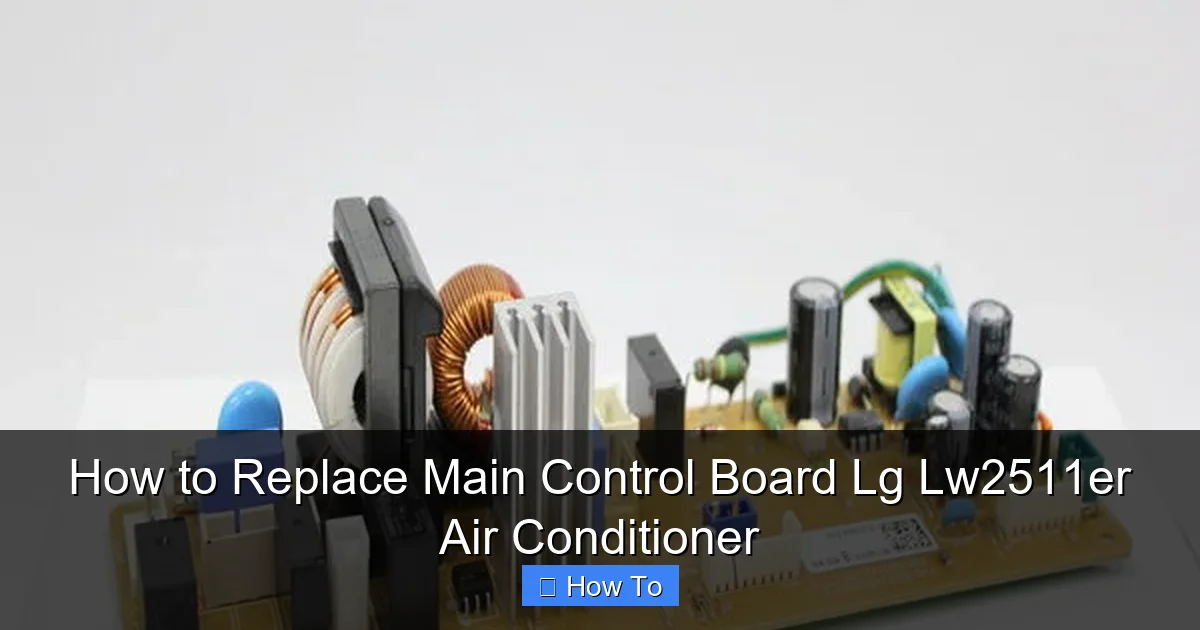
The main control board is a rectangular circuit board with multiple wire connectors, relays, and capacitors. It’s often labeled “MAIN PCB” or has a model number printed on it. Confirm it matches your replacement part.
Take Reference Photos
Before disconnecting anything, take clear photos of the board from multiple angles. Focus on wire colors, connector positions, and labels. These photos will help you reconnect everything correctly later.
Step 4: Disconnect Wires and Components
This is the most critical step. Incorrect wiring is the #1 cause of failure after board replacement. Proceed slowly and methodically.
Label Each Wire
Use small pieces of electrical tape and a marker to label each wire connector. Write the connector name or function (e.g., “Fan Motor,” “Compressor,” “Thermistor”) directly on the tape. Alternatively, take close-up photos of each connection before unplugging.
Disconnect Connectors
Use needle-nose pliers or your fingers to gently pull each connector straight out. Do not yank or twist. Most connectors have a locking tab—press it before pulling. Work one connector at a time to avoid confusion.
Remove Mounting Screws
Once all wires are disconnected, locate the screws securing the board to the chassis. There are usually 3–4 screws. Remove them and carefully lift the board out. Note any grounding wires attached to the board—these must be reconnected to the new board.
Step 5: Install the New Control Board
Now it’s time to install the replacement board. Handle it by the edges to avoid static damage.
Position the New Board
Place the new control board in the same position as the old one. Align the screw holes and ensure it sits flat. Reattach any grounding wires to the designated screw terminals.
Secure with Screws
Insert and tighten the mounting screws. Do not overtighten—this can crack the board or strip the screw holes.
Reconnect All Wires
Refer to your photos and labels. Reconnect each wire to the correct terminal. Push connectors in firmly until they click. Double-check each connection against your reference images. Pay special attention to:
- Power input (usually red/black wires)
- Fan motor (often white/yellow)
- Thermistor (temperature sensor, typically two thin wires)
- Remote control receiver (ribbon cable or small plug)
Reattach the Control Board Cover
Once all wires are connected, replace the protective cover and secure it with screws.
Step 6: Reassemble the Unit
With the new board installed, it’s time to put everything back together.
Reconnect the Front Panel
If you disconnected a ribbon cable, carefully reinsert it into the connector on the new board. Make sure the locking tab clicks into place.
Replace the Front Panel
Align the front panel with the unit and gently press it into place. Reinsert and tighten all screws. Ensure the panel is flush and secure.
Double-Check All Connections
Before plugging in the unit, do a final visual inspection. Make sure no wires are pinched, all connectors are seated, and screws are tight.
Step 7: Test the Air Conditioner
Now for the moment of truth—testing your repair.
Plug In the Unit
Plug the air conditioner back into the wall outlet. If it’s hardwired, turn the circuit breaker back on.
Power On and Test
Press the power button on the remote or control panel. The unit should turn on, and the display should show normal operation. Set the temperature low and select “Cool” mode.
Listen and Observe
Listen for the compressor and fan to start. Feel for cool air coming from the vents. Check that the fan speed changes when you adjust the settings.
Monitor for Errors
Watch the display for any error codes. If the unit runs smoothly for 10–15 minutes without issues, your repair was successful.
Troubleshooting Common Issues
Even with careful installation, problems can occur. Here’s how to fix common post-replacement issues.
Unit Won’t Turn On
Check that the power cord is fully plugged in and the outlet is working. Test the outlet with another device. If the outlet is fine, double-check all power connections to the new board.
Error Code Appears
If you see an error code, refer to the LG LW2511ER manual. E1 or E6 may indicate a wiring mistake. Recheck all connectors, especially the fan motor and thermistor.
Fan Doesn’t Spin
Verify the fan motor connector is securely attached. Use a multimeter to test the motor for continuity. If the motor is faulty, it may need replacement.
No Cooling
Ensure the compressor is running. If it’s not, check the compressor relay on the board and the wiring. Low refrigerant is another possibility, but that requires a professional.
Blinking Lights or Intermittent Operation
This could indicate a loose connection or a defective new board. Recheck all wiring. If the problem persists, contact the seller for a replacement under warranty.
Tips for Success
To ensure a smooth repair process, keep these tips in mind:
- Work slowly: Rushing increases the risk of mistakes. Take your time with each step.
- Keep a clean workspace: A clutter-free area helps prevent lost screws and tools.
- Use a parts organizer: Store screws and small parts in labeled compartments.
- Consult the manual: Download the LG LW2511ER service manual from LG’s website for wiring diagrams and specifications.
- Document everything: Photos and notes are invaluable if you need to troubleshoot later.
When to Call a Professional
While replacing the main control board is doable for many homeowners, there are situations where professional help is best.
- You’re uncomfortable working with electricity
- The unit is still under warranty (DIY repairs may void it)
- You suspect refrigerant leaks or compressor issues
- The new board doesn’t resolve the problem
- You lack the proper tools or workspace
A licensed HVAC technician has the training and equipment to diagnose and repair complex issues safely. In 2026, many technicians also offer remote diagnostics and virtual support, making professional help more accessible than ever.
Conclusion
Replacing the main control board in your LG LW2511ER air conditioner is a challenging but rewarding DIY project. By following this guide, you’ve learned how to diagnose the issue, safely remove the old board, install a new one, and test the unit for proper operation. With the right tools and careful attention to detail, you can restore your air conditioner to full functionality and save money on repair bills.
Remember, safety is paramount—always unplug the unit and discharge capacitors before starting. Use genuine LG parts for the best results, and don’t hesitate to seek professional help if you’re unsure. With your newly replaced control board, you’ll enjoy cool, comfortable air all summer long.
Whether you’re a seasoned DIYer or a first-time repairer, this project proves that with patience and the right guidance, you can tackle complex home repairs with confidence. Keep this guide handy for future reference, and share it with others who might benefit from your experience.