This guide walks you through how to remove the front grill of an LG window air conditioner safely and efficiently. Whether you’re cleaning, replacing filters, or performing maintenance, these clear instructions ensure you do it right—without damaging your unit.
Key Takeaways
- Safety first: Always unplug the air conditioner before starting any work to prevent electrical shock.
- Know your model: LG window AC units vary slightly by series (e.g., LW8016ER, LW1216ER), so check your user manual or model number first.
- Use proper tools: Most grills require only your hands or a flathead screwdriver—no complex tools needed.
- Handle with care: The front grill is often made of lightweight plastic and can crack if forced.
- Clean while you’re at it: Removing the grill gives you access to the filter and interior vents—ideal for deep cleaning.
- Reinstall correctly: Ensure all clips and tabs are securely fastened to maintain airflow and prevent rattling.
- Regular maintenance matters: Removing and cleaning the grill every 1–2 months improves efficiency and air quality.
How to Remove Front Grill of LG Window Air Conditioner
Keeping your LG window air conditioner running smoothly isn’t just about setting the right temperature—it’s also about regular maintenance. One of the most important yet often overlooked tasks is cleaning the front grill. Over time, dust, pet hair, and debris accumulate on the grill and behind it, blocking airflow and reducing cooling efficiency. In 2026, LG continues to design reliable, energy-efficient window AC units, but even the best models need a little TLC.
If you’ve never removed the front grill of your LG window air conditioner, don’t worry—you’re not alone. Many users assume it’s complicated or risky, but in reality, it’s a simple process that takes just a few minutes. Whether you’re cleaning the filter, inspecting the interior, or troubleshooting a noise issue, knowing how to safely remove and reinstall the front grill is a valuable skill.
In this comprehensive guide, we’ll walk you through every step of removing the front grill of your LG window air conditioner. We’ll cover safety precautions, tools you might need, model-specific tips, and troubleshooting advice. By the end, you’ll feel confident handling this task like a pro—and your AC will thank you with better performance and cleaner air.
Let’s get started!
Why Remove the Front Grill?
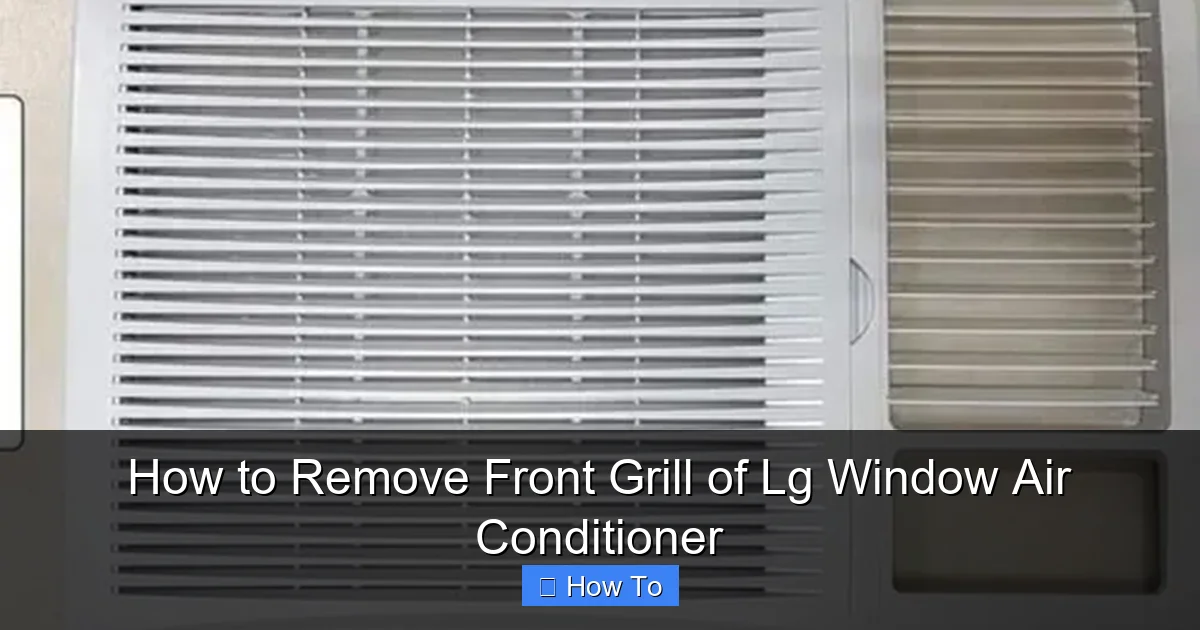
Visual guide about How to Remove Front Grill of Lg Window Air Conditioner
Image source: 5.imimg.com
Before diving into the steps, it’s helpful to understand why removing the front grill is beneficial. The front grill is the visible panel on the front of your LG window air conditioner. It’s designed to allow air to flow into the unit while protecting the internal components. However, it also acts as the first line of defense against dust and debris—which means it gets dirty fast.
Here are the top reasons to remove and clean the front grill regularly:
- Improved Airflow: A clogged grill restricts air intake, forcing the compressor to work harder and use more energy.
- Better Air Quality: Dust and allergens trapped in the grill can be recirculated into your room, affecting indoor air quality.
- Extended Lifespan: Regular cleaning reduces strain on internal parts, helping your AC last longer.
- Quieter Operation: Debris buildup can cause rattling or humming noises—cleaning the grill often resolves these issues.
- Easier Filter Access: The air filter sits just behind the grill. Removing the grill makes filter replacement or cleaning much simpler.
In 2026, LG has continued to emphasize user-friendly designs, making maintenance easier than ever. Most newer models feature tool-free access to the front grill, meaning you won’t need a screwdriver in many cases. However, older models or specific series may still require minor disassembly.
Now that you know why it’s important, let’s move on to the actual process.
Safety First: Precautions Before You Begin
Safety should always be your top priority when working with any electrical appliance—especially one that’s plugged into a wall outlet. The LG window air conditioner contains electrical components, moving parts, and refrigerant lines, so taking the right precautions is essential.
Here’s what you need to do before removing the front grill:
1. Turn Off and Unplug the Unit
Never attempt to remove the grill while the air conditioner is plugged in. Even if it’s turned off via the remote or control panel, there could still be residual power in the system. To be 100% safe:
- Press the power button on the unit or remote to turn it off.
- Locate the power cord and unplug it from the wall outlet.
- If possible, switch off the circuit breaker that powers the outlet for added safety.
This step prevents accidental electric shock and protects both you and the unit.
2. Let the Unit Cool Down
If your AC has been running, the internal components—especially the compressor and coils—may be hot. Give the unit at least 15–20 minutes to cool down before handling it. This reduces the risk of burns and makes the process more comfortable.
3. Work in a Clean, Well-Lit Area
Find a flat, stable surface near the window unit—like a table or the floor—where you can lay the grill once removed. Good lighting helps you see small clips or screws, and a clean space prevents dust from re-entering the unit during maintenance.
4. Wear Protective Gear (Optional but Recommended)
While not always necessary, wearing gloves can protect your hands from sharp edges or dust. Safety glasses are also a good idea if you’re cleaning deep inside the unit, as debris may fall out.
5. Check the User Manual
LG designs its window air conditioners with slight variations across models. Your specific unit may have unique features, such as hidden latches or screw-secured grills. Locate your user manual—either the physical copy that came with the unit or the digital version on LG’s official website—and review the maintenance section.
If you don’t have the manual, you can usually find it by searching “LG [your model number] user manual” online. For example, “LG LW1016ER manual.”
Once you’ve completed these safety steps, you’re ready to begin removing the front grill.
Tools You Might Need
One of the best things about removing the front grill on most LG window air conditioners is that it typically requires minimal tools. In fact, many models are designed for tool-free access.
Here’s what you might need, depending on your model:
- Your hands: Most LG window AC grills are held in place by plastic clips or tabs that can be released by hand.
- Flathead screwdriver (small): Useful for gently prying open stubborn clips or prying up a grill that’s stuck due to dust buildup.
- Soft cloth or microfiber towel: For wiping down the grill and surrounding area.
- Vacuum with brush attachment: Helps remove loose dust before handling the grill.
- Compressed air (optional): Great for blowing out dust from hard-to-reach areas behind the grill.
Avoid using sharp tools like knives or metal pry bars, as they can scratch or crack the plastic. If a clip feels stuck, wiggle it gently rather than forcing it.
Now, let’s get into the step-by-step process.
Step-by-Step: Removing the Front Grill
The exact method for removing the front grill may vary slightly depending on your LG window air conditioner model. However, the general process is consistent across most units. Below is a detailed, step-by-step guide that works for the majority of LG window ACs, including popular 2026 models like the LG LW8026ER, LW1226ER, and LW1526ER.
Step 1: Locate the Front Grill
The front grill is the large, slatted panel on the front of the air conditioner. It’s usually white or light gray and covers the air intake area. On most LG models, it spans the entire width of the unit and is slightly curved or flat, depending on the design.
Look for small gaps or seams around the edges of the grill—these indicate where it connects to the main body.
Step 2: Identify the Fastening Mechanism
LG uses one of two common methods to secure the front grill:
- Snap-on clips: The most common type. The grill is held in place by plastic tabs that snap into slots on the main housing.
- Screws or latches: Found on some older or commercial models. These may require a screwdriver to remove.
To determine which type your unit uses, inspect the top and sides of the grill. If you see small screw heads, you’ll need to remove them first. If not, it’s likely a clip-on design.
Step 3: Remove Any Screws (If Applicable)
If your model uses screws, they are typically located at the top corners of the grill. Use a small flathead or Phillips screwdriver to carefully remove them. Set the screws aside in a small container so you don’t lose them.
Note: Some models have hidden screws behind a decorative cover or sticker. Check for any removable panels.
Step 4: Release the Top Clips
For clip-on grills, start at the top. Place your fingers on the upper edge of the grill, near the center. Gently pull the top edge outward, away from the unit. You should feel the clips begin to release.
Work your way from the center to the sides, applying even pressure. Don’t pull too hard—LG clips are durable but can break if forced.
Tip: If the grill feels stuck, it may be due to dust or dried grime. Use a soft brush or compressed air to clean around the edges before attempting to remove it.
Step 5: Release the Side and Bottom Clips
Once the top is free, move to the sides. Gently pull the left and right edges outward to release the side clips. Finally, lift the bottom edge slightly and pull it away from the unit.
The grill should now come free. Hold it with both hands to avoid dropping it.
Step 6: Set the Grill Aside Safely
Place the removed grill on a clean, flat surface—preferably on a soft cloth to prevent scratching. Avoid placing it on the floor where it could collect dust or get stepped on.
Now that the grill is off, you’ll have full access to the air filter and the interior vents. This is the perfect time to clean everything thoroughly.
Cleaning the Grill and Interior
With the front grill removed, you’re ready to clean. This is one of the most effective ways to maintain your LG window air conditioner and keep it running efficiently.
Cleaning the Front Grill
The grill itself collects a lot of dust and debris. Here’s how to clean it properly:
- Rinse the grill under lukewarm water. Avoid hot water, as it can warp the plastic.
- Use a mild dish soap and a soft sponge or brush to scrub away dirt.
- Pay special attention to the slats—dust often builds up between them.
- Rinse thoroughly to remove all soap residue.
- Let the grill air dry completely before reinstalling. Never reinstall a wet grill, as moisture can promote mold or damage electrical components.
For stubborn grime, soak the grill in a basin of soapy water for 10–15 minutes before scrubbing.
Cleaning the Air Filter
The air filter sits directly behind the grill. Most LG models have a washable filter that can be cleaned and reused.
To clean it:
- Gently pull the filter out of its slot.
- Vacuum both sides to remove loose dust.
- Rinse under lukewarm water, using mild soap if needed.
- Let it dry completely—this may take 1–2 hours.
- Reinsert the filter before putting the grill back on.
Replace the filter every 6–12 months, or sooner if it appears damaged or excessively dirty.
Cleaning the Interior Vents and Coils
While the grill is off, take a moment to clean the interior:
- Use a vacuum with a brush attachment to remove dust from the evaporator coils and fan blades.
- For deeper cleaning, use a coil cleaner spray (available at hardware stores) and follow the instructions.
- Wipe down the interior housing with a damp cloth.
Avoid spraying water directly into the unit. If you’re unsure, stick to dry cleaning methods.
Reinstalling the Front Grill
Once everything is clean and dry, it’s time to put the grill back on. Reinstalling is usually the reverse of removal, but it’s important to do it correctly to ensure a secure fit and proper airflow.
Step 1: Align the Grill
Hold the grill in front of the unit, making sure it’s oriented correctly. The slats should face outward, and any logos or labels should be in the right position.
Step 2: Attach the Bottom First
Most LG grills are designed to hook into place at the bottom. Slide the bottom edge of the grill into the corresponding slot on the unit. You should feel it click or snap into place.
Step 3: Secure the Sides and Top
Next, press the side edges firmly until you hear or feel the clips engage. Finally, press the top edge until it snaps into place.
Apply even pressure across the entire grill to ensure all clips are fully seated.
Step 4: Test the Fit
Gently tug on the grill to make sure it’s secure. It shouldn’t wobble or come loose. If it does, check for missed clips or misaligned parts.
Step 5: Reconnect Power
Once the grill is securely reinstalled, plug the unit back into the wall outlet. Turn it on and listen for any unusual noises. If everything sounds normal, you’re all set!
Troubleshooting Common Issues
Even with careful handling, you might encounter a few hiccups when removing or reinstalling the front grill. Here are some common problems and how to fix them:
Problem: Grill Won’t Come Off
If the grill feels stuck, don’t force it. Instead:
- Check for hidden screws or latches you may have missed.
- Use a flashlight to inspect the edges for dust or debris blocking the clips.
- Gently wiggle the grill side to side while pulling outward to release stubborn clips.
- If needed, use a flathead screwdriver wrapped in tape (to prevent scratching) to carefully pry up a corner.
Problem: Clip Broke During Removal
Plastic clips can break, especially on older units. If a clip snaps:
- Check if the grill still fits securely without it. Sometimes, the remaining clips are enough.
- If not, you can use a small zip tie or plastic fastener to secure the loose area.
- Contact LG customer support for a replacement grill if the damage is severe.
Problem: Grill Doesn’t Fit After Cleaning
If the grill won’t snap back into place:
- Ensure it’s completely dry—warped plastic won’t fit properly.
- Double-check the orientation—some grills are not symmetrical.
- Inspect the mounting slots on the unit for damage or blockages.
Problem: AC Makes Noise After Reinstallation
If your unit starts rattling or humming after reinstalling the grill:
- Turn off and unplug the unit.
- Remove the grill again and check that all clips are fully engaged.
- Ensure the filter is properly seated and not blocking airflow.
- Look for loose screws or foreign objects inside the unit.
Most noise issues are caused by improper reinstallation and can be fixed with a quick check.
Maintenance Tips for 2026 and Beyond
To keep your LG window air conditioner in top shape, make grill removal and cleaning a regular part of your routine. Here are some best practices for 2026:
- Clean every 1–2 months: Especially during peak usage seasons (summer and winter).
- Inspect before reinstalling: Look for cracks, warping, or wear on the grill and filter.
- Use genuine LG parts: If you need a replacement grill or filter, buy from authorized dealers to ensure compatibility.
- Schedule professional servicing: Once a year, have a technician check refrigerant levels, electrical connections, and overall performance.
- Keep the area around the unit clean: Vacuum or sweep the floor near the window to reduce dust intake.
By following these tips, you’ll maximize efficiency, improve air quality, and extend the life of your LG window air conditioner.
Conclusion
Removing the front grill of your LG window air conditioner is a simple yet essential maintenance task that every owner should know. In 2026, LG continues to deliver reliable, user-friendly units, and with the right approach, you can keep yours running smoothly for years to come.
From unplugging the unit to safely releasing the clips, cleaning the components, and reinstalling the grill, this guide has covered everything you need to know. Remember to prioritize safety, handle the grill with care, and clean regularly for the best results.
By taking a few minutes every month to remove and clean the front grill, you’ll enjoy better airflow, cleaner air, and a more efficient cooling system. Plus, you’ll save money on energy bills and avoid costly repairs down the line.
So the next time your LG window air conditioner feels a little sluggish or sounds louder than usual, don’t ignore it—remove that grill and give it the attention it deserves. Your home (and your wallet) will thank you.