
Cleaning your LG portable air conditioner regularly ensures optimal performance, better air quality, and energy efficiency. This guide walks you through every step—from unplugging the unit to reassembling it—with clear instructions and safety tips.
Key Takeaways
- Turn off and unplug the unit before cleaning: Always ensure safety by disconnecting power before starting any maintenance.
- Clean or replace the air filter monthly: A dirty filter reduces airflow and efficiency; regular cleaning improves performance.
- Wipe down the exterior with a damp cloth: Use mild soap and water to remove dust and grime without damaging the surface.
- Clean the water tank and drain properly: Prevent mold and odors by emptying and sanitizing the tank regularly.
- Inspect and clean the evaporator coils if accessible: Dust buildup on coils reduces cooling power; gentle cleaning restores function.
- Check the exhaust hose for blockages: Ensure proper airflow by removing debris from the hose and vent connection.
- Schedule deep cleaning every 3–6 months: Regular maintenance prevents long-term damage and extends the unit’s life.
How to Clean a LG Portable Air Conditioner
Keeping your LG portable air conditioner clean isn’t just about appearances—it’s essential for performance, energy efficiency, and indoor air quality. Over time, dust, pet dander, mold, and moisture can build up inside and outside your unit, reducing its cooling power and potentially causing unpleasant odors or even mechanical issues. The good news? Cleaning your LG portable AC is straightforward, especially when you follow a consistent routine.
In this comprehensive guide, you’ll learn exactly how to clean a LG portable air conditioner safely and effectively. Whether you’re a first-time user or have owned your unit for years, these step-by-step instructions will help you maintain peak performance all season long. We’ll cover everything from basic exterior wiping to deep-cleaning internal components like filters, coils, and drainage systems. Plus, we’ll share practical tips, troubleshooting advice, and answers to common questions so you can keep your AC running smoothly for years to come.
Let’s get started!
Why Cleaning Your LG Portable Air Conditioner Matters
Before diving into the cleaning process, it’s helpful to understand why regular maintenance is so important. LG portable air conditioners are designed to cool and dehumidify your space efficiently, but they rely on clean components to do their job well.
When dust and debris accumulate on the air filter, it restricts airflow. This forces the unit to work harder, increasing energy consumption and potentially overheating the compressor. A clogged filter also means less cool air reaches your room—and worse, it can circulate allergens and pollutants back into your living space.
Moisture inside the unit—especially in the water tank or drip pan—creates a breeding ground for mold and bacteria. If left unchecked, this can lead to musty smells, poor air quality, and even health concerns for sensitive individuals.
Additionally, dirt buildup on the evaporator coils or condenser reduces heat exchange efficiency, meaning your AC won’t cool as effectively. And if the exhaust hose gets blocked, hot air can’t escape properly, causing the unit to shut down or overheat.
By cleaning your LG portable air conditioner regularly, you:
– Improve cooling performance
– Reduce energy bills
– Extend the lifespan of your unit
– Maintain healthier indoor air
– Prevent costly repairs
Now that you know the “why,” let’s move on to the “how.”
What You’ll Need to Clean Your LG Portable Air Conditioner
Gathering the right tools and supplies before you begin makes the process faster and safer. Here’s a checklist of items you’ll likely need:
- Soft microfiber cloths or sponges
- Mild dish soap or all-purpose cleaner
- White vinegar or a commercial mold/mildew cleaner
- Soft-bristle brush (like an old toothbrush)
- Vacuum cleaner with a brush attachment
- Bucket of warm water
- Rubber gloves (optional, but recommended)
- Screwdriver (if your model requires panel removal)
- Replacement air filter (if needed)
- Garden hose (for rinsing the exhaust hose, if applicable)
Most of these items are household staples, so you probably already have them on hand. Avoid using harsh chemicals, abrasive scrubbers, or excessive water near electrical components—these can damage your unit or create safety hazards.
Step 1: Turn Off and Unplug the Unit
Safety always comes first. Before you touch any part of your LG portable air conditioner, make sure it’s completely powered down.
Power Down Properly
Press the power button on the unit or remote control to turn it off. Then, unplug the power cord from the wall outlet. Never attempt to clean your AC while it’s plugged in—even if it’s turned off. Residual electricity can pose a shock risk, especially when handling wet components.
Visual guide about How to Clean a Lg Portable Air Conditioner
Image source: smartacsolutions.com
Let It Cool Down
If your AC has been running recently, give it at least 15–30 minutes to cool down. Hot surfaces can cause burns, and internal components may still be under pressure. This also gives any collected water in the tank time to settle, making drainage easier.
Move the Unit (If Needed)
Portable air conditioners are, well, portable! If your unit is heavy or awkwardly placed, consider rolling it to a well-ventilated area like a garage, patio, or near a sink. Just make sure the exhaust hose is disconnected and the wheels are locked to prevent rolling during cleaning.
Step 2: Remove and Clean the Air Filter
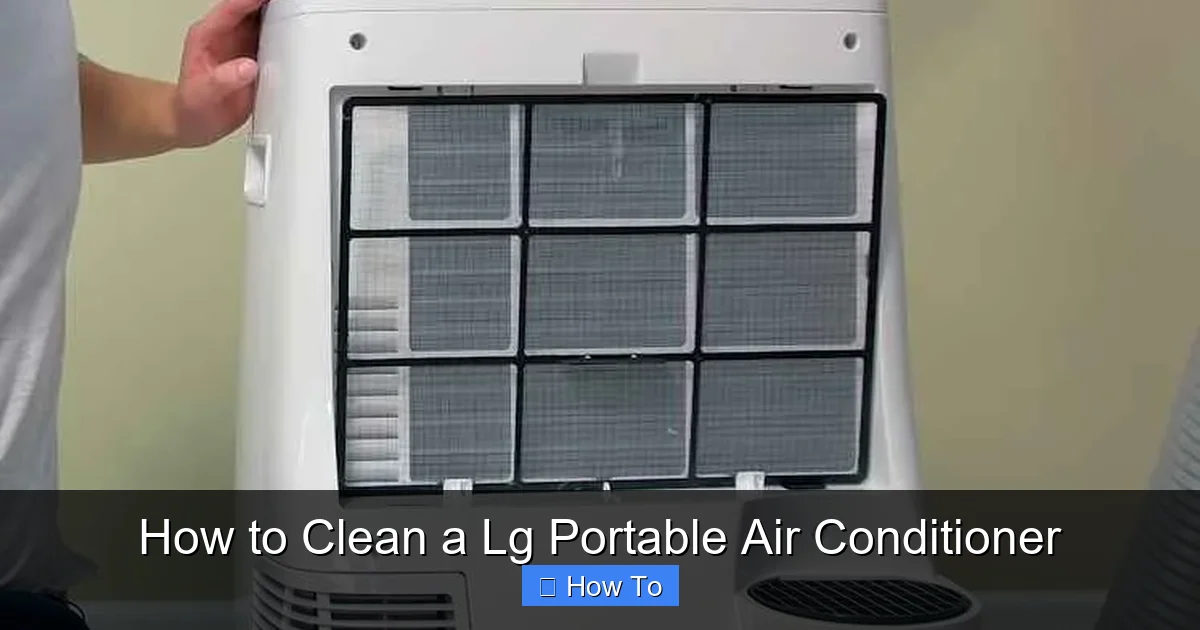
The air filter is one of the most critical—and easiest—components to clean. LG portable ACs typically feature a washable mesh or foam filter located behind a front or side panel.
Locate the Filter Panel
Most LG models have a filter access panel on the front or side of the unit. Look for a grille or cover that can be gently pulled open or removed with a screwdriver. Refer to your user manual if you’re unsure—LG provides model-specific diagrams online.
Remove the Filter
Carefully slide out the filter. It should come out easily—don’t force it. Take note of how it’s positioned so you can reinstall it correctly later.
Rinse the Filter
Hold the filter under lukewarm running water to rinse away loose dust and debris. For stubborn grime, use a soft brush and a few drops of mild dish soap. Avoid hot water, as it can warp or damage the filter material.
Soak for Deep Cleaning (Optional)
If the filter is very dirty or has a mildew smell, soak it in a solution of warm water and white vinegar (1:1 ratio) for 15–20 minutes. Vinegar naturally kills mold and bacteria without harsh chemicals.
Dry Completely
After cleaning, shake off excess water and let the filter air-dry completely—preferably in a shaded, well-ventilated area. Never reinstall a damp filter, as moisture can promote mold growth inside the unit.
Reinstall the Filter
Once dry, slide the filter back into place, ensuring it fits snugly and faces the correct direction (usually with the arrow pointing inward). Close the access panel securely.
Pro Tip: Clean your air filter every 2–4 weeks during heavy use (like summer months) and monthly during lighter use. If the filter appears damaged or excessively worn, replace it with a genuine LG replacement part.
Step 3: Wipe Down the Exterior
A clean exterior not only looks better but also prevents dust from entering the unit through vents and gaps.
Use a Damp Cloth
Dampen a microfiber cloth with water and a small amount of mild soap. Wring it out well—you want it damp, not dripping. Wipe down the entire outer surface, including the control panel, handles, and vents.
Avoid Harsh Cleaners
Never spray cleaning liquids directly onto the unit. Instead, apply them to the cloth first. Avoid bleach, ammonia, or abrasive cleaners, which can discolor plastic or damage seals.
Clean the Control Panel Gently
Use a slightly damp cloth (not wet) to wipe the display and buttons. If there’s sticky residue, a cotton swab dipped in rubbing alcohol can help—just be careful not to let liquid seep into the electronics.
Dry with a Clean Cloth
After wiping, use a dry microfiber cloth to buff the surface and remove any moisture. This prevents water spots and reduces the risk of corrosion.
Step 4: Empty and Clean the Water Tank
LG portable air conditioners collect condensation in an internal water tank or drip pan. If this isn’t emptied regularly, it can overflow, cause leaks, or breed mold.
Locate the Drain Plug or Tank
Most LG models have a drain plug at the bottom rear of the unit or a removable water tank. Check your user manual for the exact location. Some newer models feature auto-evaporation, but many still require manual draining.
Prepare for Drainage
Place a shallow pan or towel underneath the drain area to catch any spills. If your unit has a removable tank, carefully pull it out—some models require you to tilt the unit slightly.
Empty the Tank
Pour out all collected water. If there’s sludge or residue, rinse the tank with warm water.
Sanitize the Tank
To kill bacteria and prevent odors, wipe the inside of the tank with a cloth soaked in a vinegar-water solution (1:1). For tough stains or smells, use a soft brush. Rinse thoroughly and let air-dry before reinserting.
Check the Float Switch
Many LG units have a float switch that shuts off the AC when the tank is full. Make sure this mechanism moves freely and isn’t stuck with debris. A malfunctioning float switch can prevent the unit from turning on.
Pro Tip: If you notice frequent overflow, consider using a continuous drain hose (if your model supports it) or emptying the tank more often during humid weather.
Step 5: Clean the Exhaust Hose and Vent
The exhaust hose expels hot air from your room to the outside. Over time, dust, pet hair, and debris can accumulate inside, restricting airflow.
Disconnect the Hose
Carefully detach the exhaust hose from both the unit and the window vent kit. Most hoses connect via clips or twist-lock fittings—refer to your manual if needed.
Vacuum the Interior
Use a vacuum cleaner with a brush attachment to suck out loose dust from both ends of the hose. Insert the nozzle gently to avoid tearing the material.
Rinse with Water (If Removable)
If your hose is made of flexible aluminum or plastic and can be safely removed, rinse it with a garden hose. Turn it inside out if possible to flush out stubborn debris. Let it dry completely in the sun before reattaching.
Inspect for Damage
Check the hose for cracks, holes, or kinks. A damaged hose reduces efficiency and can let hot air leak back into your room. Replace it if necessary—LG sells compatible replacement hoses online.
Clean the Window Vent Kit
Wipe down the window bracket and seals with a damp cloth. Ensure the flap opens and closes freely to prevent backdrafts.
Step 6: Clean the Evaporator Coils (If Accessible)
The evaporator coils absorb heat from indoor air. While most LG portable ACs don’t allow easy access to these coils, some models have removable panels or service doors.
Check Your Model
Consult your user manual to see if your unit allows coil access. If not, skip this step—forcing open sealed compartments can void your warranty.
Remove the Access Panel
If accessible, use a screwdriver to remove the panel covering the coils. Be gentle—these parts are often fragile.
Vacuum Loose Dust
Use a soft brush attachment on your vacuum to remove surface dust. Avoid pressing too hard, as the fins are delicate and can bend easily.
Apply Coil Cleaner (Optional)
For heavy buildup, spray a foaming coil cleaner (available at hardware stores) onto the coils. Let it sit for 5–10 minutes, then rinse with water if the product instructions allow. Never use high-pressure water.
Reassemble Carefully
Once dry, replace the panel and secure all screws. Double-check that no tools or debris are left inside.
Note: If you’re uncomfortable accessing internal components, consider hiring a professional technician for deep cleaning.
Step 7: Reassemble and Test the Unit
After cleaning all components, it’s time to put everything back together and make sure your AC works properly.
Reattach All Parts
Reinstall the air filter, water tank, exhaust hose, and any removed panels. Ensure all connections are secure and hoses are properly aligned.
Plug In and Power On
Plug the unit back into a grounded outlet. Turn it on using the power button or remote.
Listen and Observe
Listen for unusual noises like grinding, rattling, or excessive humming. Check that cool air is blowing and that the unit isn’t leaking water.
Run a Test Cycle
Let the AC run for 15–20 minutes. Monitor the temperature drop and ensure the fan and compressor are operating smoothly.
If everything works as expected, you’re all set! If you notice issues, refer to the troubleshooting section below.
Troubleshooting Common Cleaning Issues
Even with careful cleaning, you might encounter problems. Here’s how to address the most common ones:
Unit Won’t Turn On After Cleaning
Double-check that the power cord is fully plugged in and the outlet is working. Ensure the water tank is properly seated and the float switch isn’t stuck in the “full” position. Also, verify that the air filter is reinstalled correctly—some models won’t operate without it.
Weak Airflow or Poor Cooling
This usually indicates a clogged filter, blocked exhaust hose, or dirty coils. Recheck all cleaned components and ensure nothing is obstructed. If the problem persists, the refrigerant level may be low—contact LG support.
Strange Odors When Running
A musty smell often means mold in the water tank or drain line. Repeat the sanitizing step with vinegar or a commercial cleaner. If odors return quickly, consider using an antimicrobial HVAC spray designed for portable ACs.
Water Leaking from the Unit
Check that the drain plug is tightly closed and the water tank isn’t overfilled. Inspect the exhaust hose for condensation buildup—tilting the unit slightly forward during operation can help drainage. If leaks continue, the internal drain line may be clogged and require professional service.
Error Codes on Display
Refer to your user manual for error code meanings. Common codes like “E1” or “F1” often relate to drainage or sensor issues. Resetting the unit (unplugging for 5 minutes) may resolve temporary glitches.
How Often Should You Clean Your LG Portable Air Conditioner?
Consistency is key to maintaining performance. Follow this general schedule:
- Air filter: Every 2–4 weeks during peak use; monthly otherwise
- Exterior and control panel: Weekly wipe-down
- Water tank: After every 1–2 weeks of use, or when the “full” indicator lights up
- Exhaust hose and vent: Every 1–2 months
- Deep cleaning (coils, internal components): Every 3–6 months, or as needed
Adjust based on your environment. Homes with pets, smokers, or high humidity may need more frequent cleaning.
Final Tips for Long-Term Care
– Store your unit properly during off-seasons: Clean it thoroughly, cover it with a breathable cloth, and keep it in a dry, cool place.
– Use a surge protector to protect electronics from power fluctuations.
– Never cover the unit while in use—this can cause overheating.
– Keep the area around the AC clear of furniture or curtains to ensure proper airflow.
– Register your product with LG to receive maintenance reminders and warranty support.
Conclusion
Cleaning your LG portable air conditioner doesn’t have to be a chore—it’s a simple yet powerful way to keep your home cool, your air fresh, and your energy bills low. By following this step-by-step guide, you’ll ensure your unit operates at peak efficiency year after year.
Remember: regular maintenance prevents problems before they start. A little effort now saves you from costly repairs, poor performance, and unhealthy indoor air down the road. So grab your cleaning supplies, set a reminder on your calendar, and give your LG portable AC the care it deserves.
Your comfort—and your wallet—will thank you.

