
This comprehensive guide walks you through how to adjust your Carrier air conditioner for better efficiency and comfort. You’ll learn how to set the right temperature, adjust fan speeds, program schedules, and troubleshoot common issues—all with simple, step-by-step instructions. Whether you’re upgrading your thermostat or performing routine maintenance, this guide ensures your Carrier unit runs smoothly all season long.
Adjusting your Carrier air conditioner is more than just turning a dial—it’s about fine-tuning your system for maximum comfort, efficiency, and longevity. Whether you’re dealing with a basic manual thermostat or a smart digital model, knowing how to properly configure your unit can make a big difference in your home’s climate control. This guide will walk you through everything from setting the ideal temperature to scheduling routines and troubleshooting hiccups. By the end, you’ll feel confident adjusting your Carrier AC like a pro.
Quick Answers to Common Questions
Should I set my Carrier AC to 68°F for maximum cooling?
No. While 68°F feels cool, lowering it further increases energy use without proportional comfort gains. Stick to 72–78°F for efficiency.
Can I adjust my Carrier AC while it’s running?
Yes. You can safely change temperature or fan speed settings at any time. The system will respond accordingly.
Is it okay to override a programmed schedule?
Absolutely. Manual overrides let you adapt to changing conditions, like unexpected guests or extreme weather.
Do I need to adjust my Carrier AC for humidity?
Yes. High humidity makes rooms feel warmer. Use dehumidifier modes (if available) or lower the thermostat slightly during humid days.
How often should I check my air filter?
Every 1–3 months. Homes with pets, allergies, or heavy use may need monthly checks.
Understanding Your Carrier Air Conditioner System
Before diving into adjustments, it helps to understand how your Carrier AC works. These systems consist of several key components: the outdoor compressor unit, indoor evaporator coil, ductwork (if applicable), and the thermostat that controls everything. When you adjust settings on the thermostat, you’re essentially telling the system how much cooling power to use based on the current room temperature. Proper adjustment ensures balanced airflow, consistent temperatures, and reduced wear and tear on the compressor.
Carrier models vary widely—from central air units with central ducting to split systems and even portable or window units—but the core adjustment principles remain similar. Most modern Carrier systems also support programmable or smart thermostats, which add convenience and energy-saving features. Knowing your specific model helps you access the right controls and take full advantage of available functions.
Step 1: Locate and Inspect Your Thermostat
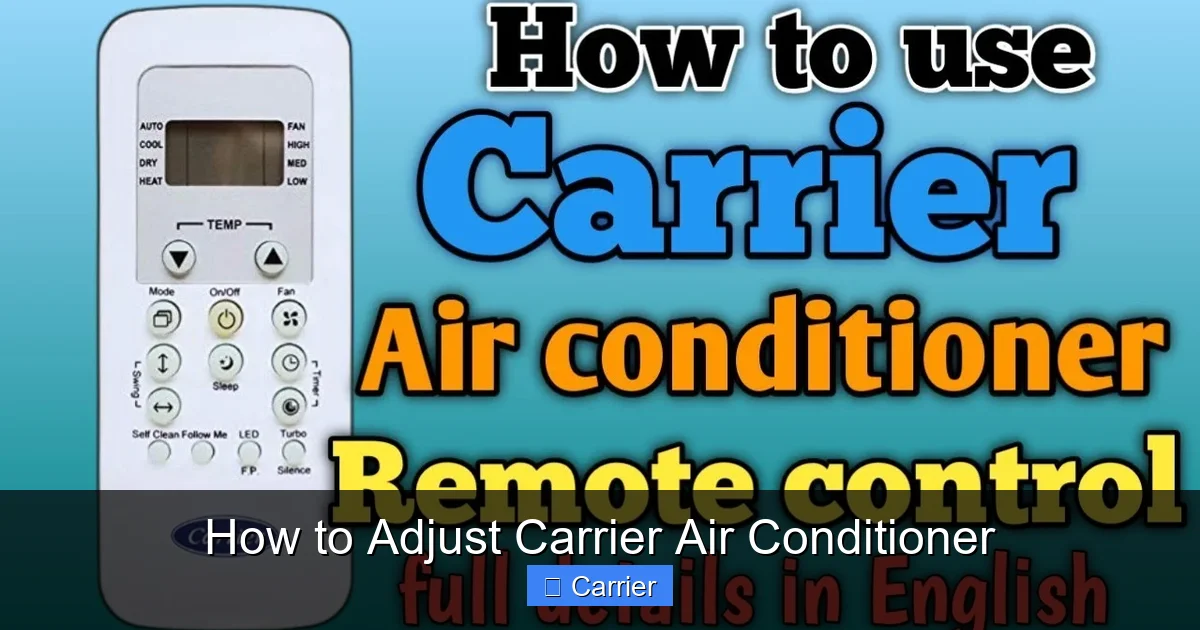
Visual guide about How to Adjust Carrier Air Conditioner
Image source: i.ytimg.com
The first step in adjusting your Carrier air conditioner is finding and examining your thermostat. It’s usually mounted on an interior wall near the center of your home. Look for a display showing the current room temperature, time, and possibly humidity levels. If you have a Carrier branded thermostat (like a Carrier Infinity or Performance model), it may feature a sleek touchscreen or backlit display.
Check the following:
– Is the thermostat powered on? (Look for a light or active screen)
– Are there any error messages flashing?
– Does the display show the correct time and date?
– Are batteries low or absent (for non-wired models)?
If the thermostat isn’t working, check the circuit breaker or replace batteries. A dead thermostat means no matter how you adjust other parts, your AC won’t respond. Once confirmed functional, proceed to the next step.
Sub-step: Identifying Manual vs. Digital Controls
Not all thermostats are created equal. Some have simple sliders or knobs for temperature and fan speed, while others use touch-sensitive panels. On manual units, you typically turn a dial or press buttons to change settings. Digital models allow for precise input, scheduling, and remote access via apps. Knowing which type you have helps you navigate the interface correctly.
Step 2: Set the Desired Temperature
Visual guide about How to Adjust Carrier Air Conditioner
Image source: i.ytimg.com
One of the most common ways to adjust your Carrier air conditioner is by setting the desired temperature. The general rule of thumb is to keep your thermostat between 72°F and 78°F (22°C to 26°C) for optimal comfort and energy savings. Setting it too low forces the compressor to work harder, increasing electricity use without significant comfort gain.
How to Adjust the Temperature
– Press the “Up” or “Down” arrow button until your desired temperature appears.
– Wait 5–10 minutes for the system to respond. You’ll hear the outdoor unit kick on.
– Monitor the actual room temperature using a separate thermometer to ensure accuracy.
– Avoid frequent changes. Let the system stabilize before adjusting again.
Tip: If you’re away during the day, consider raising the temp by a few degrees to save energy. Return home to a cool environment by pre-cooling earlier.
Step 3: Adjust Fan Speeds for Efficiency
Your Carrier AC includes a fan that circulates cooled air throughout your home. You can control its speed to balance comfort and energy use. Most systems offer three settings: Low, Medium, and High.
When to Use Each Fan Speed
– Low: Ideal when you’re sleeping or away. Reduces noise and saves energy.
– Medium: Good for mild days or partial occupancy.
– High: Best when you need rapid cooling or strong airflow.
Access fan speed settings on your thermostat by pressing the “Fan” button and selecting your preference. On some Carrier models, you can even set the fan to “Auto” (runs only when cooling) or “On” (continuous blower operation).
Step 4: Program Your Thermostat Schedule
Modern Carrier thermostats often include scheduling features that let you automate temperature changes based on your daily routine. For example, you can set the AC to lower the temp before you wake up and raise it while you’re at work.
How to Set a Basic Schedule
1. Press the “Menu” or “Settings” button.
2. Select “Schedule” or “Program.”
3. Choose “Weekday” or “Custom” schedule.
4. Input the time and target temperature for each period (e.g., 68°F at 6 AM).
5. Repeat for weekends if needed.
6. Confirm and save.
Most Carrier smart thermostats sync with your phone via Wi-Fi, allowing you to adjust settings remotely. This is especially useful if you forget to turn off the AC before leaving home.
Step 5: Maintain Airflow with Clean Filters
Even with perfect thermostat settings, dirty air filters can block airflow, forcing your Carrier unit to work harder. Check and clean or replace your filter every 1–3 months, depending on usage and pet presence.
How to Replace a Filter
– Turn off the AC unit.
– Locate the return air grille (usually in a hallway or central area).
– Remove the old filter (note its orientation for replacement).
– Insert a new filter with the air flow arrow pointing toward the furnace or indoor coil.
– Close the grille and restart the system.
Using high-efficiency particulate air (HEPA) or electrostatic filters can improve indoor air quality and system performance.
Step 6: Calibrate Your Thermostat for Accuracy
Over time, thermostats can drift out of calibration, causing your Carrier AC to run longer or shorter than intended. You can manually recalibrate your thermostat to match a known accurate temperature source, such as a kitchen oven thermometer or smartphone app.
Calibration Process
1. Place a separate thermometer in the same room as your thermostat.
2. Note the actual room temperature after 15 minutes.
3. Compare it to the reading on your Carrier thermostat.
4. If there’s a difference, access the calibration menu (often found under “Advanced Settings” or “Tools”).
5. Enter the offset value (e.g., +2°F if the thermostat reads 2° higher than reality).
6. Save and test again.
Accurate calibration prevents unnecessary cycling and improves comfort.
Step 7: Use Smart Features and Remote Access
Many Carrier thermostats support smart home integration. With the Carrier app (or compatible platforms like Google Home or Amazon Alexa), you can:
– View real-time temperature and humidity
– Adjust settings from your phone
– Receive maintenance reminders
– Track energy usage
Setting Up Remote Access
1. Download the Carrier app or log in via web portal.
2. Connect your thermostat to your home Wi-Fi network.
3. Link the device to your account using the provided code.
4. Enable notifications for alerts and updates.
Remote access lets you cool your home before arriving and avoid wasting energy on empty houses.
Step 8: Troubleshoot Common Adjustment Problems
Even with proper setup, you might encounter issues. Here’s how to address them:
Problem: AC Runs Constantly
– Possible causes: Dirty filter, blocked vents, incorrect thermostat setting, or refrigerant leak.
– Solutions: Clean filter, clear obstructions, verify temp setting, call a technician for refrigerant check.
Problem: Inconsistent Cooling
– Possible causes: Oversized unit, poor insulation, or failing compressor.
– Solutions: Ensure proper insulation, consult an HVAC professional for sizing, and inspect ductwork for leaks.
Problem: No Response After Adjustment
– Check power supply, circuit breaker, and thermostat mode (cool vs. heat).
– Reset the thermostat by turning off power for 30 seconds.
Always consult a licensed HVAC technician for complex repairs or electrical concerns.
Conclusion: Keep Your Carrier AC Running Smoothly
Adjusting your Carrier air conditioner doesn’t require technical expertise—just attention to detail and regular maintenance. From setting the right temperature to programming schedules and cleaning filters, small steps lead to big improvements in comfort and cost savings. By understanding your thermostat’s capabilities and responding to common issues early, you extend the life of your unit and reduce utility bills.
Remember, Carrier systems are built to last with proper care. When in doubt, refer to your user manual or contact Carrier customer support. With these tips, you’re ready to take full control of your home’s climate all year round.

