How Long Does It Take to Replace an AC Compressor
Replacing an AC compressor in your car may seem like a daunting task, but with the right tools and knowledge, it can be done in a reasonable amount of time. Let's explore the steps involved in replacing an AC compressor and how long it typically takes.
Step-by-Step Process:
When replacing an AC compressor, the process typically involves the following steps:
- Diagnose a bad compressor
- Remove refrigerant from the system
- Remove the fan belt
- Remove refrigerant lines
- Install the new compressor
- Add oil to the new compressor
- Slide compressor on and bolt it back up
- Reinstall the power steering pump
- Refill the system with refrigerant
Tools and Materials You'll Need
Before starting, gather the following to avoid mid-job delays: a certified recovery machine for refrigerant (legally required), metric wrenches and sockets (usually 10–14 mm), a serpentine-belt tool or long breaker bar, torque wrench, new O-rings compatible with your refrigerant type, PAG oil specified by the compressor manufacturer, vacuum pump and manifold gauge set, and a refrigerant scale. In practice, skipping the vacuum step is the most common shortcut that leads to premature failure — moisture left in the system turns acidic and destroys the new compressor within months. For more on this, see our guide on how long does it take to replace an.
Resource Estimated Time
HVAC School Approximately 51 minutes
ChrisFix Around 14 minutes
How Long Does It Take?
On average, replacing an AC compressor on a car can take around four to six hours. The process involves removing and disposing of any remaining refrigerant, disconnecting and removing the old compressor, installing the new one with proper fittings, and recharging the system with refrigerant.
Factors such as experience level and complexity of the job can affect the time needed for the replacement. While some resources suggest that it can be completed in as little as three hours, it is important to allow for additional time for a thorough and accurate installation.
Factors That Extend the Job Beyond Six Hours
- Rust-seized bolts on the compressor mounting brackets or line connections — common in northern climates — can add 60–90 minutes of penetrating-oil soak and careful extraction.
- Condenser or drier replacement recommended by most OEMs whenever the system is opened adds another 30–45 minutes.
- Difficult access on transverse V6 engines (e.g., certain Honda/Audi models) may require removing the front bumper cover or subframe bolts, pushing total shop time to 8+ hours.
- Re-learning idle / throttle adaptation after battery disconnect on newer drive-by-wire vehicles adds 10–15 minutes with a scan tool.
DIY vs. Professional: Time Comparison
| Scenario | Typical Elapsed Time | Key Variables |
|---|---|---|
| Experienced DIYer, good access, no seized hardware | 4–5 hrs | Tool completeness, prior system evacuation |
| First-time DIYer, same vehicle | 7–9 hrs | Learning curve, parts runs, re-work |
| Independent shop (flat-rate) | 3.5–4.5 hrs | Lift, recovery machine, tech familiarity |
| Dealership (flat-rate) | 3–4 hrs | OEM scan tool, factory torque specs, warranty paperwork |
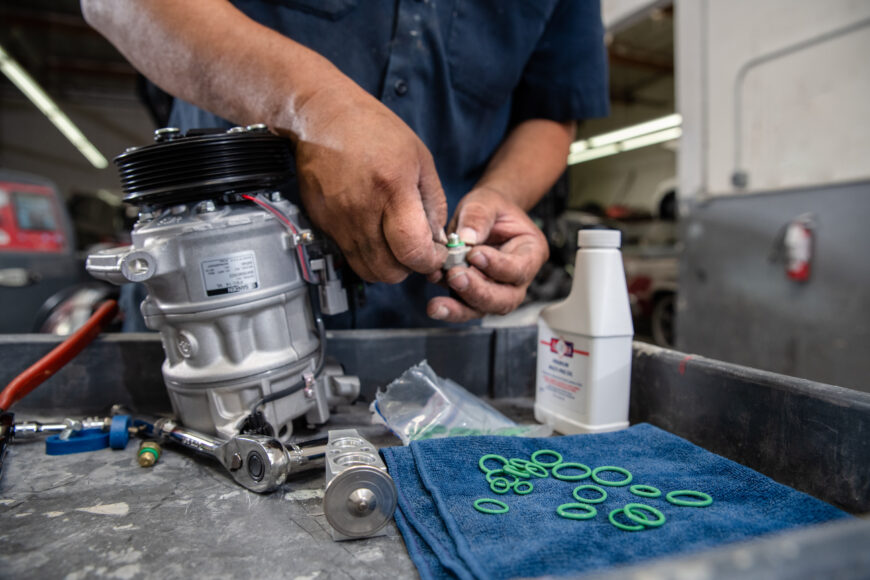
Credit: www.autozone.com — A technician connects a recovery machine before compressor removal.
Is It Difficult?
Replacing an AC compressor may be challenging due to the specific knowledge and skills required. Understanding HVAC systems, electrical connections, and refrigerant handling is crucial for a successful replacement. Therefore, even experienced DIYers may find this task complex.

Credit: www.amazon.com — Typical replacement compressor with clutch assembly and manifold ports.
Common Mistakes That Cost Time and Money
- Reusing old O-rings — they flatten and leak; always install the kit supplied with the new compressor.
- Guessing oil quantity — overfill causes high-head-pressure shutdown; underfill starves the compressor. Use the “drain-and-measure” method: drain old compressor, measure oil, add same volume of fresh PAG to new unit.
- Skipping the 30-minute vacuum hold — a system that won’t hold 29.9 inHg for 30 minutes has a leak you’ll chase after recharge.
- Forgetting to spin the new clutch hub by hand before energizing — binding indicates shipping damage or wrong pulley offset.
Safety & Legal Reminders (2026 Guidance)
- EPA Section 608 certification is mandatory for anyone handling R-134a or R-1234yf; venting refrigerant carries fines up to $25,000 per day per violation (EPA enforcement page).
- Wear ANSI Z87.1 safety glasses and nitrile gloves — liquid refrigerant causes instant frostbite.
- Disconnect the negative battery terminal before unplugging the compressor clutch coil to avoid shorting the BCM.
https://www.youtube.com/watch?v=H4kub2gAzV0
Cost Breakdown: What You’re Actually Paying For
| Item | Typical Range (2026 USD) | Notes |
|---|---|---|
| Remanufactured compressor | $180–$350 | Includes clutch; warranty 1–3 yrs |
| New OEM compressor | $350–$650 | Dealer-sourced; longest warranty |
| Receiver-drier / accumulator | $25–$60 | Replace whenever system opened |
| Expansion valve / orifice tube | $15–$40 | Often overlooked but critical |
| PAG oil (8 oz) | $12–$20 | Match viscosity to spec (e.g., PAG 46, 100, 150) |
| Refrigerant (R-134a, 2 lb) | $60–$90 | R-1234yf: $120–$180 per lb |
| Shop labor (independent) | $400–$700 | 4–5 hrs @ $100–$140/hr |
| Shop labor (dealership) | $600–$1,000 | 3–4 hrs @ $150–$250/hr |
| Total DIY (parts only) | $300–$600 | Plus tool rental/recovery machine |
| Total Pro Install | $800–$1,800 | Includes recovery, vacuum, recharge, warranty |
Pro tip: If your vehicle uses R-1234yf, many independent shops lack the dedicated recovery machine — confirm before booking.
When to DIY vs. Call a Pro
DIY makes sense if: you already own a vacuum pump, manifold gauges, and have EPA 608 certification; the compressor is top-mounted with clear access; you can borrow or rent a recovery machine locally.
Hire a pro when: the compressor is buried under the timing cover or requires subframe drop; you’re dealing with R-1234yf and no local rental exists; the system shows signs of metal debris (“black death”) requiring full flush and condenser replacement; you want a nationwide warranty on labor.
For a deeper look at system diagnostics before committing to replacement, see our guide on troubleshooting the condenser first — a restricted condenser often mimics compressor failure.
Frequently Asked Questions Of How Long Does It Take To Replace A Ac Compressor : Efficient Replacement Techniques.
How Hard Is It To Replace An Ac Compressor?
Replacing an AC compressor is a straightforward process, similar to replacing other motor accessories like the alternator or power steering pump. The main difference is the removal of refrigerant lines connected to the compressor. The entire process typically takes about four to six hours.
How Long Does It Take To Replace Car Ac Compressor?
The process generally takes about 4 to 6 hours to replace a car AC compressor. This includes removing the old compressor, installing the new one, and recharging the system.
How Much Should It Cost To Replace An Ac Compressor?
The cost to replace an AC compressor may range from $500 to $2,000, including parts and labor.
Is Changing Ac Compressor Hard Job?
Replacing an AC compressor is not a difficult task, even for experienced DIYers. However, it does require knowledge of HVAC systems, electrical connections, and refrigerant handling. The process involves removing and disposing of refrigerant, disconnecting and removing the old compressor, installing the new one, and recharging with refrigerant.
On average, it takes about four to six hours to complete the job.
Can I Replace Just the Compressor Clutch Instead of the Whole Unit?
On many late-model vehicles the clutch is not serviceable separately; the pulley bearing, coil, and hub are pressed together. Even when it is, labor to remove the compressor, swap the clutch, and reinstall often exceeds the price difference between a clutch kit and a reman compressor — plus you lose the warranty on the internal seals.
Do I Have to Replace the Condenser Too?
Most OEM service bulletins (GM, Ford, Toyota, Hyundai/Kia) mandate condenser replacement whenever the compressor fails catastrophically because metal particles lodge in the micro-channel tubes and cannot be flushed out. Skipping this step voids many aftermarket compressor warranties.
What Oil Viscosity Should I Use?
Check the under-hood sticker or the new compressor’s hang tag. Common specs: PAG 46 (most Japanese), PAG 100 (many GM/Ford), PAG 150 (some heavy-duty). Using the wrong viscosity alters compressor displacement and voids warranty.
How Do I Know the System Is Fully Charged Without a Scale?
You don’t. Pressure gauges alone cannot determine charge weight on variable-displacement compressors. A $40 refrigerant scale pays for itself in one avoided over/under-charge.
Conclusion
In conclusion, replacing an AC compressor in your car is a project that demands attention to detail and a methodical approach. While the process can typically take around four to six hours, allowing for additional time and ensuring a proper installation is essential for optimal performance of your vehicle's AC system.
Ready to tackle the job? Bookmark this page, gather the tools listed above, and schedule a block of uninterrupted time — your future self will appreciate the cool air on the first hot day. If you’d rather leave refrigerant handling to a certified tech, use our shop locator to find a nearby specialist with the right recovery equipment.