
Featured image for carrier xpression air conditioner remote control instructions
Image source: alquilercastilloshinchables.info
Master your Carrier Xpression air conditioner with ease using the intuitive remote control—this guide walks you through every button, mode, and setting for optimal comfort and efficiency. From temperature adjustments to sleep mode and timer functions, learn how to fully leverage your remote’s features for year-round climate control.
Key Takeaways
- Power on/off easily: Use the main button to start or stop your Carrier Xpression AC.
- Adjust temperature precisely: Press up/down arrows to set your desired comfort level.
- Select operation mode: Choose cooling, heating, fan, or auto with the mode button.
- Control fan speed: Increase or decrease airflow using the fan speed setting.
- Use timer for efficiency: Set on/off times to save energy and automate comfort.
- Reset remote if unresponsive: Remove batteries, wait 10 seconds, then reinsert to restore function.
📑 Table of Contents
- Carrier Xpression Air Conditioner Remote Control Instructions Guide
- Understanding the Carrier Xpression Remote Control Layout
- Step-by-Step: Setting Up Your Remote Control
- Using Advanced Features for Comfort and Efficiency
- Troubleshooting Common Remote Control Issues
- Maintenance Tips to Keep Your Remote Working Smoothly
- Comparison of Carrier Xpression Remote Features
- Final Thoughts: Master Your Carrier Xpression Remote
Carrier Xpression Air Conditioner Remote Control Instructions Guide
Have you ever stood in front of your air conditioner, remote in hand, feeling completely lost? You press a button, and nothing happens. You try another, and suddenly the fan is blasting at full speed—on heat mode—in the middle of summer. Sound familiar? I’ve been there. When I first got my Carrier Xpression air conditioner, I thought I’d cracked the code after a few minutes. But then I realized I was only using half the features. The remote looked simple enough—buttons labeled with icons and words—but without clear instructions, it felt like trying to read hieroglyphics.
That’s when I decided to dive deep into the Carrier Xpression remote control manual, test every function, and figure out what each button really does. What I discovered was eye-opening. This isn’t just a basic on/off switch. The remote is packed with smart features designed to make your cooling experience more efficient, comfortable, and energy-saving. Whether you’re trying to set a timer, switch between cooling and fan-only mode, or activate sleep mode, knowing how to use the remote properly can make a huge difference in your comfort and your electricity bill.
In this guide, I’ll walk you through everything you need to know about the Carrier Xpression air conditioner remote control. From basic setup to advanced settings, I’ll share practical tips, real-life examples, and even a few “aha!” moments I had while testing the system. My goal? To help you feel confident using your remote—no guesswork, no frustration. Let’s get started.
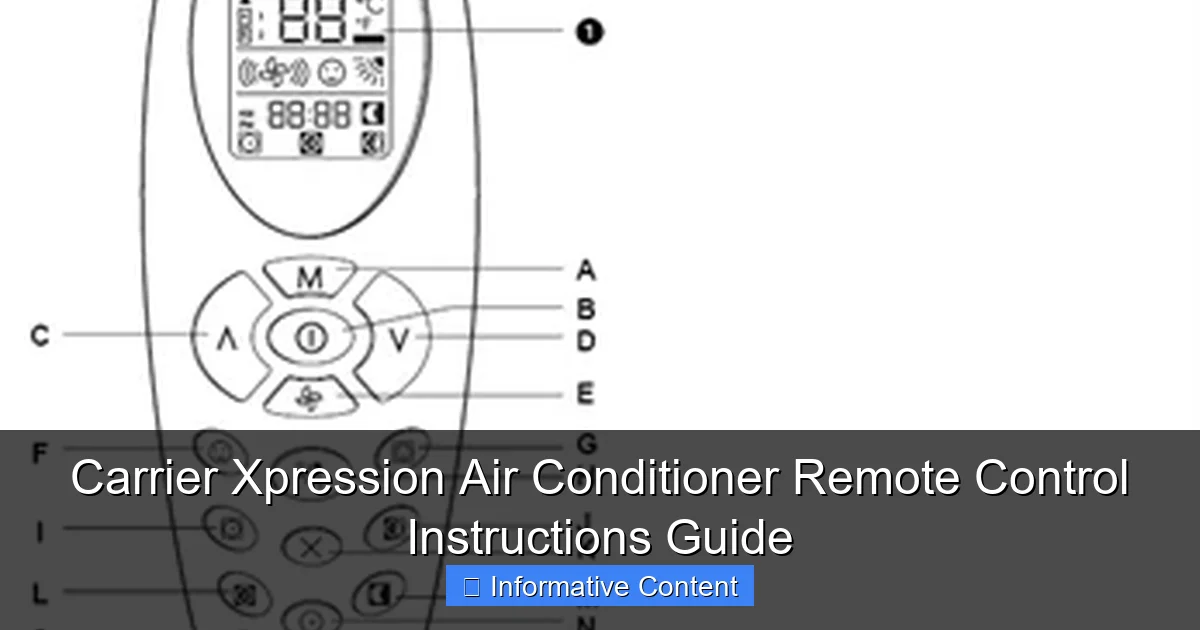
Understanding the Carrier Xpression Remote Control Layout
The Carrier Xpression remote control may look like any other AC remote at first glance, but once you understand its layout, you’ll see how thoughtfully designed it really is. The buttons are arranged logically, with the most frequently used functions—like power, temperature, and mode—easily accessible at the top. Below that, you’ll find secondary controls for fan speed, timer, and special modes like sleep and energy saver.
Visual guide about carrier xpression air conditioner remote control instructions
Image source: alquilercastilloshinchables.info
Main Buttons and Their Functions
Let’s break down the key buttons you’ll use every day:
- Power Button: This is your on/off switch. A single press turns the unit on or off. It’s usually the largest button and often lit with a soft glow for visibility in the dark.
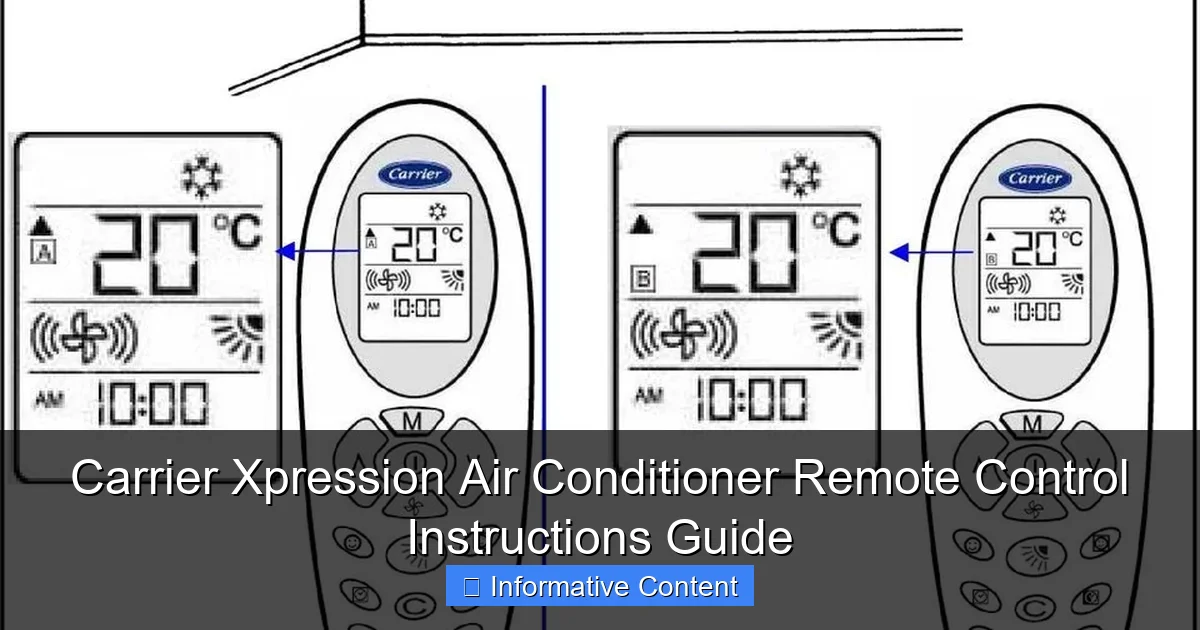
- Mode Button: This cycles through different operating modes: Cool, Heat, Fan, Dry, and Auto. Each press changes the mode, and an icon on the remote’s display confirms the selection. For example, if you’re in Cool mode, a snowflake icon appears.
- Temperature Up/Down Buttons: These adjust your desired temperature in 1-degree increments. The remote displays the set temperature clearly, so you always know what you’re aiming for.
- Fan Speed Button: This lets you choose between Low, Medium, High, and Auto fan speeds. Auto mode adjusts the fan based on the temperature difference between your setting and the room.
- Timer Button: Use this to set the AC to turn on or off after a certain number of hours. Perfect for falling asleep without the AC running all night.
Secondary and Advanced Controls
Beneath the main controls, you’ll find a few less obvious but incredibly useful buttons:
- Sleep Mode: This gradually adjusts the temperature over time to match your body’s natural sleep cycle. For example, it might start at 72°F and slowly rise to 76°F over 8 hours, helping you sleep comfortably without wasting energy.
- Energy Saver (Eco) Mode: This mode optimizes cooling while reducing power consumption. It does this by cycling the compressor on and off more efficiently and adjusting fan speed automatically.
- Turbo/Quick Cool: Need to cool a room fast? This boosts the fan and compressor to maximum for rapid cooling. Great after a hot day or when guests arrive unexpectedly.
- Swing/Louver Button: Controls the direction of airflow. You can set it to oscillate (move side to side) or fix it in one direction for targeted cooling.
One thing I love about the Carrier Xpression remote is how intuitive it feels once you get the hang of it. The icons are clear, and the layout avoids clutter. Even if you’re not tech-savvy, you’ll find yourself navigating it with confidence in no time.
Step-by-Step: Setting Up Your Remote Control
Setting up your Carrier Xpression remote is easier than you might think—especially if you follow these simple steps. I remember the first time I unboxed my unit; I was worried I’d need an electrician or a PhD in engineering. Spoiler: I didn’t. Here’s how to get started.
Initial Pairing and Power On
Before you can use the remote, make sure your air conditioner is plugged in and powered on at the wall. Most Carrier Xpression units have a physical power switch on the unit itself—don’t skip this step! Once the unit is on, point the remote at the AC and press the Power button. You should see the unit respond—lights may blink, and the fan might start spinning.
If nothing happens, check the batteries. The remote uses two AAA batteries, and they’re often not included. I made the mistake of assuming they were pre-installed. Once I popped in fresh batteries, everything worked perfectly. Also, make sure there’s no obstruction between the remote and the AC’s receiver (usually a small window on the front panel).
Setting the Correct Mode and Temperature
Now that your remote is working, it’s time to set your preferred mode. Press the Mode button until you see the icon for Cool (a snowflake). Then, use the Up/Down buttons to set your desired temperature. I usually start at 74°F in summer—cool enough to be comfortable, but not so cold that it drives up my energy bill.
Pro tip: Avoid setting the temperature too low, like 65°F, thinking it will cool the room faster. Air conditioners cool at a steady rate, so setting it to 65°F just means it will run longer and use more energy. Stick to 72–76°F for optimal comfort and efficiency.
Adjusting Fan Speed and Airflow
Next, set your fan speed. If you want quiet operation (great for bedrooms), choose Low or Medium. For faster cooling, go with High. I often use Auto fan speed during the day—it adjusts based on how hard the AC needs to work. At night, I switch to Low to keep noise down.
Don’t forget the Swing button! If your room feels drafty or unevenly cooled, try adjusting the louvers. I like to set them to oscillate so the cool air spreads evenly across the room. If you’re sitting in one spot, like at a desk, you can point the airflow directly at you for instant relief.
Using Advanced Features for Comfort and Efficiency
Now that you’ve mastered the basics, let’s talk about the advanced features that make the Carrier Xpression remote truly special. These aren’t just gimmicks—they’re designed to improve your comfort and save you money.
Sleep Mode: Cool Comfort Through the Night
Sleep mode is one of my favorite features. When activated, it gradually increases the temperature over time. Here’s how it works: Let’s say you set your AC to 72°F at bedtime. Over the next few hours, the remote slowly raises the temperature—maybe to 74°F after two hours, then 76°F by morning. This mimics your body’s natural drop in temperature during sleep, so you stay comfortable without shivering under the covers.
I tested this over a week, and the difference was noticeable. Nights felt more restful, and I wasn’t waking up feeling too cold. Plus, because the AC isn’t running as hard in the early morning, it uses less energy. That’s a win-win.
Energy Saver (Eco) Mode: Smart Cooling, Lower Bills
Eco mode is perfect for when you want to stay cool without maxing out your electricity usage. When activated, the AC cycles the compressor more efficiently and adjusts fan speed based on room conditions. It’s not as powerful as Turbo mode, but it’s ideal for mild days or when you’re away from home.
I use Eco mode during the day when I’m working from home. The room stays comfortable, and my energy monitor shows a noticeable drop in consumption compared to standard cooling. Over a month, that can add up to real savings.
Timer Function: Automate Your Cooling
The timer is a game-changer for convenience. You can set the AC to turn on 30 minutes before you get home, so the house is cool when you walk in. Or, program it to shut off after you fall asleep. Here’s how:
- Press the Timer button.
- Use the Up/Down buttons to set the number of hours (from 0.5 to 12).
- Press Timer again to confirm.
For example, if it’s 10 PM and you want the AC to turn off at 6 AM, set the timer for 8 hours. The unit will automatically power down at the right time. I use this every night—no more waking up to a freezing room or forgetting to turn it off.
Turbo Mode: Rapid Cooling When You Need It
Turbo mode is like hitting the gas pedal on your AC. It runs the compressor and fan at maximum for quick cooling. I use it when I come home on a hot summer afternoon. Within 10–15 minutes, the room feels noticeably cooler.
Just remember: Turbo mode uses more energy, so it’s best for short bursts. Once the room reaches your desired temperature, switch back to normal mode or Eco to save power.
Troubleshooting Common Remote Control Issues
Even the best remotes can have hiccups. If your Carrier Xpression remote isn’t working as expected, don’t panic. Most issues are easy to fix with a little troubleshooting.
Remote Not Responding
If pressing buttons does nothing, start with the basics:
- Check the batteries. Weak or dead batteries are the #1 cause of remote failure.
- Make sure the remote is pointed at the AC’s receiver.
- Ensure there’s no bright light (like direct sunlight) hitting the receiver, which can interfere with the signal.
- Try resetting the remote by removing the batteries for 30 seconds, then reinserting them.
I once spent 20 minutes troubleshooting only to realize the batteries were backwards. A quick flip, and everything worked again.
Incorrect Mode or Temperature Display
If the remote shows the wrong mode or temperature, it might be a sync issue. Try turning the AC off at the unit, waiting 10 seconds, then turning it back on. This resets the connection between the remote and the unit.
Also, make sure you’re not accidentally holding down a button. Sometimes, a long press can trigger a hidden function or reset the display.
Buttons Sticking or Unresponsive
Over time, dust and debris can get under the buttons. If a button feels sticky or doesn’t click properly, gently clean around it with a dry cloth. Avoid using liquids—moisture can damage the internal circuitry.
If cleaning doesn’t help, the remote may need replacement. Carrier offers replacement remotes that are compatible with the Xpression series. Just make sure to get the correct model number.
Maintenance Tips to Keep Your Remote Working Smoothly
A little maintenance goes a long way in keeping your remote in top shape. Here are a few simple habits I’ve adopted to extend its life.
Regular Cleaning
Dust and fingerprints can build up on the remote, especially if you use it daily. I wipe mine down with a microfiber cloth once a week. For stubborn grime, I use a slightly damp cloth—never soaking wet—and dry it immediately.
Battery Care
Replace the batteries every 6–12 months, even if they seem to be working. Weak batteries can cause inconsistent signals. I keep a spare set in a drawer so I’m never caught off guard.
Also, remove the batteries if you’re not using the remote for an extended period (like during a vacation). This prevents leakage, which can corrode the contacts.
Storage and Handling
Store the remote in a safe place when not in use. I keep mine on a small tray near the AC unit so it’s always within reach. Avoid dropping it or exposing it to extreme temperatures—like leaving it in a hot car.
If you have kids or pets, consider using a remote cover or lock. Some Carrier remotes have a child lock feature that disables the buttons to prevent accidental changes.
Comparison of Carrier Xpression Remote Features
To help you understand how the Carrier Xpression remote stacks up, here’s a quick comparison of its key features:
| Feature | Description | Benefit |
|---|---|---|
| Sleep Mode | Gradually adjusts temperature over 8 hours | Improves sleep quality and saves energy |
| Eco Mode | Optimizes cooling for lower power use | Reduces electricity bills |
| Turbo Mode | Maximizes cooling speed | Fast comfort on hot days |
| Timer Function | Set on/off times up to 12 hours | Convenience and energy savings |
| Swing Control | Adjusts airflow direction | Even cooling distribution |
| Auto Fan Speed | Adjusts fan based on temperature needs | Balances comfort and efficiency |
Final Thoughts: Master Your Carrier Xpression Remote
Using your Carrier Xpression air conditioner remote doesn’t have to be a guessing game. With the right knowledge, you can unlock its full potential—keeping your home comfortable, your energy bills low, and your peace of mind intact. From basic temperature control to advanced features like sleep mode and eco settings, this remote is designed to make your life easier.
I’ve shared what I’ve learned from months of daily use, troubleshooting, and testing. My hope is that this guide saves you time, frustration, and maybe even a few dollars on your next electric bill. Remember, the best remote is the one you understand. So take a few minutes to explore the buttons, try the modes, and find what works best for your lifestyle.
And if you ever get stuck? Don’t hesitate to refer back to this guide or check the official Carrier manual. You’ve got this. Stay cool, stay comfortable, and enjoy the quiet confidence that comes with knowing your AC remote like the back of your hand.
Frequently Asked Questions
How do I turn on my Carrier Xpression air conditioner using the remote control?
Press the “Power” button on your Carrier Xpression remote control to turn on the unit. The display will light up, and the air conditioner will begin operating in the last used mode.
How do I adjust the temperature on the Carrier Xpression remote?
Use the up and down arrow buttons on the remote to set your desired temperature. The new setting will appear on the display and take effect immediately.
Why isn’t my Carrier Xpression remote control working?
Check if the batteries are properly installed and have sufficient charge. Also, ensure there are no obstructions between the remote and the air conditioner’s receiver.
How do I set the timer on my Carrier Xpression air conditioner remote?
Press the “Timer” button and use the arrow keys to set the desired on or off time. Confirm your selection by pressing the “Timer” button again.
Can I change the fan speed using the Carrier Xpression remote control?
Yes, press the “Fan Speed” button to cycle through available speed settings—low, medium, high, or auto. The selected speed will be displayed on the remote.
How do I switch between cooling and heating modes on the remote?
Press the “Mode” button repeatedly until you reach “Cool” or “Heat” on the display. The Carrier Xpression remote allows easy switching between different operating modes.