Featured image for wall air conditioner installation
Proper wall air conditioner installation starts with choosing the right size unit and a structurally sound wall to ensure efficiency and safety. Always follow the manufacturer’s guidelines and use a level, secure mounting sleeve to prevent vibration and leaks. For optimal performance and energy savings, seal gaps with weatherstripping and ensure the unit slopes slightly outward for proper drainage.
Key Takeaways
- Measure carefully: Ensure precise wall opening dimensions for a snug fit.
- Choose the right unit: Match BTU capacity to room size for optimal cooling.
- Seal gaps properly: Use weatherstripping to prevent air leaks and energy loss.
- Prioritize drainage: Slope the unit slightly outward for effective condensate runoff.
- Secure mounting: Anchor the AC firmly to support its weight and reduce vibration.
- Check electrical needs: Verify voltage and circuit compatibility before plugging in.
📑 Table of Contents
- Why Wall Air Conditioners Are a Smart Choice
- 1. Choosing the Right Wall Air Conditioner
- 2. Preparing for Installation: Tools, Safety, and Planning
- 3. Step-by-Step Installation Guide
- 4. Common Pitfalls and How to Avoid Them
- 5. Maintenance Tips for Long-Term Performance
- 6. Cost Breakdown and When to Hire a Pro
- Final Thoughts: Enjoy Your Cool, Efficient Home
Why Wall Air Conditioners Are a Smart Choice
When summer hits, nothing feels better than stepping into a cool, air-conditioned home. If you’re tired of lugging around portable units or dealing with the limited reach of window ACs, a wall air conditioner might be your new best friend. These sleek, built-in units are a game-changer for homes without central AC. They’re energy-efficient, quiet, and blend seamlessly into your space. But here’s the thing: wall air conditioner installation isn’t as simple as plugging in a toaster. It requires planning, the right tools, and a bit of patience.
I learned this the hard way when I installed my first wall AC. I thought, “How hard could it be?” Spoiler: harder than expected. From choosing the right model to sealing the unit properly, there are pitfalls everywhere. But with the right tips, you can avoid rookie mistakes and enjoy a perfectly cool home. Whether you’re a DIY enthusiast or hiring a pro, this guide will walk you through everything you need to know—from picking the perfect spot to sealing gaps like a pro.
1. Choosing the Right Wall Air Conditioner
Not all wall ACs are created equal. Picking the right one is the first step to a successful wall air conditioner installation. Here’s how to avoid buyer’s remorse.
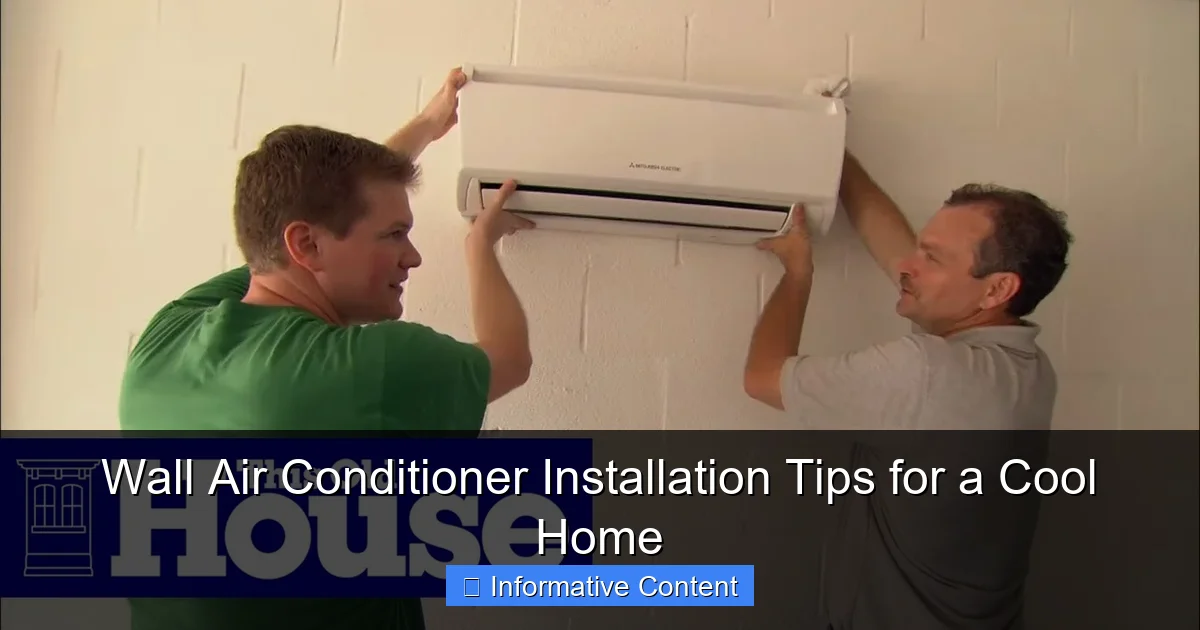
Visual guide about wall air conditioner installation
Image source: i.ytimg.com
Assess Your Room Size and Cooling Needs
Start by calculating the square footage of the room you want to cool. A unit that’s too small will struggle, while one that’s too large will waste energy and create humidity issues. Here’s a quick reference:
- 150–350 sq ft: 5,000–8,000 BTU
- 350–550 sq ft: 8,000–12,000 BTU
- 550–800 sq ft: 12,000–18,000 BTU
For example, my 400 sq ft living room needed an 11,000 BTU unit. I went with a 12,000 BTU model to be safe—and it’s been perfect.
Energy Efficiency Matters (Look for EER and SEER)
Energy efficiency isn’t just about saving money. It’s about long-term comfort. Check the Energy Efficiency Ratio (EER) and Seasonal Energy Efficiency Ratio (SEER). The higher the number, the better. Aim for an EER of at least 10 and SEER of 13+ for optimal performance. I once bought a cheap unit with an EER of 8. It cooled okay but spiked my electric bill. Lesson learned.
Wall vs. Through-the-Wall vs. Ductless Mini-Split
Confused about the types? Here’s the breakdown:
- Standard wall AC: Installed in a sleeve in an exterior wall. Best for permanent setups.
- Through-the-wall AC: Similar but doesn’t require a sleeve. Easier for renters or temporary fixes.
- Ductless mini-split: More expensive but offers heating/cooling and superior efficiency.
For my home, I went with a standard wall AC because I wanted a permanent, low-profile solution.
2. Preparing for Installation: Tools, Safety, and Planning
Before you grab a drill, take a deep breath. Proper prep prevents poor performance (and potential disasters). Here’s what you need to know.
Essential Tools and Materials
You’ll need more than just a screwdriver. Here’s my go-to checklist:
- Drill and masonry bits (for exterior walls)
- Level
- Tape measure
- Stud finder
- Jigsaw (for cutting drywall or siding)
- Exterior-grade caulk or sealant
- Insulation foam (for gaps)
- Safety gear: goggles, gloves, dust mask
Pro tip: Borrow or rent tools if you don’t own them. My neighbor lent me his jigsaw, and it saved me $50.
Electrical Safety: Voltage and Circuit Requirements
Wall ACs often require a dedicated circuit (220V or 240V). Never plug them into a regular outlet—this can trip breakers or cause fires. Check the unit’s manual for specs. If you’re unsure, call an electrician. I once tried to jury-rig a 220V outlet with an adapter. Spoiler: It didn’t end well. A pro fixed it for $150.
Location, Location, Location: Picking the Perfect Spot
Not all walls are equal. Consider these factors:
- Exterior wall: Must be outside-facing for proper exhaust.
- Clearance: Leave 12+ inches above and 6+ inches on each side.
- Sun exposure: Avoid direct sunlight to prevent overheating.
- Proximity to furniture: Don’t block airflow with a couch or bookshelf.
I installed mine on the shadiest side of my house, away from my TV setup. It’s been whisper-quiet.
3. Step-by-Step Installation Guide
Time to roll up your sleeves. This is the meat of wall air conditioner installation. Follow these steps carefully.
Step 1: Cutting the Wall Opening
Measure the sleeve dimensions (usually 15.5” x 26” for standard units). Use a stud finder to avoid cutting through framing. Trace the outline with a pencil, then cut carefully. If you hit brick or stucco, use a masonry bit. For drywall, a jigsaw works best. I messed up my first cut by rushing—it was crooked. A level and steady hand are your friends.
Step 2: Installing the Sleeve (If Required)
Most wall ACs need a metal sleeve. Slide it into the opening, ensuring it’s level. Secure it with screws or brackets. Leave a slight downward tilt (about 1/4 inch) so condensation drains outside. I used rubber shims to get the tilt just right.
Step 3: Mounting the Air Conditioner
Lift the unit into the sleeve—get a helper if it’s heavy. Slide it in until it clicks. Secure with screws from the inside. Check the manual for specific torque settings. My unit had a locking tab that made a satisfying “snap” when engaged.
Step 4: Electrical Connections
This is where many DIYers get nervous. If your unit needs 220V:
- Turn off the main power.
- Run a dedicated circuit to the wall opening.
- Connect wires (black to black, white to white, ground to ground).
- Use wire nuts or a junction box for safety.
When in doubt, hire an electrician. I did, and it was worth every penny.
Step 5: Sealing and Insulating
Seal gaps with exterior-grade caulk and foam. Pay extra attention to the top and sides—these are common leak spots. I used spray foam for small gaps and caulk for larger seams. It’s messy but effective.
4. Common Pitfalls and How to Avoid Them
Even experienced DIYers make mistakes. Here are the top issues and how to dodge them.
Leaky Installation: Preventing Air and Water Infiltration
A poorly sealed unit lets hot air in and cool air out. Worse, it can cause water damage. To fix:
- Use backer rod for large gaps before caulking.
- Apply sealant in a “bead” (not a blob).
- Check for gaps after a rainstorm.
I once ignored a tiny gap at the top. A week later, I found water stains on the wall. Lesson learned.
Electrical Issues: Tripped Breakers and Overheating
Overloaded circuits are dangerous. Signs include:
- Frequent breaker trips.
- Warm outlets or cords.
- Flickering lights when the AC runs.
If you see these, call an electrician immediately. Don’t risk it.
Noise and Vibration Problems
Wobbly units make noise. To reduce vibration:
- Use rubber gaskets between the unit and sleeve.
- Secure the unit firmly—no wiggle room.
- Add sound-dampening foam to the sleeve.
My first unit rattled like a washing machine. A $10 gasket fixed it.
5. Maintenance Tips for Long-Term Performance
Installing your wall AC is just the beginning. Maintenance keeps it running smoothly.
Cleaning the Filter (Every 2–4 Weeks)
Dirty filters restrict airflow and strain the motor. Remove the front panel, take out the filter, and rinse it with water. Let it dry completely before reinserting. I set a monthly reminder on my phone.
Checking the Condensate Drain (Seasonally)
Clogged drains cause leaks. Use a pipe cleaner or wet/dry vac to clear debris. Pour a cup of bleach down the drain to kill mold. I do this every spring.
Inspecting Seals and Insulation (Annually)
Weather and pests can damage seals. Check for cracks, gaps, or chewed foam. Re-caulk or replace insulation as needed. I found mouse nests in my unit once—yikes!
6. Cost Breakdown and When to Hire a Pro
DIY saves money, but some tasks are worth outsourcing. Here’s what to expect.
DIY vs. Professional Installation Costs
Here’s a rough cost comparison for a standard wall AC installation:
| Task | DIY Cost | Pro Cost |
|---|---|---|
| Wall AC unit (12,000 BTU) | $400–$800 | $400–$800 (same unit) |
| Tools (if renting) | $50–$100 | $0 (included in labor) |
| Electrical work (220V) | $0 (if you’re qualified) | $300–$800 |
| Labor (installation) | $0 | $200–$500 |
| Total | $450–$900 | $900–$2,100 |
For me, DIY saved about $600. But if you’re not confident with electrical work, the pro cost is worth it.
When to Call a Professional
Hire a pro if:
- You need a new electrical circuit.
- Your wall is brick, stone, or concrete (hard to cut).
- You’re uncomfortable with heights (for upper floors).
- You hit a snag (like a hidden pipe).
I hired a pro for the electrical work. Best decision ever.
Final Thoughts: Enjoy Your Cool, Efficient Home
Installing a wall air conditioner is a big project, but it’s absolutely doable—even for beginners. The key is patience, preparation, and knowing when to ask for help. From choosing the right unit to sealing gaps like a pro, every step matters. I’ve had my wall AC for three years now, and it’s been flawless. No more sweating through summer nights, no more noisy portable units. Just cool, quiet comfort.
Remember, wall air conditioner installation isn’t just about staying cool. It’s about creating a home that’s energy-efficient, comfortable, and tailored to your needs. So grab your tools, follow these tips, and get ready to enjoy a cooler, calmer summer. And if you run into trouble? That’s what neighbors (and electricians) are for. Happy installing!
Frequently Asked Questions
What should I consider before wall air conditioner installation?
Before installing a wall air conditioner, evaluate the wall’s structural strength, ensure proper electrical wiring, and choose a location that allows for efficient airflow and easy maintenance. It’s also important to check local building codes and obtain necessary permits.
Can I install a wall-mounted air conditioner myself?
While DIY installation is possible for experienced homeowners, it’s recommended to hire a professional for safe and correct wall air conditioner installation, especially when dealing with electrical connections and structural modifications.
How much does professional wall air conditioner installation cost?
Installation costs vary by location and unit size, but typically range from $200 to $600. This includes labor, materials, and potential electrical or structural upgrades needed for safe operation.
What tools are needed for wall air conditioner installation?
Common tools include a drill, level, stud finder, screwdrivers, and a saw for cutting the wall opening. A voltage tester and sealant are also essential to ensure safety and prevent air leaks.
Where is the best place to install a wall air conditioner?
The ideal location is on an exterior wall, away from direct sunlight and heat sources, with enough clearance for airflow. Avoid areas near doors or windows to maximize cooling efficiency and reduce strain on the unit.
Do I need to reinforce the wall for air conditioner installation?
Yes, most wall air conditioners require reinforcement to support their weight, especially in drywall or older structures. A mounting bracket and additional framing may be needed to ensure long-term stability and safety.