Featured image for install air conditioner through wall
Image source: hvacseer.com
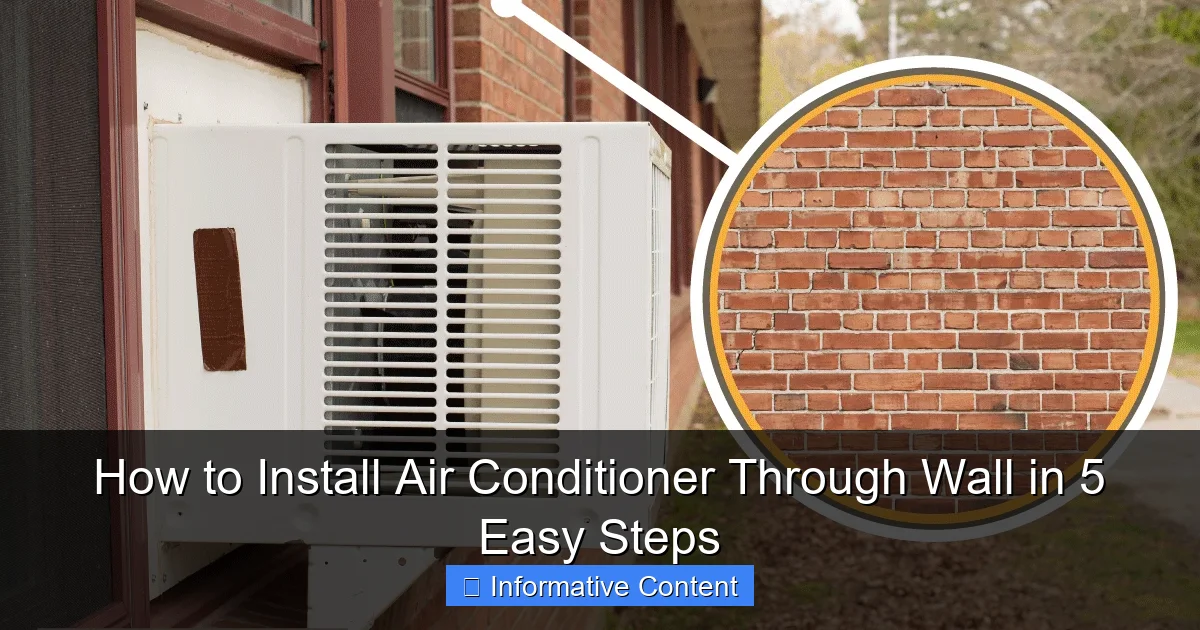
Installing an air conditioner through a wall is a straightforward DIY project when done in five simple steps. Start by choosing the right AC unit and marking the wall opening, then cut carefully and secure the sleeve for a snug fit. Seal gaps with weatherproofing materials and connect electrical wiring safely to ensure efficient, long-lasting cooling without compromising your home’s insulation or structure.
Key Takeaways
- Measure carefully: Ensure accurate wall and AC unit dimensions before cutting.
- Choose the right location: Pick a spot near power sources and away from sunlight.
- Seal gaps properly: Use weatherproof sealant to prevent air leaks and moisture.
- Secure the unit firmly: Brace the AC with brackets to avoid sagging or vibration.
- Check local codes: Verify building regulations before drilling through walls.
- Test after installation: Run the AC to confirm proper function and cooling.
📑 Table of Contents
- How to Install Air Conditioner Through Wall in 5 Easy Steps
- Why Choose a Through-the-Wall Air Conditioner?
- Choosing the Right Air Conditioner for Your Wall
- Tools and Materials You’ll Need
- Step-by-Step Guide: How to Install Air Conditioner Through Wall
- Common Mistakes to Avoid
- Maintenance Tips to Keep Your Unit Running Smoothly
- Conclusion
How to Install Air Conditioner Through Wall in 5 Easy Steps
So, you’ve decided it’s time to beat the summer heat—without relying on noisy window units that block your view or let in drafts. Installing an air conditioner through the wall might sound like a daunting project, but with the right tools, a bit of patience, and a clear plan, it’s totally doable—even for someone who’s never picked up a power drill before.
I remember the first time I tackled this project. My apartment had no central air, and the window unit I’d been using for years was on its last legs. I wanted something cleaner, quieter, and more energy-efficient. After some research, I landed on a through-the-wall AC unit. At first, I was nervous—what if I messed up the wall? What if it leaked? But after following a step-by-step process and taking my time, I ended up with a professional-looking installation that’s kept me cool for three summers straight. And the best part? It didn’t cost me a fortune in labor fees.
Whether you’re a DIY enthusiast or just looking to save money on HVAC installation, this guide will walk you through everything you need to know about how to install air conditioner through wall safely and effectively. We’ll cover the tools you’ll need, how to choose the right unit, how to prepare your wall, and—most importantly—how to do it in just five manageable steps. By the end, you’ll feel confident enough to tackle this project yourself, with peace of mind and a cooler home.
Why Choose a Through-the-Wall Air Conditioner?
Before we dive into the installation process, let’s talk about why you might want to go with a through-the-wall AC unit in the first place. These systems have come a long way from the bulky, inefficient models of the past. Today’s units are sleek, energy-efficient, and designed for permanent installation—making them a great middle ground between portable units and full central air systems.

Visual guide about install air conditioner through wall
Image source: ajmadison.com
One of the biggest advantages is energy efficiency. Unlike window units, which often allow air to escape around the edges, through-the-wall units are sealed tightly into the wall. This means less energy loss and lower utility bills. Plus, they free up your windows, so you can enjoy natural light and unobstructed views—something I really appreciated in my small living room.
Another benefit is noise reduction. Because the compressor and fan are housed inside the wall cavity, the indoor noise level is significantly lower than with window units. If you work from home or just value a quiet environment, this is a game-changer. I used to wake up every time my old window unit kicked on—now, I barely notice when the AC is running.
And let’s not forget aesthetics. A properly installed through-the-wall unit looks clean and intentional, almost like built-in climate control. It doesn’t stick out awkwardly like a window unit, and it doesn’t require you to remove it every winter (though some people do for insulation purposes).
Of course, there are a few downsides to consider. For one, installation is more involved than simply sliding a unit into a window. You’ll need to cut into your wall, which means you’ll need permission if you’re renting. Also, once it’s in, it’s not exactly easy to move or replace. But if you’re looking for a long-term cooling solution, the pros far outweigh the cons.
Who Should Consider This Option?
Through-the-wall air conditioners are ideal for:
- Apartment or condo dwellers who can’t install window units due to building rules
- Homeowners wanting a permanent, energy-efficient cooling solution
- People with limited window space or windows that don’t open
- Those who work from home and need a quiet environment
- Anyone tired of seasonal window unit hassle
If any of these sound like you, then installing an air conditioner through the wall could be the perfect solution.
Choosing the Right Air Conditioner for Your Wall
Not all air conditioners are created equal—and not all walls can support just any unit. Before you start measuring or drilling, it’s crucial to choose the right air conditioner for your space. This decision will affect everything from installation ease to long-term performance.
The first thing to consider is cooling capacity, measured in BTUs (British Thermal Units). A unit that’s too small won’t cool your room effectively, while one that’s too large will cycle on and off too frequently, wasting energy and reducing comfort. As a general rule:
- 150–250 sq. ft.: 6,000 BTUs
- 250–300 sq. ft.: 7,000 BTUs
- 300–350 sq. ft.: 8,000 BTUs
- 350–400 sq. ft.: 9,000 BTUs
- 400–450 sq. ft.: 10,000 BTUs
- 450–550 sq. ft.: 12,000 BTUs
But don’t stop there. Factors like ceiling height, sun exposure, and insulation also play a role. For example, a south-facing room with large windows will need more cooling power than a shaded room of the same size.
Wall Compatibility and Unit Size
Next, you’ll need to check if your wall can accommodate a through-the-wall unit. Most models require a wall thickness between 7 and 12 inches—standard for interior and exterior walls in most homes. But if you live in an older building or have unusually thick or thin walls, measure carefully.
Also, consider the rough opening size—the space you’ll cut into the wall. This varies by model, so check the manufacturer’s specifications. Common sizes include 26” x 16” or 28” x 18”, but always confirm before buying. I made the mistake of assuming all units fit the same opening—don’t do the same!
Energy Efficiency and Features
Look for units with a high Energy Efficiency Ratio (EER). The higher the EER, the less energy the unit uses to cool your space. Aim for at least 10.7 EER or higher—this is especially important if you’re in a hot climate and plan to run the AC often.
Modern units also come with helpful features like:
- Remote control for easy adjustments
- Programmable timers to save energy
- Sleep mode for quieter nighttime operation
- Washable filters for better air quality
- Smart connectivity (Wi-Fi enabled) for app control
I opted for a unit with a remote and timer—being able to turn it on before I get home from work has been a lifesaver on hot days.
Brand and Warranty
Stick with reputable brands like LG, Frigidaire, GE, or Friedrich. These companies offer reliable units with good customer support and warranties. Most come with a 1-year parts and labor warranty, and some offer extended coverage for the compressor.
When I bought mine, I chose a Frigidaire model because it had great reviews, a 5-year compressor warranty, and was on sale at my local hardware store. It’s been running smoothly ever since.
Tools and Materials You’ll Need
Now that you’ve picked the right unit, it’s time to gather your tools. Don’t start cutting until you have everything on hand—this will save you time and frustration.
Here’s a checklist of what you’ll need to install air conditioner through wall:
- Measuring tape – for accurate dimensions
- Pencil – to mark your cutting area
- Level – to ensure the opening is straight
- Stud finder – to locate wall studs and avoid cutting into them
- Circular saw or reciprocating saw – for cutting through drywall and sheathing
- Jigsaw – for cutting precise corners
- Drill and drill bits – for pilot holes and mounting
- Screwdriver or impact driver – for securing the unit
- Caulk and caulk gun – for sealing gaps
- Foam insulation board or backer rod – to fill gaps around the unit
- Safety gear – gloves, safety glasses, and a dust mask
- Shims – to level the unit if needed
- Mounting brackets or sleeve – usually included with the unit
Most of these tools are common household items, but if you don’t have a circular saw or jigsaw, consider borrowing or renting one. Many hardware stores offer tool rental programs for a fraction of the cost.
Safety First
Cutting into a wall can be messy and potentially dangerous. Always wear safety glasses to protect your eyes from dust and debris, gloves to protect your hands, and a dust mask—especially if you’re cutting into drywall or insulation. If you’re working near electrical wiring or plumbing, turn off the power at the breaker and double-check with a voltage tester.
And if you’re not confident in your DIY skills, don’t hesitate to consult a professional. It’s better to spend a little extra than to risk damaging your wall or injuring yourself.
Step-by-Step Guide: How to Install Air Conditioner Through Wall
Now for the main event—the actual installation. I’ll walk you through each step as if we’re doing it together. Take your time, follow the instructions, and don’t rush. A careful installation now means fewer problems later.
Step 1: Choose and Mark the Installation Location
Start by deciding where to install the unit. Ideally, place it on an exterior wall, away from direct sunlight and heat sources like lamps or electronics. Avoid areas near doors or high-traffic zones where the unit might be bumped.
Use your stud finder to locate the studs in the wall. You’ll want to center the opening between two studs to avoid cutting into them. Once you’ve found a clear spot, measure the rough opening size from your AC unit’s manual and mark it on the wall with a pencil.
Use a level to draw straight lines—this is critical. A crooked opening will make installation difficult and could cause air leaks. I learned this the hard way when my first attempt was slightly off-level. It wasn’t a disaster, but it made sealing the unit much harder.
Step 2: Cut the Wall Opening
Before cutting, double-check your measurements and make sure there are no electrical wires, plumbing, or HVAC ducts behind the wall. If you’re unsure, consult a professional or use a borescope to peek inside.
Start by drilling pilot holes in each corner of your marked area. This will give your saw a starting point and prevent the drywall from tearing. Then, use a circular saw to cut along the lines, stopping about 1 inch from the corners. Finish the corners with a jigsaw for a clean, precise cut.
If you’re cutting through exterior siding or brick, you may need a masonry drill bit and a hammer drill. Take it slow and wear eye protection—brick dust is no joke.
Once the opening is cut, remove the debris and vacuum the area. You should now have a clean, rectangular hole ready for the AC sleeve.
Step 3: Install the Mounting Sleeve or Bracket
Most through-the-wall units come with a metal sleeve or mounting bracket that fits into the wall opening. This sleeve provides structural support and helps seal the unit.
Slide the sleeve into the opening from the outside. Make sure it fits snugly and is level. If there are gaps, use shims to adjust. Secure the sleeve to the wall framing using screws—usually provided with the unit.
From the inside, check that the sleeve is flush with the wall and level. If it’s not, adjust the shims until it is. A level sleeve ensures the AC unit sits properly and drains correctly.
Once the sleeve is secure, apply a bead of exterior-grade caulk around the outside edge where the sleeve meets the wall. This prevents water from seeping in during rain or snow.
Step 4: Install the Air Conditioner Unit
Now it’s time to install the AC unit itself. Carefully lift the unit—these can be heavy, so ask for help if needed—and slide it into the sleeve from the inside.
Most units have mounting brackets or screws that attach to the sleeve. Follow the manufacturer’s instructions to secure it in place. Make sure the unit is level and doesn’t wobble.
Check the drainage slope: the unit should tilt slightly backward (about 1/4 inch) to allow condensation to drain properly. If it’s not sloped correctly, use shims under the front to adjust.
Once the unit is in place, connect the power. Most through-the-wall units require a dedicated 240-volt circuit. If you don’t have one, you’ll need to hire an electrician to install it. Never plug a 240V unit into a standard outlet—it won’t work and could be dangerous.
Step 5: Seal and Insulate the Installation
The final step is sealing and insulating around the unit to prevent air leaks and improve energy efficiency.
Fill any gaps between the unit and the sleeve with foam backer rod or spray foam insulation. Be careful not to overfill—expanding foam can warp the unit or sleeve.
From the inside, apply a bead of silicone caulk around the edges where the unit meets the wall. This creates a weathertight seal and keeps bugs and drafts out.
Finally, install the front panel or grille that came with your unit. This not only looks better but also protects the internal components.
Turn on the unit and test it. Listen for unusual noises, check for leaks, and make sure it’s cooling properly. If everything looks good, you’re done!
Common Mistakes to Avoid
Even with careful planning, things can go wrong. Here are some common pitfalls I’ve seen—and experienced—and how to avoid them.
Cutting into a stud or electrical wire: Always use a stud finder and check for wires before cutting. If you hit something unexpected, stop immediately and assess the situation.
Improper slope: If the unit isn’t tilted back slightly, condensation can pool inside and cause water damage or mold. Use a level and shims to get it right.
Skipping the seal: Air leaks around the unit can reduce efficiency and let in pests. Always caulk and insulate thoroughly.
Ignoring electrical requirements: Most through-the-wall units need a dedicated 240V circuit. Don’t assume your existing outlet will work—check the specs and consult an electrician if needed.
Rushing the process: Take your time. A rushed installation can lead to mistakes that are costly to fix later.
Maintenance Tips to Keep Your Unit Running Smoothly
Once your air conditioner is installed, regular maintenance will keep it running efficiently for years.
Clean or replace the air filter every 1–2 months during peak usage. A dirty filter restricts airflow and makes the unit work harder.
Check the drain line periodically to ensure it’s not clogged. Standing water can lead to mold or leaks.
Inspect the seals and caulk around the unit each season. Reapply caulk if you notice cracks or gaps.
Keep the area around the unit clear of debris, furniture, or curtains that could block airflow.
And if you live in a cold climate, consider covering the outside of the unit in winter to protect it from snow and ice.
Conclusion
Installing an air conditioner through the wall might seem like a big project, but with the right preparation and a step-by-step approach, it’s completely achievable. From choosing the right unit to sealing the final gap, each step brings you closer to a cooler, more comfortable home.
I’ll be honest—there were moments when I doubted myself. But once the unit was in and humming quietly, I knew it was worth the effort. Not only did I save hundreds on installation fees, but I also gained valuable DIY skills and the satisfaction of doing it myself.
So if you’re ready to upgrade your cooling system, don’t let fear hold you back. Follow this guide, take your time, and trust the process. Before you know it, you’ll be enjoying crisp, quiet air—all thanks to your own two hands.
| Room Size (sq. ft.) | Recommended BTUs |
|---|---|
| 150–250 | 6,000 |
| 250–300 | 7,000 |
| 300–350 | 8,000 |
| 350–400 | 9,000 |
| 400–450 | 10,000 |
| 450–550 | 12,000 |
Remember, the key to a successful installation is patience and attention to detail. Whether you’re cooling a bedroom, home office, or living room, a through-the-wall air conditioner can be a smart, long-term investment. And now, you have the knowledge to do it right.
Frequently Asked Questions
How do I install an air conditioner through a wall safely?
To install an air conditioner through a wall safely, ensure the wall can support the unit’s weight and use proper mounting hardware. Always follow the manufacturer’s guidelines and consider hiring a professional if you’re unsure about electrical or structural requirements.
What tools do I need for a through-the-wall air conditioner installation?
You’ll need a drill, level, stud finder, screwdriver, measuring tape, and a hole saw for cutting the wall opening. A helper is also recommended to hold the unit during installation to prevent accidents.
Can I install an air conditioner through a wall without professional help?
Yes, you can install an air conditioner through a wall as a DIY project if you have basic handyman skills. However, complex electrical work or heavy units may require a licensed technician to ensure safety and efficiency.
What size hole do I need for a through-the-wall air conditioner?
The hole size depends on your AC unit’s specifications, typically ranging from 14”x14” to 20”x20”. Always check the manufacturer’s manual for exact measurements before cutting into the wall.
How do I seal the gap after installing an AC through the wall?
Use weatherproof foam, caulk, or a mounting bracket to seal gaps around the unit, preventing air leaks and water damage. Proper sealing also improves energy efficiency and reduces noise.
Is a through-wall air conditioner better than a window unit?
A through-wall air conditioner offers a more permanent, space-saving solution with better insulation and noise reduction. However, it requires more effort to install and isn’t easily removable like a window unit.