
Setting a timer on your Panasonic air conditioner helps you save energy and maintain comfort without manual adjustments. Whether you want the AC to turn on before you arrive home or off before bedtime, the timer function makes it simple. This guide walks you through every step using your remote control, ensuring your unit operates efficiently and on schedule.
Key Takeaways
- Timer Function Basics: The timer allows you to schedule when your Panasonic AC turns on or off, improving convenience and energy savings.
- Remote Control Required: You must use the original remote control that came with your Panasonic air conditioner to access the timer settings.
- Two Timer Types: Most models support On Timer (to turn on later) and Off Timer (to turn off after a delay).
- Time Accuracy Matters: Set the correct current time first—otherwise, your timer won’t work properly.
- Model Variations Exist: While steps are similar across models, always check your user manual for specific features.
- Energy Savings: Using the timer reduces unnecessary runtime, lowering electricity bills.
- Troubleshooting Tips: If the timer doesn’t activate, ensure batteries are fresh and the unit is in cooling mode.
Quick Answers to Common Questions
Can I set multiple timers per day on my Panasonic AC?
Answer: Most standard Panasonic models only support one active timer at a time—either On or Off. However, some premium inverter series (like the K Series) allow weekly scheduling via the menu system. Check your manual for multi-timer support.
Will the timer work if my AC is already running?
Answer: Yes! You can set an Off Timer even when the AC is on. It will shut down after the set delay. But avoid setting an On Timer while the unit is already active—it may ignore the command or behave erratically.
Do I need internet to use the timer?
Answer: Absolutely not. All timer functions work offline using your remote control. Only smart ACs with Wi-Fi connectivity require internet for cloud-based scheduling.
What if my remote has no TIMER button?
Answer: Try pressing MODE + POWER simultaneously for 3 seconds—some older models hide timer functions behind combo keys. Alternatively, use the physical buttons on the indoor unit (look for ▲▼ arrows near the display).
How long does the timer battery backup last?
Answer: Panasonic ACs retain timer settings for up to 72 hours during power loss due to internal memory. Once power returns, the clock resets—so always set the correct time after outages.
How to Set Timer on Panasonic Air Conditioner: A Complete Step-by-Step Guide
If you’re tired of coming home to a sweltering house or waking up to an overworked air conditioner, learning how to set timer on Panasonic air conditioner is a game-changer. The built-in timer function lets you automate your cooling schedule so your space stays comfortable without wasting energy. Whether you’re away at work, heading out early, or just want peace of mind knowing your AC will turn off automatically, this guide walks you through everything you need to know—from setup to troubleshooting.
This comprehensive guide covers all major Panasonic inverter and non-inverter AC models available in India, North America, Europe, and Asia. We’ll explain the difference between On and Off timers, show you how to set them using your remote, and share pro tips to maximize efficiency. No technical jargon—just clear, simple instructions anyone can follow.
Why Use a Timer on Your Panasonic Air Conditioner?
Before diving into the steps, let’s understand why setting a timer matters. Modern Panasonic air conditioners come with advanced features designed to save energy and improve comfort. The timer function is one of the most underused yet powerful tools in your AC arsenal.
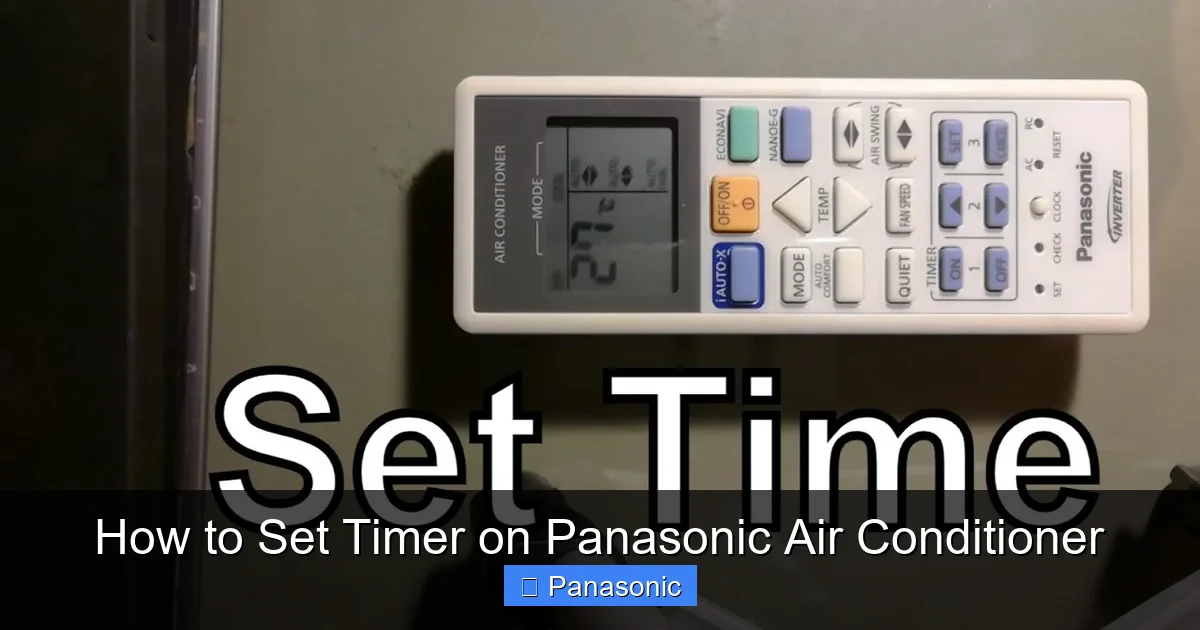
Visual guide about How to Set Timer on Panasonic Air Conditioner
Image source: i.ytimg.com
Here’s what you gain by using the timer:
- Saves Money: Running your AC only when needed cuts down electricity usage significantly.
- Prevents Overcooling: Avoid leaving the AC running overnight or while no one’s home.
- Convenience: Schedule cooling before you wake up or return from work.
- Protects Your Unit: Frequent on/off cycles can stress compressors; timers help manage runtime smoothly.
Panasonic uses smart microprocessors in their ACs to handle timer operations efficiently. Even older models support basic timer functions—no app or Wi-Fi required. That means you don’t need a “smart” AC to benefit from scheduling.
What You’ll Need Before Starting
Getting ready is half the battle. Make sure you have these items handy before attempting to set the timer:
- The original Panasonic remote control (third-party remotes may not work)
- Fresh batteries (low power can cause glitches)
- Your AC unit powered ON and in standby mode
- A few minutes of free time (the process takes less than 60 seconds)
If you’ve lost your remote, many Panasonic models allow timer programming via the physical buttons on the indoor unit—but we’ll focus on the standard remote method since it’s easier and more reliable.
Understanding Timer Types: On vs. Off
Panasonic air conditioners typically offer two types of timers:
On Timer
This schedules your AC to turn ON at a specific future time. For example, if you leave work at 5 PM and commute takes 45 minutes, you can set the On Timer for 5:30 PM so your room is cool and comfortable when you arrive.
Off Timer
This sets your AC to shut down after a chosen delay. Perfect for bedtime—set it for 11 PM, and your AC will turn off automatically, saving energy while you sleep.
Some advanced models also support dual-timer setups or multiple daily schedules, but most home users only need basic On/Off functionality. Let’s explore how to activate each.
Step-by-Step: How to Set Timer on Panasonic Air Conditioner
Follow these simple steps to program your timer. Remember: the exact button names might vary slightly depending on your model (e.g., C/S, MODE, TIMER), but the logic remains the same.
Step 1: Press the Timer Button
Point your Panasonic remote at the AC unit and locate the TIMER button. It usually appears near the bottom right corner of the remote. Press it once.
You’ll see the display on the AC unit flicker and show options like “ON TIMER” or “OFF TIMER.” If nothing happens, try pressing the button firmly or replacing the batteries.
Step 2: Choose Between On Timer or Off Timer
After pressing TIMER, tap the button again to cycle through options:
- First press → OFF TIMER
- Second press → ON TIMER
- Third press → returns to current time
For instance, if you want the AC to turn ON later, select “ON TIMER” by pressing the TIMER button twice.
Step 3: Set the Current Time
This is critical! Your AC needs accurate time to trigger the timer correctly. Here’s how to sync it:
- Press and hold the TIMER button for about 3 seconds until the clock icon blinks.
- Use the + and – buttons (usually labeled “TEMP UP/DOWN”) to adjust hours and minutes.
- Confirm by pressing TIMER again or waiting for auto-save.
Example: If it’s currently 3:15 PM and you want the AC to turn ON at 6:00 PM, set the time to 6:00 before selecting the On Timer.
Step 4: Select Duration or Exact Time
Depending on your model, you’ll either pick a delay (e.g., “2 hours”) or an exact time (e.g., “18:00”).
- Delay Mode (common in older models): After choosing ON/OFF, press + repeatedly to increase hours/minutes until desired duration shows up.
- Exact Time Mode (newer models): Once time is set, press ENTER or SET to lock it in.
Tip: Newer Panasonic inverter ACs like the CS/CU-XU12YKYWU often use digital clocks with AM/PM—make sure you’re in 12-hour format if applicable.
Step 5: Confirm and Activate
Once everything looks right:
- Press TIMER one last time to activate.
- Check the display—it should show “TIMER ON” or a countdown.
- If unsure, wait 10 seconds; the screen should stabilize.
Your AC will now follow the schedule. You can still manually override it anytime by pressing POWER.
Advanced Timer Features (Select Models)
High-end Panasonic units like the Premium Inverter series include extra timer capabilities:
- Weekly Schedules: Program different times for weekdays vs. weekends.
- Sleep Mode Integration: Combine timer with automatic temperature rise during sleep.
- Energy Saver Mode: Reduces fan speed after timer ends to cut noise and power.
To access these, look for MENU, SETUP, or ADVANCED buttons on your remote. Consult your user manual for model-specific paths.
Troubleshooting Common Timer Issues
Even with perfect setup, things sometimes go wrong. Here’s how to fix frequent problems:
Problem: Timer Doesn’t Activate
Causes: Dead batteries, incorrect time setting, or AC not in standby mode.
Solution: Replace batteries, reset time, and ensure the unit is plugged in and responsive to remote commands.
Problem: AC Turns On/Off Randomly
Cause: Power fluctuations or faulty sensor.
Solution: Unplug the AC for 2 minutes, then restart. If issue persists, contact Panasonic service.
Problem: Display Shows “–:–” or Flashes
Cause: Time wasn’t synced properly.
Solution: Repeat Step 3 carefully, holding buttons until digits change.
Problem: Remote Not Responding
Cause: Obstruction, low signal, or incompatible remote.
Solution: Remove obstacles between remote and AC. Test with another device to confirm remote works.
Pro Tips for Optimal Timer Use
- Set Timers Early: Program schedules during cooler parts of the day (e.g., morning) to reduce strain.
- Use Sleep Mode + Timer: Combines energy savings with comfort during rest.
- Clean Filters Regularly: Dirty filters reduce efficiency—timers won’t compensate for poor airflow.
- Check Seasonal Needs: Adjust timer durations based on outside temperatures.
- Update Manuals Online: Download PDF guides from Panasonic’s website for your exact model number.
Conclusion: Master Your AC with Smart Timing
Learning how to set timer on Panasonic air conditioner transforms your unit from a simple appliance into a smart climate manager. With just a few clicks on your remote, you gain control over energy use, comfort, and maintenance. No apps, no subscriptions—just reliable, built-in technology that works seamlessly.
Remember: accuracy starts with correct time-setting. Always verify the clock before programming. And don’t forget that manual override is always an option if plans change unexpectedly.
By following this guide, you’ll enjoy lower bills, longer compressor life, and consistent comfort—every single day. Happy cooling!
