
Removing a Carrier air conditioner is easier when you follow the right steps. This guide walks you through disconnecting power, draining refrigerant, and safely uninstalling your unit. You’ll also learn how to prepare for replacement or storage while staying safe and compliant.
Quick Answers to Common Questions
Can I remove my Carrier AC myself?
Yes, but only if you handle electrical and refrigerant work safely. For central systems, hire a licensed HVAC tech to recover refrigerant. DIY is fine for window units.
How much does it cost to remove a Carrier AC?
Prices vary by location and system size. Expect $200–$600 for central units (including refrigerant recovery), or $50–$150 for window units. Check with local HVAC pros for quotes.
What happens to the refrigerant?
It’s legally required to be recovered and recycled by EPA-certified technicians. Never release it into the atmosphere—it’s a potent greenhouse gas.
Can I reinstall the same unit?
Possibly, but inspect it for wear. If it’s over 10 years old or damaged, replacement is safer and more efficient.
Where can I recycle my Carrier AC?
Visit Carrier.com/recycling or search “EPA-certified appliance recyclers near me.” Many retailers like Home Depot also offer take-back programs.
How to Remove Carrier Air Conditioner: A Step-by-Step Guide
Thinking about removing your Carrier air conditioner? Whether you’re upgrading to a new system, replacing an old unit, or relocating, knowing how to safely and correctly remove your Carrier AC is essential. This guide walks you through every step—from preparing the area to safely disconnecting and transporting the unit. With clear instructions and practical tips, you’ll handle the process confidently and efficiently.
This guide covers both central air conditioning systems and window or portable units. While Carrier is known for high-efficiency central AC systems, many people also own window-mounted or ductless mini-split models. We’ll address each type where relevant, but most steps apply broadly across Carrier models.
Before we begin, remember: safety comes first. Working with electrical systems and refrigerants requires care. If you’re unsure about any step, consult a licensed HVAC professional. Now, let’s get started.
Tools and Supplies You’ll Need
Gather these items before beginning:
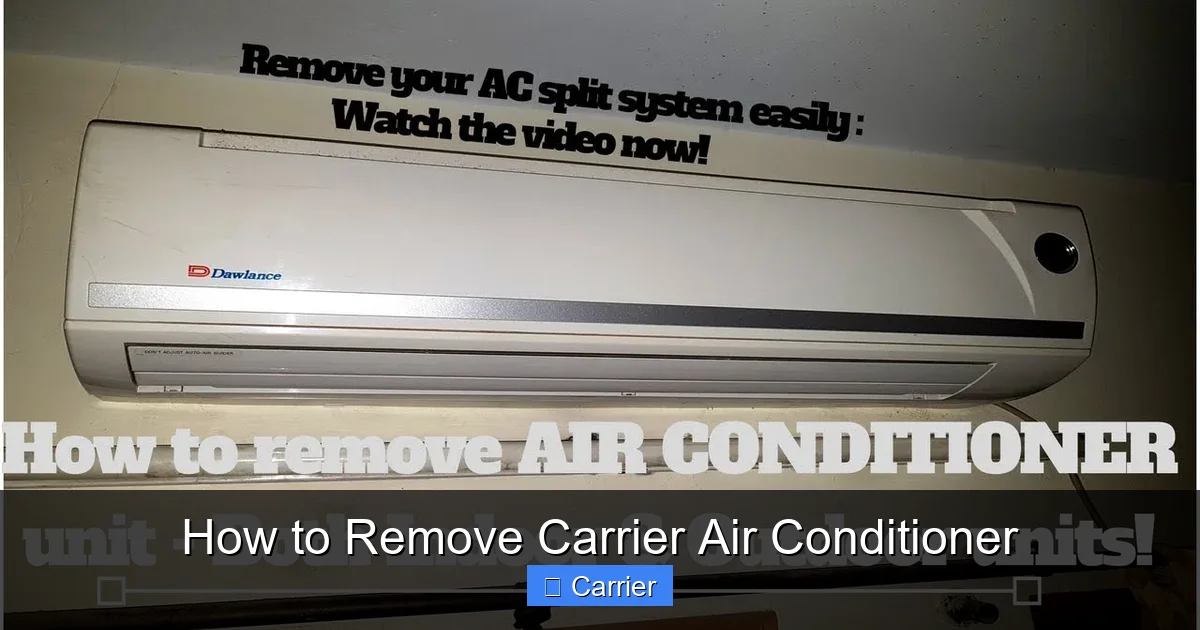
Visual guide about How to Remove Carrier Air Conditioner
Image source: i.ytimg.com
- Voltage tester (non-contact)
- Screwdrivers (Phillips and flathead)
- Adjustable wrench
- Bucket or drain pan
- Shop towels or rags
- Work gloves and safety glasses
- Ladder (if working on a wall-mounted or window unit)
- Refrigerant recovery equipment (only for certified technicians)
- Labeling tape and marker
- Moving dolly or furniture sliders (for heavy units)
For central air systems, you may need access to the outdoor condenser unit, indoor evaporator coil, and ductwork. For window units, you’ll focus more on electrical and mounting hardware.
Step 1: Turn Off Power to the Unit
Locate the Circuit Breaker
Find your home’s electrical panel. Look for the breaker labeled “Air Conditioner” or “HVAC.” If unsure, refer to your Carrier installation manual or contact your utility company. Turn the breaker completely off—switch it to the “off” position and confirm it’s not receiving power.
Visual guide about How to Remove Carrier Air Conditioner
Image source: c-ssl.dtstatic.com
Test the Power
Use a non-contact voltage tester near the AC unit’s wiring terminals or breaker box. If the light doesn’t glow, the power is off. Safety tip: Never skip this step—electrical shock can occur even if the unit seems off.
Unplug Portable Units
If you have a Carrier portable AC, simply unplug it from the wall. For window units, unplug the power cord from the outlet.
Step 2: Drain Water and Clean the Unit
Remove Condensate Drain Line
Central air systems collect moisture in a condensate drain pan. Locate the drain line (usually a PVC pipe under the indoor unit). Place a bucket beneath it and carefully disconnect the line. Allow residual water to drain out. Wipe the area dry with a cloth.
Clean Evaporator Coil (Optional)
While the unit is open, vacuum or gently brush the indoor coil to remove dust. This helps prevent mold and improves future performance if you plan to reinstall.
Step 3: Disconnect Refrigerant Lines (Central Systems Only)
Call a Licensed Technician
Never attempt to disconnect refrigerant lines yourself. These contain pressurized Freon (R-410A in modern Carrier units), which must be safely recovered according to EPA Section 608 regulations.
A certified HVAC technician will:
- Connect recovery equipment to the service ports
- Recover all refrigerant into approved tanks
- Label the recovered gas for reuse or recycling
This step ensures environmental compliance and avoids fines. Most Carrier warranties require professional servicing for refrigerant-related work.
Cap the Lines Temporarily
After refrigerant recovery, the technician will cap the copper lines with protective caps. Do not remove these until ready for disposal or reinstallation.
Step 4: Disconnect Electrical Wiring
Take Photos First
Before touching any wires, snap clear photos of the wiring diagram. This helps during reinstallation or troubleshooting.
Label Each Wire
Use tape and a marker to label wires (e.g., “Y” for compressor, “G” for fan, “C” for common). Refer to your Carrier manual for correct labeling.
Disconnect Wires
Loosen terminal screws and gently pull wires free. For central systems, access panels are usually on the side or bottom of the indoor unit. For window units, unscrew the cover plate and disconnect wires from the terminal block.
Secure Loose Wires
Tape wires together or coil them neatly to prevent damage during transport.
Step 5: Remove Mounting Hardware
Window Units
Remove screws securing the unit to the window frame. Slide the unit slightly outward to break the seal, then lift it out. Have someone assist—window units can weigh up to 150 pounds.
Wall-Mounted Ductless Mini-Splits
Locate the mounting bracket behind the indoor unit. Unscrew bolts and carefully slide the unit downward. Support the weight as it detaches.
Central System Indoor Unit
Access panels may be secured with screws or clips. Remove them, then disconnect any remaining ducts or vents. Note: Ductwork removal should be done by a professional.
Step 6: Disconnect Outdoor Condenser Unit
Turn Off Power Again
Even after indoor disconnection, ensure the outdoor breaker remains off. Safety first.
Remove Screws and Panels
Unscrew the top and side panels of the Carrier condenser unit. Set aside screws and brackets for reuse.
Disconnect Refrigerant Lines
Again, only a licensed technician should cut or disconnect these lines. They will use a tubing cutter to slice the lines cleanly and cap them.
Unbolt the Unit
Use a wrench to loosen the bolts securing the condenser to its pad. Carefully lift and move it away from the house.
Step 7: Prepare for Transport or Storage
Protect Internal Components
Seal the refrigerant lines with plastic caps and wrap them in foam or bubble wrap. Cover the unit with a tarp to prevent dirt and debris buildup.
Store Upright
Always store Carrier AC units upright. Tipping the unit can damage the compressor and refrigerant system.
Transport Safely
Use a dolly with straps to secure the unit. Avoid sharp turns or sudden stops. Cover the unit during transit to shield it from weather and road debris.
Step 8: Handle Disposal or Recycling
Contact a Certified E-Waste Facility
Carrier units contain metals, plastics, and refrigerants that require responsible disposal. Many areas have e-waste recycling centers that accept appliances.
Schedule Carrier Take-Back Programs
Carrier offers rebates and take-back programs for old units. Visit Carrier.com/recycling to find local options.
Do Not Landfill
Throwing an AC unit in the trash is illegal in many regions due to hazardous materials. Always recycle or dispose through approved channels.
Troubleshooting Common Issues
Unit Won’t Power Down
If the breaker won’t switch off, shut off the main power to your home. Contact an electrician immediately.
Water Leaking During Removal
Ensure the condensate drain line is fully disconnected and sloped downward. Use towels to catch residual water.
Difficulty Removing Wires
If wires seem fused, do not force them. Apply a drop of penetrating oil and wait 10 minutes before trying again. If stuck, call a technician.
Missing Parts or Manuals
Search online using your Carrier model number (found on the serial plate). Download manuals from Carrier’s support site.
Conclusion
Removing a Carrier air conditioner doesn’t have to be overwhelming. By following this step-by-step guide, you can safely disconnect, transport, and dispose of your unit with confidence. Remember: prioritize safety, involve professionals for refrigerant handling, and always follow local regulations. Whether you’re upgrading, relocating, or retiring an old system, proper removal protects your home, the environment, and your peace of mind.
When in doubt, don’t hesitate to call a Carrier-certified technician. They ensure the job is done right the first time—and often provide free estimates for new installations.
Final Tips
- Schedule removal during mild weather to reduce stress on the unit.
- Keep original packaging if possible—it makes transport easier.
- Document the process with photos for insurance or warranty purposes.
- Consider donating functional units to schools or shelters if still in good condition.

