
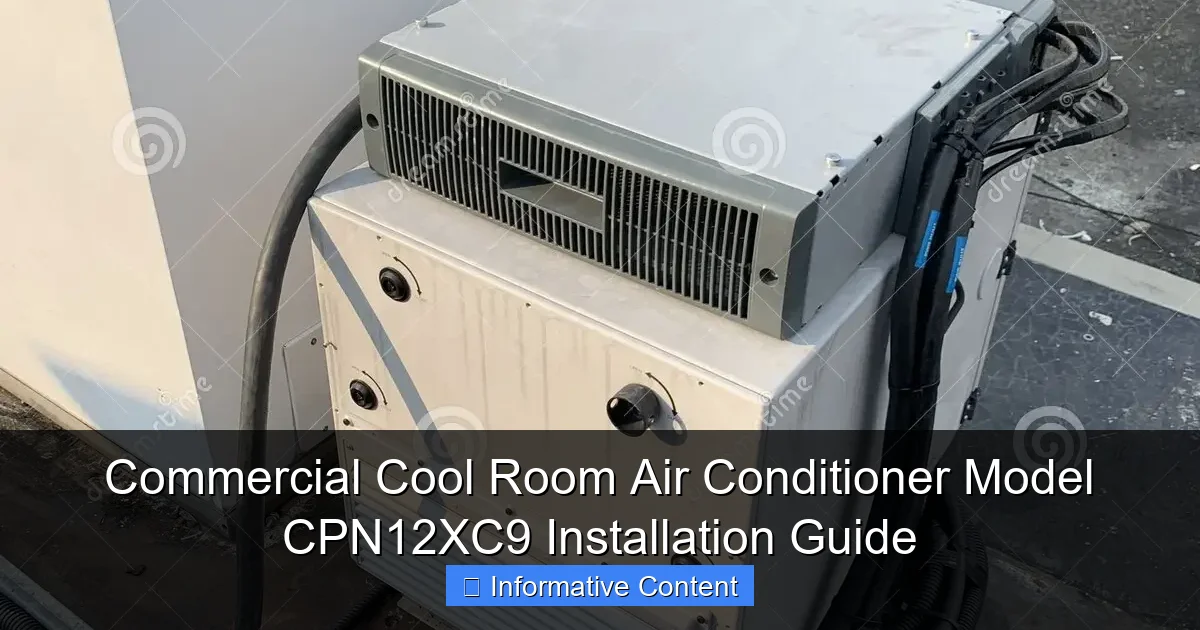
Featured image for commercial cool room air conditioner model cpn12xc9 instalation instructions
Image source: thumbs.dreamstime.com
Proper installation of the Commercial Cool Room Air Conditioner Model CPN12XC9 is critical for optimal performance, energy efficiency, and long-term reliability. This guide provides step-by-step instructions, including electrical requirements, mounting procedures, and refrigerant line handling, ensuring a safe and compliant setup. Following these detailed directions minimizes risks and maximizes cooling effectiveness in demanding commercial environments.
Key Takeaways
- Verify space requirements: Ensure 3+ feet clearance for optimal airflow and performance.
- Use professional installation: Hire certified technicians to handle electrical and refrigerant connections safely.
- Follow mounting guidelines: Secure unit on level, vibration-free surfaces to reduce noise.
- Inspect ductwork: Seal all joints to prevent air leaks and efficiency loss.
- Test post-installation: Run diagnostics and check thermostat accuracy before finalizing setup.
- Review maintenance schedule: Clean filters and coils quarterly to extend unit lifespan.
📑 Table of Contents
- Getting Started with the CPN12XC9: A Real-World Installation Journey
- Pre-Installation Preparation: Setting Yourself Up for Success
- Step-by-Step Installation Process: From Unboxing to Startup
- Post-Installation Checks and Testing
- Maintenance and Long-Term Care
- Optimizing Performance for Your Environment
- Final Thoughts: Making the Most of Your CPN12XC9
Getting Started with the CPN12XC9: A Real-World Installation Journey
Installing a commercial cool room air conditioner like the Commercial Cool Room Air Conditioner Model CPN12XC9 might seem intimidating at first, but with the right guidance, it becomes a manageable and even rewarding task. Whether you’re a seasoned HVAC technician or a facility manager taking on a DIY project, this guide is designed to walk you through every step with clarity and confidence. I remember my first time setting up a similar unit—there was a moment of panic when I realized the mounting brackets didn’t line up perfectly. But once I took a breath and followed the instructions methodically, it all came together. That’s the spirit we’re channeling here: practical, real-world advice without the fluff.
The Commercial Cool Room Air Conditioner Model CPN12XC9 is built for reliability in demanding environments like restaurants, grocery stores, and industrial kitchens. It’s designed to maintain consistent temperatures in walk-in coolers, storage units, and other commercial refrigeration spaces. But none of that matters if it’s not installed correctly. A poor installation can lead to inefficiency, higher energy bills, or even premature system failure. So, let’s dive into the nitty-gritty of getting your CPN12XC9 up and running—safely, efficiently, and with minimal stress.
Pre-Installation Preparation: Setting Yourself Up for Success
Assess the Installation Site
Before unpacking the CPN12XC9, take a close look at where you plan to install it. This unit is typically wall-mounted, so you’ll need a sturdy, vertical surface capable of supporting its weight (around 120 lbs). Check for structural integrity—avoid drywall or flimsy partitions. Concrete, brick, or reinforced steel studs are ideal. Also, ensure there’s at least 12 inches of clearance above the unit for airflow and service access. I once saw a technician install a similar model too close to a ceiling beam, which later made filter changes a nightmare. Learn from that mistake!

Visual guide about commercial cool room air conditioner model cpn12xc9 instalation instructions
Image source: dygtyjqp7pi0m.cloudfront.net
- Pro tip: Use a stud finder to locate framing members. If you’re unsure about the wall’s load capacity, consult a structural engineer.
- Space requirements: Minimum 6 inches of clearance on each side and 24 inches in front for airflow.
Gather Your Tools and Materials
Having everything ready before you start saves time and frustration. Here’s what you’ll need for the Commercial Cool Room Air Conditioner Model CPN12XC9 installation:
- Power drill with masonry and wood bits (if mounting on concrete or wood)
- Level (laser levels are great, but a standard bubble level works too)
- Socket wrench set
- Refrigerant manifold gauge set (for leak testing)
- Electrical tester (non-contact voltage tester is safest)
- Flexible refrigerant lines (if not included with the unit)
- Condensate drain tubing (PVC or flexible vinyl)
- Mounting hardware (usually included, but double-check)
- Insulated copper tubing (for refrigerant lines)
Note: The CPN12XC9 often comes with a pre-charged refrigerant system, but you’ll still need to connect the lines properly. If you’re not experienced with refrigerant handling, consider hiring a licensed HVAC pro for this step.
Review Safety Protocols
Safety is non-negotiable. Here’s how to stay safe during installation:
- Electrical safety: Turn off the main power supply to the installation area. Use a voltage tester to confirm no live wires are present.
- Refrigerant handling: Wear safety goggles and gloves. Avoid inhaling fumes, and work in a well-ventilated area.
- Lifting technique: The CPN12XC9 is heavy. Use your legs, not your back, and have a helper nearby if possible.
- Fire safety: Keep a fire extinguisher rated for electrical fires nearby during electrical work.
I’ve seen too many DIYers skip the safety checks—don’t be one of them. A few extra minutes can prevent serious injury or property damage.
Step-by-Step Installation Process: From Unboxing to Startup
Unboxing and Initial Inspection
Start by carefully unboxing the CPN12XC9. Remove all packaging materials, including foam inserts and plastic wrap. Inspect the unit for visible damage—dents, cracks, or bent fins. Check the compressor and condenser coils for any signs of shipping mishaps. If you notice anything concerning, contact the supplier immediately. Trust me, it’s better to resolve this now than after you’ve mounted it.
Next, verify all included components:
- Unit with pre-installed refrigerant lines (if applicable)
- Mounting brackets and hardware
- User manual and warranty documents
- Drain pan and condensate tubing
- Electrical connection kit
Mounting the Unit
This is where precision matters. Follow these steps:
- Hold the mounting bracket against the wall, ensuring it’s level. Use a pencil to mark drill holes.
- Drill pilot holes. For concrete, use a masonry bit and insert wall anchors. For wood studs, drill directly into the studs.
- Secure the bracket with the provided bolts. Double-check the level—even a slight tilt can cause drainage issues.
- Lift the CPN12XC9 onto the bracket. Have a helper support the weight while you align the mounting tabs.
- Secure the unit with the locking bolts. Tighten them firmly, but don’t overtorque—this can strip the threads.
Pro tip: If you’re installing the unit in a cold environment, let it acclimate for at least 30 minutes before mounting. Temperature differences can cause condensation, which might affect the mounting process.
Connecting Refrigerant Lines and Drainage
The CPN12XC9 uses a split-system design, with refrigerant lines connecting the indoor unit to an outdoor condenser (sold separately). Here’s how to connect them:
- Route the insulated copper lines from the indoor unit to the outdoor condenser. Avoid sharp bends—this restricts refrigerant flow.
- Use a flaring tool to create clean, leak-free connections at both ends.
- Attach the lines to the service valves on the unit and condenser. Hand-tighten first, then use a wrench for a final quarter-turn. Don’t overtighten!
- For the condensate drain, connect the PVC tubing to the drain pan outlet. Ensure it has a slight downward slope toward the floor drain or condensate pump.
- Test the drainage by pouring a cup of water into the pan. It should flow freely with no leaks.
Real-world example: A restaurant in Chicago once had a drainage issue because the tubing was kinked behind the unit. Regularly inspect the drain line during the first few weeks to catch problems early.
Electrical Connections and Grounding
Electrical work requires attention to detail. The CPN12XC9 typically requires a 208/230V, 1-phase, 30A dedicated circuit. Here’s how to wire it:
- Turn off the main power. Install a disconnect switch within sight of the unit (per code).
- Run the correct gauge wire from the disconnect to the unit’s electrical box. Use conduit for outdoor runs.
- Connect the wires: black (hot) to L1, red (hot) to L2, white (neutral) to N, and green (ground) to the grounding terminal.
- Secure the connections with wire nuts or terminal screws. Double-check for loose wires.
- Ground the unit to the building’s grounding system. Use a grounding rod if required by local code.
Important: If you’re not confident with electrical work, hire a licensed electrician. Incorrect wiring can cause fires, equipment damage, or void the warranty.
Post-Installation Checks and Testing
Leak Testing and Vacuuming
Before starting the system, you must ensure the refrigerant lines are leak-free and moisture-free:
- Connect a refrigerant manifold gauge set to the service valves.
- Pressurize the lines with nitrogen (not refrigerant) to 150 psi. Hold for 30 minutes—if the pressure drops, there’s a leak.
- Locate leaks with a soapy water solution or electronic leak detector.
- Once leak-free, attach a vacuum pump and pull a deep vacuum (below 500 microns) for at least 30 minutes. This removes moisture and air.
- Close the service valves and let the vacuum sit for 15 minutes—if it holds, you’re ready to charge.
Pro tip: Use a micron gauge, not just a vacuum gauge. It gives more precise readings for moisture removal.
Initial Startup and System Calibration
Now for the moment of truth—starting the CPN12XC9:
- Open the service valves to release the refrigerant into the lines.
- Turn on the power at the disconnect switch.
- Set the thermostat to cooling mode and lower the temperature setting.
- Listen for the compressor to engage. The fan should start immediately.
- Check for unusual noises—vibrations, rattling, or hissing.
- Monitor the temperature drop in the cool room. It should reach the setpoint within 30-60 minutes.
Troubleshooting tip: If the compressor doesn’t start, check the thermostat settings, power supply, and overload protector. A tripped breaker is a common culprit.
Performance Verification
After startup, verify the system is working efficiently:
- Measure the temperature difference (delta T) between the supply and return air. It should be around 15-20°F.
- Check for proper airflow—hold your hand near the vents to feel a steady stream.
- Inspect the condensate drain—water should be dripping steadily, not gushing or not at all.
- Monitor the system for at least 2 hours to ensure stable operation.
Real-world example: A grocery store in Texas noticed uneven cooling after installation. The issue was traced to a blocked return air filter. Always check filters during the first post-installation inspection.
Maintenance and Long-Term Care
Routine Maintenance Schedule
To keep your CPN12XC9 running smoothly, follow this maintenance schedule:
| Task | Frequency | Details |
|---|---|---|
| Clean air filters | Monthly | Rinse with water and dry thoroughly before reinserting. |
| Inspect condenser coils | Quarterly | Use a soft brush or vacuum to remove dirt and debris. |
| Check refrigerant pressure | Annually | Use a gauge set to verify levels—low pressure indicates a leak. |
| Inspect electrical connections | Annually | Look for loose wires, corrosion, or overheating signs. |
| Lubricate fan motor | Bi-annually | Use manufacturer-recommended oil (usually SAE 20). |
Common Issues and Troubleshooting
Even well-maintained systems can develop issues. Here are common problems and fixes:
- Unit not cooling: Check thermostat settings, air filters, and refrigerant levels. Low refrigerant often indicates a leak.
- Water pooling: Inspect the condensate drain for clogs. Use a wet/dry vacuum to clear blockages.
- Loud noises: Vibrations? Tighten mounting bolts. Hissing? Check for refrigerant leaks.
- High energy bills: Dirty coils or filters reduce efficiency. Clean them regularly.
Pro tip: Keep a maintenance log. Note dates, tasks performed, and any observations. This helps track performance and identify patterns.
Seasonal Considerations
The CPN12XC9 is designed for year-round use, but seasonal changes affect performance:
- Winter: If the outdoor condenser is exposed, clear snow and ice buildup. Consider a winter cover.
- Summer: High ambient temperatures reduce efficiency. Ensure the condenser is shaded and well-ventilated.
- Humid climates: Condensate production increases. Check the drain pan more frequently.
Real-world example: A bakery in Florida had frequent drain pan overflows during summer storms. The solution was to install a condensate pump with a larger reservoir.
Optimizing Performance for Your Environment
Temperature and Humidity Settings
The CPN12XC9 excels at maintaining precise temperatures, but optimal settings depend on your use case:
- Food storage: Set between 34-38°F for refrigerated goods. Use a separate thermometer to verify accuracy.
- Pharmaceutical storage: Follow manufacturer guidelines (usually 36-46°F).
- Humidity control: For produce, aim for 85-95% humidity. The CPN12XC9’s built-in humidistat helps maintain this.
Pro tip: Use a data logger to track temperature and humidity fluctuations over time. This helps fine-tune settings.
Energy Efficiency Tips
The CPN12XC9 is ENERGY STAR® certified, but you can maximize efficiency:
- Seal gaps around doors and walls to prevent air leaks.
- Install a programmable thermostat to reduce runtime during off-hours.
- Use strip curtains for walk-in coolers to minimize cold air loss.
- Schedule regular maintenance to keep coils clean and refrigerant levels optimal.
Real-world example: A deli in New York saved 15% on energy bills by adding a timer to turn off the unit during overnight hours when the cooler wasn’t accessed.
Upgrades and Accessories
Enhance your CPN12XC9 with these optional accessories:
- Remote monitoring kit: Track performance via smartphone app.
- Backup battery: Keep the thermostat running during power outages.
- High-efficiency filters: Improve air quality and reduce maintenance frequency.
Note: Always check compatibility before adding accessories. Some may void the warranty if not installed correctly.
Final Thoughts: Making the Most of Your CPN12XC9
Installing the Commercial Cool Room Air Conditioner Model CPN12XC9 is a significant investment, but it pays off in reliability, efficiency, and peace of mind. By following this guide, you’ve set yourself up for long-term success. Remember, the key to a smooth installation is preparation—checking the site, gathering tools, and prioritizing safety. Don’t rush the process; take your time with each step.
Over the years, I’ve seen how proper installation makes all the difference. A well-installed CPN12XC9 can last 10-15 years with minimal issues, while a poorly installed one might fail in half that time. Whether you’re cooling a restaurant’s walk-in or a hospital’s medicine storage, this unit delivers consistent performance when cared for properly.
As you enjoy the cool, stable environment your CPN12XC9 provides, keep in mind that maintenance is just as important as installation. Regular check-ups, timely repairs, and attention to detail will keep it running smoothly for years to come. And if you ever hit a snag, don’t hesitate to consult the manual or reach out to a certified HVAC technician. You’ve got this—now go enjoy that perfectly chilled space!
Frequently Asked Questions
What are the key steps for installing the Commercial Cool Room Air Conditioner Model CPN12XC9?
Begin by selecting a suitable indoor location with proper ventilation and access to electrical supply. Follow the mounting template in the manual to secure the unit, connect refrigerant lines, and ensure correct electrical wiring per local codes.
Do I need special tools to install the CPN12XC9 air conditioner?
Yes, you’ll need basic hand tools, a vacuum pump, refrigerant gauges, and a drill. A level and tape measure are also essential for proper alignment and secure mounting of the unit.
Can I install the Commercial Cool Room Air Conditioner Model CPN12XC9 myself?
While DIY installation is possible for experienced individuals, it’s recommended to hire a licensed HVAC technician. Proper handling of refrigerant and electrical connections requires certification and expertise.
What electrical requirements does the CPN12XC9 model have?
The CPN12XC9 requires a dedicated 208/230V, 60Hz, single-phase power supply with a properly sized circuit breaker. Always consult the installation guide and local electrical codes before wiring.
How far can the refrigerant lines be run for the CPN12XC9?
The maximum recommended line length is 50 feet with a height difference of no more than 20 feet. Exceeding these limits may reduce efficiency and require additional refrigerant charge.
Where should I place the Commercial Cool Room Air Conditioner for optimal performance?
Install the indoor unit on a sturdy, vibration-free wall away from direct sunlight and heat sources. Ensure adequate clearance around the unit for airflow and future maintenance access.

