
Carrier RV air conditioners are reliable but not immune to issues. Common problems include weak cooling, poor airflow, and electrical glitches—often caused by dirty filters or faulty capacitors. With proper maintenance and timely repairs, most issues can be resolved quickly and affordably.
Key Takeaways
- Regular filter cleaning prevents airflow blockages: Dirty filters restrict air movement, forcing the unit to work harder and reducing efficiency.
- Capacitor failure is a common culprit: A bad start capacitor can prevent the AC from turning on or cause it to run intermittently.
- Thermostat issues lead to temperature inconsistencies: Faulty thermostats may not read room temperatures accurately or fail to signal the unit to turn off.
- Refrigerant leaks reduce cooling power: Low refrigerant levels indicate a leak, which must be repaired by a certified technician.
- Power supply problems can mimic AC failure: Loose connections or tripped breakers often go unnoticed but stop the unit from operating.
- Condensation buildup causes mold and odors: Poor drainage or blocked drain lines lead to water leakage and indoor air quality issues.
- Professional servicing extends lifespan: Annual tune-ups help catch small issues before they become expensive repairs.
Quick Answers to Common Questions
Why is my Carrier RV AC blowing warm air?
Warm air usually stems from a clogged filter, low refrigerant, or a frozen evaporator coil. Check your filter first, then inspect for ice buildup. If the issue persists, it may require professional refrigerant service.
How often should I clean my RV AC filter?
Clean or replace the filter every 30–60 days during heavy usage. In dusty or humid environments, do it more frequently. A clean filter ensures proper airflow and prevents strain on the system.
Can I use my RV AC while plugged into shore power only?
Yes, most RV AC units are designed to run on 110V household current when connected to shore power. However, ensure your inverter or generator can handle the load to avoid tripping breakers.
What does a bad capacitor sound like?
A failing capacitor often causes a loud humming or clicking noise when you try to turn on the unit. The motor may struggle to start or spin slowly. Replacement is usually necessary.
Is it safe to run my RV AC on a generator?
Only if the generator provides at least 3,000 watts of continuous power. Smaller generators can’t support the startup surge. Always check wattage ratings before connecting.
📑 Table of Contents
- Introduction: Why Carrier RV Air Conditioners Need Attention
- Common Causes of Carrier RV Air Conditioner Problems
- Top 5 Carrier RV Air Conditioner Problems and How to Fix Them
- Preventive Maintenance Tips for Long-Term Performance
- Troubleshooting Step-by-Step: A Beginner’s Guide
- When to Call a Professional vs. DIY Fixes
- Conclusion: Stay Cool with Confidence
Introduction: Why Carrier RV Air Conditioners Need Attention
If you’re a recreational vehicle (RV) owner who relies on your Carrier RV air conditioner to beat the heat during summer road trips, you know how essential it is to have a cool and comfortable living space. Whether you’re parked at a scenic campsite or boondocking off-grid, your AC unit keeps you refreshed and ready for adventure. But like any mechanical system, Carrier RVs are not immune to problems. From weak airflow to complete system failures, Carrier RV air conditioner problems can disrupt your comfort—and sometimes even your entire trip.
The good news? Many of these issues are preventable with routine care and early detection. In this comprehensive guide, we’ll walk you through the most common Carrier RV air conditioner problems, explain their causes, and share practical solutions. You’ll learn how to troubleshoot like a pro, avoid costly mistakes, and keep your unit running smoothly season after season. So grab your toolkit, settle in, and let’s dive into everything you need to know about diagnosing and fixing Carrier RV air conditioner problems.
Common Causes of Carrier RV Air Conditioner Problems
Before jumping into fixes, it’s important to understand what typically goes wrong with RV air conditioners—especially Carrier models, which are known for durability but still require attention. Most issues fall into a few categories: mechanical wear, environmental factors, and user-related maintenance oversights.
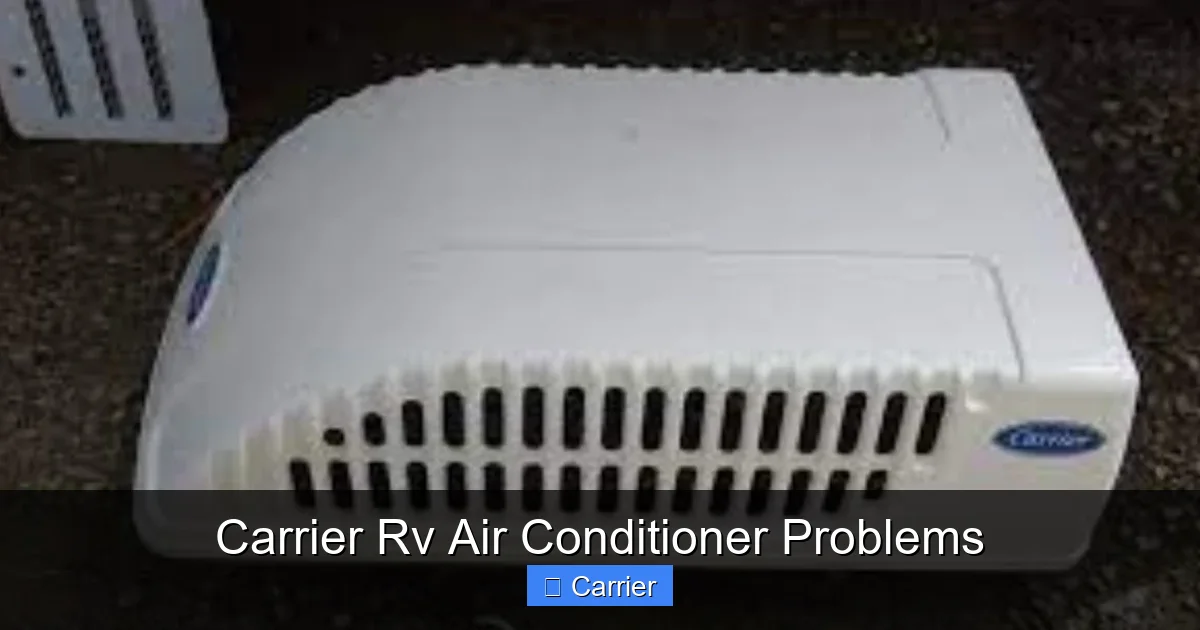
Visual guide about Carrier Rv Air Conditioner Problems
Image source: gridsub.com
Wear and Tear Over Time
Like all appliances, RV air conditioners degrade over time. Components such as capacitors, motors, and fan belts wear out with use. Carrier units, while built to last, are not invincible. After several years of service, internal parts begin to show signs of fatigue. This is why many owners notice performance drops after 5–7 years of regular use.
Environmental Exposure
RVs spend a lot of time outdoors. Extreme heat, humidity, and exposure to dust or debris can strain your AC unit. For example, if your RV sits under a tree with dropping leaves, those leaves can clog intake vents and block airflow. Similarly, high ambient temperatures make the compressor work harder, increasing the risk of overheating.
Inadequate Maintenance
This is perhaps the most preventable cause of Carrier RV air conditioner problems. Skipping routine maintenance leads to a cascade of issues—dirty filters, frozen coils, and reduced efficiency. Many RV owners assume that because the unit turns on, it’s working fine. But even a slight reduction in airflow can mean the difference between comfort and discomfort.
Top 5 Carrier RV Air Conditioner Problems and How to Fix Them
Now that we’ve covered the root causes, let’s get into the specifics. Here are the five most frequent issues RV owners face with Carrier air conditioners—along with actionable steps to resolve them.
Visual guide about Carrier Rv Air Conditioner Problems
Image source: pic3.zhimg.com
1. Weak or No Cooling
If your AC runs but doesn’t cool effectively, the problem could be one of several things. Start by checking the thermostat setting. Is it actually set to “cool” and below room temperature? Sometimes a simple misadjustment causes confusion.
Next, inspect the air filter. A clogged filter restricts airflow, making the evaporator coil freeze up. When the coil freezes, it can’t absorb heat properly, resulting in warm air blowing out. Replace or clean the filter every 30–60 days, especially during heavy use seasons.
Another possibility is low refrigerant. If the refrigerant level is too low due to a leak, the AC simply can’t remove enough heat. This requires professional diagnosis. Never attempt to recharge refrigerant yourself unless you’re certified—improper handling can damage the system or pose safety risks.
2. Poor Airflow
Weak airflow is often the first sign something is wrong. It might feel like the AC is blowing air, but it’s not strong or consistent. This is usually caused by obstructions in the ductwork or a failing blower motor.
Check the return air grille inside the RV. Make sure it’s not blocked by furniture, curtains, or storage items. Even a small obstruction can reduce airflow by 20% or more. Also, inspect the outdoor unit—look for dirt, leaves, or spider webs around the condenser coils. Clean them gently with a soft brush or vacuum attachment.
If the blower motor is old or worn, it may not generate enough suction. Listen for unusual noises like grinding or whining. If you hear these, the motor might need replacement. Some RV models allow access to the blower without removing the entire unit, but always consult your manual first.
3. Electrical Issues
Electrical problems are tricky because they don’t always give clear warning signs. A tripped breaker, loose wiring, or a failing capacitor can stop your AC from turning on entirely.
Start by checking your RV’s main electrical panel. Look for a tripped breaker labeled “AC” or “Compressor.” Reset it and see if the unit powers back on. If it trips again immediately, there’s likely a short circuit or overload—don’t reset it repeatedly; that could damage the system further.
Capacitors are another common point of failure. The start capacitor provides the initial jolt to spin the compressor. If it fails, the motor won’t start. Test the capacitor with a multimeter (or replace it if you’re unsure). Symptoms include clicking sounds, slow spinning, or no response at all.
4. Water Leaks and Mold Growth
Water dripping from the ceiling or walls is never a good sign. It usually means the condensate drain line is clogged. The AC produces moisture as it cools the air, and this water should flow out through a dedicated drain tube.
Over time, algae, dirt, or mineral deposits can build up in the drain line, blocking it completely. To fix this, locate the external drain hose (usually near the outdoor unit) and flush it with vinegar or a specialized cleaner. You can also use a wet-dry vacuum to suck out blockages.
Moisture buildup also encourages mold and mildew growth inside the RV. These can trigger allergies and unpleasant odors. If you notice musty smells, clean the evaporator coil area with a mixture of water and bleach (wear gloves and goggles), then rinse thoroughly.
5. Unit Won’t Turn On
Sometimes the simplest explanation is the right one. Before assuming a major breakdown, check the basics: Is the power connected? Is the circuit breaker on? Does the remote control have fresh batteries?
If those checks pass, the issue might be a faulty contactor or relay. These small electrical switches control power flow to the compressor. They often burn out due to arcing or age. Replacing a contactor is relatively easy and can be done with basic tools. Just disconnect power, remove the old part, and install the new one—make sure to match the voltage and amperage ratings.
Another possibility is a blown fuse. Most RV AC units have a thermal fuse designed to protect the compressor from overheating. If this fuse blows, the unit won’t start at all. Locate the fuse box (usually behind the control panel) and test each fuse with a multimeter. Replace any that show no continuity.
Preventive Maintenance Tips for Long-Term Performance
The best way to avoid Carrier RV air conditioner problems is through consistent maintenance. Think of it like taking your car to the shop—regular check-ups prevent bigger issues down the road.
Monthly Inspections
Set a reminder to inspect your AC once a month during peak travel season. Check the filter, clean vents, and ensure the outdoor unit isn’t obstructed. A quick visual inspection can catch problems early.
Annual Professional Servicing
Even the most careful DIYer benefits from an annual tune-up by a certified HVAC technician. They can check refrigerant levels, inspect wiring, and test electrical components. For RVs, some service providers offer mobile diagnostics—meaning they come to your location.
Use a Surge Protector
Power surges are a silent killer for RV electronics. Install a whole-house surge protector to shield your AC from voltage spikes caused by storms or faulty generators. This small investment can save you thousands in repair costs.
Keep the Area Around the Unit Clear
The outdoor unit needs space to breathe. Keep grass, weeds, and debris at least two feet away. Trim nearby trees to prevent leaf litter from entering the housing.
Monitor Temperature Settings
Avoid setting the thermostat too low. While it’s tempting to blast cold air, extreme settings force the compressor to cycle on and off frequently, increasing wear. Aim for a comfortable 72–75°F when possible.
Troubleshooting Step-by-Step: A Beginner’s Guide
Not every issue requires a mechanic. Many Carrier RV air conditioner problems can be solved with basic troubleshooting. Follow this simple process:
- Gather Tools: Multimeter, screwdriver, flashlight, gloves.
- Safety First: Disconnect power before inspecting electrical components.
- Check Thermostat: Ensure it’s set to “cool” and functioning.
- Inspect Filter: Replace if dirty.
- Look for Obstructions: Clear vents and outdoor unit.
- Test Breaker and Fuses: Reset or replace as needed.
- Listen for Sounds: Grinding, buzzing, or silence can indicate motor issues.
- Consult Manual: Every model has unique specs—refer to your owner’s guide.
If you’ve gone through these steps and the problem persists, it’s time to call in a professional. Trying to fix complex electrical or refrigerant issues without training can worsen the situation.
When to Call a Professional vs. DIY Fixes
Knowing when to roll up your sleeves—and when to call a pro—is crucial. Here’s a quick decision guide:
| Situation | DIY Possible? | Notes |
|---|---|---|
| Dirty filter | Yes | Easy swap; improves airflow |
| Loose wiring | Maybe | Only if experienced with electricity |
| Capacitor replacement | Yes (with caution) | Disconnect power first; follow diagram |
| Refrigerant leak | No | Requires EPA certification |
| Blower motor failure | Depends on model | Some are accessible; others require disassembly |
| Contactor or relay issue | Yes | Simple swap if you have the right part |
Remember: safety comes first. If you’re uncomfortable working with electricity or unfamiliar with RV systems, don’t hesitate to hire a technician. It’s better to pay a little now than risk a fire or major damage later.
Conclusion: Stay Cool with Confidence
Your Carrier RV air conditioner is a vital piece of equipment that deserves attention and care. While Carrier RV air conditioner problems do occur, many are manageable with knowledge, tools, and routine maintenance. By staying proactive—cleaning filters, checking connections, and scheduling annual services—you can extend your unit’s life and enjoy reliable cooling wherever your adventures take you.
Don’t wait until you’re stuck in 90-degree heat with a broken AC. Arm yourself with the right information, treat your system like the asset it is, and you’ll breeze through summer months with ease. And remember: when in doubt, consult the experts. There’s no shame in getting help—it’s how seasoned RVers stay ahead of the curve.
So next time you fire up your Carrier RV AC, do so with confidence. You’re not just turning on a machine—you’re reclaiming your comfort, your peace of mind, and your freedom on the open road.
Frequently Asked Questions
How do I know if my RV AC is leaking refrigerant?
Signs include reduced cooling performance, hissing sounds near the unit, or oil stains around joints. Only a certified technician can safely detect and repair refrigerant leaks.
Why does my AC drip water inside the RV?
It’s likely a clogged condensate drain line. Flush the line with vinegar or a cleaning solution, and ensure the drain hose isn’t kinked or blocked outside the unit.
Can I replace my RV AC capacitor myself?
Yes, if you’re comfortable working with electricity. Turn off power, discharge the capacitor, and follow wiring diagrams. Otherwise, hire a qualified technician to avoid injury.
What temperature should I set my RV AC to?
Aim for 72–75°F for comfort and efficiency. Avoid setting it much lower, as it forces the compressor to cycle more often, increasing wear.
How long do Carrier RV AC units typically last?
With proper maintenance, most last 10–15 years. Neglect and harsh conditions can shorten this lifespan significantly.
Should I cover my RV AC during winter storage?
Yes, use a breathable cover to protect against snow, ice, and debris. Avoid plastic covers that trap moisture and promote mold growth.

