The Carrier RV air conditioner motherboard is the brain of your recreational vehicle’s cooling system, managing power, temperature, and safety functions. When it fails, your AC may not start, overheat, or display error codes. Understanding its role helps you diagnose issues early and maintain comfort on the road.
Key Takeaways
- Central Control Hub: The motherboard regulates voltage, sensors, relays, and communication between components in your Carrier RV AC.
- Common Failure Signs: Look for no power, unresponsive controls, error codes, or inconsistent cooling—these often point to motherboard trouble.
- Diagnostic Tools Help: Use a multimeter or Carrier-specific scan tool to test voltage and identify faulty circuits before replacing parts.
- Replacement Requires Care: Always match model numbers and firmware versions when ordering a new Carrier RV air conditioner motherboard.
- DIY vs. Professional: While some basic checks are safe for DIYers, complex diagnostics or soldering should be left to certified technicians.
- Preventive Maintenance Matters: Clean filters, clear vents, and annual servicing reduce strain on the motherboard and extend its lifespan.
- Warranty Considerations: Check if your RV or AC warranty covers motherboard repairs—voiding it by tampering can lead to costly out-of-pocket expenses.
[FEATURED_IMAGE_PLACEHOLDER]
When you hit the open road in your RV, one of the first things you want to do is kick back, relax, and let that Carrier RV air conditioner blow cool air into your living space. But have you ever stopped to think about what makes it all happen? Behind every smooth startup, steady airflow, and precise temperature control lies a tiny yet mighty component called the motherboard. In this deep dive, we’re going to explore everything you need to know about the Carrier RV air conditioner motherboard, from what it does to how to spot problems, fix them, and even replace it if needed.
Whether you’re an experienced RVer or just getting started, understanding this critical piece of hardware can save you time, money, and frustration down the line. So grab a seat, plug in your AC (if it’s working), and let’s get into the nitty-gritty of your Carrier RV air conditioner motherboard.
Key Takeaways
- Understanding carrier rv air conditioner motherboard: Provides essential knowledge
Quick Answers to Common Questions
What does the Carrier RV air conditioner motherboard do?
It acts as the central control unit, managing power distribution, sensor readings, and component coordination for your RV’s air conditioning system.
How can I tell if my motherboard is bad?
Signs include no power, random shutdowns, error codes, non-responsive fans, or visible burns/swelling near the board.
Can I replace the motherboard myself?
Yes, if you have basic electrical skills and tools, but complex jobs are best left to professionals to avoid damage.
How much does a new motherboard cost?
Expect to pay $150–$400 for a quality unit, plus possible labor fees if installed by a technician.
Will a bad motherboard damage other parts?
Potentially yes—failing boards can send incorrect signals, causing overheating, motor burnout, or capacitor failure in connected components.
📑 Table of Contents
- What Is the Carrier RV Air Conditioner Motherboard?
- Common Symptoms of a Failing Motherboard
- Can You Replace the Carrier RV Air Conditioner Motherboard Yourself?
- Preventing Motherboard Failures: Maintenance Tips
- Where to Buy Genuine Carrier RV Air Conditioner Motherboards
- Final Thoughts: Your AC’s Brain Deserves Respect
What Is the Carrier RV Air Conditioner Motherboard?
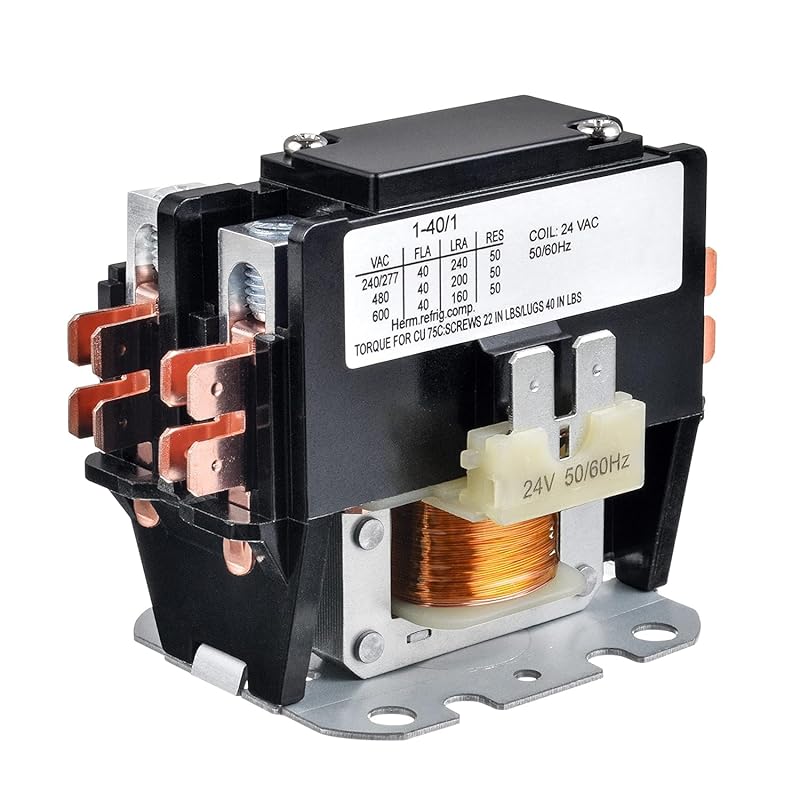
At its core, the motherboard in your Carrier RV air conditioner acts as the central nervous system. It’s a printed circuit board loaded with microchips, resistors, capacitors, and integrated circuits that coordinate all the electrical activity within your AC unit. Think of it like the brain of your refrigerator—except instead of keeping food cold, it keeps you comfy while you camp under the stars.
This board receives signals from various sensors—like temperature probes, fan speed detectors, and pressure switches—and then sends commands to motors, relays, compressors, and control panels. Without a functioning motherboard, your Carrier RV air conditioner simply won’t operate. It manages everything from turning the compressor on and off to regulating fan speeds and responding to thermostat inputs.
Unlike older analog models, modern Carrier units use digital motherboards that communicate with remote controls and onboard diagnostic systems. This allows for more precise climate control and easier troubleshooting via error codes. The motherboard also plays a key role in protecting your system from overloads, voltage spikes, and other electrical faults—making it both powerful and protective.
How Does It Interact With Other Components?
Your Carrier RV air conditioner is made up of several interconnected parts: compressor, condenser fan, evaporator fan, thermostat, wiring harness, and yes—the motherboard. The motherboard sits at the center, acting as the hub that connects them all.
For example, when you set your thermostat to 72 degrees, that signal travels through wires to the motherboard. The board interprets the input, checks real-time sensor data (is it actually hot in there?), and decides whether to activate the compressor. If everything looks good, it triggers a relay that powers the compressor motor. Meanwhile, the motherboard tells the condenser fan to spin faster if the outdoor temperature is high, ensuring efficient heat exchange.
If a sensor detects low refrigerant or excessive pressure, the motherboard can shut down the system automatically to prevent damage. That’s why you might see blinking lights or hear unusual noises—they’re often the motherboard warning you something’s wrong.
Common Symptoms of a Failing Motherboard

Visual guide about Carrier Rv Air Conditioner Motherboard
Image source: game-hashirigaki.site
Spotting a bad motherboard early can save you from being stuck in 95°F heat with no AC. Here are the most common signs that your Carrier RV air conditioner motherboard might be on its last legs:
– No Power at All: If pressing the “on” button does nothing, and there’s no clicking sound or indicator lights, the issue could be a dead motherboard.
– Intermittent Operation: The unit starts, runs for a few minutes, then stops—only to restart randomly. This often points to unstable power delivery or fried components on the board.
– Error Codes Displayed: Modern Carrier units flash error codes (like “E1,” “E5,” or “F0”) when internal diagnostics detect a fault—often related to the motherboard.
– Fan Runs Continuously or Not At All: A stuck-on fan or silent motor suggests the motherboard isn’t sending the right signals.
– Compressor Doesn’t Kick On: Even if the fan works, if the compressor remains idle, the motherboard may be preventing activation due to a safety lockout.
– Burning Smell or Visible Damage: Swollen capacitors, blackened traces, or melted plastic around the board are red flags indicating catastrophic failure.
If you notice any of these symptoms, don’t panic—but do take action quickly. Ignoring a failing motherboard can lead to cascading damage to motors, capacitors, or even your entire electrical system.
Diagnosing the Problem Step by Step
Before tearing apart your RV, try these simple diagnostic steps to confirm whether the motherboard is truly the culprit:
1. Check the Power Source: Ensure your RV’s battery or shore power is supplying adequate voltage (usually 12V DC or 120V AC). A weak connection elsewhere can mimic motherboard failure.
2. Inspect Circuit Breakers: Reset any tripped breakers in your breaker panel. Sometimes, a blown fuse or GFCI trip mimics total system shutdown.
3. Examine the Control Panel: Make sure buttons aren’t stuck and the display isn’t cracked. Faulty buttons can send false signals to the motherboard.
4. Listen for Sounds: A humming relay or buzzing transformer indicates the board is trying to activate components but failing.
5. Use a Multimeter: Test continuity across key terminals. No voltage where there should be? Likely a broken trace or component on the motherboard.
Only after ruling out external causes should you suspect the motherboard itself. And even then, professional testing with an oscilloscope or diagnostic scanner gives the clearest picture.
Can You Replace the Carrier RV Air Conditioner Motherboard Yourself?

Visual guide about Carrier Rv Air Conditioner Motherboard
Image source: down-ph.img.susercontent.com
This is a tough call—and the answer depends on your mechanical skills and tools. Replacing a motherboard isn’t like swapping a lightbulb. It involves delicate soldering, precise alignment, and sometimes reprogramming firmware. That said, many RVers tackle the job themselves with the right guidance.
Pros of DIY Replacement:
– Save hundreds in labor costs
– Gain hands-on knowledge for future repairs
– Immediate availability of replacement parts online
Cons of DIY Replacement:
– Risk of further damaging sensitive electronics
– Voiding warranties if not done correctly
– Need for specialized tools (soldering iron, anti-static wristband, etc.)
If you decide to go the DIY route, start by disconnecting the battery and removing the access panel behind the control unit. Carefully unscrew the old board, note wire connections (take photos!), and install the new one using the same mounting holes. Double-check polarity and secure all screws before reconnecting power.
However, if you’re not comfortable working with high-voltage circuits or lack experience with PCBs, it’s safer to call a certified HVAC technician who specializes in RV systems. They’ll have the right equipment and expertise to avoid accidental shorts or misconfigurations.
Tips for a Smooth Replacement Process
– Order the Exact Model: Carrier uses specific part numbers for each AC unit. Cross-reference your serial number with the manufacturer’s database.
– Buy from Reputable Sources: Avoid cheap knockoffs. OEM or high-quality aftermarket boards last longer and integrate better.
– Work in a Dry, Static-Free Area: Moisture and static electricity can fry new components instantly.
– Label Wires Before Disconnecting: Use masking tape and markers to keep track of which wire goes where.
– Test After Installation: Run a full cycle before sealing everything back up. Listen for normal operation and check temperature output.
Remember: patience pays off. Rushing increases the chance of mistakes that could cost more than hiring help.
Preventing Motherboard Failures: Maintenance Tips
Just like your car needs regular oil changes, your Carrier RV air conditioner benefits from consistent care—especially when it comes to the motherboard. While you can’t “clean” a motherboard directly, maintaining the overall health of your AC reduces stress on the board and prolongs its life.
Here’s how to keep your system running smoothly:
– Clean or Replace Filters Monthly: Clogged filters force the system to work harder, increasing heat buildup and electrical load.
– Keep Vents Clear: Furniture, curtains, or debris blocking airflow overheats the evaporator coil, triggering safety shutdowns.
– Schedule Annual Inspections: Have a pro check refrigerant levels, clean coils, and inspect wiring connections.
– Avoid Overloading Shore Power: Running too many appliances on one circuit strains the entire electrical system, including the AC.
– Use Surge Protectors:: Power surges during storms can fry delicate circuitry on the motherboard.
– Park Smart: Shade your RV when possible to reduce ambient temperature and workload on the compressor.
By treating your Carrier RV air conditioner with respect and attention, you’ll rarely have to worry about motherboard failures—and when they do happen, you’ll be prepared.
Long-Term Reliability Starts with Quality Parts
Not all replacement motherboards are created equal. Some third-party brands cut corners on components like electrolytic capacitors or shielding, leading to premature burnout. Stick with genuine Carrier parts or trusted equivalents from manufacturers like Dometic or Suburban (which often share compatible designs).
Also, consider upgrading to a newer model if yours is over 10 years old. Newer motherboards include improved thermal protection, quieter operation, and smartphone app integration for remote monitoring.
Where to Buy Genuine Carrier RV Air Conditioner Motherboards
Finding the right motherboard doesn’t have to be a scavenger hunt. Start by visiting Carrier’s official website or contacting their customer support with your AC’s serial number. They’ll provide the exact part number and guide you to authorized dealers.
Alternatively, reputable online retailers like RV Parts Express, Camping World, or Amazon Business carry OEM and compatible boards. Always verify compatibility before purchasing—don’t assume “fits all Carrier RVs” means “fits my specific model.”
Local RV repair shops also stock common replacement boards and can order specialty items overnight. Plus, they offer installation services if you prefer not to DIY.
Cost Considerations
A quality Carrier RV air conditioner motherboard typically ranges from $150 to $400, depending on features like digital controls, surge protection, and included sensors. Labor for professional installation adds another $100–$300. While it’s tempting to look for cheaper alternatives, remember: a subpar board may fail within weeks and void remaining warranties.
Investing in reliability upfront saves headaches later—especially during summer road trips when you absolutely need that cool breeze.
Final Thoughts: Your AC’s Brain Deserves Respect
The Carrier RV air conditioner motherboard may be small, but its role is enormous. It’s the invisible hero that keeps your sanctuary cool, protects your investment, and ensures peace of mind on every adventure. Whether you’re troubleshooting flickering lights, deciphering error codes, or planning a full upgrade, knowing how this component works empowers you to make smart decisions.
Don’t wait until you’re sweating through a July afternoon with no way to cool off. Stay proactive, stay informed, and treat your AC like the vital system it is. With proper care, a well-maintained motherboard will serve you faithfully for years to come.
And if you ever do need to replace it? Now you know exactly what to look for—and why choosing the right board matters.
Frequently Asked Questions
Is the motherboard the same as the control board?
Often used interchangeably, but technically the motherboard houses the main logic circuitry, while the control board may refer to user interface elements. In most RV ACs, they’re integrated.
Can I bypass the motherboard to test my AC?
Not safely or reliably. Bypassing risks short-circuiting motors or compressors and can cause permanent damage—always consult a pro before attempting.
Do all Carrier RV ACs use the same motherboard?
No. Models vary by size, voltage, and features. Always match the exact model and serial number when ordering replacements.
How long do motherboards typically last?
With proper maintenance, most last 8–12 years. Harsh climates, poor ventilation, or frequent cycling can shorten lifespan significantly.
Are aftermarket motherboards as good as OEM?
Some high-quality aftermarket boards rival OEM parts, but cheap ones often lack durability. Research brand reputation before buying.
Why did my motherboard fail suddenly?
Common causes include power surges, moisture intrusion, overheating from dirty filters, or manufacturing defects. Regular maintenance reduces sudden failures.