
Featured image for aeg air conditioner instructions
Image source: images.merstatic.com
Get your AEG air conditioner up and running in minutes with these straightforward, step-by-step instructions designed for hassle-free setup. From unboxing to optimal cooling, follow the user-friendly guide to ensure efficient installation and peak performance—no expert skills required.
Key Takeaways
- Read the manual first: Always start with the official AEG air conditioner instructions for model-specific guidance.
- Check power requirements: Ensure your outlet meets the voltage and amperage needed for safe operation.
- Secure the mounting bracket: Proper installation prevents unit damage and ensures efficient airflow.
- Connect drain hose correctly: Prevents water leakage and protects your walls and flooring.
- Test before regular use: Run a short cycle to confirm cooling, drainage, and remote functionality.
- Use the remote or app: Maximize convenience with AEG’s smart controls for temperature and scheduling.
📑 Table of Contents
Easy AEG Air Conditioner Instructions for Quick Setup
Let’s be honest—no one wants to spend their first hot summer afternoon hunched over a thick manual, trying to figure out how to get their new AEG air conditioner up and running. I remember the first time I unboxed mine: I was so excited to cool down, but the thought of deciphering technical jargon and tangled wires made me want to just open a window instead. Sound familiar? You’re not alone. Many people feel overwhelmed when setting up a new AC unit, especially if it’s their first time dealing with something more complex than a basic fan.
The good news? AEG air conditioners are designed with user-friendliness in mind, and with the right guidance, you can have yours installed and cooling your space in under an hour. Whether you’ve got a portable, window, or split-system AEG model, this guide walks you through every step—clearly, simply, and without the fluff. No engineering degree required. Just follow along, and you’ll be enjoying that crisp, refreshing airflow before you know it.
Understanding Your AEG Air Conditioner Model
Before you even think about plugging anything in, it’s important to know exactly what type of AEG air conditioner you have. AEG offers several models, each with slightly different setup requirements. Taking a few minutes to identify your model can save you a lot of confusion (and potential frustration) down the line.
Visual guide about aeg air conditioner instructions
Image source: blog.coldwind.co.uk
Types of AEG Air Conditioners
AEG produces three main types of air conditioners: portable, window-mounted, and split systems. Each has its own installation process, so let’s break them down.
- Portable Air Conditioners: These are freestanding units that you roll into place. They’re great for renters or people who don’t want to modify their windows. Most portable AEG models come with a hose that vents hot air out through a window or wall. They’re easy to move and require minimal setup.
- Window Air Conditioners: These fit directly into a window frame and are a popular choice for single-room cooling. They’re more permanent than portable units but still relatively straightforward to install. AEG window units often include brackets and seals to ensure a snug, energy-efficient fit.
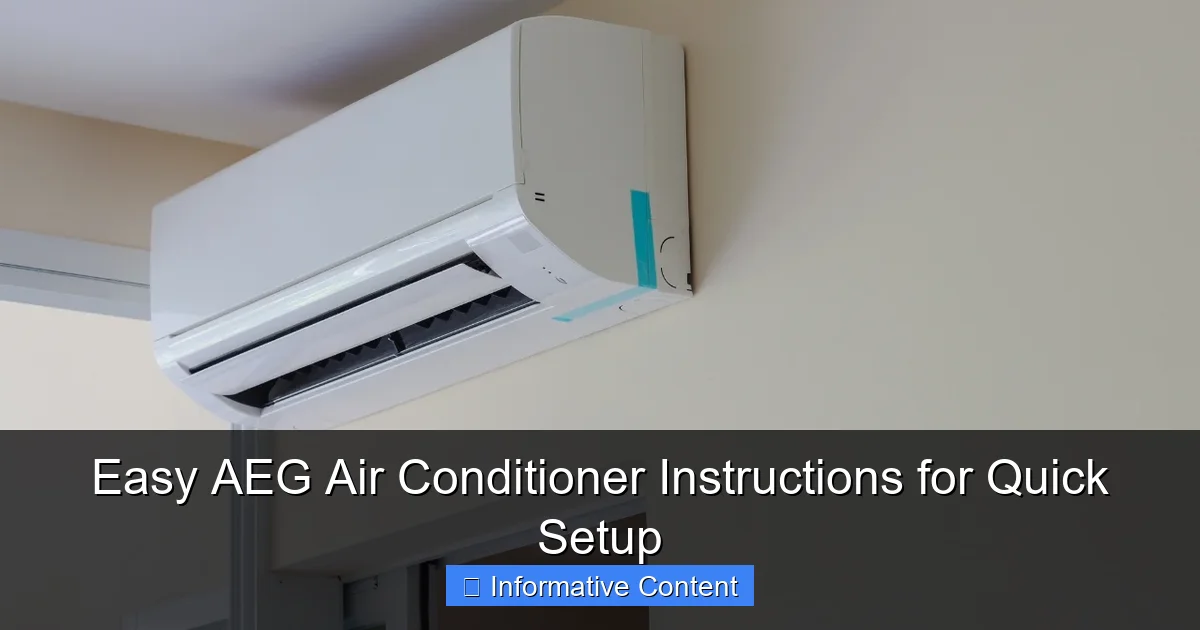
- Split System Air Conditioners: These consist of an indoor unit and an outdoor compressor. They’re more powerful and efficient but require professional installation in most cases. If you’ve got a split system, you’ll likely need a technician to handle the refrigerant lines and electrical connections.
How to Identify Your Model
Your AEG air conditioner’s model number is usually found on a label on the back or side of the unit. It typically starts with letters like “AEG” followed by numbers and letters (e.g., AEG PAC 2600). This number is your key to finding the right manual, troubleshooting tips, and compatible accessories.
For example, if you have an AEG PAC 1200 portable unit, you’ll know it’s a compact, single-hose model ideal for small rooms up to 350 square feet. On the other hand, an AEG WAC 9000 window unit is better suited for larger spaces and includes features like remote control and energy-saving modes.
Pro tip: Take a photo of the model label and save it on your phone. That way, if you ever need to contact customer support or look up replacement parts, you’ve got the info ready to go.
Unboxing and Initial Setup
Now that you know what model you’re working with, it’s time to unbox your AEG air conditioner. This step might seem simple, but there are a few things you’ll want to do right from the start to ensure everything goes smoothly.
What’s in the Box?
When you open the box, you should find the following items (exact contents may vary by model):
- The main air conditioner unit
- Exhaust hose (for portable models)
- Window kit (includes brackets, seals, and adapters)
- Remote control (with batteries)
- User manual and quick start guide
- Drainage hose (for dehumidifying mode)
- Mounting hardware (for window units)
Double-check that all parts are present before you begin. If anything is missing, contact AEG customer service immediately. It’s much easier to resolve issues before you start installing.
Choosing the Right Location
Where you place your AEG air conditioner matters—a lot. A poorly placed unit can reduce efficiency, increase noise, and even cause water leaks.
For portable units, choose a spot near a window (for venting) and away from direct sunlight or heat sources like ovens or radiators. Make sure there’s at least 18–24 inches of clearance on all sides for proper airflow.
For window units, pick a window that’s structurally sound and can support the weight. Avoid windows that face west if possible—afternoon sun can overwork the unit. Also, ensure the window opens and closes easily so you can install the support brackets securely.
For split systems, the indoor unit should be mounted high on an interior wall, away from curtains or furniture that could block airflow. The outdoor unit needs a stable, level surface with good ventilation—never install it in a tight enclosure or near bushes that could clog the fins.
Real-life example: My friend installed her portable AEG unit in a corner behind a bookshelf. At first, it seemed fine—until she noticed it was struggling to cool the room and making a loud humming noise. After moving it to a more open area near the window, the difference was night and day. Proper placement really does make a difference.
Step-by-Step Installation Guide
Now for the main event: installing your AEG air conditioner. Don’t worry—this isn’t rocket science. With a little patience and the right tools, you’ll have it running in no time.
Installing a Portable AEG Air Conditioner
Portable units are the easiest to install, making them a favorite for beginners. Here’s how to do it:
- Position the unit: Roll it into place near the window. Make sure the exhaust hose can reach without stretching or kinking.
- Attach the exhaust hose: Connect one end to the back of the unit and the other to the window adapter. Most AEG models use a simple twist-lock or clamp system—no tools needed.
- Install the window kit: Slide the adjustable window bracket into the window frame. Tighten the screws to secure it. The hose should fit snugly into the opening.
- Plug it in: Use a dedicated outlet—don’t plug it into an extension cord or power strip. AEG units draw a lot of power, and overloading a circuit can trip your breaker.
- Turn it on: Press the power button on the unit or remote. Set your desired temperature and fan speed.
Tip: If you’re using the unit in dehumidifier mode, you may need to connect the drainage hose to a bucket or drain. Check your model’s manual for specifics.
Installing a Window AEG Air Conditioner
Window units require a bit more effort, but they’re still manageable for most DIYers. Follow these steps:
- Prepare the window: Open the window and remove the screen. Measure the opening to ensure the unit fits.
- Install the support bracket: Most AEG window units come with an L-shaped bracket that attaches to the windowsill. Secure it with screws (usually included).
- Place the unit: With a helper, lift the AC into the window opening. Slide it down onto the bracket. Make sure it’s level and centered.
- Secure the unit: Close the window sash onto the top of the unit. Use the included side panels or foam seals to fill any gaps. This prevents hot air from sneaking in.
- Fasten with screws: Drill pilot holes and screw the unit into the window frame for stability. Don’t overtighten—you don’t want to crack the casing.
- Plug in and test: Connect to a grounded outlet and turn it on. Adjust settings using the control panel or remote.
Safety note: Never install a window unit alone. These units can weigh 50–80 pounds, and dropping one could cause injury or damage.
Installing a Split System (Professional Help Recommended)
Split systems are more complex and involve refrigerant lines, electrical wiring, and wall drilling. Unless you’re experienced with HVAC systems, it’s best to hire a certified technician.
That said, here’s what the process typically involves:
- Mounting the indoor unit on the wall
- Drilling a hole through the wall for the refrigerant and electrical lines
- Connecting the lines to the outdoor compressor
- Vacuuming the lines to remove air and moisture
- Charging the system with refrigerant
- Testing for leaks and proper operation
AEG recommends using authorized installers to ensure your warranty remains valid. Plus, a pro can help you choose the best location for maximum efficiency.
Operating Your AEG Air Conditioner
Once your unit is installed, it’s time to enjoy the cool air! But knowing how to use your AEG air conditioner effectively can help you save energy, extend its lifespan, and stay comfortable all season long.
Using the Control Panel and Remote
Most AEG air conditioners come with a digital control panel on the unit and a remote control. Here’s how to use them:
- Power: Press the power button to turn the unit on or off.
- Mode: Switch between cooling, fan, dehumidify, and auto modes. Cooling is the most common for summer use.
- Temperature: Use the up/down arrows to set your desired temperature. AEG units typically range from 60°F to 86°F (15°C to 30°C).
- Fan Speed: Choose from low, medium, high, or auto. Auto adjusts the fan based on room temperature.
- Timer: Set the unit to turn on or off after a certain number of hours. Great for cooling your room before you get home.
- Sleep Mode: Gradually increases the temperature over time to save energy while you sleep.
Example: I use sleep mode every night. It starts at 72°F and slowly rises to 76°F by morning. I stay comfortable, and my energy bill stays low.
Energy-Saving Tips
Air conditioners can be energy hogs, but a few smart habits can make a big difference:
- Set the thermostat to 78°F: This is the sweet spot for comfort and efficiency. Every degree lower can increase energy use by 6–8%.
- Use a programmable timer: Don’t cool an empty room. Set the timer to turn on 30 minutes before you arrive home.
- Close curtains and blinds: Blocking sunlight reduces heat gain and eases the load on your AC.
- Seal air leaks: Check windows and doors for drafts. Use weatherstripping or caulk to seal gaps.
- Maintain regular cleaning: A dirty filter or clogged coils make the unit work harder. Clean or replace filters monthly.
Bonus tip: Pair your AEG air conditioner with a ceiling fan. Fans use much less energy and help circulate cool air, making the room feel several degrees cooler.
Maintenance and Troubleshooting
Like any appliance, your AEG air conditioner needs regular care to perform at its best. A little maintenance goes a long way in preventing breakdowns and extending the life of your unit.
Routine Maintenance Checklist
Here’s a simple schedule to keep your AEG air conditioner in top shape:
| Task | Frequency | Notes |
|---|---|---|
| Clean or replace air filter | Monthly | Washable filters can be rinsed; disposable ones should be replaced. |
| Clean the exterior and vents | Every 2–3 months | Use a damp cloth and mild detergent. Never spray water directly on the unit. |
| Check drain line (portable units) | Monthly | Clear any clogs to prevent water leaks. |
| Inspect window seals | Seasonally | Replace worn seals to maintain efficiency. |
| Professional servicing | Annually | Recommended for split systems and older units. |
Common Issues and Fixes
Even with proper care, problems can arise. Here are a few common issues and how to fix them:
- Unit won’t turn on: Check the power outlet, circuit breaker, and remote batteries. Make sure the unit isn’t in timer mode.
- Not cooling properly: Clean the filter, check for blocked vents, and ensure the exhaust hose isn’t kinked. Also, verify the temperature setting.
- Water leaking: This is often due to a clogged drain line or full condensate pan. Clear the drain and empty the pan if needed.
- Strange noises: Rattling could mean loose parts; grinding may indicate a motor issue. Turn off the unit and inspect for obstructions.
- Remote not working: Replace the batteries and ensure there’s no obstruction between the remote and the unit’s sensor.
When in doubt, consult your AEG air conditioner instructions or contact customer support. Most issues are easy to resolve, but some may require professional help.
Conclusion
Setting up and using an AEG air conditioner doesn’t have to be stressful. With the right preparation, a clear understanding of your model, and a few simple steps, you can enjoy cool, comfortable air all summer long. Whether you’ve got a portable, window, or split system, the key is to follow the AEG air conditioner instructions carefully and maintain your unit regularly.
Remember, your air conditioner is an investment in your comfort and well-being. Taking the time to install it correctly and use it wisely will pay off in lower energy bills, fewer repairs, and a longer lifespan. So go ahead—unbox that unit, follow this guide, and beat the heat like a pro. Your future self (and your electric bill) will thank you.
Frequently Asked Questions
How do I set up my AEG air conditioner for the first time?
To set up your AEG air conditioner, first ensure it’s placed near a window for proper ventilation. Follow the included AEG air conditioner instructions to secure the exhaust hose and connect the unit to the window bracket.
What should I do if my AEG air conditioner isn’t cooling properly?
Check that the air filter is clean and the room is properly sealed. Also, verify the temperature setting and ensure the unit is in cooling mode according to the AEG air conditioner instructions.
Can I use my AEG air conditioner as a heater?
Yes, many AEG air conditioner models include a heating function. Refer to your model’s AEG air conditioner instructions to activate heat mode safely and efficiently.
How often should I clean the filter on my AEG air conditioner?
Clean the air filter every two weeks during heavy use to maintain performance. Regular cleaning prevents dust buildup and ensures better air quality.
Why is my AEG air conditioner making a loud noise?
Loud noises may result from loose parts or an unbalanced installation. Consult the AEG air conditioner instructions to check mounting stability and tighten any components if needed.
Do I need a special outlet for my AEG air conditioner?
Most AEG air conditioners require a dedicated 220–240V outlet. Always follow the electrical guidelines in the AEG air conditioner instructions to avoid overloading circuits.

