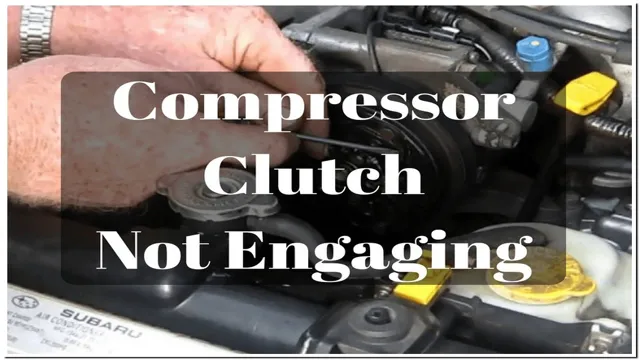
Have you ever experienced an issue where your car’s AC compressor is not starting? It can be frustrating, especially during hot summer days. Your car’s AC compressor is responsible for compressing and circulating the refrigerant throughout the AC system, which cools down the air blowing into the cabin. Without it, you’ll feel like you’re driving in a sauna! In this blog, we’ll take a look at some common reasons why your AC compressor might not be starting, and what you can do about it.
So buckle up and let’s get started!
Check Power Supply
If your AC compressor won’t start, one of the possible culprits could be an issue with the power supply. It’s essential to check your power source and ensure that it’s working correctly. First, you can start by checking the circuit breaker, which might have been tripped.
Reset it and see if it resolves the problem. Additionally, check your thermostat setting and ensure that you’ve set the right temperature. If you’ve set the temperature to a lower level, it might not turn the AC on, thinking it hasn’t reached the desired temperature yet.
Suppose you have an older property; it’s possible that the wires connected to the AC compressor have gone bad. In this case, it’s advisable to contact an HVAC repair professional to have them check the wiring and fix the issue. By checking the power supply first, you’ll save time, effort, and possibly the cost of a service call.
Inspect Electrical Connections
When it comes to inspecting electrical connections, checking the power supply should be the first step. Before you start fiddling with any wires or checking outlets, make sure there’s a consistent source of power. You can do this by verifying that your circuit breaker or fuse box is supplying power to the area in question.
If the power supply seems fine, move on to checking individual outlets or switches. It’s important to note that checking the power supply should only be done by someone with proper training or experience working with electrical systems. Don’t take any unnecessary risks when it comes to electricity, as it can be dangerous if mishandled.
By taking the time to properly inspect your power supply, you can ensure that your electrical connections are in working order and prevent any potential hazards.
Check Circuit Breaker
If you’re facing a power outage, one of the first things you should check is whether the circuit breaker has tripped. The circuit breaker is designed to protect the electrical circuit by shutting off the power supply if there’s any overloading or short circuits. To check if the circuit breaker is the culprit, open the electrical panel and look for the switch that has flipped to the “off” position.
If you find one, simply flip it back on to restore power to the affected area. However, if the circuit breaker keeps tripping repeatedly, it’s a sign of a more serious electrical problem that requires professional attention. Remember that regularly checking your circuit breaker can prevent power outages and avoid electrical hazards.
Quite simply, if you want to ensure your power supply isn’t the issue, check the circuit breaker.
Check Thermostat Settings
If your AC compressor won’t start, don’t panic. One of the first things you should check is your thermostat settings. Is your thermostat set to “heat” instead of “cool”? If so, your AC compressor won’t turn on no matter what you do.
Additionally, double-check that your thermostat is set to the correct temperature and that the temperature sensor isn’t obstructed or malfunctioning. It’s also a good idea to make sure that your thermostat is getting power and has fresh batteries, as this can cause issues with the compressor starting. By taking the time to ensure your thermostat is set correctly, you may be able to solve your problem and avoid an expensive repair or replacement.
Keep your system humming and comfortable by conducting regular thermostat checks and maintenance.
Ensure Thermostat is Set to Cool
One common reason why your air conditioner may not be cooling your home is incorrect thermostat settings. It might sound silly, but it’s worth checking if your thermostat is set to “cool.” Sometimes, due to accidental touches or other factors, the settings can be changed to “heat” or “off,” which can result in your system blowing warm air.
If you’re not sure how to check your thermostat settings, don’t worry; it’s a straightforward process. First, ensure that your thermostat is turned on and set to “cool.” Then, adjust the temperature lower than the current room temperature.
If you hear your AC unit turn on and feel the cold air coming out of the vents, you’re good to go. However, if you still don’t feel cold air, you might want to check for other potential issues, such as dirty air filters or refrigerant leaks, and contact a professional for help. Remember, double-checking your thermostat settings can save you time and money in the long run.
Check Temperature Settings
One of the most common causes of HVAC malfunction is incorrect thermostat settings. It’s critical to ensure that your thermostat is set at the right temperature to optimize your system’s performance. You should set your thermostat to match your desired indoor temperature accurately.
Make sure you adjust the temperature according to the season. During winter, you may want to raise the temperature slightly, while during summer, you’ll need to lower it. Also, consider the time of day when setting your thermostat.
For example, you may want to set the temperature higher during the day when you’re at work and lower when you’re home in the evening. By adjusting your thermostat to the right temperature, you can save energy and reduce your utility bills. Try experimenting with different settings to find the sweet spot where you’re comfortable while minimizing your energy consumption.
Inspect Capacitor
If your AC compressor won’t start, one of the first things to check is the capacitor. A defective capacitor can cause the compressor to fail to start or run intermittently. To inspect the capacitor, turn off the power supply to the AC unit, and remove the access panel.
Locate the capacitor, which looks like a metal can with wires attached to the top. Check for any bulges, cracks, or leaks on the capacitor’s exterior, as these are signs of a failing or faulty capacitor. If you notice any issues, it’s best to replace the capacitor as soon as possible.
However, if the exterior looks fine, you can use a multimeter to test the capacitor’s electrical charge. Capacitors should hold a steady electrical charge, and a reading of zero or a fluctuating charge indicates a defective capacitor that needs replacing. Don’t attempt to handle or test a capacitor without proper knowledge and equipment, as capacitors store an electrical charge even when the power supply is off, which can be hazardous.
Contact a trusted HVAC technician if you’re not comfortable inspecting or testing the capacitor yourself.
Test Capacitor with Multimeter
If you want to ensure your electronics or appliances function properly, it’s essential to inspect the capacitor regularly. A capacitor is a small device that stores energy and releases it when needed. Over time, capacitors may lose their ability to hold a charge properly, which can lead to various issues with your electronics.
The good news is that testing a capacitor with a multimeter is relatively simple and can help you identify any issues before they turn into a significant problem. To test a capacitor, you need to set your multimeter to the capacitance setting and touch the probes to the capacitor terminals. The reading should match the capacitor’s rating within 5%, indicating that it’s functioning correctly.
If the reading falls outside of this range, the capacitor may be faulty and needs to be replaced. By inspecting your capacitor periodically and testing it with a multimeter, you can ensure that your electronics and appliances run efficiently and prevent any costly repairs down the road.
Replace Faulty Capacitor
Before replacing a faulty capacitor, it’s important to inspect it thoroughly. A capacitor is a vital component in many electrical systems, including air conditioners. A damaged capacitor can cause the system to malfunction or even fail completely.
Capacitors can fail due to a range of reasons, such as overheating, or due to age and wear and tear. A straightforward way to check for a faulty capacitor is by using a multi-meter to test the capacitor’s capacitance. Other signs of a problematic capacitor could include bulges or leaks, and in some cases, the system may make strange noises.
Regularly inspecting and maintaining capacitors can help ensure the efficient working and longevity of your electrical system. Remember to seek professional assistance if you’re not confident in conducting the inspection yourself as electrical systems can be hazardous.
Call for Professional Help
If you’re experiencing an issue with your AC compressor not starting, it’s time to call in the professionals. While it may be tempting to try and fix the problem yourself, attempting to do so could cause more harm than good. HVAC technicians have the training and expertise to safely diagnose and repair any issues with your AC compressor.
They’ll be able to pinpoint the root cause of the problem and provide a cost-effective solution to get your unit up and running again. Additionally, attempting to fix the problem yourself could void any existing warranties or service agreements you have in place. So, save yourself the headache and reach out to a reputable HVAC technician to get your AC compressor back in working order.
Conclusion
Well folks, it looks like the AC compressor has decided to take a vacation without notifying us. It’s lounging on some tropical beach, sipping on coconut water while we’re left sweating in the scorching heat. Let’s hope it decides to come back soon, otherwise we might need to resort to some creative and unconventional cooling methods to survive the summer.
“
FAQs
What are some possible reasons why an AC compressor won’t start?
There could be several reasons why an AC compressor won’t start, including a faulty relay switch, low refrigerant levels, or a problem with the compressor motor.
How can I troubleshoot a faulty AC compressor?
To troubleshoot a faulty AC compressor, you can check the connection to the relay switch, test the thermostat, or inspect the compressor motor for any visible damage.
Is it safe to try to fix an AC compressor myself?
It is not recommended to try to fix an AC compressor yourself unless you have experience in HVAC repairs. Attempting to repair an AC compressor without proper knowledge and tools can be dangerous and cause further damage.
Can a low refrigerant level cause an AC compressor to fail to start?
Yes, a low refrigerant level can cause an AC compressor to fail to start. The compressor requires a certain amount of refrigerant to operate, and if the level is too low, the compressor may not start.