
Featured image for york air conditioner remote control instructions
Image source: cdn.shopify.com
Master your York air conditioner with ease using these straightforward remote control instructions. This guide simplifies every function—from temperature settings to timer programming—so you can maximize comfort and efficiency in minutes, no technical expertise required.
Key Takeaways
- Master the power button: Press once to turn on/off your York AC.
- Adjust temperature easily: Use up/down arrows for precise climate control.
- Set modes effortlessly: Toggle between cool, fan, dry, or heat modes.
- Use timers wisely: Schedule on/off times to save energy and enhance comfort.
- Check fan speed: Select low, medium, or high for optimal airflow.
- Replace batteries promptly: Weak batteries cause unresponsiveness—swap them early.
- Keep remote clean: Wipe regularly to prevent button malfunctions.
📑 Table of Contents
- Understanding Your York Air Conditioner Remote Control
- Getting to Know the Remote: Layout and Key Functions
- Step-by-Step York Air Conditioner Remote Control Instructions
- Advanced Features and Custom Settings
- Troubleshooting Common Remote Issues
- Maintaining Your Remote and AC for Long-Term Performance
- Conclusion: Take Control of Your Comfort
Understanding Your York Air Conditioner Remote Control
Let’s be honest—nothing’s more frustrating than standing in front of your air conditioner, pressing buttons on the remote, and nothing happening. You’re sweating, your patience is thin, and all you want is a cool, comfortable home. If you’ve ever found yourself in this situation with your York air conditioner remote control, you’re not alone. I’ve been there too—fumbling with the remote, wondering if I pressed the right button, or worse, doubting if the remote was even the issue.
The good news? Most York remote control issues aren’t about broken remotes or faulty units. They’re about understanding how to use the device correctly. Whether you’ve just moved into a home with a York system or inherited one from a previous owner, knowing how to use your remote effectively can make a world of difference. This guide will walk you through everything you need to know about York air conditioner remote control instructions—from basic functions to advanced settings, troubleshooting, and even energy-saving tips. By the end, you’ll feel confident and in control, literally.
Getting to Know the Remote: Layout and Key Functions
Before we dive into specific instructions, let’s take a moment to understand the remote itself. York remotes come in a few different models depending on the air conditioner series (like the York Affinity, York YCJF, or York YCGL), but most share a similar layout. Think of it like a smartphone—once you learn the icons and buttons, you can use any version confidently.
Visual guide about york air conditioner remote control instructions
Image source: cdn.shopify.com
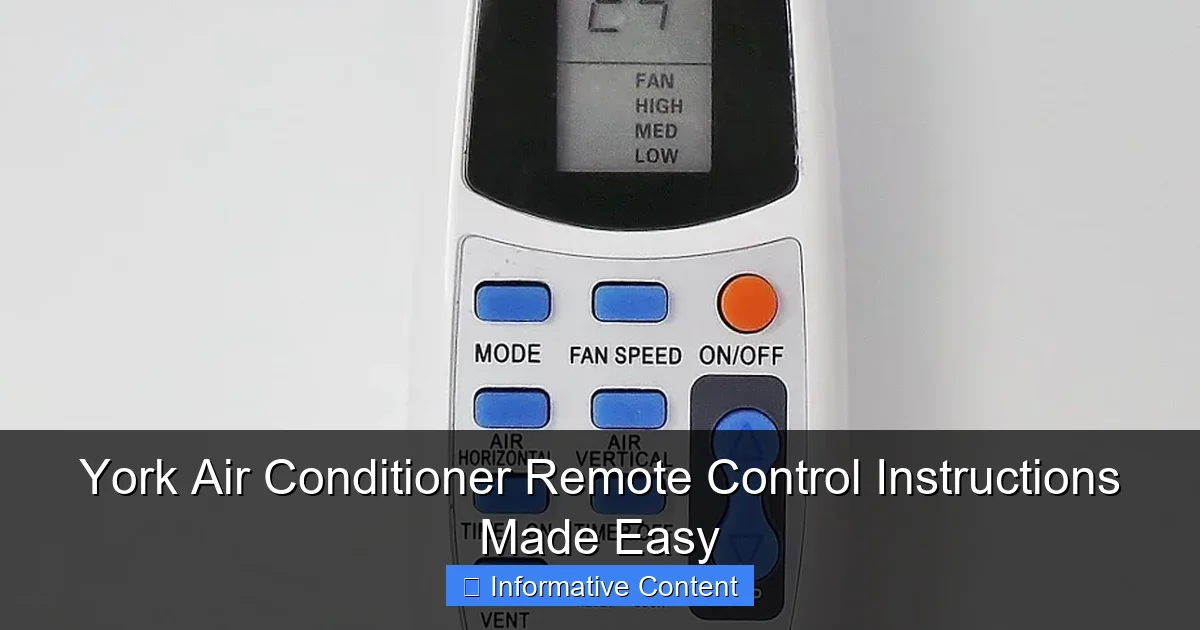
Common Buttons and Their Functions
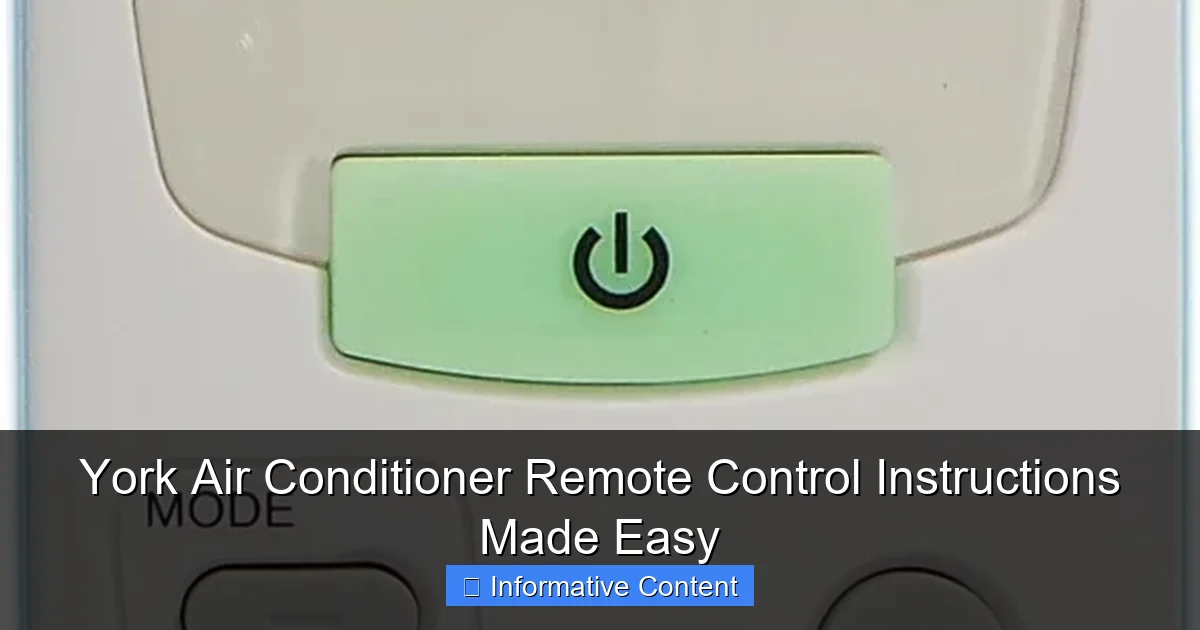
- Power Button (On/Off): The big one at the top. Press once to turn the system on or off. Simple, but sometimes it takes a second press—don’t panic if it doesn’t respond immediately.
- Mode Button: Cycles through operating modes: Cool, Heat (if heat pump), Dry (dehumidify), Fan Only, and Auto. In Auto mode, the system decides whether to cool or heat based on your set temperature.
- Temperature Up/Down Arrows: Adjust your desired room temperature. Most York remotes allow settings from 60°F to 86°F (16°C to 30°C).
- Fan Speed Button: Lets you choose between Low, Medium, High, or Auto. Auto adjusts fan speed based on cooling demand.
- Timer Button: Used to set on/off schedules. Great for saving energy when you’re not home.
- Swing Button (Airflow Direction): Controls the louvers (flaps) inside the indoor unit. You can set them to oscillate or stay fixed in one position.
- Sleep Button: Gradually adjusts temperature over a few hours for comfort and efficiency while you sleep.
- LED Display: Shows current temperature, mode, fan speed, timer, and other status indicators.
<
For example, if you’re coming home from work and want the house cool by 6 PM, you can use the Timer On function. Set it for 5:30 PM, and your York system will start cooling before you walk in. No more sweltering entryways!
Remote Display Icons: What They Mean
The LED screen might look like hieroglyphics at first, but it’s actually quite intuitive. Here’s what you’ll commonly see:
- Snowflake Icon: Cool mode is active.
- Sun Icon: Heat mode (on heat pump models).
- Water Drop: Dry mode—reduces humidity without overcooling.
- Fan Icon: Fan-only mode. No heating or cooling.
- Clock Icon: Timer is set.
- Zzz Icon: Sleep mode is on.
- Swing Arrow: Louvers are oscillating.
One tip: If the display is dim or hard to read, check the remote’s batteries. Weak batteries often cause a faint screen. Also, avoid placing the remote in direct sunlight—it can fade the display over time.
Step-by-Step York Air Conditioner Remote Control Instructions
Now that you know what each button does, let’s walk through how to use them in real-life scenarios. These step-by-step York air conditioner remote control instructions are designed to help you get the most out of your system—without guesswork.
1. Turning On the Air Conditioner
Start by pressing the Power button. Wait a few seconds. You should hear the indoor unit click on, and the fan may start after a 30-second delay (this is normal—it prevents cold air from blowing before the system is ready). The display will show the current room temperature and your last mode setting.
Tip: If nothing happens, double-check that the unit is plugged in and the circuit breaker isn’t tripped. Also, make sure the remote is pointed at the indoor unit’s IR sensor (usually on the front panel).
2. Selecting the Right Mode
Press the Mode button repeatedly until you see the desired icon on the display.
- Cool: For hot days. Set your preferred temperature (e.g., 72°F).
- Heat: For colder months (if you have a heat pump).
- Dry: Ideal for humid days. It cools slightly but mainly removes moisture—great for sticky summers.
- Fan Only: Circulates air without heating or cooling. Good for mild days or if you just want airflow.
- Auto: The system picks the best mode based on your set temperature. For example, if it’s 75°F inside and you set the remote to 72°F, it will cool. If the room drops to 68°F, it might switch to heat (if equipped).
Real-life example: I use Dry mode during summer thunderstorms. The temperature isn’t extreme, but the humidity makes it feel hotter. Dry mode keeps the air comfortable without making the house too cold.
3. Setting the Temperature
Use the Up/Down arrows to set your ideal temperature. Most people find 72°F–75°F (22°C–24°C) the most comfortable. Remember: Every degree below 72°F can increase energy use by 6–8%. So, set it as high as you’re comfortable with.
Pro tip: In summer, set it to 75°F when you’re home and 78°F when you’re out. This balances comfort and energy savings. Your remote can help with this using the timer function (more on that later).
4. Adjusting Fan Speed
Press the Fan Speed button to cycle through options:
- Low: Quiet, gentle airflow. Good for night.
- Medium: Balanced noise and performance.
- High: Maximum cooling. Use during heatwaves.
- Auto: The system adjusts fan speed based on how much cooling is needed. This is usually the most efficient setting.
I keep mine on Auto most of the time. It’s smart enough to ramp up when the house heats up and slow down when it’s cool. But if I’m watching a movie and want less noise, I switch to Low.
5. Using the Timer Function
The Timer button lets you schedule on/off times. Here’s how:
- Press Timer once. The display shows “ON” and a clock icon.
- Use the Up/Down arrows to set the time you want the unit to turn on.
- Press Timer again. The display now shows “OFF.”
- Set the time you want it to turn off.
- Press Timer once more to confirm. The clock icon will stay lit.
Example: I set the timer to turn on at 5:30 PM (so the house is cool by 6 PM) and off at 8:30 PM (when I go to bed). This saves energy and keeps the house comfortable.
Note: To cancel the timer, press and hold the Timer button for 3 seconds. The clock icon will disappear.
6. Activating Sleep Mode
Press the Sleep button once. The system will gradually adjust the temperature over the next few hours. In cooling mode, it will raise the temperature by about 1–2°F per hour. This prevents you from waking up too cold and saves energy.
Sleep mode typically lasts 6–8 hours, then the system returns to your original settings. It’s perfect for overnight use.
Advanced Features and Custom Settings
Beyond the basics, York remotes offer some clever features that can enhance comfort and efficiency. Let’s explore a few you might not know about.
Controlling Airflow Direction (Swing Function)
Press the Swing button to make the louvers (the flaps inside the indoor unit) move up and down. This spreads cool air more evenly across the room. You can also set them to a fixed angle—great if you want to direct airflow away from your bed or desk.
- Auto Swing: Press Swing once. The louvers will oscillate.
- Fixed Position: Press Swing and hold for 3 seconds. Use the Up/Down arrows to set the angle, then press Swing again to lock it.
I use a fixed position in my home office—directing airflow toward me but not blowing directly on my face. It’s a game-changer during long work sessions.
Turbo Mode (on Some Models)
Some York remotes have a Turbo button (or a hidden function via a combination press). When activated, the system runs at maximum fan and compressor speed for 20–30 minutes to cool the room quickly.
How to use: In cooling mode, press and hold the Fan Speed and Down buttons together for 3 seconds. You’ll see “Turbo” on the display. Great for when you come home to a hot house.
Child Lock Feature
If you have kids (or pets), the Child Lock prevents accidental changes to settings. To activate:
- Press and hold the Up and Down arrows for 5 seconds.
- The display will show “LOC” (locked).
While locked, most buttons won’t work—except Power and Child Lock. To unlock, repeat the same button combo.
Energy-Saving Tips Using Remote Functions
- Use Timer + Sleep Mode: Set the timer to turn on before you wake up, then activate Sleep mode. This ensures a cool room in the morning and a comfortable, efficient night.
- Set a Higher Temperature: Every degree above 72°F saves energy. Try 75°F during the day.
- Use Dry Mode in Humid Weather: It uses less energy than full cooling.
- Turn Off When Not Home: Use the timer or simply press Power. No need to run the AC all day.
One summer, I saved nearly 20% on my electric bill just by using the timer and setting the temperature to 75°F. The remote made it easy to stay consistent.
Troubleshooting Common Remote Issues
Even the best remotes can act up. Here are the most common problems and how to fix them—without calling a technician.
Remote Not Responding
- Check Batteries: Weak batteries are the #1 cause. Replace them with fresh AAA or AA (depending on model). Make sure they’re inserted correctly.
- Clean the IR Lens: The small window on the remote and the sensor on the indoor unit can get dusty. Wipe both with a soft cloth.
- Distance and Obstruction: Stand within 20 feet and ensure nothing (like a plant or curtain) is blocking the signal.
- Reset the Remote: Remove batteries, wait 30 seconds, then reinsert. This clears any glitches.
I once spent 10 minutes pressing buttons, only to realize my cat had knocked the remote behind the couch. Lesson learned: keep it on a high shelf!
Display Not Lighting Up
- Batteries are likely dead or inserted backward.
- The screen may be damaged. Try a different remote (if you have one) to test the unit.
Wrong Mode or Temperature Displayed
This can happen if the remote was used with another unit or if there was a power surge. Try:
- Turning the AC off and on.
- Resetting the remote (remove batteries).
- Re-pairing (if it’s a smart model with pairing function).
Timer Not Working
- Make sure you confirmed the setting (clock icon should be lit).
- Check if the current time on the remote matches your actual time. Some remotes have a clock that can drift.
- Disable and re-enable the timer.
When to Call a Pro
If the remote works but the AC doesn’t respond, the issue might be with the indoor unit’s receiver board or wiring. Also, if the remote is physically damaged (cracked, water-damaged), it may need replacement. York remotes are generally reliable, but like any electronic device, they don’t last forever.
Maintaining Your Remote and AC for Long-Term Performance
Your York air conditioner remote control is a small device, but it plays a big role in your comfort. A little care goes a long way.
Cleaning and Care Tips
- Wipe Monthly: Use a soft, dry cloth to clean the remote. Avoid water or cleaning sprays.
- Keep It Dry: Don’t leave it in the bathroom or near sinks.
- Store Properly: Use a remote holder or designated spot. Avoid leaving it on the floor or in drawers with keys and coins (which can press buttons).
- Protect from Sunlight: UV rays can fade the display. Keep it in a shaded area.
Battery Replacement Schedule
Most remotes use alkaline batteries that last 6–12 months. I replace mine every 6 months—right after daylight saving time ends. That way, I don’t get caught off guard. Keep a spare set handy.
AC Unit Maintenance That Affects Remote Use
Even the best remote won’t help if the AC isn’t maintained. Here’s what to do:
- Clean Filters Monthly: Dirty filters reduce airflow, making the AC work harder. This can cause the remote to show “cooling” but the room stays hot.
- Schedule Annual Service: A technician can check refrigerant levels, electrical connections, and the IR sensor on the indoor unit.
- Check for Obstructions: Make sure furniture or curtains aren’t blocking the indoor unit’s vents.
Data Table: Recommended Settings by Season
| Season | Mode | Temperature | Fan Speed | Additional Tips |
|---|---|---|---|---|
| Summer (Hot) | Cool | 72°F–75°F | Auto or High | Use Timer to turn on before you get home |
| Summer (Humid) | Dry | 75°F | Medium | Great for sticky days; saves energy |
| Spring/Fall | Fan Only or Auto | 70°F–75°F | Low or Auto | Use windows to supplement airflow |
| Winter (Heat Pump) | Heat | 68°F–72°F | Auto | Use Sleep mode at night |
Following these settings can improve comfort and reduce wear on your system. Your remote is the key to making it all work smoothly.
Conclusion: Take Control of Your Comfort
Using your York air conditioner remote control doesn’t have to be confusing. With a little understanding, you can master everything from basic cooling to advanced scheduling and energy savings. Think of the remote as your personal climate assistant—once you learn its language, it works hard for you.
Remember: The most effective settings are the ones that match your lifestyle. Use the timer to align with your routine, the swing function to direct airflow where you need it, and sleep mode to stay comfortable all night. And when something goes wrong, don’t panic. Most issues are simple to fix—just check the batteries, clean the lens, or reset the remote.
I’ve had my York system for five years, and the remote has been my go-to tool for comfort and efficiency. Whether I’m escaping a heatwave or keeping the house cozy in winter, knowing how to use it makes all the difference. Now that you have these York air conditioner remote control instructions, you can do the same.
So, grab your remote, take a deep breath, and enjoy the cool. You’ve got this.
Frequently Asked Questions
How do I pair my York air conditioner remote control with the unit?
To pair your York air conditioner remote, ensure the unit is powered on, then press and hold the “Set” or “Pair” button on the remote for 3-5 seconds until the LED indicator flashes. Refer to your model’s manual for specific steps, as some York remote controls require a code entry.
Why is my York air conditioner remote control not responding?
If your remote isn’t working, first check the batteries and replace them if needed. Ensure there’s no obstruction between the remote and the AC unit’s sensor, and verify the remote is set to the correct mode (e.g., “Cool” or “Heat”).
How do I set the timer on my York AC remote?
Press the “Timer” button on your York air conditioner remote control, then use the up/down arrows to adjust the hours. Confirm by pressing “Enter” or “Set.” The display will show the programmed time for automatic on/off.
What do the symbols on my York remote mean?
Common symbols include a snowflake (cool mode), sun (heat mode), fan (air circulation), and a clock (timer). For a full list of icons, consult your York air conditioner remote control manual or visit the manufacturer’s website.
Can I use a universal remote with my York AC unit?
Yes, but ensure the universal remote is compatible with York models. Program it using the correct code (found in the universal remote’s manual). Note that advanced features may not work without a genuine York remote.
How do I reset my York air conditioner remote control?
To reset, remove the batteries, press all buttons for 10 seconds to discharge residual power, then reinsert the batteries. For persistent issues, perform a factory reset via the “Reset” button (if available) or contact York support.