
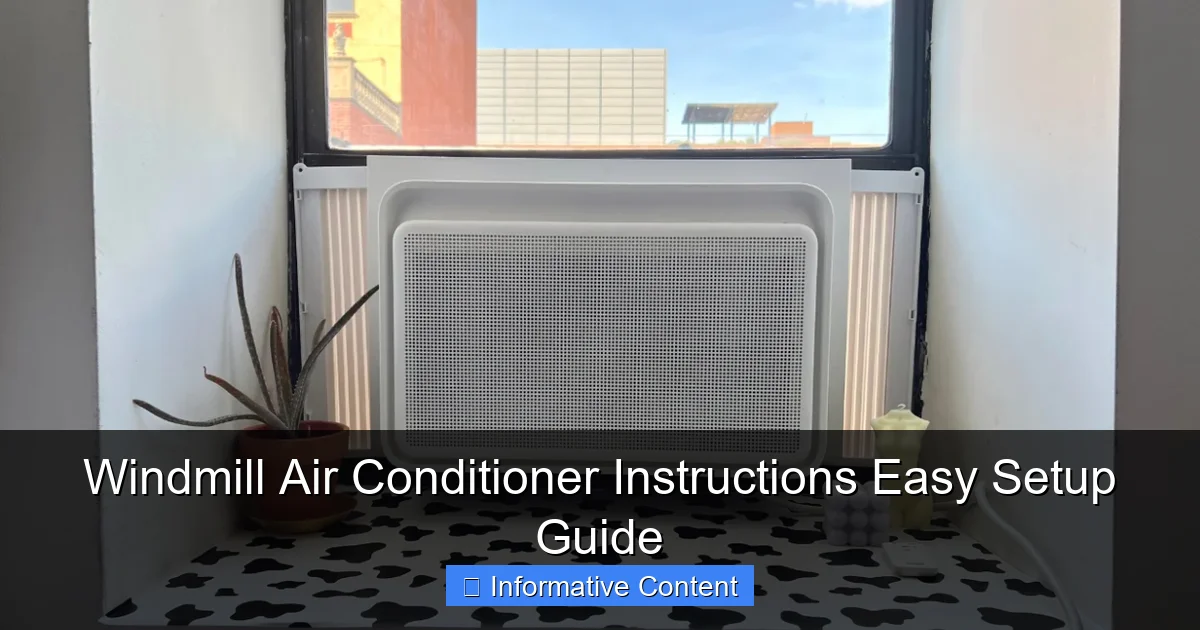
Featured image for windmill air conditioner instructions
Image source: helios-i.mashable.com
Effortless setup is the hallmark of the Windmill Air Conditioner, designed with user-friendly instructions that get you cooling in minutes—no tools or expertise required. Clear, step-by-step guidance and intuitive controls ensure seamless installation and operation, making it perfect for renters and homeowners alike.
Key Takeaways
- Read the manual first: Always start with the manufacturer’s instructions for safe, correct setup.
- Check power requirements: Ensure your outlet matches the AC’s voltage and amperage needs.
- Secure window installation: Use included brackets to prevent the unit from falling.
- Clean the filter regularly: Improve efficiency by washing the filter every two weeks.
- Optimize airflow: Position the unit for unobstructed airflow and maximum cooling.
- Use timer settings: Save energy by scheduling on/off times in advance.
📑 Table of Contents
- Why Windmill Air Conditioners Are a Smart Choice for Your Home
- Unboxing and What’s Included in the Box
- Step-by-Step Installation Guide (With Real-Life Tips)
- Using the Remote and Control Panel Like a Pro
- Maintenance and Care to Keep Your AC Running Smoothly
- Troubleshooting Common Issues (And When to Call Support)
- Energy Efficiency and Cost Comparison
- Final Thoughts: Is the Windmill AC Right for You?
Why Windmill Air Conditioners Are a Smart Choice for Your Home
Let me paint a picture for you: It’s the middle of July. The sun is relentless, the humidity is sticky, and your old AC unit just gave up the ghost. You’re sweating through your shirt, your dog is panting on the floor, and you’re wondering how you’ll survive the next three months. That’s when a friend casually mentions, “Hey, have you looked at Windmill air conditioners?”
You might be thinking, Windmill? Like the ones on farms? Nope, not those. The Windmill air conditioner is a sleek, modern, energy-efficient window unit that’s been making waves in the home cooling space. It’s not just about cooling—it’s about doing it smartly, quietly, and with a focus on sustainability. And the best part? The Windmill air conditioner instructions are designed to be so simple, you’ll have it up and running in under an hour, even if you’ve never installed a window AC before.
Unboxing and What’s Included in the Box
When your Windmill air conditioner arrives, it’s like opening a present that actually solves a problem (unlike that “useful” avocado slicer you got for Christmas). The packaging is compact, recyclable, and thoughtfully designed—no styrofoam mountains or plastic nightmares.
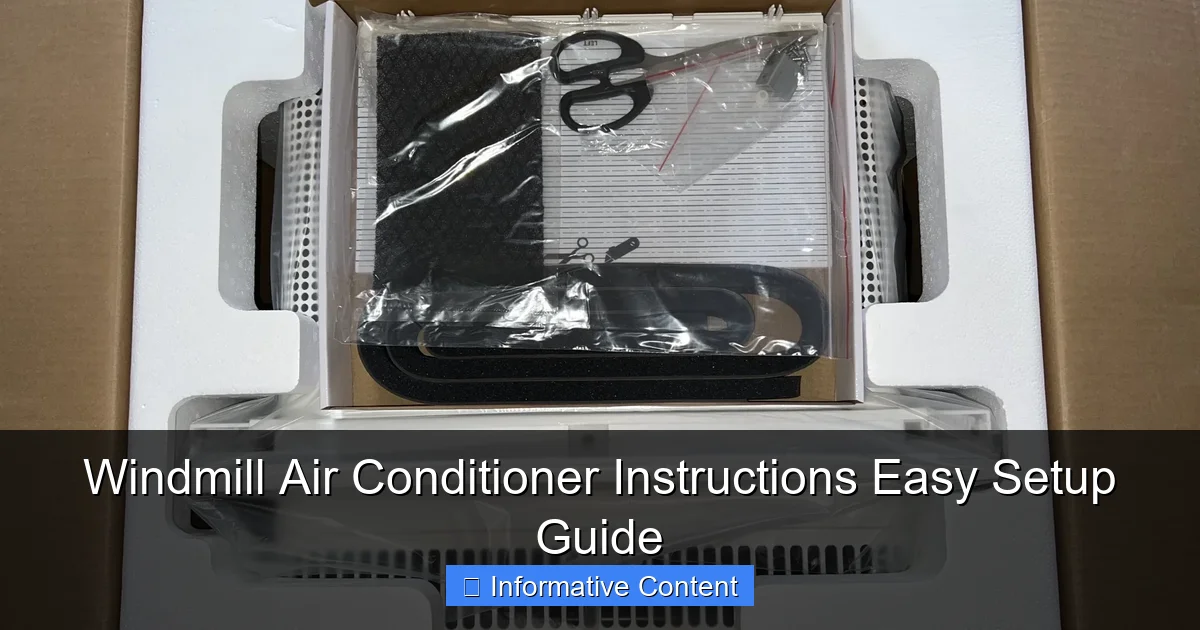
Visual guide about windmill air conditioner instructions
Image source: helios-i.mashable.com
What You’ll Find Inside
Here’s what you can expect to see when you open the box:
- Windmill AC unit – Compact, with a clean white design and a front panel that slides off easily for filter access.
- Side panels (expandable) – These slide into the sides of the unit to fit your window opening. No tools needed—just slide and lock.
- Foam weather stripping – Pre-cut strips to seal gaps around the window and prevent hot air from sneaking in.
- User manual and quick start guide – The Windmill air conditioner instructions are clear, with diagrams, troubleshooting tips, and QR codes for video help.
- Remote control with batteries – Simple, intuitive, and includes a magnetic holder to keep it from getting lost.
- Drain hose (optional) – For continuous drainage in high-humidity climates (more on this later).
Pro tip: Before you even think about installing, lay everything out on the floor and double-check that all parts are there. I once skipped this step and spent 20 minutes looking for a missing side panel—only to realize it was tucked under the foam padding. Lesson learned.
What You’ll Need to Provide
Windmill keeps things simple, but you’ll still need a few basic tools:
- A measuring tape
- A level (your phone’s level app works fine)
- A screwdriver (for securing the window sash, if needed)
- A helper (optional, but helpful for lifting and aligning)
One thing I love? No need for a ladder unless your window is on the second floor. The unit is lightweight (around 70 lbs), so even solo installers can handle it with care.
Step-by-Step Installation Guide (With Real-Life Tips)
Now comes the fun part: getting your Windmill AC into your window. The Windmill air conditioner instructions make this process feel more like assembling IKEA furniture than wrestling with a bulky appliance. Let’s walk through it together.
Step 1: Measure Your Window Opening
Before you even lift the unit, measure the width of your window opening from inside the frame. The Windmill AC fits openings between 23 and 36 inches wide. If your window is narrower or wider, you might need to adjust—but most standard double-hung windows are a perfect fit.
I once tried to install an AC in a window that was just 1 inch too narrow. It didn’t go well. Measure twice, install once.
Step 2: Prepare the Window
Close the window completely. Remove any screens or obstructions. If your window has a storm window, you’ll need to either remove it or open it fully. The AC needs to sit flush against the window frame.
Pro tip: Clean the window track and sill. Dust and grime can prevent a tight seal, letting hot air sneak in and reducing efficiency.
Step 3: Attach the Side Panels
This is where Windmill shines. The expandable side panels slide into the AC unit and can be adjusted to fit your window width. No drilling, no screws—just slide, click, and lock.
Here’s how:
- Align the left panel with the left side of the AC.
- Slide it in until it clicks into place.
- Repeat for the right side.
- Adjust the panels outward until they’re snug against the window frame.
One thing to note: The panels are made of lightweight plastic, so don’t force them. If they don’t slide smoothly, double-check the alignment. Forcing them can damage the clips.
Step 4: Position the AC in the Window
With a helper (or using a sturdy table as a temporary support), gently lift the AC and slide it into the window opening. The unit should sit on the window sill, with the front facing inside and the back (where the hot air exhausts) outside.
Make sure:
- The unit is level (use your phone’s level app).
- The back of the AC is slightly tilted outward (about 1/4 inch lower than the front) for proper drainage.
- The side panels are pressed firmly against the window frame.
I learned the tilt lesson the hard way. One summer, my AC kept tripping the drain switch because water pooled inside. A slight tilt fixed it immediately.
Step 5: Secure the Window and Seal Gaps
Lower the window sash so it rests on top of the AC’s mounting bracket. If your window has a locking mechanism, secure it. For extra stability, you can use the included screws to fasten the sash to the bracket (optional but recommended in windy areas).
Next, apply the foam weather stripping around the sides and top of the window opening. This prevents drafts and keeps bugs out. I like to cut the foam into 6-inch strips and press them in place—no adhesive needed, just friction.
Step 6: Plug It In and Test
Plug the AC into a grounded electrical outlet. Make sure the outlet is on a dedicated circuit—don’t share it with other high-power devices like microwaves or space heaters.
Turn it on using the remote or the control panel. You should hear a soft hum, and cool air should start flowing within seconds. If it’s silent or making odd noises, check the Windmill air conditioner instructions for troubleshooting (more on that later).
Using the Remote and Control Panel Like a Pro
The Windmill AC doesn’t just cool your room—it does it with style. The remote and control panel are designed to be intuitive, but there are a few features worth highlighting to get the most out of your unit.
Understanding the Remote Controls
The remote has six main buttons:
- Power – Turns the unit on/off.
- Mode – Cycles through Cool, Dry, Fan, and Eco modes.
- Fan Speed – Low, Medium, High, or Auto (adjusts based on room temp).
- Temperature – Set your ideal temp (60°F to 86°F).
- Timer – Schedule on/off times (great for saving energy).
- Sleep – Gradually adjusts temp for comfort while sleeping.
One of my favorite features? The Auto mode. The AC senses the room temperature and adjusts fan speed and cooling output automatically. No more waking up freezing or sweating at 3 a.m.
Control Panel Basics
The front panel has LED indicators for power, mode, and temperature. If you lose the remote (or your dog chews it—true story), you can still control the AC manually by pressing the power button on the unit.
To access the control panel:
- Press the small button on the right side of the front panel.
- The panel slides out, revealing the control buttons and the filter.
Pro tip: Keep the remote in the magnetic holder on the side of the unit. I’ve lost remotes in couch cushions, under rugs, and once in the fridge. The magnetic holder is a game-changer.
Smart Features and App Integration
Windmill offers optional app integration via Wi-Fi. Download the Windmill app, connect your AC to your home network, and you can:
- Control the AC from anywhere (turn it on before you get home).
- Monitor energy usage.
- Set custom schedules.
- Receive filter change reminders.
The app setup is straightforward—just follow the in-app prompts. I connected mine in under five minutes. Just make sure your Wi-Fi signal is strong near the window.
Maintenance and Care to Keep Your AC Running Smoothly
Let’s be real: No one wants to spend their summer fixing a broken AC. The good news? The Windmill air conditioner instructions make maintenance easy. A little care goes a long way in keeping your unit efficient and long-lasting.
Cleaning the Air Filter (Every 2-4 Weeks)
The filter traps dust, pollen, and pet hair. A clogged filter reduces airflow and efficiency. Here’s how to clean it:
- Turn off and unplug the AC.
- Press the side button to slide out the control panel.
- Pull out the filter (it’s held in place by small tabs).
- Rinse it under lukewarm water. No soap—just water.
- Let it dry completely (about 30 minutes).
- Reinsert it.
I clean mine every three weeks during peak summer. If you have pets or allergies, do it weekly. A clean filter can save up to 15% on energy costs.
Checking the Drain Pan and Hose
The AC removes moisture from the air, which collects in the drain pan. In high-humidity areas, this pan can overflow. To prevent this:
- Check the pan monthly (you can see it through the front panel).
- If it’s full, unplug the AC and empty it.
- For continuous drainage, attach the drain hose to the back of the unit and run it to a floor drain or bucket.
I live in Florida, so I use the drain hose year-round. It’s a small addition that saves me from surprise puddles.
Winter Storage Tips
If you don’t use your AC in winter:
- Turn it off and unplug it.
- Clean the filter and wipe down the unit.
- Cover the outside with a plastic bag or tarp to keep debris out.
- Store the remote and manual in a dry place.
One year, I left mine uncovered, and a raccoon turned the back into a nest. Not fun to clean out in the spring.
Troubleshooting Common Issues (And When to Call Support)
Even the best ACs run into hiccups. The Windmill air conditioner instructions include a handy troubleshooting section, but here are the most common issues—and how to fix them fast.
AC Won’t Turn On
Check:
- Is it plugged in? (I’ve done this. More than once.)
- Is the outlet working? Try plugging in a lamp.
- Is the circuit breaker tripped? Reset it.
- Is the remote working? Try the control panel.
If none of these work, the internal fuse might be blown. This requires a technician.
Not Cooling Enough
Possible causes:
- Dirty filter (clean it).
- Blocked airflow (check for furniture in front of the unit).
- Room too large for the AC (Windmill is rated for 300-400 sq ft).
- Hot air sneaking in (check the weather stripping).
I once had a friend who placed a bookshelf right in front of her AC. The unit was working fine—it just couldn’t push air around the shelf.
Water Leaking Inside
This usually means:
- The unit isn’t tilted enough (adjust the front up slightly).
- The drain pan is full (empty it).
- The seal around the window is broken (reapply weather stripping).
Pro tip: Place a small tray under the unit as a backup. I use a baking sheet—it catches drips and is easy to clean.
Unusual Noises
Some noise is normal, but loud bangs, rattles, or grinding sounds aren’t.
- Bang: Loose part (check screws and panels).
- Rattle: Debris in the fan (turn off and inspect).
- Grinding: Motor issue (call support).
Energy Efficiency and Cost Comparison
Let’s talk numbers. How much does a Windmill AC cost to run, and how does it compare to other models?
The Windmill AC has an Energy Efficiency Ratio (EER) of 12.1, which is above average for window units. It uses about 900 watts on high, but in Auto mode, it adjusts to match the room’s needs—saving energy and money.
| Model | Cooling Capacity (BTU) | EER | Avg. Monthly Cost (8 hrs/day) | Noise Level (dB) |
|---|---|---|---|---|
| Windmill 10,000 BTU | 10,000 | 12.1 | $18.50 | 52 |
| Brand X 10,000 BTU | 10,000 | 10.5 | $22.00 | 58 |
| Brand Y 12,000 BTU | 12,000 | 11.0 | $24.30 | 62 |
Based on U.S. average electricity rates ($0.13/kWh). Costs are approximate and vary by region.
Over a summer (3 months), the Windmill saves you about $17 compared to Brand X and $32 vs. Brand Y. Plus, it’s quieter—52 dB is like a normal conversation, while 62 dB is like a loud TV.
Final Thoughts: Is the Windmill AC Right for You?
After using the Windmill air conditioner for two summers, I can honestly say it’s one of the best purchases I’ve made for my home. The Windmill air conditioner instructions make setup a breeze, the unit is quiet and efficient, and the design is sleek enough that I don’t mind looking at it every day.
It’s not perfect—no AC is. The app could be more robust, and the side panels aren’t as sturdy as metal ones. But for the price, ease of use, and performance, it’s hard to beat. Whether you’re cooling a small apartment, a bedroom, or a home office, the Windmill delivers consistent, reliable comfort.
So if you’re sweating through another summer, take a deep breath. With the right unit—and the right instructions—you’ve got this. Your cool, calm, and collected oasis is just a few steps away.
Frequently Asked Questions
How do I set up my Windmill air conditioner for the first time?
Follow the Windmill air conditioner instructions included in the manual: secure the unit in your window, attach the side panels, connect the exhaust hose, and plug it in. Ensure all components are tightly sealed to prevent air leaks.
Can I use the Windmill AC without the remote control?
Yes, the unit has manual control buttons on the front panel for basic functions like power, fan speed, and mode. However, the remote offers full access to all settings, including timer and sleep mode.
What’s the best way to clean the Windmill air conditioner filter?
Refer to your Windmill air conditioner instructions: remove the filter from the back panel, vacuum loose debris, then wash it with mild soap and water. Let it dry completely before reinstalling to maintain efficiency.
Why is my Windmill AC not cooling properly?
Check if the filter is clogged, the exhaust hose is kinked, or the unit is set to “Fan” mode instead of “Cool.” Also, verify that the room isn’t excessively hot or humid, as this can strain the system.
How often should I drain the water tank on my Windmill AC?
Most models are self-evaporative, so manual draining is rarely needed. If the tank fills, the unit will shut off automatically—empty it when the indicator light turns on, following the instructions in your manual.
Can I install the Windmill air conditioner in a sliding window?
Yes, but you’ll need an adjustable window seal kit (sold separately) to secure the unit. Follow the Windmill air conditioner instructions for custom setups to ensure a snug, weatherproof fit.