

If your LG air conditioner is leaking water, it’s usually due to a clogged drain line, dirty air filter, or frozen evaporator coil. These issues disrupt normal condensation flow and can lead to water damage if ignored. The good news? Most leaks are preventable with regular maintenance and simple troubleshooting steps.
Key Takeaways
- Clogged condensate drain line: The most common cause of leaks; debris and algae block water flow, causing overflow.
- Dirty or clogged air filter: Restricts airflow, leading to frozen coils that melt and drip excess water.
- Frozen evaporator coil: Ice buildup from poor airflow or low refrigerant melts and overwhelms the drain pan.
- Improper installation or leveling: If the unit isn’t level, water can’t drain properly and pools inside.
- Damaged or cracked drain pan: Over time, pans can rust or crack, allowing water to escape.
- Low refrigerant levels: Causes coils to freeze and later thaw, increasing water production.
- Excessive humidity or high usage: Can overwhelm the drainage system during peak cooling periods.
📑 Table of Contents
Why Is My LG Air Conditioner Leaking? Understanding the Basics
If you’ve noticed water pooling around your LG air conditioner, you’re not alone. Leaking AC units are one of the most common complaints among homeowners, especially during hot summer months when the system runs constantly. While it might seem alarming at first, most leaks are not signs of a major breakdown—they’re often symptoms of manageable issues that can be fixed with a bit of know-how and regular care.
Air conditioners naturally produce condensation as they cool your home. Warm air passes over the cold evaporator coils, causing moisture in the air to condense into water droplets. This water is supposed to drip into a drain pan and exit your home through a condensate drain line. But when something goes wrong in this process—like a clog, a blockage, or a mechanical issue—the water has nowhere to go. That’s when you start seeing leaks on the floor, walls, or ceiling near your indoor unit.
LG air conditioners are known for their reliability and energy efficiency, but like any HVAC system, they require maintenance to perform at their best. A leaking LG AC doesn’t necessarily mean the unit is faulty. In fact, many leaks stem from simple oversights—like forgetting to change the air filter or ignoring routine cleaning. The key is to act quickly. Ignoring a leak can lead to water damage, mold growth, and even electrical hazards. The sooner you identify the cause, the easier (and cheaper) it is to fix.
Common Causes of LG Air Conditioner Leaks
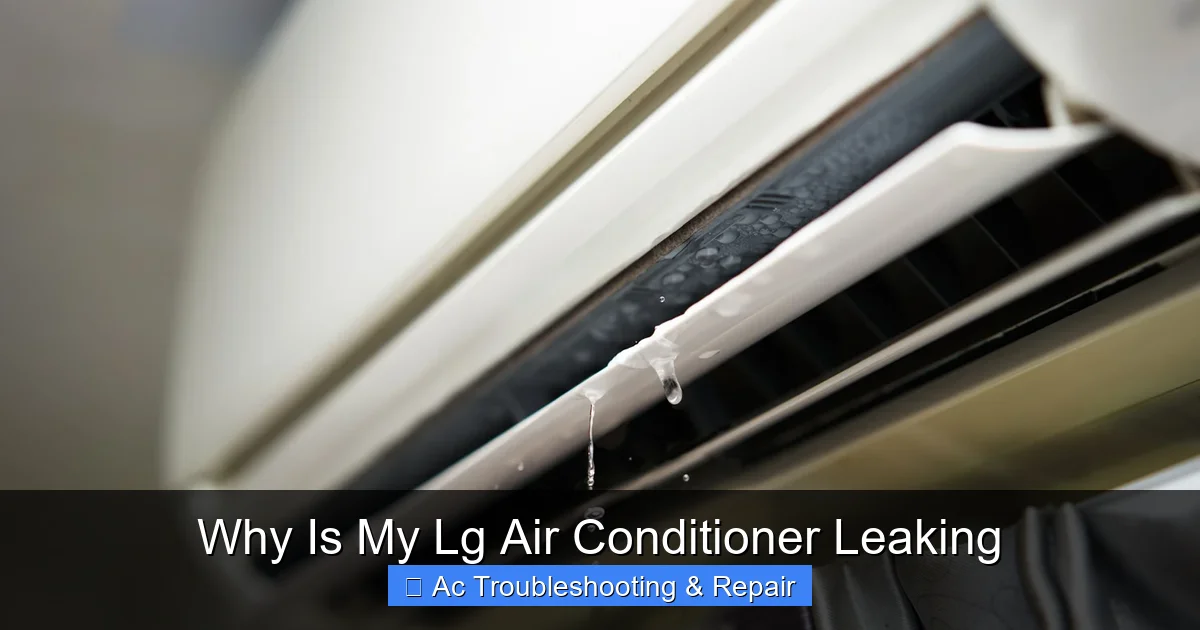
Visual guide about Why Is My Lg Air Conditioner Leaking
Image source: hvacseer.com
Understanding why your LG air conditioner is leaking starts with knowing how it’s supposed to work. When everything is functioning properly, condensation is collected and safely drained away. But when one part of the system fails, the whole process breaks down. Let’s break down the most frequent culprits behind AC leaks.
Clogged Condensate Drain Line
The condensate drain line is a small PVC or rubber tube that carries water from the indoor unit to the outside of your home. Over time, this line can become clogged with dirt, dust, mold, or algae—especially in humid environments. When the drain line is blocked, water backs up into the drain pan and eventually overflows, causing a leak.
This is one of the most common reasons for LG air conditioner leaks. You might notice water dripping from the indoor unit or pooling on the floor beneath it. In some cases, you’ll even hear gurgling sounds as air tries to push through the clogged line.
The good news? Cleaning the drain line is relatively simple. You can use a wet/dry vacuum to suck out the blockage or flush it with a mixture of water and vinegar to dissolve algae buildup. For persistent clogs, consider installing a drain line trap or algae treatment tablet to prevent future issues.
Dirty or Clogged Air Filter
Your air filter plays a crucial role in maintaining airflow through the system. When it becomes clogged with dust, pet dander, or debris, it restricts the amount of air flowing over the evaporator coils. This reduced airflow causes the coils to get too cold and freeze over. Once the system shuts off or the ice begins to melt, the excess water can overwhelm the drain pan and cause a leak.
If your LG air conditioner is leaking and you haven’t changed the filter in the last 1–3 months, this is likely the cause. Check the filter—if it’s gray and dirty, replace it with a new one. Most experts recommend changing filters every 30 to 90 days, depending on usage and air quality.
A clean filter not only prevents leaks but also improves efficiency, reduces energy bills, and extends the life of your AC unit. It’s one of the easiest and most effective maintenance tasks you can do.
Frozen Evaporator Coil
The evaporator coil is where the magic happens—it absorbs heat from your home’s air to cool it down. But if the coil gets too cold, it can freeze over. This usually happens when airflow is restricted (due to a dirty filter or blocked vents) or when refrigerant levels are low.
When the coil freezes, ice builds up and eventually melts when the system cycles off. The resulting water can exceed the capacity of the drain pan, leading to leaks. You might also notice reduced cooling performance or the AC turning on and off frequently.
To fix a frozen coil, turn off the AC and let the ice melt completely. Check the air filter and replace it if needed. Make sure all vents and registers are open and unobstructed. If the problem persists, it could indicate a refrigerant leak or a malfunctioning thermostat—issues that require professional attention.
Improper Installation or Leveling
Even the best LG air conditioner can leak if it’s not installed correctly. One critical factor is the unit’s level. The indoor unit (typically a wall-mounted or ceiling cassette) must be installed slightly tilted toward the drain outlet so that water flows naturally into the drain line.
If the unit is level or tilted the wrong way, water can pool in the drain pan and overflow. This is especially common in DIY installations or when the unit has shifted over time due to vibrations or settling.
To check the level, use a bubble level on the indoor unit’s base. If it’s not tilted correctly, you may need to adjust the mounting brackets or call a technician to reposition the unit. Proper installation ensures that condensation drains efficiently and prevents water damage.
Damaged or Cracked Drain Pan
The drain pan sits beneath the evaporator coil and collects condensation before it flows into the drain line. Over time, especially in older units, the pan can rust, crack, or warp—particularly if it’s made of metal. Plastic pans are more resistant to corrosion but can still crack due to impact or wear.
A damaged drain pan won’t hold water, so even a small amount of condensation can leak onto the floor. You might notice water stains, dampness, or a musty smell near the indoor unit.
Inspecting the drain pan requires removing the front panel of the unit. Look for cracks, rust spots, or standing water. If the pan is damaged, it should be replaced. In some cases, a temporary fix with waterproof sealant might work, but a full replacement is the best long-term solution.
Low Refrigerant Levels
Refrigerant is the substance that absorbs heat from your home’s air. If your LG air conditioner is low on refrigerant—due to a leak or improper charging during installation—the evaporator coil can become excessively cold and freeze. When the ice melts, it produces more water than the system can handle, leading to leaks.
Low refrigerant also reduces cooling efficiency, so you might notice your home isn’t getting as cool as it used to. Other signs include hissing sounds (indicating a leak), ice buildup on the outdoor unit, or higher-than-normal energy bills.
Refrigerant issues should always be handled by a licensed HVAC technician. Adding refrigerant without fixing the underlying leak is only a temporary fix and can be dangerous if not done properly. A professional can locate the leak, repair it, and recharge the system to the correct level.
How to Diagnose a Leaking LG Air Conditioner
Now that you know the common causes, it’s time to figure out what’s actually causing your LG air conditioner to leak. Diagnosing the problem doesn’t require special tools—just a little observation and some basic troubleshooting.
Start by turning off the AC and unplugging it for safety. Then, inspect the area around the indoor unit. Look for water stains, puddles, or damp carpet. Note where the water is coming from—is it dripping from the front, side, or bottom of the unit?
Next, check the air filter. Remove it and hold it up to the light. If you can’t see through it, it’s time for a replacement. A dirty filter is a quick and easy fix that could solve the entire problem.
If the filter is clean, inspect the drain pan. Remove the front panel (usually held by screws or clips) and look inside. Is there standing water? Is the pan cracked or rusted? Use a flashlight to get a better view.
Then, locate the condensate drain line. It’s usually a small white or gray tube exiting the wall near the indoor unit. Check if it’s clogged by gently squeezing it or using a wet/dry vacuum to suction out any debris. You can also pour a cup of water into the drain line to see if it flows freely.
If the drain line is clear and the pan is intact, the issue might be more complex—like a frozen coil or low refrigerant. In these cases, it’s best to call a professional. Attempting to fix refrigerant issues or internal components without proper training can be dangerous and may void your warranty.
Step-by-Step Fixes for a Leaking LG Air Conditioner
Once you’ve identified the cause, it’s time to take action. Many LG air conditioner leaks can be resolved with simple DIY steps. Here’s how to tackle the most common issues.
Cleaning the Condensate Drain Line
Turn off the power to the AC unit. Locate the drain line—usually a small tube near the indoor unit. Disconnect it from the drain pan if possible. Use a wet/dry vacuum to suction out any clogs from the open end. Alternatively, flush the line with a mixture of 1 part vinegar and 1 part water to kill algae and dissolve debris. Reconnect the line and test by pouring a small amount of water into the pan to ensure it drains properly.
Replacing the Air Filter
Turn off the AC and locate the filter slot, typically behind the front panel. Slide out the old filter and note its size and type. Purchase a matching replacement (common sizes include 16x20x1 or 20x25x1). Insert the new filter with the arrow pointing toward the unit (indicating airflow direction). Close the panel and turn the AC back on.
Thawing a Frozen Evaporator Coil
Turn off the AC and switch the fan to “on” to help melt the ice. Wait 4–6 hours for the coil to thaw completely. Once melted, check the air filter and replace it if dirty. Ensure all vents are open and unobstructed. Turn the AC back on and monitor for leaks. If the coil freezes again, call a technician.
Checking and Adjusting Unit Level
Use a bubble level to check if the indoor unit is tilted correctly. It should slope slightly toward the drain outlet (about 1/4 inch per foot). If not, adjust the mounting brackets or shim the unit as needed. This may require removing the unit from the wall, so proceed carefully or consult a professional.
Replacing a Damaged Drain Pan
Turn off power and remove the front panel. Disconnect the drain line and any electrical connections. Unscrew the old pan and carefully remove it. Install the new pan, ensuring it’s properly aligned and sealed. Reconnect the drain line and electrical components. Test the system to confirm no leaks.
Preventing Future Leaks in Your LG Air Conditioner
The best way to deal with a leaking LG air conditioner is to stop it before it starts. Regular maintenance is the key to preventing water damage and keeping your system running efficiently.
Schedule Routine Maintenance
Have a licensed HVAC technician inspect your LG air conditioner at least once a year—preferably before the cooling season begins. They’ll clean the coils, check refrigerant levels, inspect the drain line, and ensure all components are in good working order.
Change the Air Filter Regularly
Set a reminder to check your air filter every month and replace it every 1–3 months. This simple task improves airflow, prevents frozen coils, and reduces the risk of leaks.
Keep the Area Around the Unit Clean
Make sure the indoor unit is free of dust, pet hair, and debris. Vacuum the front panel and vents regularly. Keep the area around the outdoor unit clear of leaves, grass, and other obstructions.
Install a Drain Line Alarm
Consider installing a condensate drain pan overflow switch or alarm. These devices detect water in the pan and automatically shut off the AC to prevent leaks. They’re especially useful if your unit is in a hard-to-reach location.
Monitor Humidity Levels
High indoor humidity can increase condensation and strain the drainage system. Use a dehumidifier in damp areas like basements or laundry rooms. Keep windows and doors closed when the AC is running to maintain consistent humidity.
When to Call a Professional
While many LG air conditioner leaks can be fixed at home, some issues require expert attention. Don’t hesitate to call a licensed HVAC technician if:
– The leak persists after cleaning the drain line and replacing the filter.
– You suspect a refrigerant leak (hissing sounds, ice on the outdoor unit).
– The evaporator coil is repeatedly freezing.
– The drain pan is rusted or cracked and needs replacement.
– The unit was improperly installed or is not level.
Attempting to fix complex electrical or refrigerant issues without proper training can be dangerous and may void your warranty. A professional has the tools and expertise to diagnose and repair the problem safely and effectively.
Conclusion
A leaking LG air conditioner is rarely a sign of a major failure—but it’s always a signal that something needs attention. Whether it’s a clogged drain line, a dirty filter, or a frozen coil, most leaks are preventable with regular maintenance and timely repairs. By understanding the common causes and knowing how to diagnose and fix them, you can keep your home cool, dry, and comfortable all summer long.
Don’t ignore the drip. A small leak today can lead to big problems tomorrow. Take action now—clean that filter, check the drain line, and schedule a professional tune-up if needed. Your LG air conditioner will thank you with reliable performance and years of trouble-free cooling.
Frequently Asked Questions
Why is my LG air conditioner leaking water inside the house?
Your LG air conditioner may be leaking due to a clogged condensate drain line, dirty air filter, or frozen evaporator coil. These issues prevent proper drainage of condensation, causing water to overflow and drip inside your home.
Can a dirty air filter cause my LG AC to leak?
Yes, a dirty air filter restricts airflow, which can cause the evaporator coil to freeze. When the ice melts, it produces excess water that may overwhelm the drain pan and lead to leaks.
How do I clean the condensate drain line on my LG air conditioner?
Turn off the power, locate the drain line, and use a wet/dry vacuum to remove clogs. You can also flush it with a vinegar-water solution to dissolve algae and debris.
Is it safe to use my LG air conditioner if it’s leaking?
It’s best to turn it off until the leak is fixed. Continuing to run a leaking AC can cause water damage, mold growth, or electrical hazards.
How often should I replace the air filter in my LG air conditioner?
Replace the air filter every 1–3 months, depending on usage, pets, and air quality. A clean filter improves efficiency and prevents leaks.
Should I call a professional if my LG air conditioner is leaking?
Yes, if the leak persists after basic troubleshooting, or if you suspect a refrigerant leak or electrical issue, contact a licensed HVAC technician for safe and proper repair.