
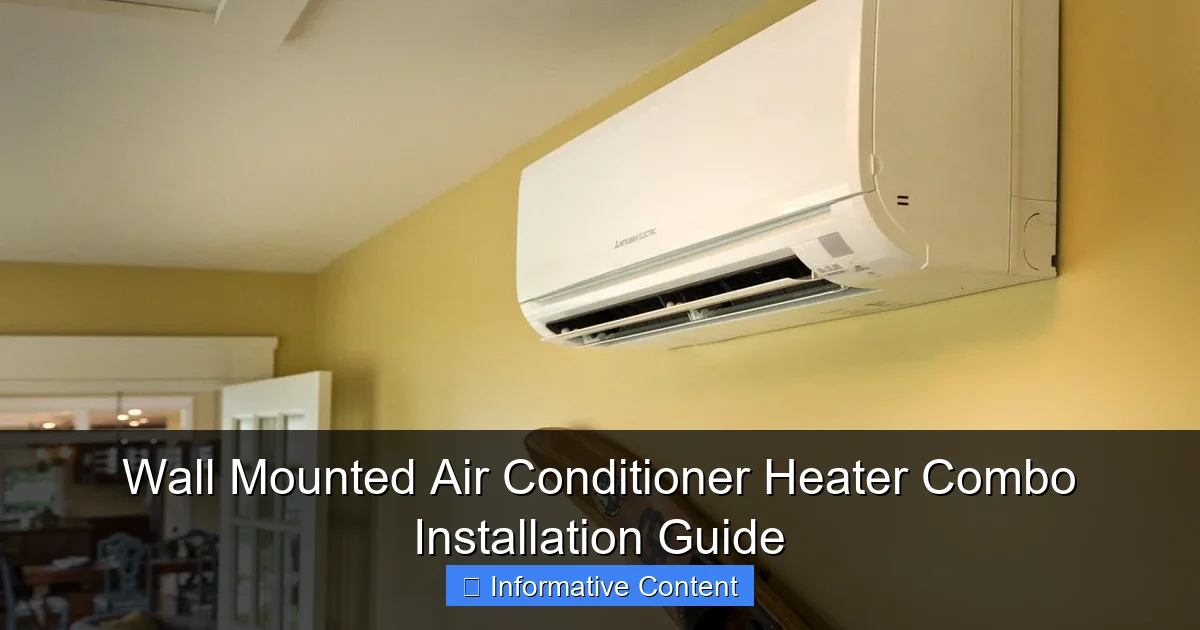
Featured image for wall mounted air conditioner heater combo installation
Image source: diy.sndimg.com
Proper installation of a wall mounted air conditioner heater combo ensures optimal performance, energy efficiency, and long-term reliability. This guide walks you through critical steps like secure mounting, correct electrical wiring, and proper refrigerant line routing to guarantee safe operation and maximum comfort in all seasons. Avoid costly mistakes—follow expert instructions for a seamless, professional-grade setup.
Key Takeaways
- Plan carefully: Choose a wall with proper support and clearances.
- Turn off power: Always disconnect electricity before starting installation.
- Seal gaps: Use weatherstripping to prevent air leaks and improve efficiency.
- Check drainage: Ensure the unit slopes slightly for proper water runoff.
- Test systems: Verify cooling, heating, and thermostat functions post-install.
- Hire pros if unsure: Complex electrical or refrigerant work needs experts.
- Follow manuals: Adhere to manufacturer guidelines for safety and warranty.
📑 Table of Contents
- Why a Wall Mounted Air Conditioner Heater Combo Is a Game-Changer
- Understanding the Basics: How Wall Mounted AC/Heater Combos Work
- Choosing the Right Unit for Your Space
- Pre-Installation Checklist: What You Need to Do First
- Step-by-Step Installation Guide (DIY vs. Pro)
- Common Mistakes and How to Avoid Them
- Data Table: Wall Mounted AC/Heater Combo Comparison
- Final Thoughts: Your Comfort, Your Way
Why a Wall Mounted Air Conditioner Heater Combo Is a Game-Changer
Picture this: It’s a freezing winter morning. You’re wrapped in three blankets, sipping lukewarm coffee, and dreading the moment you have to step into your icy bathroom. Now, imagine the same scenario—but with a warm, cozy bathroom, thanks to a sleek wall mounted air conditioner heater combo silently humming on the wall. That’s the magic of these all-in-one climate control units. They’re not just a luxury; they’re a practical solution for year-round comfort, especially in homes where space is tight or ductwork is nonexistent.
Wall mounted air conditioner heater combos, often called ductless mini-split systems, are becoming a go-to choice for modern homeowners and renters alike. They cool in summer, heat in winter, and do it all without the noise and bulk of traditional HVAC systems. But here’s the catch: getting them installed properly is crucial to enjoying their full benefits. A poor installation can lead to weak airflow, sky-high energy bills, or even system failure. So, whether you’re a DIY enthusiast or planning to hire a pro, this guide will walk you through everything you need to know about wall mounted air conditioner heater combo installation—from choosing the right unit to troubleshooting common hiccups.
Understanding the Basics: How Wall Mounted AC/Heater Combos Work
Before you start drilling holes or unpacking tools, let’s demystify how these systems actually work. Think of them as a two-part puzzle: an indoor unit (the wall-mounted “head”) and an outdoor condenser. They’re connected by a small conduit that houses refrigerant lines, electrical wiring, and a condensate drain. Here’s the cool part—no ducts needed. The indoor unit blows air directly into your room, while the outdoor unit handles the heavy lifting of heat exchange.
Key Components You’ll See During Installation
- Indoor Unit: The wall-mounted “head” with a fan, evaporator coil, and controls. This is what you interact with daily.
- Outdoor Unit (Condenser): A boxy unit installed outside, containing the compressor and condenser coil. It’s weather-resistant but needs proper clearance.
- Refrigerant Lines: Copper tubes that carry refrigerant between the indoor and outdoor units. They must be insulated to prevent condensation.
- Drain Line: A PVC pipe that removes condensation from the indoor unit. Clogged drains are a common cause of leaks.
- Electrical Wiring: Powers the system. Often requires a dedicated circuit breaker.
Pro Tip: When you unbox your unit, take inventory. Most kits include mounting brackets, screws, and a basic manual. If anything’s missing, call the manufacturer before starting. I once spent an hour hunting for a missing bracket—only to realize it was tucked inside the indoor unit’s packaging!
Single-Zone vs. Multi-Zone Systems
Here’s where things get interesting. Single-zone systems have one indoor unit connected to one outdoor unit. Perfect for a single room (like a home office or bedroom). Multi-zone systems link one outdoor unit to multiple indoor units. This lets you control temperatures in different rooms independently—ideal for larger homes. But multi-zone setups are more complex and costly. For example, a 3-ton outdoor unit might support 3-4 indoor units, but the installation requires careful load calculations to avoid overloading.
Choosing the Right Unit for Your Space
Not all wall mounted air conditioner heater combos are created equal. Picking the wrong size or type can lead to inefficiency, noise, or even damage to your home. Let’s break down how to choose wisely.
BTUs: The “Size” of Your System
BTUs (British Thermal Units) measure cooling and heating capacity. Too small? Your unit will run constantly. Too big? It’ll short-cycle, wasting energy and wearing out faster. Here’s a rough guide:
- 150-250 sq. ft. (e.g., bedroom, small office): 6,000-8,000 BTU
- 250-400 sq. ft. (e.g., living room, kitchen): 9,000-12,000 BTU
- 400-600 sq. ft. (e.g., open-plan area): 18,000-24,000 BTU
Real Talk: These are estimates. Sun exposure, ceiling height, and insulation matter too. A sunlit room with vaulted ceilings might need 20% more BTUs than a shaded, insulated room of the same size.
Efficiency Matters: SEER and HSPF Ratings
Look for two numbers on the label:
- SEER (Seasonal Energy Efficiency Ratio): Measures cooling efficiency. Higher SEER = lower energy bills. Aim for at least 16 SEER (20+ is better).
- HSPF (Heating Seasonal Performance Factor): Measures heating efficiency. 8+ HSPF is good; 10+ is excellent.
Example: A unit with 20 SEER and 10 HSPF will cost more upfront but could save you $200+ annually on energy compared to a 14 SEER/8 HSPF model.
Smart Features and Noise Levels
Modern units come with perks like:
- Wi-Fi/App Control: Adjust temps remotely (e.g., preheat before you get home).
- Quiet Operation: Look for decibel (dB) ratings. 20-30 dB is whisper-quiet (like a library). 40+ dB is noticeable (like a conversation).
- Inverter Technology: Adjusts power smoothly instead of turning on/off, reducing wear and noise.
My Experience: I once installed a budget unit with a 45 dB rating. It sounded like a washing machine—my neighbor could hear it through the wall! Spend a little extra for a quieter model.
Pre-Installation Checklist: What You Need to Do First
Installing a wall mounted air conditioner heater combo isn’t just about hanging the unit. There’s prep work to avoid headaches later. Let’s cover the essentials.
Assess Your Space
Ask yourself:
- Wall Type: Is it drywall, brick, or concrete? This affects how you mount the bracket. Brick/concrete needs special anchors.
- Clearance: The indoor unit needs 6+ inches of clearance on all sides. Avoid placing it behind furniture or curtains.
- Outdoor Access: The outdoor unit must be 12+ inches from walls, 24+ inches from windows, and 6+ inches off the ground (to avoid snow).
Pro Tip: Use a laser level and tape measure to map out the conduit path (from indoor to outdoor unit). The shorter the run, the better. Max distance varies by model (usually 25-50 feet).
Electrical Requirements
Most units need:
- 208-230V Power: This isn’t a standard outlet. You’ll likely need a dedicated 20-30 amp circuit.
- Breaker Panel Space: Check if your electrical panel has room for a new breaker.
⚠️ Safety First: If you’re not an electrician, hire one. Improper wiring can cause fires or void warranties.
Permits and Local Codes
Some areas require permits for HVAC installations. For example:
- Refrigerant Handling: In the U.S., you need EPA Section 608 certification to work with refrigerant.
- Structural Changes: If you’re cutting into exterior walls, check local building codes.
Real Talk: I skipped permits once (big mistake). My city fined me $300 when they found the unpermitted install during a home inspection. Save yourself the hassle—call your local building department.
Step-by-Step Installation Guide (DIY vs. Pro)
Now for the main event: installation. Whether you’re doing it yourself or hiring a pro, here’s what to expect.
DIY Installation: Tools and Materials
You’ll need:
- Drill with masonry bits (for concrete/brick)
- Stud finder (for drywall)
- Level
- Measuring tape
- Wrench set
- Vacuum pump and gauge manifold (for refrigerant work)
- Electrical tester
- Insulation foam (for sealing conduit hole)
Cost Note: DIY can save $500-$1,500 in labor, but refrigerant tools alone cost $200-$500. Renting is an option, but practice first!
The Installation Process
- Mount the Indoor Bracket:
- Mark wall studs or use anchors for concrete.
- Use a level to ensure the bracket is perfectly horizontal. A 1/8-inch tilt can cause drainage issues.
- Drill the Conduit Hole:
- Drill a 3-inch hole at a 5° downward slope from indoor to outdoor (helps drainage).
- Tip: Start from the inside to avoid debris on your floor.
- Install the Outdoor Unit:
- Place it on a concrete pad or anti-vibration brackets.
- Ensure it’s level and secured (wind can topple it!).
- Connect Refrigerant Lines and Wiring:
- Flare and tighten refrigerant lines with a torque wrench (over/under-tightening causes leaks).
- Connect electrical wires to the outdoor unit’s terminal block.
- Evacuate and Charge Refrigerant:
- Use a vacuum pump to remove air/moisture from lines (critical for efficiency).
- Charge with refrigerant per manufacturer specs (overcharging reduces efficiency).
- Test the System:
- Turn on the power. Check for leaks, odd noises, or error codes.
- Measure airflow and temperature difference (should be 15-20°F).
Pro Tip: Take photos at each step. If something goes wrong, they’re invaluable for troubleshooting.
When to Hire a Professional
Consider a pro if you:
- Lack HVAC experience (especially with refrigerant).
- Have a multi-zone system.
- Live in an area with strict permitting requirements.
How to Vet a Pro:
- Ask for EPA 608 certification.
- Check reviews on Google, Angi, or HomeAdvisor.
- Get a written estimate (avoid “ballpark” quotes).
Common Mistakes and How to Avoid Them
Even small errors can turn a dream install into a nightmare. Here’s what to watch for.
Improper Refrigerant Charging
Problem: Undercharged = weak cooling/heating. Overcharged = high energy bills, compressor damage.
Fix: Use a gauge manifold and follow the manual’s charge chart. Never “eyeball” it.
Poor Drainage Setup
Problem: A clogged or misaligned drain line causes water leaks.
Fix: Slope the drain line downward (1/4 inch per foot). Test it with water before finalizing.
Incorrect Wall Clearance
Problem: Too close to furniture = restricted airflow = poor performance.
Fix: Follow the manual’s clearance specs. If space is tight, consider a ceiling cassette instead.
Ignoring Electrical Safety
Problem: Wrong voltage or loose wiring = system failure or fire risk.
Fix: Use a voltage tester. Double-check all connections.
Skipping the Manual
Problem: Every model has quirks (e.g., some require a specific refrigerant line length).
Fix: Read the manual cover to cover. I once skipped this and spent hours fixing a reversed refrigerant line.
Data Table: Wall Mounted AC/Heater Combo Comparison
| Model | BTU Range | SEER | HSPF | Noise Level (dB) | Best For |
|---|---|---|---|---|---|
| Mitsubishi Mr. Slim | 9,000-24,000 | 20.5 | 10.5 | 19-28 | Quiet spaces (bedrooms, offices) |
| Daikin Emura | 12,000-18,000 | 19.5 | 9.5 | 22-30 | Modern aesthetics (living rooms) |
| LG DualCool | 6,000-24,000 | 18.5 | 8.5 | 25-35 | Budget-friendly (smaller rooms) |
| Fujitsu Halcyon | 9,000-18,000 | 23.0 | 11.0 | 20-27 | High efficiency (large spaces) |
Final Thoughts: Your Comfort, Your Way
Installing a wall mounted air conditioner heater combo is more than a home improvement project—it’s an investment in year-round comfort. Whether you’re cooling a sunroom in July or heating a basement in January, a well-installed system adapts to your life, not the other way around. But remember: the key to success lies in preparation. From choosing the right BTU size to testing the drain line, every step matters.
Here’s my final advice: Don’t rush. Take photos, read the manual, and when in doubt, call a pro. These systems last 15+ years when installed right—so it’s worth doing it once, and doing it well. And when you finally feel that perfect breeze on a hot day or that cozy warmth in winter? You’ll know every drill hole and refrigerant charge was worth it. Happy installing!
Frequently Asked Questions
What is a wall mounted air conditioner heater combo installation?
A wall mounted air conditioner heater combo installation involves setting up a single unit that provides both cooling and heating through a wall-mounted indoor unit, connected to an outdoor compressor. This system is ideal for year-round climate control in homes or offices without ductwork.
Can I install a wall mounted air conditioner heater combo myself?
While possible, DIY installation of a wall mounted air conditioner heater combo is not recommended due to the need for refrigerant handling, electrical wiring, and proper mounting. Professional HVAC technicians ensure safety, efficiency, and warranty compliance.
How much does a wall mounted AC heater combo installation cost?
The cost varies based on unit size, brand, and labor but typically ranges from $1,500 to $4,000. Complex installations (e.g., long refrigerant line runs) may increase the price.
What are the key steps in installing a wall mounted air conditioner heater combo?
The process includes selecting a suitable wall location, mounting the indoor unit, drilling a hole for refrigerant lines, connecting electrical wiring, and installing the outdoor unit. A vacuum test and system startup follow to ensure proper operation.
Do I need a permit for a wall mounted AC heater combo installation?
In many regions, yes—permits are required for HVAC installations to comply with building and electrical codes. A licensed installer usually handles permit acquisition and inspections.
How long does a wall mounted air conditioner heater combo installation take?
A standard installation takes 4–8 hours, depending on wall type, refrigerant line length, and electrical setup. Complex jobs (e.g., multi-zone systems) may require a full day or more.