If you are troubleshooting an AC condenser, check for refrigerant leaks and inspect electrical connections. An AC condenser is an essential component of an air conditioning system that helps release heat from the refrigerant.
If you encounter any issues with your AC condenser, it is important to troubleshoot the problem to ensure optimal performance and functionality. We will guide you through the process of troubleshooting an AC condenser. By following these steps, you will be able to identify common problems, such as refrigerant leaks and faulty electrical connections, and take appropriate action to resolve them.
With proper maintenance and troubleshooting, you can ensure that your AC condenser operates efficiently and provides cool air during hot summer months.

Credit: www.bobvila.com
Signs Of A Faulty Ac Condenser
A well-functioning AC condenser is crucial for the efficient cooling of your home or office. However, like any mechanical system, AC condensers can develop problems over time. Identifying the signs of a faulty AC condenser can help you troubleshoot the issue and ensure a comfortable indoor environment. In this article, we will discuss three common signs that indicate a problem with your AC condenser: not blowing cold air, strange noises coming from the unit, and frequent tripping of the circuit breaker.
Not Blowing Cold Air
If your AC unit is not blowing cold air, it may be a sign that the condenser is not functioning properly. The condenser is responsible for cooling and condensing the refrigerant, which then flows through the air handler and cools the indoor air. When the condenser fails, the refrigerant may not be able to cool down effectively, resulting in warm or lukewarm air blowing out of the vents.
There can be several reasons why the condenser is not blowing cold air. It could be due to a refrigerant leak, a clogged condenser coil, a malfunctioning compressor, or an electrical issue. If you notice that your AC is not providing the desired cooling, it’s essential to contact a professional HVAC technician to inspect and diagnose the problem.
Strange Noises Coming From The Unit
If you hear strange noises coming from your AC unit, it’s a sign that something is amiss with the condenser. A faulty condenser can produce various noises, including grinding, rattling, buzzing, or squealing sounds. These noises may indicate loose or damaged components, such as fan blades, bearings, or motors within the condenser unit.
When the condenser components are worn out or malfunctioning, they can create friction or imbalance, leading to unusual noises. It’s crucial to address these noises promptly as ignored issues can escalate into more significant problems and potentially damage the entire AC system. Contacting an HVAC technician to diagnose and fix the problem is the best course of action.
Frequent Tripping Of The Circuit Breaker
If your AC unit frequently trips the circuit breaker, it could be a sign of a faulty condenser. The condenser requires a significant amount of electrical power to function correctly. When there is an electrical problem in the condenser, such as a short circuit, damaged wiring, or a faulty capacitor, it can overload the electrical system and cause the circuit breaker to trip.
Repeated circuit breaker trips not only disrupt the cooling process but also pose a safety hazard. Ignoring this issue can lead to potential electrical damage or even a fire. To ensure the safe and efficient performance of your AC system, it is essential to have a professional HVAC technician inspect and repair any electrical issues related to the condenser.
Checking Power Supply And Connections
When your AC condenser is not working properly, one of the first things you should check is the power supply and connections. Issues with power supply or faulty connections can prevent your condenser from turning on or functioning efficiently. Follow these simple steps to troubleshoot your AC condenser and ensure that the power supply and connections are in good condition.
Inspecting The Power Cord For Any Damage
Begin by inspecting the power cord of your AC condenser for any signs of damage. Over time, the cord may get frayed, chewed by pets, or exposed to harsh weather conditions, leading to potential power supply issues. Carefully examine the entire length of the cord, checking for any cuts, exposed wires, or other forms of damage.
If you notice any damage, it is crucial to replace the power cord as soon as possible. Continuing to use a damaged cord can be hazardous and may cause electrical problems or pose a safety risk. Contact a professional technician or refer to the manufacturer’s instructions for proper replacement of the power cord.
Verifying That The Unit Is Properly Plugged In
Next, make sure that your AC condenser is properly plugged into a functioning electrical outlet. This may seem like a simple step, but sometimes the connection can become loose or unplugged accidentally. Check that the plug is securely inserted into the outlet and that there are no loose connections.
If the plug appears loose, try inserting it into a different outlet to determine if the issue is with the outlet itself. Additionally, check if there are any power switches or buttons on the condenser unit and ensure they are in the “on” position.
Testing The Circuit Breaker And Fuse Box
In some cases, a tripped circuit breaker or a blown fuse could be the reason behind your AC condenser malfunctioning. To verify if this is the case, locate your home’s circuit breaker panel or fuse box. These are typically found in basements, utility rooms, or garages.
Open the circuit breaker panel or fuse box and visually inspect the corresponding switch or fuse dedicated to your AC condenser. If the switch is in the “off” position or the fuse appears burnt or broken, you will need to reset the breaker or replace the fuse with a new one of the same rating.
It’s essential to remember that opening and working with circuit breaker panels or fuse boxes can be dangerous if you are not experienced or knowledgeable. If you are unsure, it is best to contact a qualified electrician to perform this task.
By following these steps and checking the power supply and connections of your AC condenser, you should be able to troubleshoot basic issues that may be preventing your unit from working correctly. Remember, if these troubleshooting steps do not resolve the problem, it is advisable to seek professional assistance from an HVAC technician to diagnose and repair the issue.
Cleaning And Maintaining The Ac Condenser
In order to keep your AC condenser running efficiently and effectively, regular cleaning and maintenance is essential. Cleaning and maintaining the AC condenser not only improves its performance but also extends its lifespan. In this section, we will discuss some important steps you can take to clean and maintain your AC condenser, ensuring optimal functioning throughout the year.
Clearing Debris And Dirt From The Condenser Coils
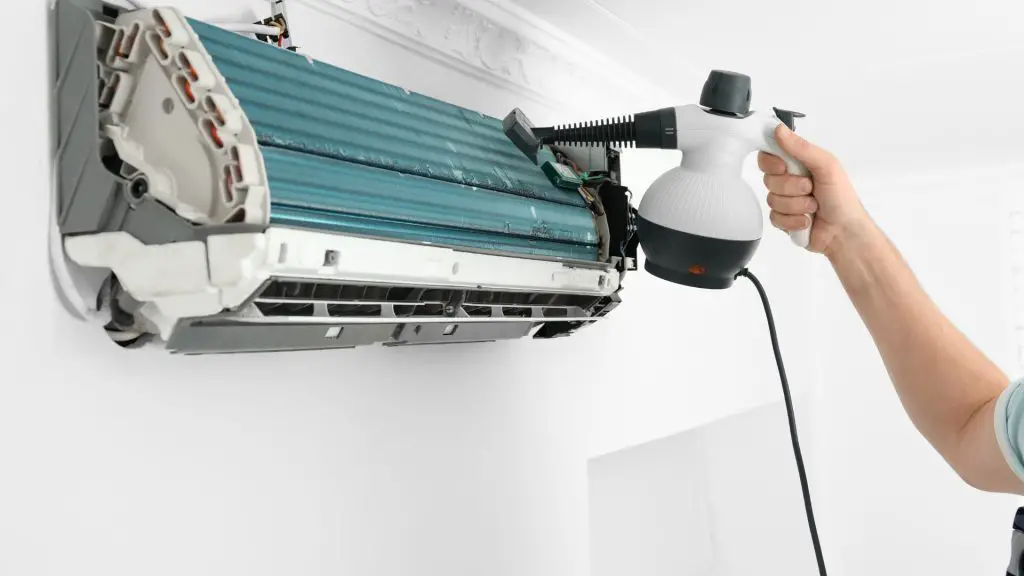
The condenser coils in your AC system play a vital role in cooling the air. Over time, these coils can become clogged with dirt, dust, leaves, and other debris, hindering their ability to transfer heat effectively. To clear the debris from the condenser coils, follow these steps:
- Turn off the power to the AC unit to ensure your safety.
- Use a soft brush or a vacuum cleaner with a brush attachment to gently remove any loose dirt or debris from the coils.
- If the coils are heavily soiled, you can use a commercially available coil cleaner. Follow the instructions on the cleaner and rinse thoroughly with water afterward.
- Be careful not to bend or damage the delicate coil fins while cleaning.
Checking And Replacing The Air Filter
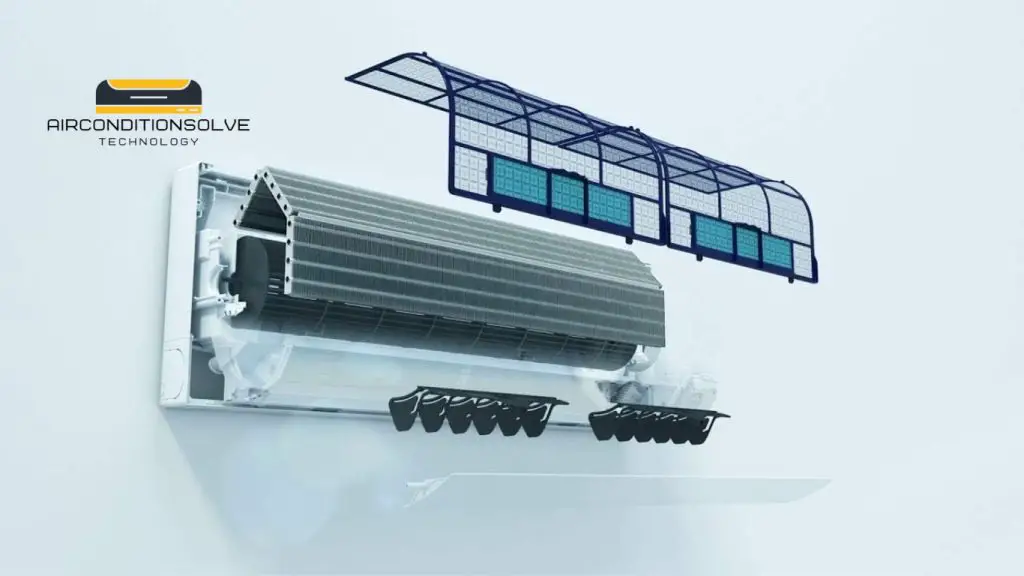
The air filter in your AC system plays a crucial role in keeping the air clean and free of dust and allergens. A clogged or dirty air filter not only affects the air quality but also puts strain on the AC system, leading to reduced efficiency. Follow these steps to check and replace the air filter:
- Locate the air filter, which is typically found in the return air grille or in the air handler unit.
- Remove the air filter and inspect it for dirt and debris. If it appears dirty or clogged, it’s time for a replacement.
- Choose a new filter that matches the size and type specified by the manufacturer.
- Insert the new filter, making sure it fits securely and is facing the correct direction.
- Regularly replace the air filter every 1 to 3 months, depending on the usage and air quality in your area.
Lubricating The Fan Motor And Other Moving Parts
A well-lubricated fan motor and other moving parts in the AC condenser can significantly reduce friction and wear, ensuring smooth operation and preventing damage. Here’s how you can lubricate the fan motor and other moving parts:
| Steps to lubricate fan motor and moving parts |
|---|
| Check the manufacturer’s instructions to identify the specific lubrication points for your AC unit. |
| Using the appropriate lubricant recommended by the manufacturer, apply a few drops to each lubrication point. |
| Avoid over-lubricating, as it can lead to excess grease buildup and attract more dirt. |
| Inspect the fan belt for any signs of wear or tension issues and adjust or replace it as needed. |
By implementing these cleaning and maintenance practices, you can ensure optimal performance and longevity of your AC condenser. Regularly cleaning the condenser coils, checking and replacing the air filter, and lubricating the fan motor and other moving parts will keep your AC unit running smoothly and efficiently, providing you with cool and comfortable air year-round.

Identifying And Fixing Refrigerant Leaks
Identify and fix refrigerant leaks to troubleshoot AC condenser issues efficiently. By addressing leaks promptly, you can prevent further damage and ensure optimal cooling performance for your air conditioning system.
Spotting Signs Of A Refrigerant Leak
If your AC system is not cooling your home as efficiently as before, or if you notice warm air blowing out of the vents, it could be a sign of a refrigerant leak.
Refrigerant leaks can cause a decrease in cooling capacity and may lead to ice buildup on the AC unit. You may also hear hissing or bubbling sounds coming from the AC system, indicating a potential leak. Additionally, if you notice a pungent, sweet smell near your AC unit, it could be a refrigerant leak.
It is important to address refrigerant leaks promptly, as they not only affect the performance of your AC system but can also be harmful to the environment. The release of refrigerant into the atmosphere contributes to ozone depletion and is a known greenhouse gas.
Using A Leak Detection Kit To Locate The Leak
To identify and locate a refrigerant leak accurately, you can use a leak detection kit specifically designed for this purpose. These kits are widely available and often include UV dye and a UV flashlight.
The first step is to turn off the AC system to prevent further loss of refrigerant. Once the system is off, inject the UV dye into the refrigerant lines through the service ports. The dye will circulate through the system and will eventually escape through the leak.
| Step | Action |
|---|---|
| Step 1 | Turn off the AC system. |
| Step 2 | Inject UV dye into the refrigerant lines through the service ports. |
| Step 3 | Wait for the dye to circulate through the system. |
| Step 4 | Use a UV flashlight to inspect the refrigerant lines and components for any signs of UV dye leakage. |
Repairing The Leak And Recharging The System
Once you have identified the location of the refrigerant leak using the leak detection kit, it is time to repair the leak and recharge the AC system.
The exact method of repairing the leak will depend on its size and the type of AC system you have. For small leaks, you can often use a sealant specifically designed for AC systems. This sealant is injected into the refrigerant lines and forms a seal around the leak, preventing further refrigerant loss.
- Turn off the AC system.
- Identify and mark the location of the leak using the UV dye.
- If the leak is small, inject a suitable AC sealant into the refrigerant lines.
- For larger leaks or damaged components, it is recommended to consult a professional AC technician for repairs.
After the leak has been repaired, the next step is to recharge the AC system with the appropriate amount of refrigerant. This is typically done by a trained technician using specialized equipment to ensure proper pressure and refrigerant levels.
By properly identifying and fixing refrigerant leaks, you can restore the efficiency and performance of your AC system while also reducing environmental impact.

Troubleshooting Common AC Condenser Issues
Problems with your AC condenser can disrupt your comfort during hot summer days. Understanding common issues and their troubleshooting steps can help you save time and money. This section will guide you through some of the most frequent AC condenser problems, including frozen coils, fan motor failure, and capacitor issues. Let’s dive in!
Frozen Coils: Causes And Solutions
When your AC unit’s coils freeze, it can affect the cooling efficiency of your system. Several factors can contribute to this issue:
- Poor airflow caused by dirty air filters or clogged vents.
- Low refrigerant levels resulting from leaks.
- Thermostat settings that are too low.
- A malfunctioning fan or blower motor.
To resolve frozen coil problems, follow these troubleshooting steps:
- Check and replace air filters: Dirty filters restrict airflow, leading to freezing coils. Regularly clean or replace filters according to your manufacturer’s recommendations.
- Clear obstructions: Ensure that there are no blockages or debris around the condenser unit’s vents and fan to maintain proper airflow.
- Inspect refrigerant levels: If you suspect a refrigerant leak, contact a professional HVAC technician to locate and repair it.
- Adjust thermostat settings: Raise the temperature setting to prevent the AC from running excessively, causing coils to freeze.
- Check the fan motor: Move on to the next section if you suspect a faulty fan or blower motor.
Fan Motor Not Working: Potential Fixes
When your AC condenser’s fan motor fails, proper heat dissipation becomes difficult, leading to poor cooling performance. Here are potential fixes for fan motor issues:
- Check power supply: Make sure the unit is receiving power and the circuit breaker hasn’t tripped.
- Inspect wiring connections: Loose or damaged electrical connections can prevent the fan motor from running. If you notice any issues, seek professional assistance.
- Test capacitor: Move on to the next section if you suspect capacitor problems.
- Consider replacing the fan motor: If all other potential issues have been ruled out, a faulty fan motor may require replacement by a professional technician.
Capacitor Problems: Symptoms And Troubleshooting Steps
The capacitor in your AC condenser helps start and run the fan and compressor motors. When it malfunctions, you may experience the following symptoms:
| Symptoms of Capacitor Problems | Troubleshooting Steps |
|---|---|
| The fan motor hums but doesn’t start | Replace the capacitor |
| Fan or compressor motor does not start | Test the capacitor’s capacitance and replace if necessary |
| Visible swelling or leaking of the capacitor | Replace the capacitor |
If you suspect capacitor problems, consider hiring a professional HVAC technician to handle the troubleshooting and replacement to ensure safety and proper functioning of your system.
Frequently Asked Questions On Troubleshooting AC Condenser
Q: Why Is My Ac Condenser Not Turning On?
A: There could be several reasons for this issue. Check your thermostat settings, ensure the circuit breaker is not tripped, and inspect the condenser fan motor for any faults. If the issue persists, it’s best to consult a professional HVAC technician for further troubleshooting and repairs.
Q: Why Is My Ac Condenser Leaking Water?
A: Excessive condensation or a clogged condensate drain line can cause water leakage from the AC condenser. Check the condensate drain line for any blockages or damage. Additionally, ensure that the unit is properly leveled. If the problem persists, it’s advisable to seek assistance from an HVAC expert.
Q: What Are The Signs Of A Failing Ac Condenser?
A: A failing AC condenser may exhibit signs such as reduced cooling efficiency, unusual noises, frequent cycling on and off, or a higher electricity bill. If you notice any of these symptoms, it’s recommended to schedule a professional inspection to diagnose the issue and prevent further damage.
Q: How Often Should I Clean My Ac Condenser Coils?
A: Regular maintenance is vital to keep your AC condenser in optimal condition. It’s recommended to clean the condenser coils at least once a year. However, if you live in an area with high pollution or heavy foliage, more frequent cleaning may be necessary to prevent clogging and maintain efficient cooling.
Conclusion
Troubleshooting your AC condenser is essential to ensure optimal performance. By following the steps outlined in this blog post, you can identify and address common issues that may arise. Regular maintenance and timely repairs will help prolong the lifespan of your condenser and keep your air conditioning system running smoothly.
Remember to consult a professional if you encounter any complex problems. Maintaining your AC condenser will ultimately save you time, money, and discomfort in the long run.

