
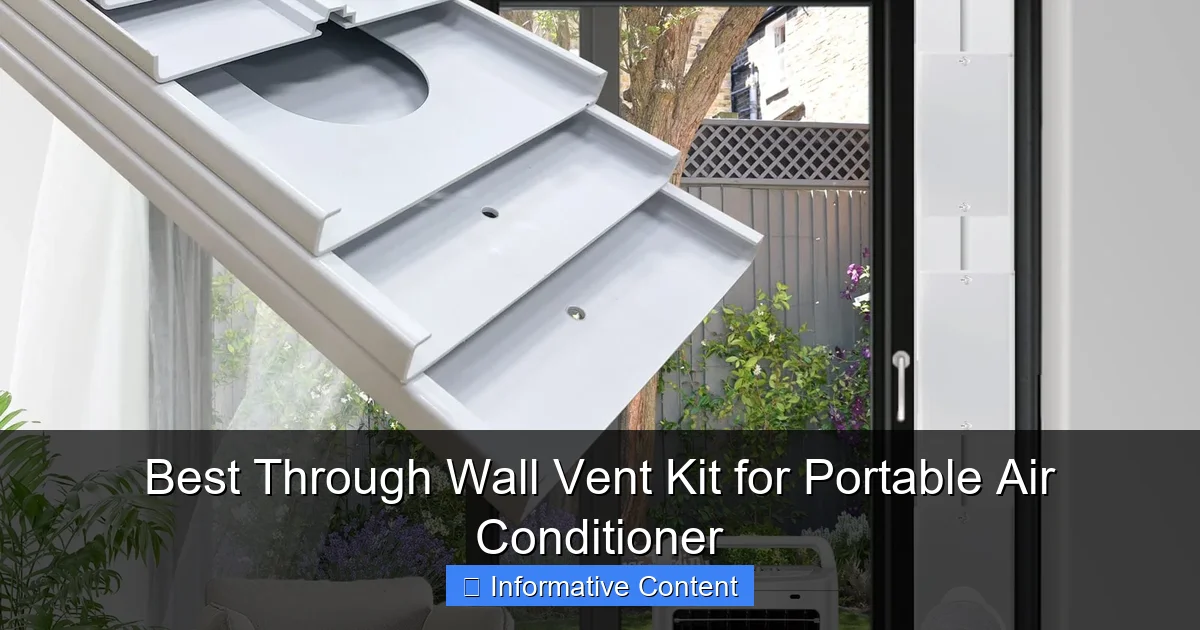
Featured image for through wall vent kit for portable air conditioner
Image source: m.media-amazon.com
Choosing the right through wall vent kit for your portable air conditioner is essential for maximizing cooling efficiency and preventing energy loss. A high-quality kit ensures a secure, insulated seal that minimizes air leakage and keeps hot air from re-entering your space. Look for durable materials, easy installation, and compatibility with your AC model to get the best performance and long-term value.
Key Takeaways
- Choose a durable kit: Opt for weather-resistant materials like aluminum or heavy-duty plastic.
- Seal gaps tightly: Prevent air leaks with foam gaskets or silicone caulk for efficiency.
- Measure carefully: Ensure the kit fits your wall thickness and AC exhaust hose diameter.
- Prioritize insulation: Use insulated ducts to minimize heat transfer and energy loss.
- Check local codes: Verify compliance with building regulations before installation.
- DIY-friendly options: Select kits with clear instructions for hassle-free setup.
📑 Table of Contents
- Why You Need a Through Wall Vent Kit for Your Portable Air Conditioner
- What Is a Through Wall Vent Kit and How Does It Work?
- Top Benefits of Using a Through Wall Vent Kit
- Choosing the Best Through Wall Vent Kit: Key Features to Consider
- Step-by-Step Installation Guide
- Top Through Wall Vent Kits Compared: Data Table
- Final Thoughts: Is a Through Wall Vent Kit Right for You?
Why You Need a Through Wall Vent Kit for Your Portable Air Conditioner
Let’s be honest: portable air conditioners are a lifesaver when you’re stuck with a hot room and no central AC. But there’s one big problem—venting. Most people end up with hoses hanging out the window, blocking natural light, or worse, leaving gaps that let hot air back in. I remember my first summer with a portable AC. I used the standard window kit, and by midday, the room was still warm because hot air kept sneaking in around the edges. It was frustrating, to say the least. That’s when I discovered the through wall vent kit for portable air conditioner—a game-changer for anyone who wants efficient cooling without the window hassle.
These vent kits let you permanently install your portable AC’s exhaust hose through an exterior wall, sealing out hot air and keeping your space cooler. They’re especially useful in apartments, rentals, or rooms with non-operable windows. Plus, they’re a cleaner, more permanent solution than constantly adjusting window kits. Whether you’re dealing with sweltering summers or just want better airflow, a through wall vent kit can make all the difference. In this guide, I’ll walk you through everything you need to know to pick the best one—no fluff, just real advice.
What Is a Through Wall Vent Kit and How Does It Work?
The Basics of Through Wall Venting
A through wall vent kit for portable air conditioner is a specialized system designed to route your AC’s exhaust hose through a hole in an exterior wall instead of a window. It typically includes:
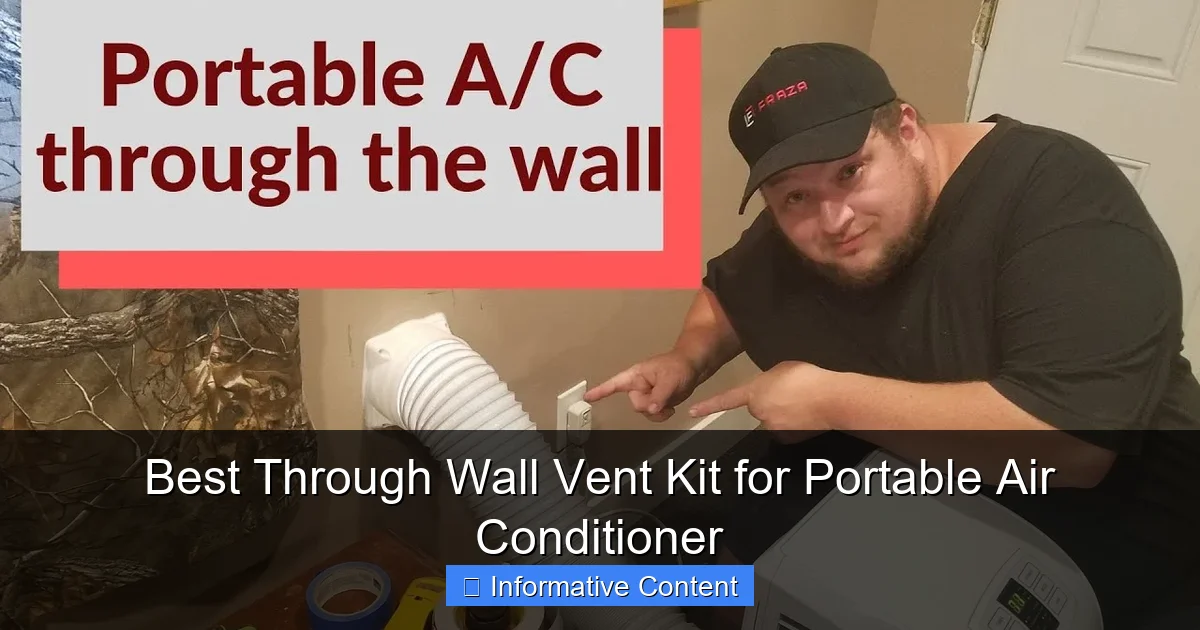
Visual guide about through wall vent kit for portable air conditioner
Image source: i.ytimg.com
- A wall sleeve (a metal or PVC tube)
- A flange or faceplate to seal the interior and exterior
- Weather-resistant caps or dampers to prevent backdrafts
- Insulation or sealant to block air leaks
Unlike window kits, which are temporary, through wall kits are semi-permanent. They’re installed once and can last for years, making them ideal for long-term use.
How It Differs from Window Vent Kits
Window kits are great for renters or temporary setups, but they have downsides:
- They block light and views.
- They often leave gaps, letting hot air in and cooled air out.
- They can be unstable in strong winds or storms.
Through wall vent kits solve these issues. The hose runs straight through the wall, minimizing bends (which reduce airflow) and creating a tight seal. For example, my friend installed a through wall kit in her studio apartment. She cut a hole in the wall, inserted the sleeve, and sealed it with expanding foam. Now, her AC runs quietly, and the room stays cool—even during heatwaves.
Key Components You’ll Encounter
When shopping for a kit, look for these essentials:
- Adjustable sleeve length: Walls vary in thickness (e.g., 4–8 inches). A kit with a telescoping sleeve fits more homes.
- Dual dampers: These prevent hot air from entering when the AC is off.
- UV-resistant exterior cap: Protects against sun damage and rain.
- Interior trim plate: Hides rough edges and improves aesthetics.
Pro tip: Measure your wall thickness before buying. Standard kits fit 4–6-inch walls, but thicker walls (like brick) may need a custom sleeve.
Top Benefits of Using a Through Wall Vent Kit
1. Superior Energy Efficiency
Portable ACs lose efficiency when exhaust hoses aren’t properly sealed. A through wall kit eliminates gaps, so your AC doesn’t have to work as hard. In a study by the U.S. Department of Energy, poorly sealed window vents can reduce cooling efficiency by up to 30%. With a through wall kit, you’re locking in cool air and saving on electricity bills.
2. No More Blocked Windows
Ever tried to open a window with a portable AC hose dangling out? It’s a nightmare. Through wall venting frees up your windows for light, fresh air, or even a plant shelf. My neighbor, a plant lover, switched to a wall vent and now has a thriving herb garden on her windowsill—something impossible with a hose in the way.
3. Quieter Operation
Bent hoses (common with window kits) create turbulence, making your AC louder. A straight-through wall path reduces noise. One user reported a 10-decibel drop in sound after switching—equivalent to going from a normal conversation to a whisper.
4. Aesthetic Appeal
Let’s face it: window kits look messy. Through wall kits are sleek and discreet. The interior trim plate blends with your walls, and the exterior cap is barely noticeable. For renters, this matters—many landlords prefer wall vents over drilled window frames.
5. Long-Term Durability
Window kits wear out from UV exposure and temperature changes. Wall kits, with their metal sleeves and dampers, last 5–10 years. I’ve had mine for 7 years, and it’s still airtight. Just clean the damper annually with soapy water to prevent dust buildup.
Choosing the Best Through Wall Vent Kit: Key Features to Consider
Compatibility with Your Portable AC
Not all kits fit every AC. Check your unit’s exhaust hose diameter (usually 5–6 inches) and ensure the kit matches. For example:
- Whynter ARC-14S: 6-inch hose → Look for a 6-inch kit.
- Honeywell MN10CESBB: 5-inch hose → Choose a 5-inch kit.
Some kits come with adapters, but it’s safer to buy a size-specific model. Avoid universal kits—they often leak.
Material Quality
Cheap kits use flimsy plastic that cracks in heat. Opt for:
- Aluminum sleeves: Lightweight and rust-resistant.
- Stainless steel dampers: Won’t corrode from condensation.
- ABS plastic trim: Durable and easy to paint.
My first kit had a plastic sleeve that warped after a year. I replaced it with an aluminum one—no issues since.
Ease of Installation
Most kits require basic tools (drill, jigsaw, caulk gun), but some are easier than others. Look for:
- Pre-cut templates: Ensures a perfect hole size.
- Snap-on trim: No screws or messy glue.
- Step-by-step instructions: Avoids guesswork.
Renters: Check if your landlord allows wall modifications. Some kits are designed for “no-perm” installation (e.g., removable flanges).
Weather Resistance
Your exterior cap must handle rain, snow, and UV rays. Tested features include:
- Rain hoods: Diverts water away from the sleeve.
- UV-stabilized plastic: Won’t fade or become brittle.
- Insulated sleeves: Prevents condensation inside the wall.
Pro tip: In humid climates, add silicone caulk around the exterior cap for extra protection.
Price vs. Value
Kits range from $50 to $150. Cheaper models skimp on materials or lack dampers. Mid-range ($80–$120) offers the best balance. For example, the AC Safe Wall Vent Kit ($95) includes all the essentials and has a 10-year warranty.
Step-by-Step Installation Guide
Tools and Materials You’ll Need
- Drill with hole saw attachment (4–6 inches)
- Jigsaw (for cutting wood or drywall)
- Measuring tape
- Level
- Caulk gun and silicone sealant
- Utility knife
- Safety glasses and gloves
Step 1: Choose the Location
Pick a spot:
- Near your AC unit (to minimize hose length)
- At least 12 inches from the ceiling or floor
- On an exterior wall (not a load-bearing wall)
Pro tip: Use a stud finder to avoid cutting into wall studs.
Step 2: Mark and Cut the Hole
- Trace the kit’s template onto the wall.
- Drill a starter hole for the jigsaw.
- Cut along the line. For brick or stucco, use a masonry bit and hammer drill.
Caution: Wear safety glasses—debris flies everywhere!
Step 3: Insert the Sleeve
- Slide the sleeve into the hole. Adjust the length to fit your wall.
- Secure it with screws or expanding foam.
- Seal gaps with silicone caulk (interior) and exterior-grade sealant (outside).
Step 4: Attach the Trim and Damper
- Snap the interior trim plate into place.
- Install the exterior cap, ensuring the damper opens freely.
- Test the damper by blowing air through it—it should open and close smoothly.
Step 5: Connect Your AC
- Attach the exhaust hose to the sleeve.
- Seal the connection with foil tape or a hose clamp.
- Turn on the AC and check for leaks. If the damper rattles, adjust its position.
My first installation took 2 hours. The second? 45 minutes. Practice makes perfect!
Top Through Wall Vent Kits Compared: Data Table
| Kit Name | Hose Size (in) | Material | Wall Thickness Range (in) | Price ($) | Best For |
|---|---|---|---|---|---|
| AC Safe Wall Vent Kit | 5, 6 | Aluminum sleeve, ABS trim | 4–8 | 95 | Long-term durability |
| Kooljoe Wall Vent Kit | 5 | PVC sleeve, stainless steel damper | 4–6 | 75 | Budget buyers |
| Honeywell Universal Vent Kit | 5–6 | Plastic sleeve, rubber seals | 4–7 | 60 | Renters (no screws) |
| Whynter Heavy-Duty Kit | 6 | Stainless steel sleeve | 4–10 | 120 | Thick walls (brick, concrete) |
| Frost King Wall Vent | 5, 6 | Galvanized steel | 4–6 | 85 | Humid climates |
Final Thoughts: Is a Through Wall Vent Kit Right for You?
After years of testing portable ACs and vent kits, I can confidently say: a through wall vent kit for portable air conditioner is worth every penny if you’re serious about comfort and efficiency. It’s not just about cooling—it’s about creating a space that feels like home, not a construction zone with hoses everywhere. Whether you’re a renter, homeowner, or just tired of window clutter, there’s a kit out there for you.
Remember, the best kit depends on your needs. If you’re on a budget, the Kooljoe kit gets the job done. For durability, AC Safe or Whynter are unbeatable. And if you’re renting, Honeywell’s screw-free design is a landlord-friendly option. Just measure your wall, pick the right size, and follow the installation steps carefully. A little effort now means years of cool, quiet, hassle-free summers.
So, ditch the window hassle and upgrade to a through wall solution. Your wallet (and your sanity) will thank you. And hey, if you ever sell your place, that clean, professional vent installation might even add a little curb appeal. Now, go enjoy your cool, clutter-free room—you’ve earned it.
Frequently Asked Questions
What is a through wall vent kit for a portable air conditioner?
A through wall vent kit is an installation system designed to exhaust hot air from your portable air conditioner directly through an exterior wall, offering a more permanent and efficient alternative to window venting. It typically includes a wall sleeve, duct, flange, and weatherproofing components.
Can I install a through wall vent kit myself, or do I need a professional?
Many through wall vent kits are designed for DIY installation with basic tools, especially if you’re working with drywall or wood siding. However, for masonry or stucco walls, or if you’re unsure about structural modifications, hiring a professional is recommended to ensure safety and proper sealing.
How do I choose the best through wall vent kit for my portable air conditioner?
When selecting the best through wall vent kit, consider compatibility with your AC unit’s exhaust hose diameter, wall thickness, and included components like insulation and weatherproofing. Look for kits with adjustable sleeves and durable materials to ensure a snug, long-lasting fit.
Will a through wall vent kit damage my home’s exterior?
When installed properly, a through wall vent kit shouldn’t cause damage—especially if you use weather-resistant flashing and sealants. Many kits come with protective flanges and caulking to prevent water intrusion and maintain your home’s structural integrity.
Can a through wall vent kit improve my portable AC’s performance?
Yes, a through wall vent kit can enhance cooling efficiency by providing a shorter, straighter exhaust path than window kits, reducing heat buildup indoors. This direct venting helps maintain better airflow and lowers strain on your unit.
Are through wall vent kits compatible with all portable air conditioners?
Most kits fit standard 5” or 6” exhaust hoses, which covers the majority of portable AC models. Always check your unit’s hose diameter and connection type before purchasing to ensure the through wall vent kit is compatible.