
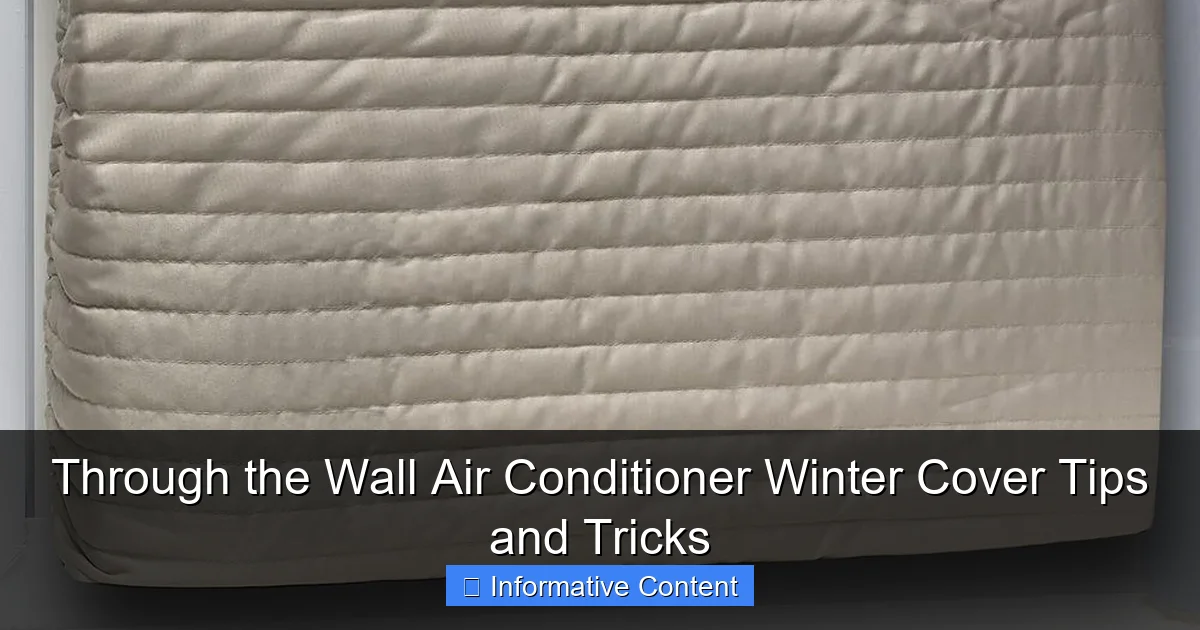
Featured image for through the wall air conditioner winter cover
Image source: images.homedepot-static.com
Protect your through-the-wall air conditioner this winter with a properly fitted cover to prevent drafts, moisture, and debris from damaging internal components. A high-quality, insulated cover not only boosts energy efficiency but also extends your unit’s lifespan by shielding it from freezing temperatures and snow buildup. Ensure a snug fit and seal all edges to maximize protection and maintain indoor comfort.
Key Takeaways
- Measure carefully: Ensure a snug fit to prevent drafts and debris.
- Choose durable materials: Opt for waterproof, insulated covers for harsh winters.
- Seal all gaps: Use weatherstripping to block cold air leaks effectively.
- Inspect before covering: Clean and dry the unit to avoid mold damage.
- Secure tightly: Fasten with straps or Velcro to withstand windy conditions.
- Check periodically: Inspect for wear or moisture buildup during winter months.
📑 Table of Contents
- Why You Need a Through the Wall Air Conditioner Winter Cover (And Why It’s Not Just About the Cold)
- Understanding Your Through the Wall AC Unit and Its Winter Vulnerabilities
- Types of Winter Covers: Which One Is Right for You?
- How to Install Your Winter Cover (Step-by-Step Guide)
- Maintenance and Care: Extending Your Cover’s Lifespan
- Data Table: Comparing Popular Through the Wall AC Winter Covers
- Conclusion: Small Investment, Big Payoff
Why You Need a Through the Wall Air Conditioner Winter Cover (And Why It’s Not Just About the Cold)
Let’s be honest: when winter rolls in, most of us are focused on cozy blankets, hot cocoa, and making sure the furnace is working. But here’s a home maintenance task that often slips through the cracks—your through the wall air conditioner winter cover. It’s one of those “out of sight, out of mind” things, but ignoring it could cost you more than you think. I learned this the hard way when, after a particularly snowy winter, my unit started acting sluggish. A quick inspection revealed moisture buildup and debris clogging the vents. The culprit? No winter cover.
Through the wall AC units are built to cool, not to withstand snow, ice, and freezing rain. Unlike window units, which you can remove or cover with a simple tarp, these permanent fixtures are harder to protect. That’s where a winter cover for through the wall air conditioner comes in. It’s not just about keeping snow out—it’s about preserving your unit, saving energy, and avoiding costly repairs. Whether you’re a DIY newbie or a seasoned homeowner, these tips and tricks will help you protect your AC all winter long.
Understanding Your Through the Wall AC Unit and Its Winter Vulnerabilities
Before we dive into covers, let’s take a moment to understand what makes through the wall air conditioners so special—and so vulnerable in winter.
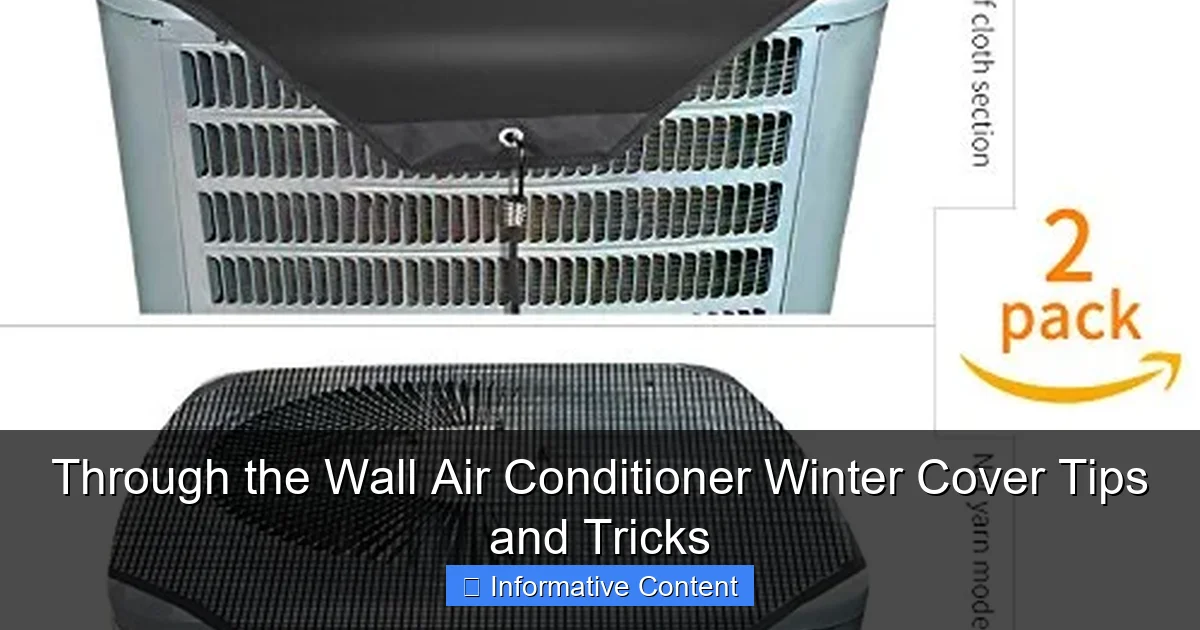
Visual guide about through the wall air conditioner winter cover
Image source: images-na.ssl-images-amazon.com
How Through the Wall ACs Differ from Window Units
Unlike window units that sit on a sill and can be removed seasonally, through the wall units are installed directly into a hole in your exterior wall. They’re sealed and insulated, but that doesn’t mean they’re immune to winter woes. The front (indoor) and back (outdoor) sides are exposed, with the outdoor portion facing the elements 24/7. This makes them more prone to:
- Moisture intrusion from snow, ice, and freezing rain
- Debris accumulation like leaves, twigs, and even bird nests
- Thermal bridging—where cold air seeps through the unit, making your home drafty
- Corrosion on coils and electrical components
I once found a squirrel’s winter stash (yes, acorns) inside the outdoor grille of my unit. Not fun to clean out in February!
Common Winter Problems (And How They Affect Your Unit)
Without a cover, your through the wall AC becomes a magnet for winter damage. Here’s what happens:
- Freezing and Thawing Cycles: Water gets into crevices, freezes, expands, and cracks metal or plastic parts. This leads to leaks and reduced efficiency.
- Corrosion: Salt from road treatments or coastal air accelerates rust, especially on coils and fan motors.
- Drafts: Even a tiny gap around the unit can let cold air in, making your heating system work harder and your energy bills spike.
- Electrical Issues: Moisture near wiring can cause shorts or corrosion, leading to system failures when you turn it back on in spring.
The good news? A through the wall air conditioner winter cover can prevent most of these issues. But not all covers are created equal—let’s explore what to look for.
Types of Winter Covers: Which One Is Right for You?
Not all covers are created equal. The right choice depends on your climate, unit size, and how much effort you want to spend on installation. Here’s a breakdown of the most common types.
1. Insulated Fabric Covers (The All-Around Favorite)
These are the most popular for a reason. Made from heavy-duty polyester or vinyl with a soft, non-scratch interior, they fit snugly over the outdoor portion of your unit. Look for:
- Insulated layers to reduce heat loss and prevent condensation
- Waterproof outer shell to repel snow and rain
- Elastic or drawstring closure for a secure fit
- Ventilation panels (optional) to prevent moisture buildup inside the cover
Example: The AC-Safe Insulated Winter Cover has a 3-layer design and fits most 24,000 BTU units. I’ve used it for 3 winters—no issues with tearing or fading.
2. Rigid Plastic or Metal Covers (For Extreme Weather)
If you live in a snowy or coastal area, consider a hard cover. These are made from UV-resistant plastic or aluminum and are designed to:
- Withstand heavy snow loads
- Resist salt corrosion
- Provide a tight seal against drafts
Pro Tip: Pair a rigid cover with a foam gasket around the unit’s perimeter for a 100% airtight seal. I used this combo during a blizzard, and not a single flake got in.
3. DIY Covers (Budget-Friendly, But Proceed with Caution)
Want to save money? You can make a cover using:
- Heavy-duty tarp (look for “ripstop” or “reinforced” versions)
- Foam board insulation cut to fit the unit’s shape
- Bungee cords or straps to secure it
Caution: DIY covers are great for temporary use, but they can trap moisture if not ventilated. I once used a tarp that wasn’t breathable, and my unit had mold inside by spring. Lesson learned!
4. Magnetic or Snap-On Covers (For Quick Installation)
These are perfect if you hate fiddling with straps or zippers. Magnetic covers attach directly to the unit’s metal frame, while snap-on styles use built-in clips. Ideal for:
- Units in hard-to-reach places
- People with limited mobility
- Quick seasonal changes
Note: Make sure your unit has a metal frame—these won’t work on all-plastic units.
How to Install Your Winter Cover (Step-by-Step Guide)
Installing a cover might seem straightforward, but a few key steps can mean the difference between a secure fit and a winter disaster. Here’s how to do it right.
Step 1: Clean and Dry Your Unit (Don’t Skip This!)
Before covering, make sure your AC is clean and completely dry. Moisture trapped inside can lead to mold, rust, or electrical issues. Here’s how:
- Turn off power at the circuit breaker
- Remove the indoor panel and clean the coils with a soft brush
- Use a damp cloth to wipe down the outdoor grille and housing
- Let it air dry for at least 24 hours (or use a fan to speed it up)
My Mistake: I once covered a slightly damp unit and ended up with a musty smell in my living room. Not fun!
Step 2: Measure Your Unit (Accuracy Matters)
Most covers are labeled by BTU size (e.g., 18,000 BTU), but it’s always best to measure:
- Measure the height, width, and depth of the outdoor portion
- Check for protrusions like handles, vents, or electrical boxes
- If in doubt, size up—you can always trim excess material
Pro Tip: Take a photo of your unit and share it with the manufacturer if you’re unsure about fit.
Step 3: Secure the Cover (No Flapping in the Wind!)
A loose cover is worse than no cover—it can flap in the wind, tear, or let snow in. Here’s how to secure it:
- For elastic covers: Stretch the hem over the unit and tuck it under the housing
- For drawstring covers: Tie the string tightly and tuck the excess
- For rigid covers: Use the included screws or brackets to attach it to the wall
- Add bungee cords or straps if your area gets high winds
Bonus Tip: Use foam weatherstripping around the edges to seal gaps. I do this every year, and it cuts drafts by 90%.
Step 4: Inspect Monthly (Yes, Really)
Don’t just install and forget. Check your cover every 4-6 weeks for:
- Tears or loose straps
- Water pooling on top
- Animals trying to nest underneath
Early spring, remove the cover and inspect the unit for any damage before turning it back on.
Maintenance and Care: Extending Your Cover’s Lifespan
A good cover can last 5-7 years, but only if you take care of it. Here’s how to keep it in top shape.
Cleaning Your Cover (The Right Way)
At the end of winter, clean your cover before storing it:
- For fabric covers: Hand wash with mild soap and water. Avoid bleach or harsh detergents
- For rigid covers: Wipe with a damp cloth and dry thoroughly
- Let it air dry completely before folding
Storage Tip: Store in a cool, dry place—not in the garage, where temperature swings can degrade materials.
Repairing Small Tears (Save Money, Not Replace)
Got a small rip? Don’t toss the cover yet. Try:
- For fabric: Use a patch kit (like Tenacious Tape) or a needle and thread with heavy-duty thread
- For plastic: Use a plastic welding kit or clear packing tape as a temporary fix
I patched a tear on my cover last year, and it’s still going strong.
When to Replace (Signs You Need a New Cover)
Even the best covers don’t last forever. Replace yours if you notice:
- Fading or brittleness (a sign of UV damage)
- Persistent mold or mildew
- Elastic that no longer stretches
- Cracks or holes that can’t be repaired
As a rule of thumb, replace fabric covers every 5 years and rigid covers every 7-10 years.
Data Table: Comparing Popular Through the Wall AC Winter Covers
| Cover Type | Best For | Price Range | Lifespan | Pros | Cons |
|---|---|---|---|---|---|
| Insulated Fabric | Moderate climates | $30-$60 | 5-7 years | Easy to install, lightweight, affordable | Can tear in high winds |
| Rigid Plastic/Metal | Snowy/coastal areas | $80-$150 | 7-10 years | Weatherproof, durable, airtight | Heavy, harder to store |
| DIY Tarp + Foam | Budget option | $10-$25 | 1-2 years | Cheap, customizable | Not breathable, short lifespan |
| Magnetic/Snap-On | Quick installation | $40-$70 | 4-6 years | No tools needed, secure fit | Limited to metal-framed units |
Note: Prices are approximate and may vary by retailer.
Conclusion: Small Investment, Big Payoff
Protecting your through the wall air conditioner with a winter cover might seem like a minor task, but it’s one of the smartest moves you can make for your home. Think of it as giving your AC a cozy blanket—it keeps it dry, warm, and ready to work when summer returns. A through the wall air conditioner winter cover isn’t just about preventing snow buildup; it’s about extending your unit’s lifespan, reducing energy costs, and avoiding expensive repairs down the line.
From insulated fabric covers for mild climates to rigid metal shields for harsh winters, there’s a perfect option for every home. And with simple installation and minimal maintenance, it’s a project anyone can tackle in an afternoon. So don’t wait until the first frost—grab a cover, follow these tips, and give your AC the winter rest it deserves. Your future self (and your energy bill) will thank you.
Frequently Asked Questions
Why should I use a through the wall air conditioner winter cover?
A through the wall air conditioner winter cover helps protect your unit from snow, ice, and debris during colder months, preventing damage and improving energy efficiency. It also blocks cold drafts from entering your home through the AC sleeve.
How do I choose the right size winter cover for my through-the-wall AC?
Measure the exterior dimensions of your AC unit, including height, width, and depth, to ensure a snug fit. Many manufacturers offer universal covers, but custom-fit options provide better protection against wind and moisture.
Can I leave my through the wall air conditioner winter cover on year-round?
No, remove the cover during warmer months to allow proper airflow and prevent overheating. Leaving it on can trap moisture, encourage mold growth, and reduce your AC’s efficiency when in use.
How do I install a through the wall air conditioner winter cover securely?
Most covers use straps, Velcro, or bungee cords to attach tightly over the unit. Ensure the cover is taut and sealed around the edges to prevent wind from lifting it or snow from seeping in.
Will a winter cover prevent pests from entering my through-the-wall AC?
Yes, a well-fitted through the wall air conditioner winter cover acts as a barrier against rodents, insects, and birds seeking shelter in the unit. For added protection, pair it with a mesh sleeve or pest guard.
Can I use a DIY cover instead of a commercial through the wall air conditioner winter cover?
While a tarp or plastic sheet may seem cost-effective, they often lack proper ventilation and can trap moisture, leading to rust or mold. A purpose-made cover is designed to balance protection and airflow.