

Featured image for sanyo air conditioner remote control instructions
Image source: remotecontrolwarehouse.com.au
Master your Sanyo air conditioner with ease using these simple remote control instructions. This guide breaks down every button function—from temperature settings to timer modes—so you can cool your space efficiently without confusion. Whether you’re a first-time user or troubleshooting an issue, these clear steps ensure quick, hassle-free operation.
Key Takeaways
- Master the basics: Learn power, mode, and temperature controls for quick operation.
- Use fan speed settings: Adjust airflow for comfort and energy efficiency.
- Activate timer functions: Schedule on/off times to save energy and automate cooling.
- Enable sleep mode: Gradually adjust temperature for a restful night’s sleep.
- Reset the remote: Replace batteries or press reset if buttons stop responding.
- Keep it clean: Wipe the remote regularly to ensure responsive button function.
📑 Table of Contents
- Sanyo Air Conditioner Remote Control Instructions Made Easy
- Understanding Your Sanyo Remote: A Quick Overview
- How to Use the Basic Functions: Cooling, Heating, and Fan
- Advanced Features and Smart Functions
- Troubleshooting Common Remote Issues
- Tips for Maximizing Comfort and Efficiency
- Conclusion: Master Your Sanyo Remote with Confidence
Sanyo Air Conditioner Remote Control Instructions Made Easy
Have you ever stood in front of your Sanyo air conditioner, remote in hand, feeling completely lost? You press a button, and nothing happens. You try another, and suddenly the fan kicks on at full blast—when all you wanted was a gentle cool breeze. Sound familiar? You’re not alone. Many people find air conditioner remotes confusing, especially when they come packed with buttons, symbols, and modes that seem more like a spaceship control panel than a simple climate tool.
I remember the first time I used my Sanyo AC remote. I just wanted to cool down after a long, sweaty day, but instead, I ended up cycling through every mode—fan, dry, heat, turbo—before finally landing on “cool” by pure luck. It was frustrating, to say the least. But once I took the time to understand how the remote actually worked, everything changed. Suddenly, I wasn’t just surviving the heat—I was in control. That’s exactly what this guide is here to do for you: turn confusion into confidence. Whether you’re a first-time user or just need a refresher, these Sanyo air conditioner remote control instructions will make your life easier, one button press at a time.
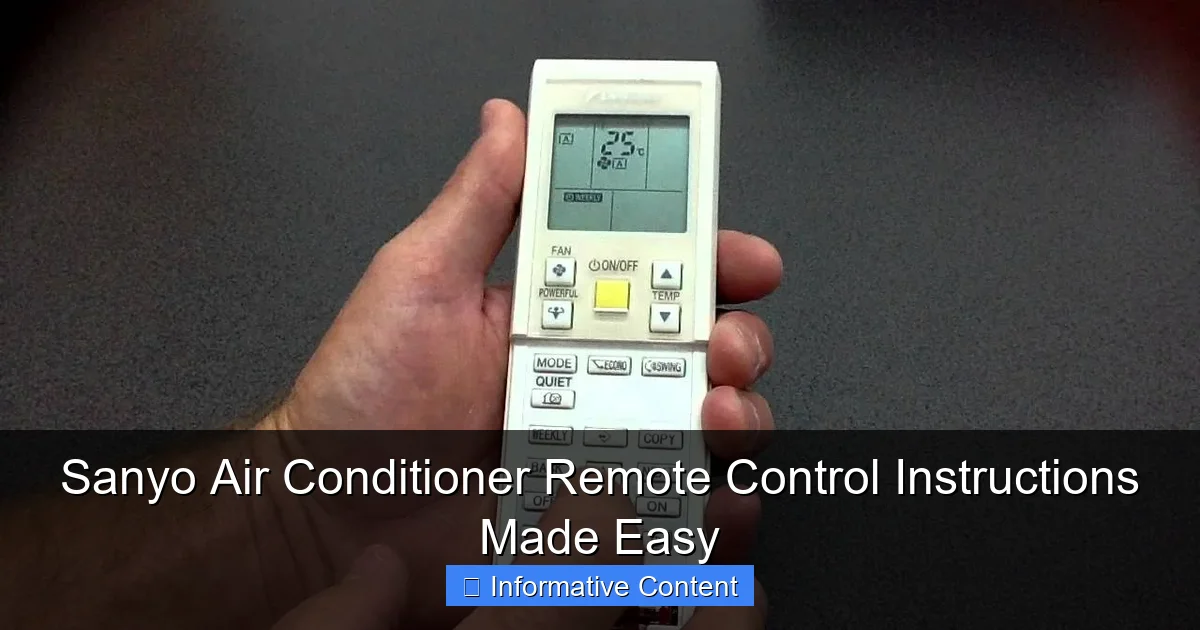
Understanding Your Sanyo Remote: A Quick Overview
Before diving into the nitty-gritty of each button, it’s important to get familiar with the overall layout and design of your Sanyo air conditioner remote. Most Sanyo remotes follow a similar design pattern, with a central display screen, a cluster of function buttons, and directional or navigation keys. While models may vary slightly—especially between window units, split systems, and portable ACs—the core functions remain consistent.
Visual guide about sanyo air conditioner remote control instructions
Image source: i.ytimg.com
The remote typically features a sleek, compact design with a soft-touch finish, making it comfortable to hold. The buttons are usually labeled with clear icons or text, though some symbols might not be immediately obvious if you’re new to air conditioning systems. Don’t worry—we’ll break them all down.
Key Components of the Remote
Let’s start by identifying the main parts of your Sanyo remote:
- Power Button: Usually marked with a circle or power symbol (⭘). This turns the AC on or off.
- Mode Button: Often labeled “MODE” or shown with icons like snowflakes, suns, or fans. This cycles through cooling, heating, fan, dry, and auto modes.
- Temperature Controls: Up and down arrows (▲/▼) to adjust the desired temperature.
- Fan Speed Button: Lets you choose between low, medium, high, or auto fan settings.
- Timer Button: Allows you to set the AC to turn on or off after a certain time.
- Swing/Louver Button: Controls the direction of airflow from the vents.
- Sleep Mode: Gradually adjusts temperature for comfort during sleep.
- Turbo/Quick Cool: Rapidly cools or heats the room.
Some remotes also include additional features like “I Feel” mode (which uses a sensor in the remote to detect room temperature), “Eco” mode for energy savings, or “Display” to turn off the unit’s LED lights for nighttime use.
Remote Display Screen
The small LCD screen at the top of the remote is your command center. It shows the current mode, temperature setting, fan speed, timer status, and sometimes even error codes. Pay attention to this screen—it’s your best clue for understanding what the AC is doing. For example, if you press “cool” but the screen still shows “fan,” you’ll know the mode hasn’t changed yet.
Pro tip: If the screen is dim or unresponsive, check the battery compartment. Weak batteries are one of the most common reasons remotes seem “broken.” Replace them with fresh AAA batteries, and you might solve your problem instantly.
How to Use the Basic Functions: Cooling, Heating, and Fan
Now that you know what each part of the remote does, let’s walk through the most common functions step by step. These are the everyday tasks you’ll use most often, so mastering them will make your AC experience smooth and stress-free.
Turning On the Air Conditioner
Start by pressing the Power button (⭘). You should see the unit’s indicator light turn on, and the remote display will activate. If nothing happens, make sure the AC is plugged in and the circuit breaker hasn’t tripped. Also, check that the remote is pointed at the receiver on the AC unit—usually located on the front panel.
Once powered on, the default mode is often “cool,” but this can vary. If it’s not, don’t worry—we’ll fix that next.
Setting the Mode: Cool, Heat, Fan, Dry, and Auto
Press the Mode button repeatedly to cycle through the available modes. Here’s what each one does:
- Cool: Lowers the room temperature. Ideal for hot days. The compressor runs to remove heat and humidity.
- Heat: Warms the room. Useful in colder months if your Sanyo model is a heat pump.
- Fan: Circulates air without cooling or heating. Great for ventilation on mild days.
- Dry: Reduces humidity without significantly lowering temperature. Perfect for damp or rainy weather.
- Auto: The AC automatically selects the best mode based on the room temperature.
For example, if it’s a humid summer afternoon, you might choose “cool” to lower the temperature and reduce moisture. On a chilly spring morning, “heat” could take the edge off. And on a breezy evening, “fan” might be all you need.
Adjusting the Temperature
Use the ▲ (up) and ▼ (down) arrows to set your desired temperature. Most Sanyo units allow settings between 16°C and 30°C (60°F to 86°F). A common mistake is setting the temperature too low—like 16°C—thinking it will cool the room faster. But air conditioners don’t work that way. They cool at a steady rate, so setting it to 22°C or 24°C is usually more comfortable and energy-efficient.
Personal tip: I like to set my AC to 24°C in summer. It’s cool enough to be refreshing but not so cold that I need a blanket. In winter, 20°C feels cozy without overworking the heater.
Controlling Fan Speed
The Fan Speed button lets you choose how fast the internal fan blows air. Options typically include:
- Low: Quiet operation, gentle airflow. Great for nighttime.
- Medium: Balanced noise and cooling. Good for everyday use.
- High: Maximum cooling power. Use during heatwaves or when cooling a large room.
- Auto: The AC adjusts fan speed based on temperature needs.
For example, if you’re trying to cool down quickly after coming home from work, set the fan to “high” and mode to “cool.” Once the room is comfortable, switch to “medium” or “auto” to save energy and reduce noise.
Advanced Features and Smart Functions
Beyond the basics, your Sanyo remote includes several advanced features designed to enhance comfort, save energy, and make your life easier. These aren’t just fancy extras—they’re practical tools that, when used correctly, can significantly improve your AC experience.
Timer Function: Set It and Forget It
The Timer button is one of the most useful features, especially if you want your AC to turn on or off automatically. Here’s how it works:
- Timer On: Set the AC to turn on at a specific time. Useful if you want the room cool by the time you get home.
- Timer Off: Set the AC to shut off after a certain number of hours. Great for saving energy while you sleep.
To use the timer:
- Press the Timer button once to enter timer mode.
- Use the ▲/▼ arrows to set the number of hours (e.g., 2 hours).
- Press the button again to confirm.
For instance, if you’re going to bed at 10 PM and want the AC to run for 6 hours, set the timer to “6 hours.” It will automatically turn off at 4 AM, saving energy and preventing overcooling.
Sleep Mode: Comfort Through the Night
Sleep Mode is designed to adjust the temperature gradually while you sleep, so you stay comfortable without waking up too cold or too hot. When activated, the AC typically raises the temperature by 1–2°C after 30 minutes and then again after an hour, mimicking your body’s natural cooling process during sleep.
To activate Sleep Mode:
- Press the Sleep button (often marked with a moon icon 🌙).
- The remote display will show “Sleep” or a similar indicator.
This feature is perfect for summer nights when you want to fall asleep in a cool room but don’t want to freeze at 3 AM. I use it every night—it’s a game-changer for restful sleep.
Turbo/Quick Cool: Beat the Heat Fast
The Turbo or Quick Cool button (sometimes labeled “Turbo” or shown with a lightning bolt ⚡) kicks the AC into high gear. It runs the compressor and fan at maximum speed for rapid cooling or heating.
Use this when:
- You’ve just come home on a scorching day.
- Guests are arriving and the room feels stuffy.
- You need to heat up a cold room quickly in winter.
Just remember: Turbo mode uses more energy, so it’s best for short bursts. Once the room reaches a comfortable temperature, switch back to normal mode.
Swing/Louver Control: Direct the Airflow
The Swing or Louver button controls the direction of the air vents. Press it to make the louvers move up and down (or side to side, depending on the model), distributing air more evenly throughout the room.
This is especially helpful in large rooms or when you want to avoid direct airflow on your bed or couch. I like to set the swing to “auto” so the air moves around the room instead of blowing straight at me.
Eco Mode: Save Energy, Stay Comfortable
Eco Mode (sometimes called “Energy Saver”) reduces power consumption by adjusting the compressor and fan operation. It might slightly increase the set temperature by 1–2°C to save energy while still keeping you comfortable.
Perfect for:
- Long-term use during mild weather.
- Reducing electricity bills.
- Environmentally conscious users.
To activate, look for the “Eco” button or enable it through the mode menu. It’s a small change that can make a big difference over time.
Troubleshooting Common Remote Issues
Even the best remotes can act up from time to time. If your Sanyo remote isn’t working as expected, don’t panic—most issues are easy to fix with a few simple steps.
Remote Not Responding
If pressing buttons does nothing, start with these checks:
- Replace the batteries: Weak or dead batteries are the #1 cause of remote failure. Use fresh AAA batteries.
- Check the battery orientation: Make sure the + and – ends are inserted correctly.
- Clean the battery contacts: Use a cotton swab and rubbing alcohol to remove corrosion.
- Ensure line of sight: Point the remote directly at the AC’s receiver (usually on the front panel).
I once spent 20 minutes troubleshooting my remote, only to realize the batteries were backwards. A simple fix, but easy to overlook!
Buttons Sticking or Unresponsive
Over time, dust and debris can get under the buttons, causing them to stick or fail. Try:
- Gently cleaning around the buttons with a soft brush or compressed air.
- Using a cotton swab dipped in isopropyl alcohol to clean the edges.
- Avoiding spills—liquids can damage the internal circuitry.
If cleaning doesn’t help, the remote may need replacement. Contact Sanyo support or check online for compatible models.
Display Screen Issues
If the screen is blank, flickering, or showing garbled text:
- Replace the batteries—low power can affect the display.
- Reset the remote by removing the batteries for 30 seconds, then reinserting them.
- Check for physical damage or moisture exposure.
In rare cases, the screen may fail due to internal damage. If troubleshooting doesn’t work, consider a replacement.
Remote Not Syncing with the AC
If the remote turns on but doesn’t control the unit:
- Make sure the AC is in “remote control” mode (some units have a manual override).
- Reset both the remote and the AC by unplugging the unit for 5 minutes.
- Check for interference from other electronics (like TVs or routers).
Sometimes, simply turning the AC off and on again can re-establish the connection.
Tips for Maximizing Comfort and Efficiency
Using your Sanyo remote effectively isn’t just about knowing the buttons—it’s about using them wisely to create a comfortable, energy-efficient environment. Here are some practical tips I’ve learned over the years.
Set the Right Temperature
The ideal temperature depends on the season and your personal comfort, but here are some general guidelines:
| Season | Recommended Temperature | Why It Works |
|---|---|---|
| Summer (Cooling) | 24°C – 26°C (75°F – 78°F) | Balances comfort and energy use. Every degree below 24°C increases energy consumption by 3–5%. |
| Winter (Heating) | 20°C – 22°C (68°F – 72°F) | Warm enough to be cozy without overworking the heater. |
| Humid Weather | Use “Dry” mode at 25°C | Reduces moisture without overcooling. |
Remember: Your AC doesn’t cool faster at lower temperatures. It just runs longer, using more energy.
Use Timer and Sleep Mode Together
Combine the Timer and Sleep Mode for the ultimate overnight comfort. For example:
- Set the AC to turn on 30 minutes before bedtime.
- Activate Sleep Mode so the temperature adjusts gradually.
- Set the Timer to turn off after 6–8 hours.
This way, you wake up refreshed—not freezing—and your AC isn’t running all night for no reason.
Keep the Remote Handy and Clean
Store your remote in a consistent spot—like a nightstand or coffee table—so you never lose it. Wipe it down monthly with a damp cloth to prevent dust buildup. And never leave it in direct sunlight or near heat sources, as this can damage the electronics.
Upgrade to a Smart Remote (Optional)
If you’re tech-savvy, consider upgrading to a universal smart remote or using a smartphone app (if compatible). Some Sanyo models work with Wi-Fi adapters that let you control your AC from your phone—perfect for adjusting the temperature while you’re still at work.
Conclusion: Master Your Sanyo Remote with Confidence
Your Sanyo air conditioner remote doesn’t have to be a mystery. With the right knowledge, it becomes a powerful tool for comfort, convenience, and energy savings. From basic cooling and heating to advanced features like Sleep Mode and Timer, every button has a purpose—and now, you know how to use them all.
Remember, the key is practice. Don’t be afraid to experiment with different settings to find what works best for your home and lifestyle. And if something goes wrong, don’t stress—most issues are simple to fix with a little troubleshooting.
So the next time you pick up your Sanyo remote, you won’t be guessing. You’ll be in control. Whether it’s a hot summer day or a chilly winter night, you’ll know exactly how to create the perfect indoor climate—with just a few button presses. Welcome to stress-free cooling and heating. Your comfort, simplified.
Frequently Asked Questions
How do I pair my Sanyo air conditioner remote control?
To pair your Sanyo remote, point it at the AC unit and press the “On/Off” button for 3-5 seconds until the unit beeps. Ensure the remote is within 20 feet of the indoor unit for successful synchronization.
What do the symbols on my Sanyo air conditioner remote mean?
The symbols include a fan (fan speed), snowflake (cool mode), sun (heat mode), and timer (schedule function). Refer to your user manual for a full list of Sanyo air conditioner remote control instructions to decode all icons.
Why is my Sanyo remote not responding to the AC unit?
First, replace the batteries and ensure there’s no obstruction between the remote and the unit. If issues persist, try re-pairing the remote using the steps outlined in the Sanyo air conditioner remote control instructions.
How do I set the timer on my Sanyo air conditioner remote?
Press the “Timer” button on your remote, then use the up/down arrows to adjust the hours. Confirm by pressing “Set” to activate the timer function for automatic on/off scheduling.
Can I use a universal remote with my Sanyo AC unit?
Yes, but ensure the universal remote is compatible with Sanyo models (check code lists in its manual). Programming it with the correct code will let you access all basic Sanyo air conditioner remote functions.
How do I switch between Celsius and Fahrenheit on my Sanyo remote?
Press and hold the “Temp” or “Mode” button for 3 seconds until the display toggles between °C and °F. This setting is saved automatically once changed.